How to Install Laminate Flooring: Tips for Getting It Right the First Time
You can install laminate flooring yourself by prepping a clean, level subfloor, acclimating planks 48–72 hours, and laying the correct underlayment with a vapor barrier where needed. Click planks row by row, stagger end joints 8–12 inches, keep an expansion gap, and use proper tools for straight cuts and tight fits. Take time on thresholds and trim, maintain humidity 35–55%, and inspect for gaps or buckling; keep going and you’ll pick up pro tips and troubleshooting guidance.
Can You Install Laminate Flooring Yourself?
You can often install laminate yourself by following a few clear steps—measure and prep the subfloor, lay underlayment, and click the planks together—which typically takes a weekend for an average room.
If the floor has complex cuts, uneven subfloors, or you’re short on time, hiring a pro will save headaches and guarantee a durable result.
We’ll cover when DIY is realistic and when it’s smarter to call an expert.
Short summary of the process and time estimate
Although it takes some prep work, installing laminate flooring yourself is straightforward if you’re comfortable with basic tools and careful measuring.
You’ll remove old flooring, level the subfloor, lay underlayment, and click planks together—answering how do i fit laminate flooring by working row by row with spacers.
A small room can take a day; larger areas two to three days including trimming and settling.
When to hire a pro versus DIY
If you’re comfortable with basic tools, careful measuring, and a bit of patience, you can handle most laminate installations yourself; hire a pro when the job involves uneven subfloors, complex layouts, large open areas, or when you lack time or confidence.
You should call a pro for moisture issues, tricky changes, or warranty-sensitive work.
DIY saves money, but pros guarantee speed, precision, and lasting results.
What Is Laminate Flooring and Why Choose It?
Laminate flooring is made of stacked layers—a wear layer, a printed design, a core, and a backing—so you’ll find options that mimic hardwood, stone, or tile.
You’ll weigh pros and cons like lower cost and easier installation versus less resale value and moisture sensitivity compared with hardwood, vinyl, or ceramic.
Expect modest upfront prices and a typical lifespan of 10–25 years depending on quality and use.
Laminate construction and common types
Think of laminate flooring as a carefully layered board: a tough wear layer on top, a decorative printed image in the middle that mimics wood or stone, a core of high-density fiberboard or HDF for stability, and a backing layer that resists moisture and keeps the plank flat.
You’ll find various types: textured wood-look, smooth stone-look, water-resistant HDF, and thicker AC-rated options for durability and traffic.
Pros and cons compared to hardwood, vinyl, and tile
Having covered how laminate is constructed and the types available, you’ll want to weigh how it stacks up against hardwood, vinyl, and tile before choosing it for your project. Laminate is durable, affordable, and DIY-friendly but less authentic than hardwood and less waterproof than vinyl. Tile beats it for moisture and heat resistance.
| Feature | Strength | Weakness |
|---|---|---|
| Durability | Good | Seams can swell |
| Appearance | Realistic | Not real wood |
Typical costs and lifespan
Expect to pay roughly $1 to $5 per square foot for most laminate planks, with budget lines at the low end and premium, thicker options toward the high end.
Installation adds $1–$3 per square foot if you hire pros.
Lifespan ranges 10–25 years depending on wear layer and maintenance.
You’ll save upfront vs. hardwood, but may replace sooner in high-traffic areas.
Tools, Materials, and Pre-Installation Checklist
Before you start, gather the essential tools (saw, tapping block, pull bar, spacers) and optional helpers like a jigsaw or flooring kit, plus materials and consumables such as underlayment, trims, and fasteners.
Measure the room carefully, calculate a waste factor, and order slightly more planks than your net area to avoid shortfalls.
Finally, prepare the site by testing for moisture, inspecting and repairing the subfloor, and ensuring the space is clean, dry, and level.
Essential tools and optional helpful tools
Because you’ll work faster and make fewer mistakes when you have the right kit, gather your essential tools first: a tape measure, chalk line, utility knife, rubber mallet, tapping/block, pull bar, spacers, and a quality saw (jigsaw, circular saw, or miter saw).
Add optional helpful tools to speed and refine the job:
- Table saw or track saw for precise ripping
- Laminate puller and alignment clamps
- Oscillating tool for trims and tight cuts
Materials and consumables (underlayment, spacers, trims)
Materials make the difference between a finished floor that looks and performs well and one that fails early, so gather the right underlayment, spacers, trims, and fasteners before you start.
Choose moisture-barrier or foam underlayment, 3–8mm spacers for expansion gaps, and matching junction and quarter-round trims.
Check adhesive and trim screws.
- Underlayment
- Spacers
- Trims and fasteners
Room measurements, waste factor, and ordering tips
Measure each room carefully and note length, width, and any alcoves or obstructions so you can calculate square footage accurately.
Add a 5–10% waste factor for straight layouts, 10–15% for diagonal or patterned installs. Round up to the nearest full box and order one extra box for repairs.
Confirm plank shade/lot numbers and delivery timing to avoid delays.
Site preparation checklist (moisture testing, subfloor inspection)
Before you lay a single plank, run a quick but thorough site prep checklist so you don’t hit surprises mid-install:
- Test concrete or wood subfloors for moisture using a meter or calcium chloride kit.
- Repair, level, and clean surfaces.
- Guarantee subfloor is flat within manufacturer tolerance.
- Remove carpet tack strips and trim doors.
- Acclimate boards in the room 48–72 hours before installing.
Step-by-Step Installation Guide
Now you’ll follow a clear sequence to install your laminate, starting with acclimating the boards and prepping the room.
Next you’ll level and repair the subfloor, add a moisture barrier and underlayment, and plan your layout.
Then you’ll install the first row with the proper expansion gap, stagger seams, and cut boards to fit as you go.
Step 1 Acclimate the flooring and prepare the room
Start by letting your laminate boards acclimate to the room’s temperature and humidity for 48–72 hours while you clear the space, remove baseboards if needed, and make sure the subfloor is clean, dry, and level.
During acclimation, check doors, plan layout, and gather tools.
- Remove furniture and trim.
- Inspect the subfloor surface.
- Stash materials nearby.
Step 2 Prepare the subfloor (leveling, repair, moisture barrier)
With the room cleared and boards acclimating, turn your attention to the subfloor—its flatness and dryness determine how your laminate will lock and look.
Inspect for high or low spots, clean thoroughly, and repair damage. Install a moisture barrier where needed before laying underlayment.
- Check flatness; sand or level as required.
- Patch cracks and secure loose boards.
- Test and block moisture.
Step 3 Install underlayment and layout planning
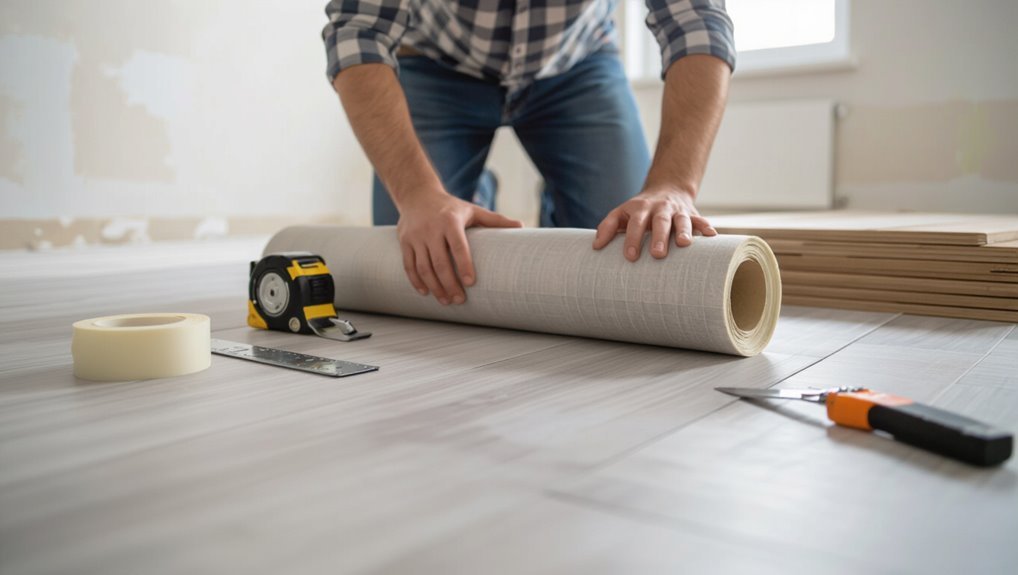
1. Lay underlayment smoothly, taping seams per manufacturer instructions to prevent shifting and moisture.
Trim at walls and cut around obstacles.
Plan layout by measuring room width, deciding plank direction, and calculating row widths to avoid narrow final strips.
Mark a straight starter line using spacers for the expansion gap.
Recheck measurements before you begin fastening.
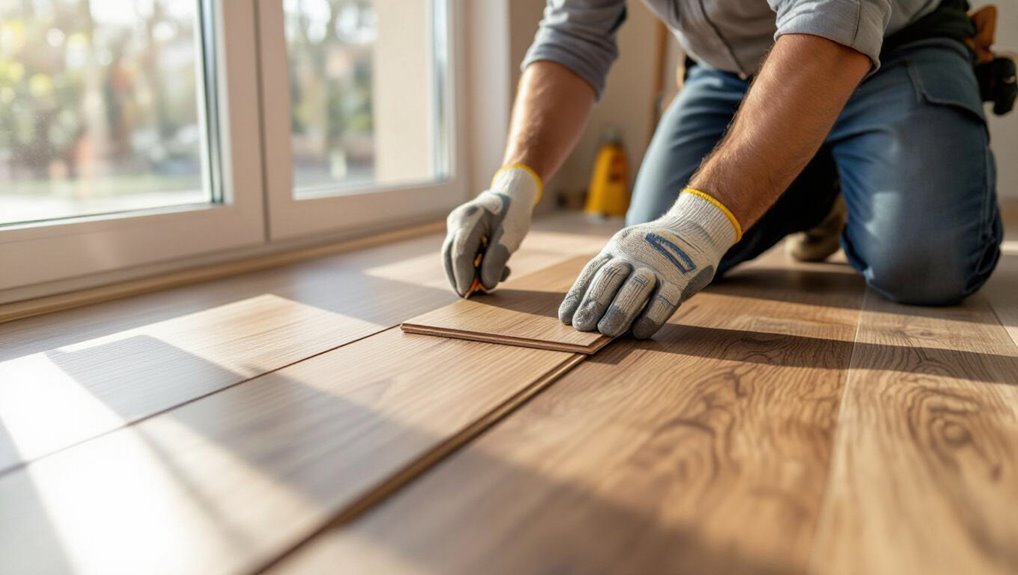
Step 4 First row installation and maintaining expansion gap
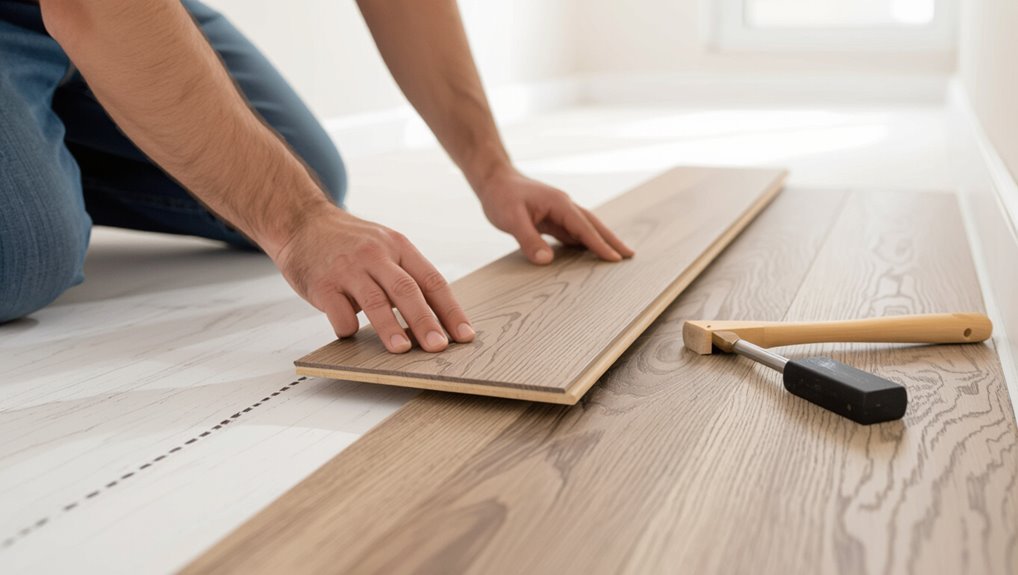
After you’ve secured the underlayment and marked your starter line, you’re ready to install the first row of planks.
Place tongues toward the wall, using spacers to maintain a consistent expansion gap (usually 1/4″ to 3/8″).
Snap or click each plank tightly against the previous one, check alignment frequently, and avoid forcing joints.
Remove spacers only after rows are secure.
Step 5 Staggering seams and cutting boards to fit
Stagger the end joints so they fall at least 8–12 inches apart between adjacent rows to create a stable, natural-looking floor; measure and cut the last plank in each row to fit, remembering to leave the same expansion gap at walls and around obstacles.
Use a chalk line to guide straight rows, offset seams randomly for realism, and trim boards with a utility knife or saw for clean, tight fits.
Step 6 Installing around obstacles (doorways, vents, cabinets)
When you reach doorways, vents, or fixed cabinets, plan each cut so boards fit snugly without compromising the expansion gap; measure twice, transfer cuts to the plank, and dry-fit pieces before locking them in place.
Use a coping saw or jigsaw for curves, trim around pipes with a hole saw, and scribe to uneven walls for tight fits.
- Cut accurately
- Dry-fit first
- Preserve gap
Step 7 Last rows, trimming, and installing transition strips
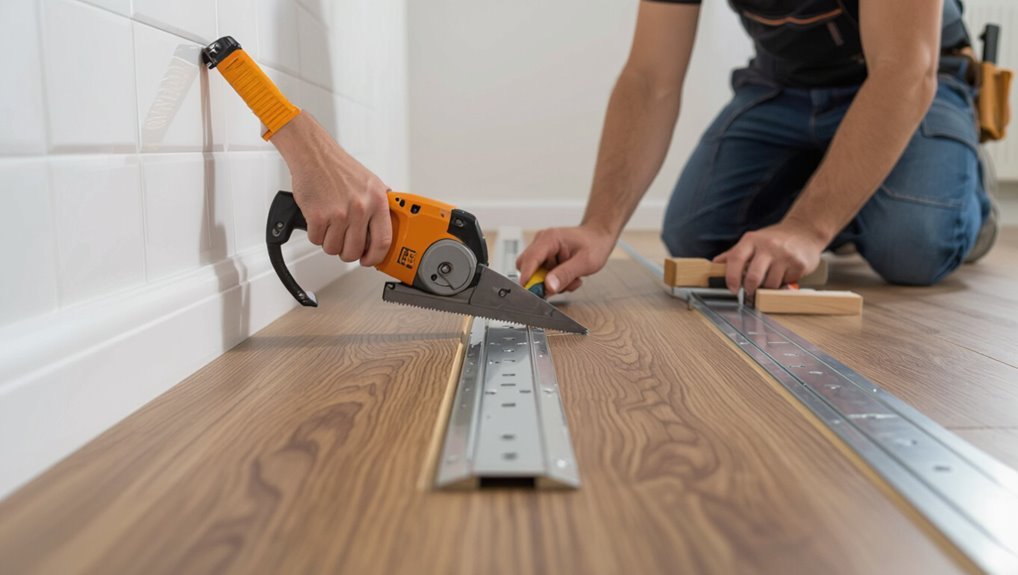
Because the last rows need precise fitting, you’ll measure and trim each plank carefully to preserve the expansion gap and maintain a seamless look.
Use a pull bar for tight fits, cut planks lengthwise with a saw, and dry-fit pieces before locking them in.
Finally, install threshold strips at doorways and room joins, anchoring them to the subfloor while keeping laminate floating.
Step 8 Finishing touches and cleanup
Inspect your new floor closely, then finish trim, clean, and protect it to guarantee a lasting result.
Remove spacers, install quarter-round or baseboards without pinching the planks, and seal gaps with matching caulk.
Vacuum and damp-mop per manufacturer instructions. Reattach thresholds and vent covers.
Place felt pads on furniture, avoid heavy traffic for 24–48 hours, and maintain humidity for stable seams.
Measurements, Cuts, and Common Joint Techniques
Before you lay a single plank, you’ll measure for both straight and irregular walls to plan your cuts and minimize waste.
You’ll use the right saws, guides, and safety gear to make precise cuts without chipping or risking injury.
Finally, you’ll learn how locking systems work and which joint techniques give the strongest, gap-free seams.
Measuring for straight and irregular walls
When you’re laying laminate against straight or irregular walls, accurate measurements and thoughtful cuts make the difference between a seamless floor and visible gaps.
Start by measuring along the length at several points and note any bows, alcoves, or out-of-square corners.
Transfer those measurements to your last row, scribe boards to fit curves or angled walls, and allow expansion gaps where required.
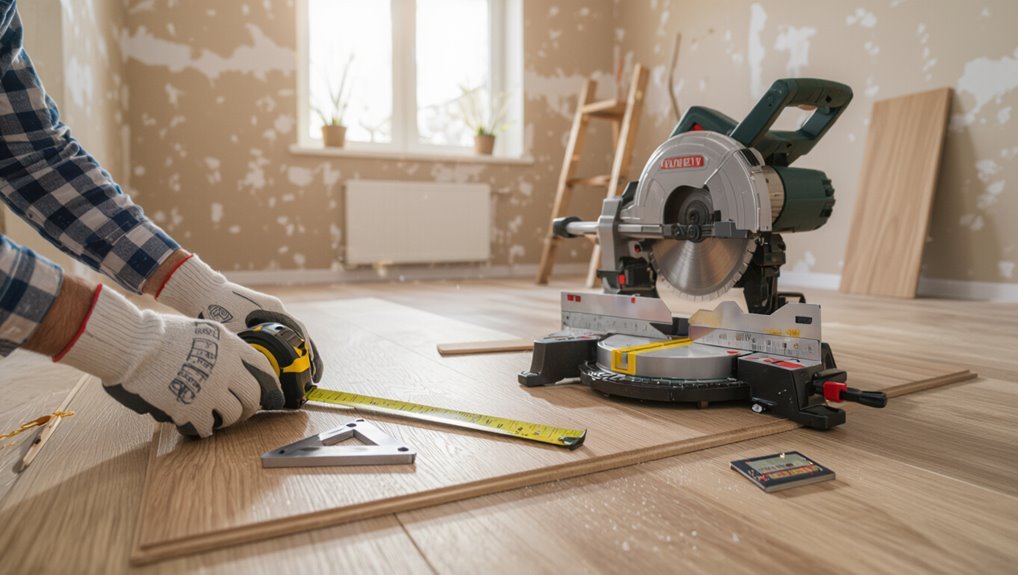
Best practices for cutting boards (tools and safety)
Though cutting laminate boards takes patience and the right tools, you’ll get cleaner, safer cuts by planning each cut, clamping boards securely, and using the correct blade and technique for the tool you choose.
Use measuring tapes, mark cut lines, and cut slowly to prevent chipping.
- Use a fine-tooth blade or scoring knife.
- Clamp and support both sides.
- Wear eye, ear, and dust protection.
Locking systems and joining techniques

Most laminate planks use one of a few locking systems—click, angle-and-click, or glue-down profiles—so you’ll want to identify yours before you cut or join boards.
Measure carefully, allow expansion gaps, and stagger end joints at least 12 inches.
Use a tapping block and pull bar for tight seams, trim undercuts at door casings, and glue seams only when specified by the manufacturer.
Common Problems and How to Fix Them
You’ll run into a few common issues—gaps or buckling, a noisy or hollow feel, damaged boards, and moisture-related failures—and each has a clear set of checks and fixes.
Start by diagnosing whether gaps/buckles are from improper acclimation or tight installation, whether noise comes from an uneven subfloor or missing underlayment, and whether damage requires board replacement.
For moisture problems, identify the source, replace affected boards with moisture-resistant materials, and add proper vapor barriers and spacing to prevent recurrence.
Gapping or buckling causes and remedies
If gaps or buckles show up after installation, they’re usually signaling moisture issues, improper acclimation, or incorrect expansion spacing.
Check subfloor moisture with a meter, verify boards acclimated per manufacturer, and confirm you left proper expansion gaps at walls.
For minor gaps, re-seat planks or add transition strips; for buckling, remove affected rows, let area dry, then reinstall with correct spacing and moisture control.
Noisy or hollow-feeling floor diagnosis and fixes
When your laminate sounds hollow or creaks underfoot, it’s usually a sign of gaps between the planks and the subfloor, loose underlayment, or uneven subflooring—so start by walking the room to locate the noisiest spots and mark them.
Check underlayment seams, add adhesive tape or flooring nails at joints, shim low areas, and guarantee expansion gaps aren’t bridged.
Test and recheck.
Damaged boards after installation replacement steps
Spot the damaged boards quickly so you can replace them before moisture or traffic makes things worse.
Remove trim and adjacent panels to access the faulty plank, lift it out by angling and sliding, then fit a matching replacement plank.
Tap joints tight with a block and mallet, trim ends if needed, and reinstall trim.
Check alignment and expansion gaps for proper performance.
Moisture-related failures and mitigation
Because laminate flooring swells, buckles, or peels mainly from excess moisture, you should identify sources and act quickly to prevent permanent damage.
Check leaks, condensation, and high humidity; dry the area with fans and dehumidifiers.
Replace affected boards and underlayment if swollen.
Install proper vapor barrier, maintain indoor humidity around 35–55%, and slope exterior grading away from the house.
Best Practices, Time-Saving Tips, and Quality Checks
Plan your layout to balance visual appeal and installation efficiency, starting with a few trial rows to set sightlines and minimize tight cuts.
Use time-saving tricks—like batching cuts, pre-sorting boards, and working with a partner—without skipping acclimation or proper underlayment.
Before you finish, run a final checklist: check seams, connections, expansion gaps, and walk the floor to spot squeaks or loose boards.
Layout strategies for visual appeal and efficiency
How will you arrange your laminate planks to balance looks and speed?
Plan runs parallel to light, stagger end joints at least 12–24 inches, and use full planks where visible.
Measure, snap chalk lines, and dry-fit rows to avoid surprises.
Consider focal points and shifts to maintain flow, while keeping waste minimal and installation consistent.
- Orient for light
- Stagger joints
- Dry-fit first
Tips to speed installation without sacrificing quality
With your layout set, you can focus on working faster without cutting corners by adopting smart techniques and checkpoints.
Pre-cut repetitive pieces, use spacers and a tapping block for quicker, consistent joints, and employ a pull bar for tight rows.
Keep adhesives and trims organized, check each row for alignment, and address gaps immediately to prevent rework and delays.
Final inspection checklist before use
Before you finish, run a concise final inspection that checks appearance, stability, and safety so the floor’s ready for use.
Walk the room; look for gaps, raised edges, or uneven seams. Test connections and trims for secure fit. Verify expansion gaps and remove debris.
- Visual: gaps, color consistency, scratches.
- Structural: click, stability, underlayment.
- Safety: connections, thresholds, trip hazards.
Tools and Material Comparison
Now you’ll compare the underlayment options—foam, cork, and rubber—and when each makes sense for moisture control, sound reduction, or added cushioning.
You’ll also weigh cutting tools, from a miter saw’s clean rip cuts to a jigsaw’s portability and a circular saw’s speed, so you can match the saw to your room and budget.
These choices affect finish quality and installation ease, so pick materials and tools that suit your subfloor and skill level.
Underlayment types and when to use each
Choosing the right underlayment is one of the smartest moves you can make when installing laminate: it cushions, smooths minor subfloor imperfections, provides moisture protection, and controls sound. Pick foam for basic cushioning, cork for superior sound control, rubber for heavy impact, and vapor barriers for basements.
| Type | Best Use |
|---|---|
| Foam | Dry, budget rooms |
| Cork | Living areas |
| Rubber | High traffic |
| Vapor barrier | Basements, slabs |
Comparison of cutting tools (saw types)
Once your underlayment’s in place, you’ll need the right saw to cut planks accurately and safely. Choose between a miter saw for straight, fast cuts; a jigsaw for tight curves; or a circular saw for long rip cuts. Match blade type to laminate. Use safety gear and clamps.
| Saw Type | Best For |
|---|---|
| Miter | Straight cuts |
| Jigsaw | Curves |
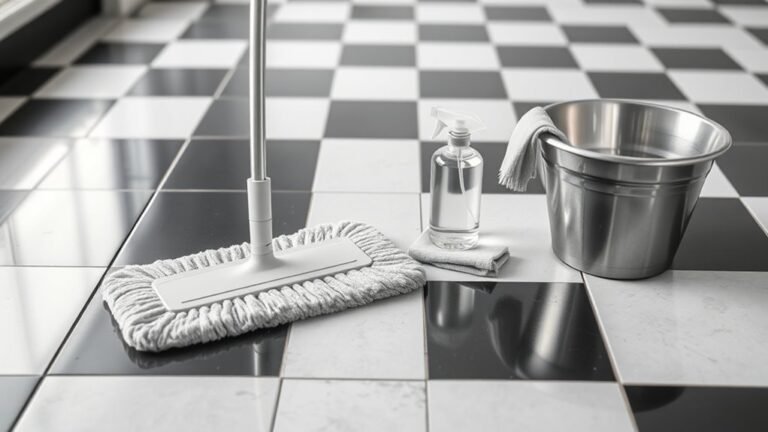
Maintenance and Care After Installation
Once your laminate is in, you’ll want a simple cleaning routine and to know which products to avoid to prevent dulling or swelling.
Wipe up spills immediately, use a soft cloth for sticky messes, and address scratches with repair kits or replacement planks as needed.
For long-term care, use felt pads, control humidity, and inspect seams periodically to keep the floor looking and performing its best.
Cleaning routines and products to avoid
Although laminate is low-maintenance, you still need a simple cleaning routine and to steer clear of certain products that can damage the surface or seams.
Use a dry microfiber broom or vacuum, damp-mop sparingly with manufacturer-approved cleaner, and wipe spills quickly.
Avoid abrasive pads, wax/polish, and steam cleaners that can strip finish or force moisture into joints.
- Abrasives
- Waxes/polishes
- Steam cleaners
How to handle spills, scratches, and long-term maintenance
After wiping up spills promptly and sticking to approved cleaners, you’ll want a simple plan for tougher issues like stains, scratches, and long-term wear.
Treat stains quickly with manufacturer-safe spot cleaners. Use felt pads and rugs to prevent scratches. Repair minor gouges with touch-up kits; replace boards for severe damage.
Maintain stable humidity, sweep regularly, and avoid harsh chemicals to extend lifespan.
Frequently Asked Questions
You probably have a few quick questions about specifics like installing over tile, required expansion gaps, and typical install times for a room.
You’ll also want to know whether laminate works in bathrooms or basements and how to handle changes between rooms or different floor heights.
Read on for clear, practical answers to those common concerns.
Can laminate be installed over tile or other flooring?
If your existing floor is solid and level, you can usually install laminate right over tile, vinyl, or some hardwoods—saving time and disposal costs—provided you prep the surface properly and meet manufacturer requirements.
Clean thoroughly, repair loose tiles or boards, and use an appropriate underlayment to smooth minor irregularities.
Check thickness limits, gluing rules, and warranty conditions before proceeding.
How much expansion gap is required and why?
Because laminate expands and contracts with changes in temperature and humidity, you need to leave an expansion gap around the room’s perimeter and at fixed obstacles so the floor can move without buckling.
Leave 1/4 inch for small rooms, 1/2 inch for larger areas or wide-plank boards, and up to 3/4 inch where HVAC or sun exposure causes bigger shifts.
Always follow manufacturer specs.
How long does installation take for a typical room?
How long will it take to install laminate in a typical room?
Expect a DIY job for a 10×12 room to take about 4–8 hours, including underlayment, cutting, and finishing trims.
If you’re experienced, you might finish in a half-day; as a beginner, plan for a full day.
Professional installers often complete the same room in 2–4 hours.
Can laminate be used in bathrooms or basements?
Can you use laminate in bathrooms or basements? You can in basements if you control moisture: use a moisture barrier, acclimate boards, and choose water-resistant or HDF cores.
Bathrooms are riskier—avoid standard laminate where standing water or high humidity occur. Consider waterproof vinyl or specifically rated waterproof laminate products and guarantee proper underlayment and tight seals to minimize water intrusion and damage.
How do I transition between rooms or different floor heights?
Wondering how to create a clean, safe change between rooms or different floor heights? Use transition strips: T-molding for same-height joins, reducer strips where laminate meets lower surfaces, and threshold bars for doorways or hard surfaces.
Measure gap and height difference, pick matching finish, and allow expansion space. Secure strips per manufacturer instructions to guarantee a smooth, durable change.