How to Clean Tile Floors: The Most Effective Routine for Every Tile Type
You should sweep or vacuum daily, spot-mop spills, and damp-mop weekly with a pH-neutral cleaner. Use microfiber mops for glazed ceramic and porcelain; avoid acids on natural stone and reseal stone and grout every 1–3 years. Scrub grout monthly in high-traffic areas and replace damaged tiles promptly. Use mats, furniture pads, and prompt stain-specific treatments (degreaser for oil, oxygen bleach for dyes). Follow these steps now and keep going to learn specific tile-by-tile tips.
How to Clean Tile Floors Quickly and Best Routine
For a quick, effective routine you’ll sweep or vacuum, spot-treat stains, and mop with a neutral cleaner suitable for all tile types.
Use the quick-clean when floors look only lightly soiled or between guests, and save deep-cleaning—scrubbing grout and using a stronger cleaner—for monthly care or after heavy traffic.
This keeps tiles looking good without wasting time.
Short direct answer one-paragraph routine for all tile types
When you need a quick, reliable clean for any tile, sweep or vacuum to remove grit.
Spot-treat stains with a pH-neutral cleaner (or a mild vinegar solution for ceramic/porcelain). Mop with warm water and the cleaner, rinse with plain water to avoid residue, and dry or buff the floor to prevent streaks.
Doing this weekly keeps tiles and grout looking their best. For a quick guide on how do you clean tile floors, follow those steps and adjust cleaners for sensitive natural stone.
When to use quick-clean vs deep-clean
How do you decide whether to do a quick-clean or a deep-clean?
You quick-clean when dirt is light: sweep, spot-mop with a mild cleaner, and dry.
Deep-clean when grout is stained, film builds up, or traffic is heavy: scrub grout, mop with a stronger tile-safe solution, rinse thoroughly, and seal if needed.
Schedule quick weekly, deep monthly or as required.
Understanding Tile Floors Types, Risks, and Why Cleaning Matters
You’ll want to know the common tile types—ceramic, porcelain, natural stone—and their different surfaces and porosity so you can choose the right cleaners.
Remember that grout is porous and often requires targeted care to prevent staining and mold.
Using the wrong methods or products can etch or discolor tile, weaken grout, or leave slippery residues, so pick techniques that match your floor.
Common tile types and characteristics
Because different tiles react to cleaners and wear in their own ways, knowing the type you’ve got is the first step to safe, effective cleaning. You’ll identify ceramic, porcelain, and natural stone by porosity, finish, and durability. Match cleaners and frequency accordingly to avoid damage.
| Tile type | Key traits |
|---|---|
| Ceramic | Glazed, low porosity |
| Porcelain | Dense, very durable |
| Stone | Porous, needs sealant |
How grout differs from tile and why it needs special care
Although grout sits between tiles and looks like a simple filler, it’s a porous, textured material that absorbs dirt and moisture far more readily than the glazed or dense surfaces of ceramic and porcelain.
You’ll need gentler, targeted cleaning and periodic sealing to prevent stains, mold, and deterioration.
Treat grout differently from tile to maintain appearance and longevity without harming the tile.
Risks of wrong cleaning methods (damage, discoloration, slipperiness)
If you use the wrong cleaners or tools, you can quickly turn a routine wash into costly damage: harsh acids or abrasive pads can etch glazes, strip protective coatings, and fade color, while oily residues or soap scum leave surfaces slippery and attract dirt.
You’ll also risk grout crumbling, staining, or becoming water-repellent, and lose slip resistance or finish uniformity.
Tools and Supplies You Need for Every Tile Type
You’ll want a basic toolkit—mop, soft-bristle broom, microfiber cloths, bucket, and a gentle pH-neutral cleaner—for routine maintenance.
For tougher jobs, add a scrub brush, grout brush, steam cleaner or floor machine, and nonabrasive pads.
Stick to safe, tile-appropriate cleaners and avoid harsh acids or bleach unless a product specifically says it’s safe for your tile type.
Basic toolkit for routine cleaning
A few reliable tools make routine tile cleaning quick and effective: a soft-bristle broom or microfiber dust mop to remove grit, a mop (microfiber or a neutral-pH sponge mop) for wet cleaning, a bucket, a nonabrasive cleaner suitable for your tile type, and clean microfiber cloths for spot-drying and polishing.
- Soft-bristle broom or dust mop
- Microfiber or neutral-pH mop and bucket
- Microfiber cloths and nonabrasive cleaner
Deep-cleaning tools and specialty equipment
Routine tools handle everyday messes, but tougher stains and grout buildup call for stronger, targeted gear.
You’ll want sturdy options that reach deep without damaging tile:
- High-torque scrub brush or rotary grout cleaner for stubborn grout and textured tile.
- Steam cleaner with adjustable settings for sanitizing and lifting soil.
- HEPA shop vacuum or wet/dry vac to extract loosened debris and moisture quickly.
Safe cleaning agents vs harsh chemicals general rules
When choosing cleaners, think about what your tile can handle and what you want to avoid: gentle, pH-neutral solutions work for most ceramic and porcelain, while natural stone needs specially formulated, non-acidic products.
You should avoid bleach, ammonia, and acidic cleaners on grout and stone. Use labeled, tile-safe products and test first.
- pH-neutral cleaner
- Stone-specific product
- Mild degreaser (spot use)
Step-by-Step Daily and Weekly Cleaning Routines
Start your daily quick-clean routine with a dry sweep or vacuum, spot-mop spills, and finish with a fast damp mop.
For weekly care, follow a 5-step process: clear the floor, sweep, mop with a tile-safe cleaner, scrub grout spots, and let everything dry.
Once a month, tackle deeper maintenance like grout sealing and checking for loose or damaged tiles to keep floors lasting longer.
Daily quick-clean routine Step 1 to Step 3
A simple three-step daily quick-clean will keep tile looking fresh with minimal effort; each step takes just a few minutes and you can do them in order or skip one when short on time.
- Sweep or vacuum high-traffic areas to remove grit that can scratch tiles.
- Spot-mop spills with a damp microfiber and mild cleaner.
- Wipe grout lines and edges with a soft brush to prevent buildup.
Weekly standard routine Step 1 to Step 5
Since you’re doing a deeper clean once a week, follow these five steps to remove buildup, protect grout, and keep grout sealers and finishes lasting longer.
Start by sweeping or vacuuming, spot-treat stains, mop with a pH-appropriate cleaner, scrub grout lines gently, and dry thoroughly.
- Warm water mop
- Grout brush detail
- Microfiber dry finish
Monthly maintenance tasks for longevity
Although you’ve already got daily tidying and a weekly deep clean down, monthly maintenance keeps grout, sealers, and tile finishes in top shape and prevents small issues from becoming costly repairs.
You should inspect grout, reapply sealer where needed, and test tile finish. Follow this checklist:
- Scrub and reseal grout in high-traffic zones.
- Spot-test and refresh sealers.
- Repair chips and replace damaged tiles promptly.
Tile-Specific Cleaning Procedures (Comparison by Tile Type)
Now you’ll compare cleaning steps tailored to each tile type so you can pick the right routine and products.
I’ll cover routine and deep-clean methods for ceramic and porcelain, safe do’s and don’ts for natural stone like granite, marble, and travertine, and best practices plus cautions for vinyl and laminate.
Finally, we’ll address stain removal and sealing advice for terracotta and cement tiles.
Ceramic and porcelain tile routine and deep-clean steps
For ceramic and porcelain tile, routine care and occasional deep cleans keep surfaces durable and looking new—so you’ll want a simple weekly habit plus targeted steps for grime or stains. Sweep/vacuum, mop with mild pH-neutral cleaner, rinse. For deep clean: scrub grout, use baking soda paste, steam if needed.
| Task | Frequency | Tool |
|---|---|---|
| Sweep | Weekly | Broom/vacuum |
| Mop | Weekly | Microfiber mop |
| Deep clean | As needed | Brush/steam |
Natural stone (granite, marble, travertine) do’s and don’ts
When caring for natural stone—granite, marble, or travertine—you’ll want to treat it differently than ceramic: these stones are porous and sensitive to acids and abrasives, so stick to pH-neutral cleaners, soft cloths or mops, and avoid vinegar, lemon, or harsh scrubbing pads that can etch or dull the surface.
| Do | Don’t |
|---|---|
| Use pH-neutral cleaner | Use acidic cleaners |
| Blot spills quickly | Let stains sit |
| Seal periodically | Use abrasive pads |
Vinyl and laminate tile best practices and cautions
Though they look similar, vinyl and laminate tiles need different care: vinyl is water-resistant and can handle mild detergents and damp mopping, while laminate swells if soaked and needs minimal water and quick drying. You should sweep often, use pH-neutral cleaners on vinyl, avoid steam on laminate, and wipe spills immediately.
| Vinyl | Laminate |
|---|---|
| Damp mop OK | Use barely damp cloth |
| Mild detergent | Fast drying required |
Terracotta and cement tiles stain removal and sealing advice
Moving from vinyl and laminate, you’ll find terracotta and cement demand a different approach because they’re porous and absorb stains quickly if left unsealed. Blot spills, use pH-neutral cleaner, apply poultice for oil, and seal with penetrating sealer; reseal yearly in high-traffic areas.
| Problem | Fix | Frequency |
|---|---|---|
| Oil | Poultice | As needed |
| Stains | Neutral cleaner | ASAP |
| Wear | Reseal | Yearly |
Deep Cleaning and Stain Removal Step-by-Step Treatments
Before you start, identify the stain type so you can match it to the right treatment and avoid damage.
Follow step-by-step grout-cleaning and whitening methods, and use targeted, safe products for tough spots like oil, rust, mold, or paint.
If stains won’t budge or the tile/grout might be harmed, call a professional for specialized removal.
Identifying stain types and matching treatments
When you spot a stain, the first step is to identify what caused it so you can choose the right treatment—oil, dye, rust, mold, and mineral deposits all respond to different cleaners and methods.
Match treatment to stain:
- Oil/grease: degreaser, hot water, scrub.
- Dye/food: enzyme or oxygen bleach soak.
- Rust/minerals: acidic cleaner or commercial rust remover.
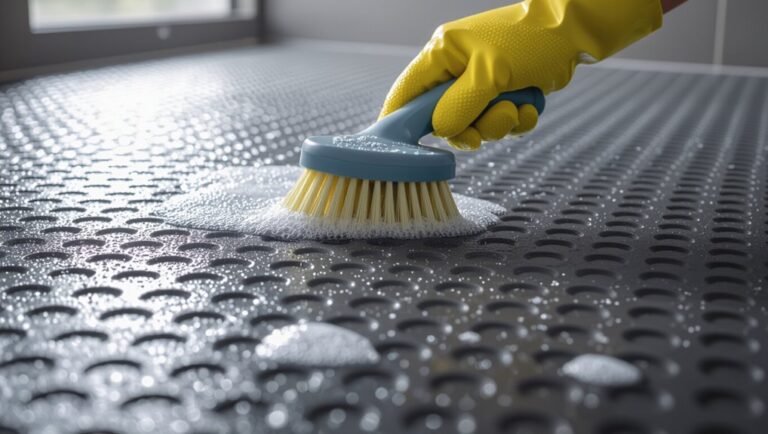
Grout deep-cleaning and whitening step-by-step
After you’ve matched treatments to specific stains, address the grout that often hides dirt and discoloration by using a focused deep-cleaning and whitening process.
- Scrub grout with a baking soda paste and soft brush to lift surface grime.
- Apply oxygen bleach solution, let it dwell, then agitate stubborn lines.
- Rinse thoroughly, dry, and seal grout to prevent future staining and simplify maintenance.
Removing tough stains (oil, rust, mold, paint) procedures and safe products
Tackle tough stains with targeted cleaners and the right tools so you don’t damage the tile while removing oil, rust, mold, or paint.
Test a small area first, use pH-appropriate cleaners, and scrub gently with nylon brushes or microfibers. Rinse thoroughly and repeat if needed.
- Oil: degreaser, hot water, brush.
- Rust: oxalic acid or rust remover.
- Mold/paint: diluted bleach or paint stripper (tile-safe).
When to call a professional
You can handle many stubborn spots yourself, but know your limits so you don’t make a repair worse or void warranties.
Call a pro when damage risk, persistent staining, or specialized equipment is involved. They’ll assess tile, grout, and substrate and use safe methods.
- Structural cracks or loose tiles
- Deep-set stains after DIY attempts
- Porcelain/stone requiring honed or sealant work
Preventative Measures and Ongoing Care
To keep your tile and grout looking their best, seal them when recommended and reapply sealant on the schedule the manufacturer suggests.
Use protective habits like mats at entrances, furniture pads, and a no-shoes policy to cut down on wear and dirt.
Also plan seasonal maintenance and extra attention for high-traffic zones to prevent stains and prolong the floor’s life.
Sealing tiles and grout when and how
When grout and porous tiles are sealed as soon as they’re fully cured and clean, they resist stains, moisture, and wear much better.
You’ll spend less time scrubbing and more time enjoying the floor. Seal every 1–3 years depending on traffic. Use a penetrating sealer; apply with a brush or roller and wipe excess. Test a small area first.
- Clean thoroughly
- Apply sealer
- Recheck annually
Protective habits (mats, furniture pads, shoe rules)
Although routine sealing and cleaning keep tile strong, simple daily habits prevent most wear and stains before they start.
You can protect floors by limiting grit, cushioning legs, and trapping moisture at entries. Follow these quick steps:
- Place doormats and a shoe-off rule at entrances.
- Add felt pads under furniture and casters.
- Use absorbent mats in wet zones and food prep areas.
Seasonal care and high-traffic zone strategies
Seasonal shifts and heavy-use areas demand targeted care, so you’ll want a simple plan that matches traffic patterns and weather.
- Increase sweeping and wet-mopping in winter to remove grit and salt; use a gentle, pH-neutral cleaner.
- In summer, mop less frequently but spot-clean spills promptly to avoid staining.
- Place washable rugs in doorways and rotate furniture pads to distribute wear.
Common Cleaning Mistakes and How to Avoid Them
Don’t grab any cleaner at random—acidic or alkaline products can etch natural stone or strip sealers on certain tiles.
Avoid soaking floors; over-wetting and poor drying can loosen grout and invite mold, so mop with minimal water and dry promptly.
Skip steel wool and harsh scrubbing pads that scratch finishes, and use soft brushes or recommended nonabrasive tools instead.
Using wrong cleaners for specific tile types examples
When you grab the wrong cleaner for a tile type—like acidic solutions on natural stone or abrasive pads on glazed ceramic—you can strip sealers, etch surfaces, or dull finishes in just one cleaning.
Read labels, match pH-safe products to materials, test in an inconspicuous spot, and avoid bleach on colored grout.
Use manufacturer-recommended cleaners and gentle tools to preserve surfaces and coatings.
Over-wetting and improper drying consequences and fixes
If you leave tile too wet or let water sit in grout lines, you can invite staining, mold growth, and adhesive failure that’s costly to fix.
Dry promptly with microfiber mops or towels, ventilate the room, and blot spills immediately.
For damp grout, run a fan or dehumidifier and repeat light cleanings until dry.
Seal grout to reduce water penetration.
Abrasive tools and techniques that damage finishes
1 simple scrub with the wrong tool can scratch tile glazes, dull sealants, and wear down grout, so choose cleaning implements that are gentle yet effective.
Skip wire brushes, scouring pads, and harsh scrapers. Use soft microfiber mops, nylon-bristle brushes, and nonabrasive sponges.
Test tools on an inconspicuous spot first, work gently, and replace abrasive items before they start fraying and scratching.
Quick Reference Charts and Checklists
Keep a one-page routine checklist you can glance at for daily, weekly, and monthly tile care so you won’t forget simple tasks.
Add a compact chart that pairs each tile type with its recommended cleaners and any precautions.
Use these quick references near your cleaning supplies for fast, confident decisions.
One-page routine checklist for daily/weekly/monthly care
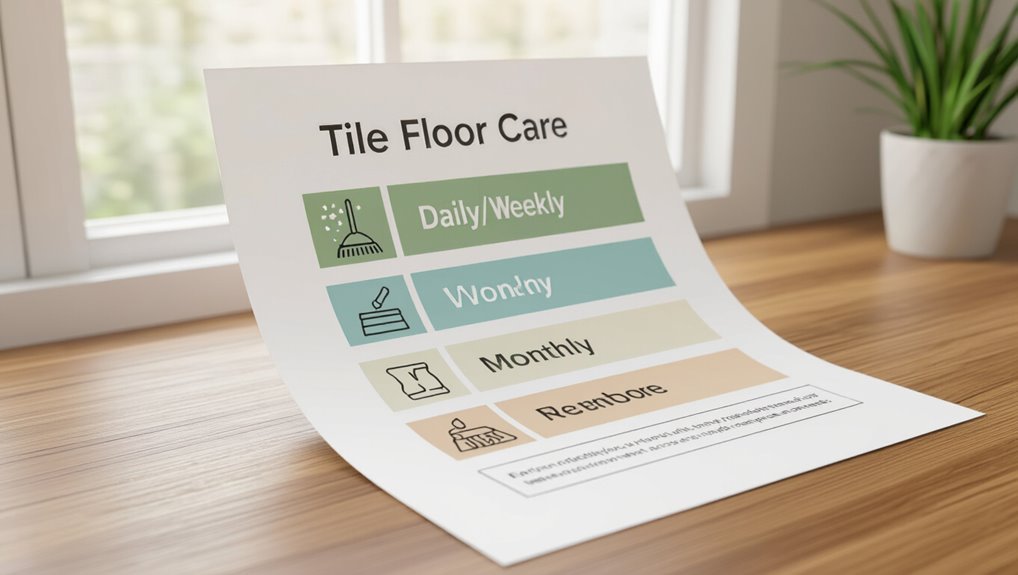
A single-page checklist helps you stay on top of tile care by laying out clear daily, weekly, and monthly tasks so maintenance stays quick and consistent.
Include: daily sweep/vacuum and spot mop; weekly damp mop and grout spot-clean; monthly deep-clean grout, inspect sealant, and re-seal if needed.
Pin it near supplies, check boxes as you go, and adjust frequency for high-traffic areas.
Tile type + recommended cleaners quick chart
Once your checklist is posted, you’ll want a one‑page chart that matches common tile types to the safest, most effective cleaners so you can grab the right product without hesitation. Keep it visible and simple: tile type one column, cleaner/recommendation in the other.
| Tile Type | Recommended Cleaner |
|---|---|
| Ceramic/Porcelain | Neutral pH mop solution |
| Natural Stone | Stone cleaner or pH-neutral soap |
FAQs Tile Floor Cleaning (35 Common Questions)
You probably have a handful of quick questions about tile care, like how often to mop, whether vinegar or bleach is safe, and how to restore a dull finish.
You’ll also want tips for keeping grout looking new and whether steam cleaners work on your tile type.
Below are clear, concise answers to those 35 common FAQs to help you maintain your floors.
How often should I mop tile floors?
How often you should mop tile floors depends on foot traffic, pets, and spills. High-traffic areas usually need mopping once or twice a week, while low-traffic rooms can get by with every two weeks.
Spot-clean spills immediately, sweep or vacuum daily or several times weekly, and deep-clean grout and textured tiles monthly to prevent buildup and maintain appearance.
Can I use vinegar or bleach on my tile floors?
Curious whether vinegar or bleach is safe for your tile floors?
Vinegar’s acidity can dull natural stone and damage grout over time, so use it diluted only on ceramic or glazed porcelain.
Bleach disinfects but can discolor colored grout and harm sealants; use sparingly, well‑diluted, and rinse thoroughly.
For most tiles, opt for pH‑neutral cleaners to protect finishes and grout integrity.
How do I restore shine to dull tiles?
If vinegar or bleach dulled your tile or grout, you’ll want methods that safely bring back shine without causing more damage.
Rinse thoroughly, then buff tiles with a microfiber cloth while still slightly damp.
Use a pH-neutral tile polish or a ceramic/glazed tile-specific product sparingly.
For natural stone, apply a manufacturer-recommended stone polish.
Test first in an inconspicuous spot.
What’s the best way to keep grout looking new?
Keeping grout looking new comes down to regular care and quick response to spills; you’ll want to clean, seal, and protect it on a schedule.
Sweep and mop weekly, scrub grout monthly with a baking soda paste or pH-neutral cleaner, rinse well, then let dry.
Reseal grout every 6–12 months, touch up stains promptly, and use mats in high-traffic or wet areas.
Are steam cleaners safe for all tile types?
You’ve already got a good routine for grout, but you might wonder whether steam cleaning can speed things up or cause damage.
Steam’s safe on sealed ceramic, porcelain, and most glazed tiles, but avoid unsealed natural stone, some decos, and weakened grout.
Test a small area, use moderate heat, and follow manufacturer guidance to prevent loosening grout or etching sensitive surfaces.