Can You Paint Ceramic Tile? The Right Way to Do It and Make It Last
You can refresh ceramic tile without tearing it out by cleaning, scuffing, priming and using a durable enamel or epoxy, then sealing for protection. Glazed and porcelain tiles need extra prep and high‑bond primers; unglazed tiles may need sealing. Use thin even coats, scuff between layers, and allow full cure before heavy use. Floors benefit from epoxy and non‑slip additives. Follow moisture‑tolerant products in bathrooms and kitchens, and below we explain the full process and tips.
Can You Paint Ceramic Tile? and What to Expect
You can paint ceramic tile when you want a budget-friendly refresh or to postpone a full replacement, but expect a more cosmetic than permanent fix.
Painted tile can last several years with proper prep and topcoat, though it won’t match the longevity of new tile.
Compared with replacement, painting is cheaper and faster up front but may cost more over time if you need to redo it.
Direct Answer: When painting tile is a good idea and realistic outcomes
Wondering whether painting ceramic tile is worth it?
If your tiles are sound, smooth, and you want a budget refresh, can you paint ceramic tile — yes, with proper prep you’ll get good short-to-medium-term results.
Don’t expect miracle durability; painted tiles hold up for bathrooms or low-traffic kitchens if you use bonding primer and durable topcoat, and accept occasional touch-ups.
Summary of durability, cost, and time compared to replacement
Although painting ceramic tile won’t match the lifespan or resale value of full replacement, it’s a much faster, cheaper way to refresh a room and can last several years with proper prep and care.
You’ll save time and money upfront—days vs. weeks and a fraction of replacement cost—but expect shorter durability, occasional touch-ups, and possible sooner redoing if high-traffic or moisture-prone.
Understanding Ceramic Tile and Paint Compatibility
You need to know what ceramic tile is made of because material and glaze affect how paint bonds.
Glazed, unglazed and porcelain surfaces all take paint differently, with glazed tiles usually needing more prep and primers.
Choose paints and coatings formulated for tile or high-bond primers and epoxy or enamel topcoats for the best, long-lasting results.
What ceramic tile is made of and why that matters
Ceramic tile is basically made from clay and other natural minerals that are shaped, fired, and often glazed, and that composition determines how well paint will stick and last.
You need to contemplate porosity, surface hardness, and thermal stability because they affect primer choice, adhesion methods, and longevity.
Knowing the material helps you pick proper prep and coatings for durable results.
Types of tile surfaces (glazed, unglazed, porcelain) and paint adhesion differences
When tile surfaces vary—from glossy glazed finishes to raw unglazed clay and dense porcelain—the way paint bites and lasts changes dramatically.
So you’ll need to match prep and products to each type.
Glazed tiles repel paint and need more aggressive sanding and a good primer.
Unglazed tiles absorb coatings differently and may require sealing.
Porcelain’s low porosity makes adhesion toughest without proper etching.
Best paint types and coatings for tile
Which paints actually stick and hold up on tile? You should choose epoxy, acrylic latex, or oil-based enamel paired with a primer and clear topcoat for durability. Prep matters: sand, clean, and prime. Use epoxy for floors, acrylic for walls, and enamel for trim. Compare features:
| Paint Type | Best Use | Durability |
|---|---|---|
| Epoxy | Floors | High |
| Acrylic | Walls | Medium |
| Enamel | Trim | High |
Tools, Materials, and Preparation Checklist
Before you start, gather the essential tools—sanders, scrapers, good-quality brushes and rollers, and a respirator—to get tile surfaces clean and ready.
Pick a primer, paint formulated for tile or high-adhesion coatings, and a durable sealer recommended for wet areas.
Also plan your safety gear and workspace setup so you’re ventilated, protected, and have dust containment in place.
Essential tools (sanders, scrapers, brushes, rollers, respirator)
Gather the right tools and you’ll make painting ceramic tile far easier and longer-lasting: you’ll need sanders or abrasive pads to scuff the glaze, scrapers to remove old caulk or grime, quality brushes and foam rollers for smooth primer and topcoat application, and a respirator to guard against dust and fumes.
- Feel confident with proper prep.
- Save time with right gear.
- Protect your health and finish.
Recommended paints, primers, and sealers
When you’re ready to coat ceramic tile, choose a high-bond primer formulated for glossy surfaces, a durable topcoat suited to the room’s use, and a clear sealer that matches the finish you want.
Pick epoxy or acrylic enamel for wet areas, water-based latex for low-traffic rooms, and a non-yellowing polyurethane sealer.
- Confident results
- Long-lasting protection
- Beautiful finish
Safety gear and workspace setup
Since you’ll be working with primers, paints, and sealers that release fumes and can irritate skin, equip yourself with a respirator rated for organic vapors, chemical-resistant gloves, safety goggles, and a long-sleeve shirt to minimize exposure.
Ventilate well, protect floors, and keep a fire-safe disposal bin.
- Breathe easier
- Feel safer
- Finish proud
Step-by-Step: How to Paint Ceramic Tile the Right Way
Before you start, you’ll assess the tile’s condition to make sure it’s suitable for painting.
Next you’ll clean, de-grease, sand or etch for adhesion, and repair any chips or grout issues.
Finally, you’ll carefully mask and protect surrounding areas so paint only goes where you want it.
Step 1 Evaluate the existing tile condition and suitability
Although tile often looks durable, you should start by closely inspecting its condition and surface type to decide if painting’s a good option.
Check for loose, cracked, or heavily glazed tiles and any water damage or mold. Confirm grout stability and whether previous coatings exist.
If tiles’re structurally sound and well-adhered, painting can work; otherwise consider repair or replacement first.
Step 2 Clean and de-grease the tile surface
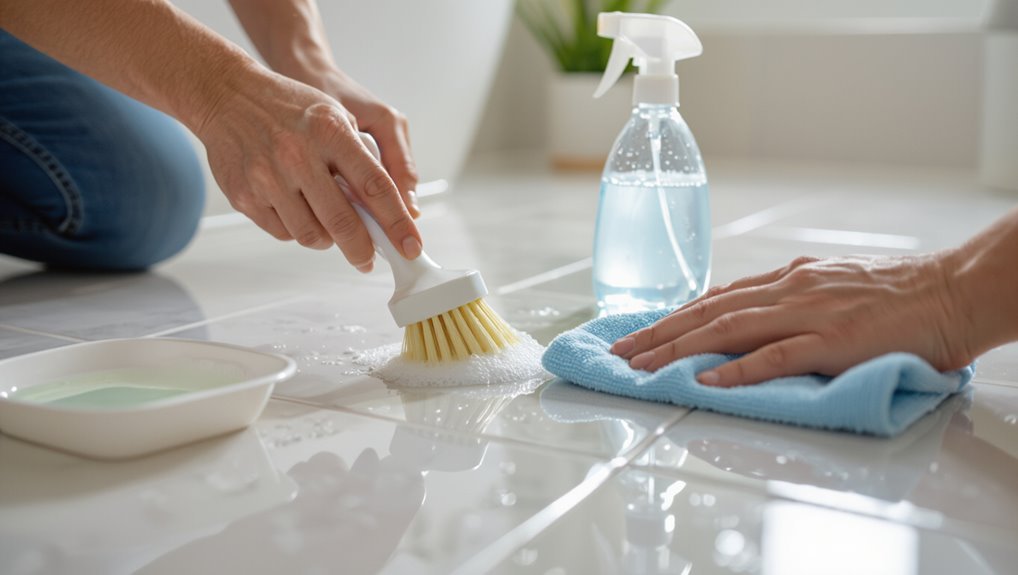
Now that you’ve confirmed the tiles are sound, you’ll need to remove dirt, grease, and soap scum so paint will stick.
Scrub grout lines and tile with a trisodium phosphate (TSP) solution or a strong degreaser, rinse thoroughly, and dry completely.
Use a toothbrush for corners, repeat stubborn areas, and ventilate the room.
Don’t skip this step.
Step 3 Sanding and etching for adhesion
After cleaning, rough up the glaze so the primer and paint can bite — you can do this by sanding with 220–320 grit sandpaper or using a liquid etching solution for glazed tiles.
Sand lightly in circular motions, wipe residue with a tack cloth, or neutralize etcher per instructions.
Confirm even dulling, rinse thoroughly, and let the surface fully dry before priming to maximize adhesion.
Step 4 Repairing chips, grout lines, and surface imperfections
With the surface sanded and clean, you’re ready to fix chips, uneven grout, and other blemishes so paint lays smooth and lasts.
Fill chips with a ceramic-grade filler or epoxy, smooth with a putty knife, and let cure.
Repoint or level grout using a matching grout or grout repair compound.
Sand any high spots, then wipe residue before priming.
Step 5 Masking and protecting surrounding areas
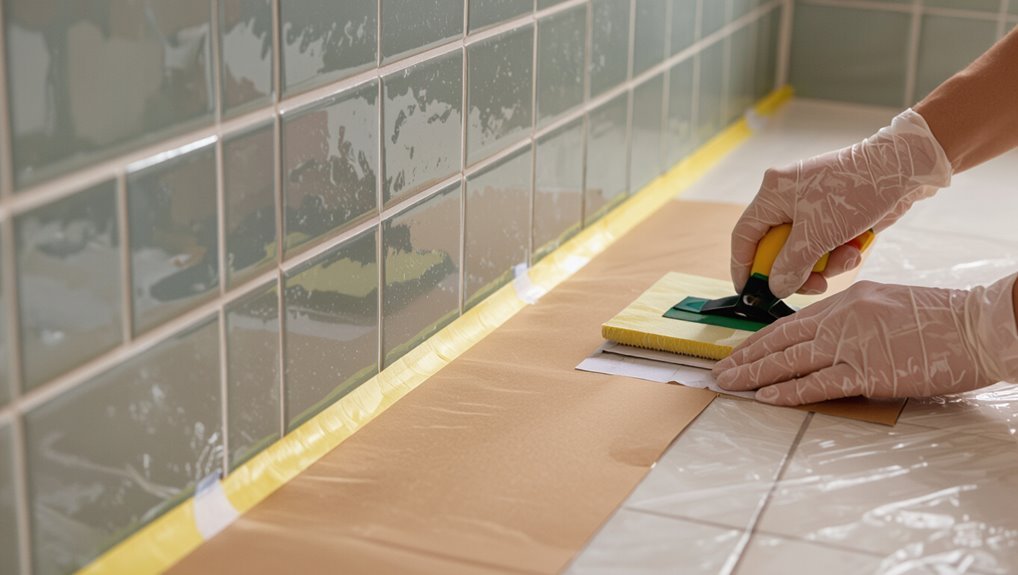
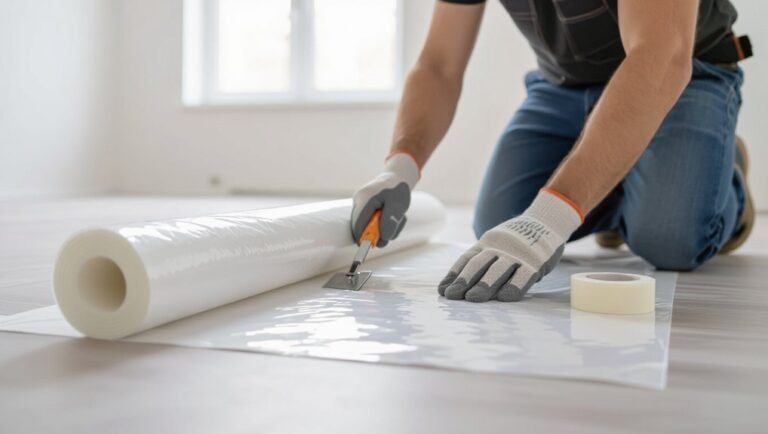
Step 5 is where you protect everything you don’t want painted: tape off edges, cover countertops, fixtures, floors, and nearby walls, and remove or mask hardware and outlet covers so overspray or drips won’t cause problems.
Use painter’s tape, plastic sheeting, drop cloths, and kraft paper. Press tape firmly along grout and seams.
Label covered switches and ventilate the area before you begin painting.
Step 6 Priming: best practices and drying times
Now that surrounding areas are protected, it’s time to prime the tile so paint will stick and last.
Choose a bonding primer labeled for tile or glossy surfaces. Apply thin, even coats with a high-density foam roller or brush, avoid drips, and sand lightly between coats if specified.
Allow manufacturer-recommended drying times—usually 1–4 hours per coat—before proceeding.
Step 7 Applying paint: techniques, coats, and drying
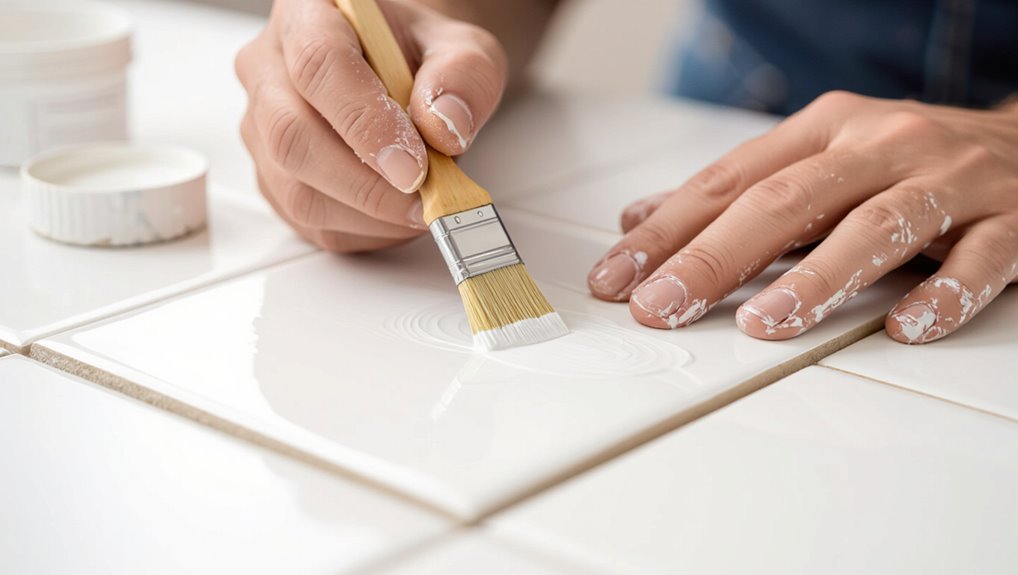
Begin by applying thin, even coats of your chosen tile paint using a high-density foam roller for flat areas and a small brush for grout lines and edges; this helps prevent drips, achieve uniform coverage, and makes drying more predictable.
Let each coat dry per manufacturer instructions, lightly scuff between coats if recommended, and apply 2–3 total coats for full, durable color without buildup.
Step 8 Sealing and curing for long-term durability
Seal the surface with a durable topcoat to lock in your paint and protect it from chips, moisture, and daily wear.
Choose a tile-safe polyurethane or epoxy sealer, apply thin even coats with a foam roller, and allow full curing between coats per manufacturer instructions.
Wait the recommended cure time before light use, avoiding heavy traffic or cleaning agents until fully set.
Step 9 Replacing or touching up grout (if applicable)
If your grout looks cracked, stained, or uneven after painting, you’ll want to replace or touch it up so the finish looks professional and stays watertight.
Remove damaged grout with a grout saw, clean joints, and let dry.
Apply new grout or a matching grout pen, smooth with a damp sponge, and cure per manufacturer directions to prevent moisture and guarantee a seamless, durable result.
Design Options and Techniques
You can transform a whole room with a solid color or pick tiles as accents while thinking about how the new hue will flow with cabinets, flooring, and lighting.
Try patterns, stencils, or faux finishes like marble, stone, or encaustic looks to add character without retiling.
Pair painted tiles with contrasting grout and edge treatments to frame the design and make details pop.
Solid color transformation and room-wide considerations
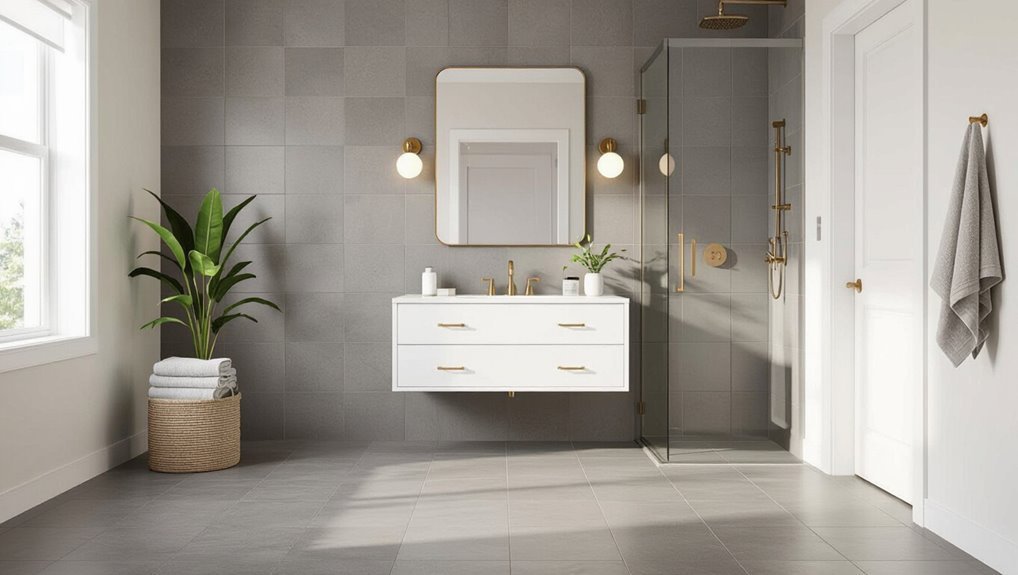
When you want a clean, cohesive look, painting ceramic tile a solid color is the fastest way to unify a room and simplify maintenance.
Choose durable, tile-specific paint and primer, pick a shade that complements fixtures, and test small areas.
Consider sheen for cleaning, coordinate trim and grout color, and plan lighting to avoid glare—this keeps the space feeling intentional and low-maintenance.
Patterns, stencils, and faux finishes (marble, stone, encaustic-look)
Solid color finishes make a room feel calm and cohesive, but adding patterns, stencils, or faux finishes lets you introduce personality without replacing tile.
You can stencil geometric motifs for an encaustic-look, hand-brush veining for marble illusion, or sponge and rag techniques for stone texture.
Seal carefully, test colors on a spare tile, and work in small sections for crisp edges and durable results.
Using contrasting grout and tile-edge treatments
One smart way to elevate painted tile is to pair it with contrasting grout and deliberate edge treatments, because those small details frame the pattern and sharpen the overall look.
Choose grout color to either highlight joints or blend seams, then finish edges with bullnose, metal trim, or painted reveals.
You’ll achieve cleaner lines, visual depth, and a more professional, lasting result.
Pros, Cons, and When to Choose Painting vs Replacement
Painting tile saves you time and money and lets you customize color and finish quickly.
It’s not as durable as replacement, so expect touch-ups or redoing in high-traffic or wet areas.
If tiles are damaged, warped, or you want a long-term remodel, replacement is the smarter choice.
Advantages of painting tile (cost, speed, customization)
Although replacing tile can give you a brand-new surface, painting offers a faster, cheaper way to refresh a room—especially when the existing tile is sound. You’ll save money, finish quickly, and personalize finishes without major demolition.
Consider painting when timelines, budget, or style changes matter more than total renovation.
- Excitement: instant transformation
- Relief: lower cost, less mess
- Pride: custom look
Limitations and longevity expectations
If you want a quick refresh, painted tile can look great for years—but it isn’t a permanent fix, and you should weigh trade-offs like durability, surface limitations, and maintenance before committing.
You’ll save money and update aesthetics quickly, but expect wear in high-traffic or wet areas, potential adhesion issues on glossy tiles, and periodic touch-ups.
Choose painting for cosmetic, lower-use spaces.
When replacement is the better option
When you need long-term durability, full waterproofing, or a complete style change, replacing tile is usually the smarter choice than painting. If tiles are damaged, uneven, or in wet zones, opt for replacement. Painting suits temporary updates or budget fixes.
| Option | Best for |
|---|---|
| Paint | Cosmetic refresh, low cost |
| Replace | Waterproofing, durability |
| Hybrid | Partial replace + paint |
Common Mistakes and How to Avoid Them
Don’t skip prep: you’ll need thorough cleaning and sanding before painting.
Use the right primer and paint, allow full curing and seal properly, and account for moisture and ventilation in bathrooms or kitchens.
Follow a simple checklist for each step to prevent these common mistakes.
Mistake 1 Skipping proper cleaning and sanding
Skipping proper cleaning and sanding is the fastest way to doom a ceramic tile paint job before it even cures.
You’ll get poor adhesion, visible blemishes, and flaking if you don’t remove grease, soap scum, and mineral deposits.
Scrub with a degreaser, rinse thoroughly, then scuff the surface with fine-grit sandpaper.
Clean again to remove dust before priming and painting.
Mistake 2 Using wrong primer or paint type
Although it might seem easy to grab any leftover paint, using the wrong primer or paint will ruin adhesion and finish; you need products formulated for nonporous surfaces like ceramic.
Choose a high-bond primer labeled for tile or glossy surfaces, then pick trim or enamel paints suited for moisture and scrubbing.
Test a small area, follow manufacturer instructions, and don’t substitute interior wall paint.
Mistake 3 Insufficient curing and sealing
Even with the right primer and paint, your job won’t last if you rush curing and sealing; paint that hasn’t fully cured or a weak sealer will blister, scratch, or peel under moisture and scrubbing.
Follow manufacturer cure times, avoid early handling, and apply recommended coats of a quality sealer.
Test a small area, then wait the full cure before regular use to guarantee durability.
Mistake 4 Ignoring high-moisture areas and ventilation
If you paint tile in bathrooms, laundry rooms, or other damp spots without addressing moisture and ventilation, the finish won’t last—mildew, bubbling, and peeling show up fast.
You must assess humidity, use moisture-tolerant primers and paints, and guarantee proper airflow.
Neglecting exhaust fans, sealed windows, or damp-prone grout invites failure, so plan for the environment before you start to avoid premature coating breakdown.
Quick checklist to prevent each mistake
Because painting tile involves several easy-to-miss steps, a short, actionable checklist helps you avoid the common pitfalls and get a durable finish.
Use this to stay focused and avoid regret:
- Prep thoroughly: clean, degloss, sand — don’t skip; you’ll thank yourself.
- Prime properly: choose a high-bond primer for lasting adhesion.
- Protect moisture zones: seal grout, ventilate, and use bathroom-rated topcoat.
Maintenance and Care to Make Painted Tile Last
To keep painted tile looking good, you’ll want a simple cleaning routine using gentle, non-abrasive cleaners approved for painted surfaces.
If you notice chips, you can sand lightly, apply touch-up paint, and blend the edges for an invisible repair.
Check the finish regularly and re-seal or repaint as soon as wear shows to prevent further damage.
Cleaning routines and approved cleaners
When you clean painted ceramic tile, stick to gentle, regular routines and approved cleaners so the finish stays intact and durable.
Use a soft microfiber mop or cloth, mild pH-neutral soap, and warm water. Avoid abrasive pads, harsh acids, or bleach.
Rinse thoroughly, dry to prevent water spots, and test any new cleaner in a hidden spot before full use.
Repairing chips and touch-up techniques
Start by evaluating the damage: examine each chip’s size, depth, and whether it exposes bare ceramic or just the paint layer, since your repair approach will differ for surface nicks versus deeper gouges.
For shallow chips, sand, clean, prime, and feather in matching paint with a fine brush.
For deeper gouges, fill with epoxy or color-matched filler, sand smooth, prime, then repaint and cure per product instructions.
When to re-seal or repaint
Plan on checking your painted tile every 6–12 months for wear, because high-traffic areas and wet rooms will need resealing or touch-ups sooner than decorative or low-use surfaces.
Look for dull spots, peeling, or water beading failure. Lightly scuff and clean before re-sealing with a compatible clear coat; repaint only when primer or color shows significant loss.
Cost, Timeframe, and Project Planning
You’ll want a clear cost picture—materials and tools can run low hundreds, while hiring pros adds labor costs.
Expect a weekend for a DIY refresh versus a few days to a week when contractors handle prep, curing, and detail work.
Plan tasks by day: sourcing supplies and prep first, painting and sealing next, and final touch-ups after cure time.
Typical cost breakdown (materials, tools, labor)
Budgeting a tile-painting project means breaking costs into three clear buckets: materials, tools, and labor. You’ll typically spend on primer, paint, sealer; essential tools; and either your time or contractor fees. Plan contingencies for repairs and extra coats. Compare DIY tool rental versus purchase to save.
| Category | Typical Cost |
|---|---|
| Materials | $30–$150 |
| Tools | $20–$150 |
| Labor | $0–$600 |
Time estimates for DIY vs professional jobs
While DIY tiling lets you control the schedule and cut labor costs, it usually takes longer than hiring a pro—expect a weekend for small projects and several days for larger areas when you factor prep, multiple coats, and proper curing.
You’ll spend extra time on surface cleaning, sanding, priming, and waiting between coats.
Pros work faster with experience, tools, and efficient workflows.
How to plan a weekend DIY vs multi-day professional project
Having sketched the time differences between DIY and pros, now decide whether you want a condensed weekend effort or a multi-day professional job by weighing cost, schedule, and scope.
If you DIY, plan prep, cure times, and backups for delays; buy quality primer and epoxy paint.
If you hire pros, get firm timelines, warranties, and clear access. Budget accordingly and book in advance.
FAQ
You probably have a few quick questions about painted tile, like how long it lasts in kitchens and bathrooms and whether it’s safe for food-prep areas.
You’ll also want to know if painted floors can stay slip-resistant, whether the finish can be removed later, and if professionals recommend painting antique or textured tiles.
Below are concise answers to help you decide.
How long does painted tile last in kitchens and bathrooms?
Wondering how long painted tile will hold up in kitchens and bathrooms? It depends on prep, paint quality, and use.
With thorough cleaning, proper primer, durable epoxy or enamel, and a clear topcoat, expect 5–10 years in moderate-traffic areas. High-use zones may show wear sooner.
Touch-ups extend life; regular gentle cleaning and avoiding abrasive scrubbing help maintain the finish.
Can you paint tile floors and still have them be slip-resistant?
If painted wall and backsplash tiles can last five to ten years with proper prep, the same care matters for floors—but you’ll also need to address traction.
Yes: you can paint floors and keep them slip-resistant by using non-slip additives in the final coat or selecting textured, slip-rated floor paint.
Clean, etch, prime, and apply multiple durable topcoats for lasting grip and wear resistance.
Is painted tile safe for food-prep areas?
Is painted tile safe for food-prep areas?
If you use food-safe, low-VOC primers and paints rated for kitchens, then seal with a durable, chemical-resistant topcoat, painted tile can be safe.
Cure fully per manufacturer instructions, clean with nonabrasive, food-safe cleaners, and avoid chips or peeling.
Replace damaged sections promptly to prevent contamination and maintain a hygienic prep surface.
Can painted tile be removed if I change my mind?
Curious whether you can undo painted tile? You can, but removal takes work.
Lightly painted tiles might strip with chemical paint remover, heat gun, or sanding—always test a small area first.
Glazed, heavily sealed, or epoxy-coated surfaces may need more aggressive methods or tile replacement.
Expect dust, fumes, and repair of underlying grout or surface before refinishing or reinstalling new tile.
Do professionals recommend painting antique or textured tiles?
Why risk damaging character that took decades to develop?
Pros usually advise against painting antique or heavily textured tiles. You’ll likely lose historic value, obscure unique textures, and face poor adhesion on uneven surfaces.
If you must, consult a conservator, test adhesion in an inconspicuous spot, and use specialty primers and paints.
Remember restoration often preserves value better than alteration.
Final Checklist Before You Start
Before you lift a brush, make sure you’ve got the right materials, the tile is clean and sound, and the room’s temperature and ventilation are suitable.
Check grout and chips so you can decide whether to paint, repair, or replace.
If the issues are minor and the surface preps well, painting can save time and money—if not, plan for repair or replacement.
Pre-paint readiness checklist (materials, surface condition, environment)
Tools and a tidy workspace make the job smoother, so check that you’ve got the right materials, the tile surface is clean and sound, and the room conditions are suitable before you open a can of primer.
Confirm grit, sealing, ventilation. Gather confidence with:
- Sturdy primer, epoxy or tile paint
- Clean, etched, crack-free tiles
- Dry, well-ventilated, temperature-stable room
Quick decision guide: paint, repair, or replace
When you’re sizing up your tiled surface, decide quickly whether painting will save time and money, a repair will extend life, or full replacement is the smarter long-term choice. Use this final checklist to pick efficiently.
| Condition | Recommended action |
|---|---|
| Minor wear, sound tile | Paint |
| Cracked grout, loose tiles | Repair |
| Widespread damage, outdated layout | Replace |
| Budget vs longevity | Choose accordingly |