
How to Install Wall Tile Like a Pro: Tools, Tips, and Techniques
You can install wall tile like a pro by planning layout, prepping the surface, and using the right tools—wet saw, notched trowel, spacers, level, and safety gear. Pick proper substrate and adhesive for your tile and mix to spec. Dry-fit tiles, snap plumb lines, set with consistent pressure, grout, then seal after curing. Take care with cuts and waterproofing to avoid problems. Keep going and you’ll find step-by-step techniques, pro tips, and troubleshooting.
How to Install Wall Tile Like a Pro and Overview
You’ll get a clear snapshot of the essential steps—surface prep, layout, adhesive, grout, and cleanup—so you can plan efficiently.
This guide tells you who it’s for and what projects are covered (backsplash, shower, full wall) and gives quick estimates for time, difficulty, and cost ranges.
Use that info to decide if you can tackle the job yourself or should hire a pro.
Essential Steps at a Glance
Start by laying out the basic sequence so you know what comes next: measure and plan your layout, prepare the wall, pick and mix the right adhesive, set and spacers the tiles, grout, and finish with sealing and cleanup.
To answer how do you install wall tile: follow those steps, use proper tools, check level and spacing, let adhesive and grout cure, then seal and tidy for a professional result.
Who this guide is for and project scope (backsplash, shower, full wall)
Now that you’ve got the basic sequence down, decide whether this guide fits your project and skill level.
This guide suits DIYers with basic tool familiarity tackling backsplashes, small accent walls, or full shower walls if you’re comfortable with waterproofing and tile cuts.
It’s not for large commercial jobs or complex mosaic restorations; seek pros for structural alterations or extensive waterproofing challenges.
Estimated time, difficulty, and cost ranges
Although your exact timeline and cost depend on the project size and your experience, a simple backsplash can take a weekend (6–12 hours), a single shower wall 1–3 days, and a full tiled bathroom wall several days to a week. You’ll need basic tools; difficulty ranges from easy (backsplash) to advanced (full wall). Plan $5–$25/ft² materials, labor extra.
| Task | Estimate |
|---|---|
| Backsplash | 6–12 hrs |
| Shower wall | 1–3 days |
| Full wall | Several days–1 week |
| Cost/ft² | $5–$25 |
Basic Understanding What Wall Tile Installation Involves
You’ll choose from ceramic, porcelain, glass, or natural stone tiles based on look, durability, and where you’re installing them.
Learn key terms—substrate, adhesive, grout, trowel notch, and spacers—so you’ll know what each component does during installation.
Getting the substrate right and using proper waterproofing is critical to prevent adhesion failures and water damage.
Types of wall tiles (ceramic, porcelain, glass, natural stone)
Choosing the right tile starts with understanding the common types—ceramic, porcelain, glass, and natural stone—because each has different strengths, looks, and installation needs. You’ll pick ceramic for affordability, porcelain for durability, glass for shine, and stone for texture. Consider weight, porosity, and finish for your space.
| Tile Type | Quick Note |
|---|---|
| Ceramic | Affordable, easy to cut |
| Porcelain | Dense, water-resistant |
| Glass | Reflective, delicate |
| Natural Stone | Unique, needs sealing |
Key tile components and terminology (substrate, grout, adhesive, trowel notch, spacers)
Think of tile installation as assembling a system: each part—the substrate that supports the tile, the adhesive that bonds it, the trowel notch that controls how much adhesive you spread, the spacers that set grout lines, and the grout that seals joints—works together to create a stable, attractive wall.
Learn each term, pick compatible materials, size trowel notches for tile size, and use spacers for even joints.
Why proper substrate and waterproofing matter
One clear rule: a sound substrate and proper waterproofing decide whether your wall tile lasts or fails.
You’ll need a flat, stable backing—cement board or approved waterproof drywall—and continuous waterproofing at wet zones. That prevents moisture, mold, and adhesive breakdown.
Prep, seams, and flashing matter; skip shortcuts and you’ll repair sooner.
Do it right once; your tile will perform and look professional.
Tools, Materials, and Safety Gear
Before you start, make sure you’ve got the must-have tools for professional results—trowels, a level, tile cutters, spacers, and a mixing drill.
Check materials and consumables against a concise project checklist so you don’t run out of thinset, grout, backerboard, or sealant.
Wear proper safety gear (gloves, eye protection, a dust mask) and follow basic best practices to prevent injuries and keep the work area clean.
Must-have tools for professional results
To get professional-looking tile, you’ll need a focused set of tools, materials, and safety gear that make each step—measuring, cutting, setting, and grouting—accurate and efficient.
You’ll want reliable tools and protection so work stays fast and precise.
- Tile cutter, wet saw, nipper
- Notched trowels, spirit level, spacers
- Knee pads, goggles, dust mask
Materials and consumables checklist by project type
Different projects call for different consumables, so start by matching your materials to the job—bathroom walls need water-resistant adhesive and grout, kitchen backsplashes benefit from stain-resistant grout, and high-traffic areas require a stronger thinset and more durable tiles.
Choose quantities, backing, and sealers appropriately, and confirm tile batch consistency.
- Tile, thinset, grout
- Backerboard, spacers, sealant
- Adhesive, primer, trim
Safety equipment and best practices
Now that you’ve matched materials to the job and confirmed quantities and batch consistency, pay close attention to the tools and safety gear you’ll use—proper equipment keeps the worksite safe and the installation sound.
Wear safety glasses, gloves, knee pads, and a dust mask; use ear protection for power tools.
Keep a first-aid kit, fire extinguisher, and good ventilation; secure ladders and clear walkways.
Preparation Surface Assessment and Prep Work
Before you start tiling, inspect the wall to choose the proper substrate—drywall, cement board, or green board—and make any repairs so the surface is solid and moisture-appropriate.
Clean, level, and patch uneven areas, then measure and plan your layout so you know where cuts will fall.
Finally, mark reference lines and your starting points (center or corner) to keep rows straight as you work.
Inspecting and choosing the right substrate (drywall, cement board, green board)
When you’re getting ready to tile, inspect the wall substrate carefully to confirm it’s flat, stable, and compatible with tile adhesive.
Check for moisture, previous finishes, and framing support.
Choose cement board for wet areas, drywall for dry, well-supported walls, and green board only where allowed by local code.
Verify manufacturer recommendations and plan fastener layout for secure installation.
Repairing, leveling, and cleaning the wall surface
Start by evaluating and fixing any damage so the tile will adhere properly: patch holes and cracks with appropriate filler, replace or reinforce soft or sagging sections, sand high spots, and skimcoat low areas to create a flat, stable plane.
Clean thoroughly—vacuum dust, remove grease or loose paint, and rinse residue.
Allow full drying time, then prime porous or repaired areas before tiling.
Measuring, planning layout, and determining tile cuts
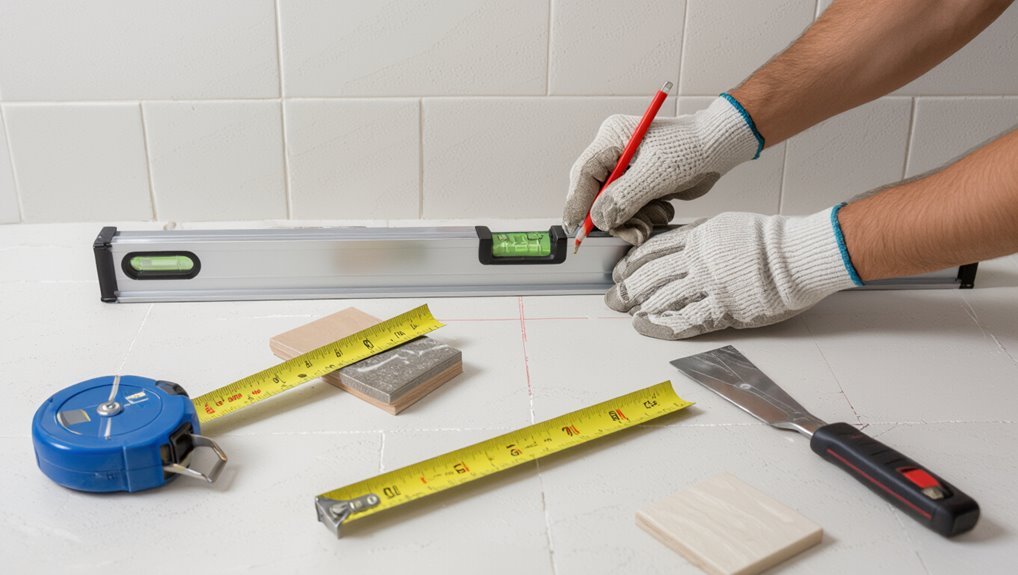
With the surface fixed and primed, you’ll want to measure and plan your tile layout so cuts are minimal and seams look balanced.
Measure wall height and width, note obstacles (outlets, fixtures), and calculate full tiles versus trims.
Sketch the layout, mark cut locations, and choose tile orientation.
Select cutting tools and verify trim sizes to guarantee clean, accurate cuts before you start.
Marking reference lines and starting points (centering, corner starts)
Pick a clear, true starting point and transfer precise reference lines to the wall before you lay a single tile.
Use a level and plumb line to mark a horizontal datum and vertical guides from that point.
Decide center or corner start, snap chalk lines, and mark tile edges and grout joints.
Work outward, checking alignment frequently so cuts stay consistent and seams remain straight.
Step-by-Step Installation Process
Start by laying out tiles dry with spacers to verify your pattern and sightlines.
Then mix the appropriate adhesive, apply it with the correct trowel and butter the backs of large tiles as needed before setting them, keeping alignment and spacing consistent as you tap tiles into place.
Finish by cutting tiles for edges and fixtures using the right tool for straight, plunge, or curved cuts.
Step 1 Dry layout and mock-up (spacers, pattern verification)
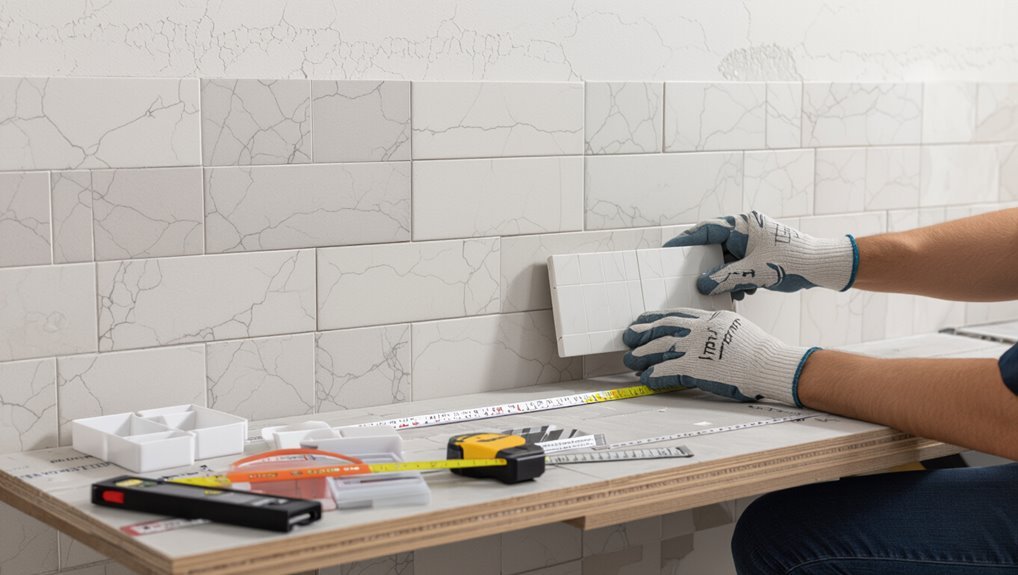
Before you spread any adhesive, dry-lay the tiles on the wall and floor to verify spacing, pattern alignment, and how cut pieces will fit at edges and around obstacles.
Use spacers to maintain grout joints, step back to check visual rhythm, adjust layout to avoid tiny slivers at corners, and mark reference lines.
Photograph the mock-up for installation guidance.
Step 2 Mixing and selecting the right adhesive/mortar
Choose the right adhesive for your tile type and substrate, then mix it precisely to the manufacturer’s specs—too thin and the tiles won’t bond, too thick and you’ll fight a lumpy, unworkable mortar.
Weigh powder, use clean water at recommended temperature, and mix to a smooth, lump-free consistency. Let slake time finish, remix briefly, and use within pot life to guarantee proper adhesion.
Step 3 Applying adhesive and buttering technique (trowel selection)
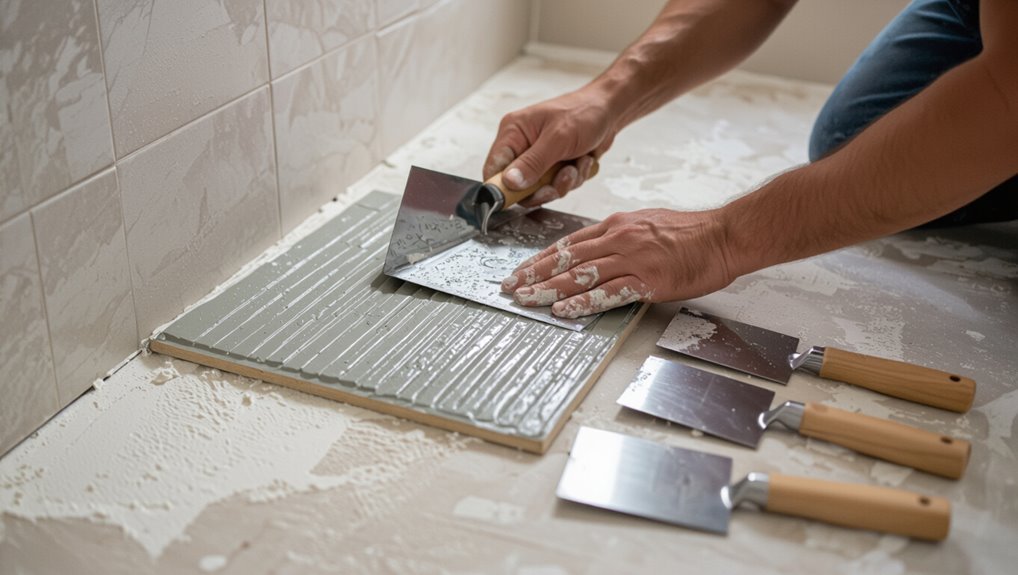
With your mortar mixed to the right consistency and rested, it’s time to spread it and set your tiles.
Choose a notched trowel sized to tile back: small tiles use 1/4″ notch, medium 1/4″–1/2″, large use 1/2″–3/4″.
Butter tile backs for uneven tiles, comb mortar on the wall, hold a 45° angle, and maintain consistent ridges for full coverage.
Step 4 Setting tiles: alignment, spacing, and tapping methods
1. You’ll press tiles into the adhesive, keeping rows straight using a level and chalk line.
Insert spacers for uniform grout joints, checking alignment frequently. Tap tiles gently with a rubber mallet or beating block to seat them and expel air. Adjust before adhesive skins.
Wipe excess adhesive from joints as you go to guarantee clean grout lines and consistent appearance.
Step 5 Cutting tiles: tools and techniques for straight, plunge, and curved cuts
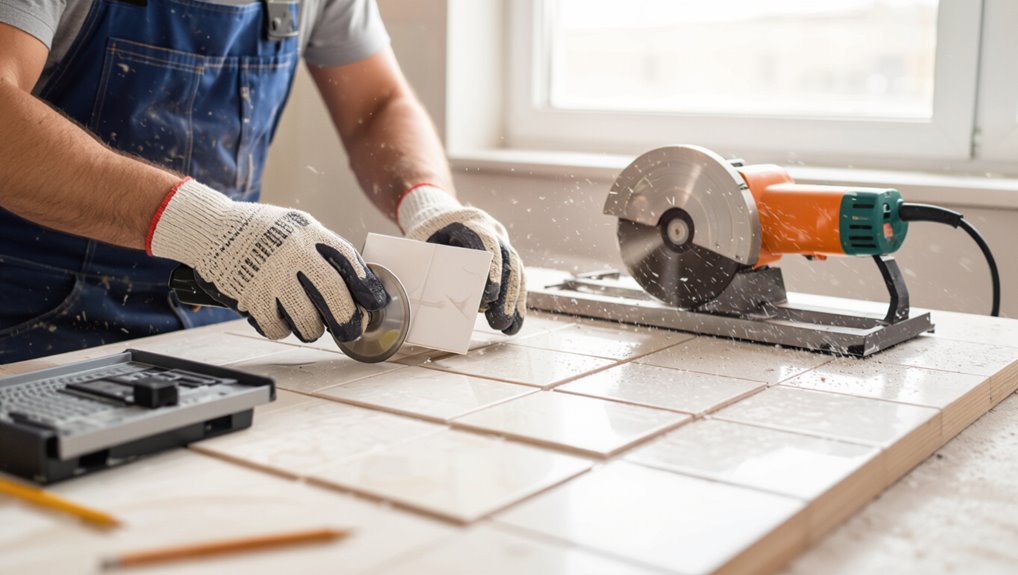
Start by measuring and marking each tile carefully—accurate cuts keep your layout tight and professional.
Use a wet saw for straight cuts, score-and-snap for small ceramic tiles, and a tile nipper or rotary tool for curves.
For plunge cuts, mark both faces, support the tile, and cut slowly.
Wear eye protection, keep blades sharp, and test on scrap before final cuts.
Step 6 Dealing with corners, edges, and transitions (trim, bullnose, Schluter)
When you reach corners, edges, and junctions, plan the trim before you apply thinset so you can cut and fit pieces precisely; bullnose tiles, metal or PVC Schluter profiles, and edging strips each solve different edge problems, so choose the one that matches your tile thickness and traffic needs.
Measure and dry-fit trims, miter or butt joints as needed, secure profiles to substrate, and pack thinset under tile edges for a neat, protected finish.
Step 7 Allowing proper cure time before grouting
Before you grout, let the thinset fully cure so tiles don’t shift or the grout won’t crack; follow the manufacturer’s recommended cure time—typically 24 to 72 hours—based on the thinset type, temperature, and humidity.
During curing, keep area undisturbed, control ventilation and temperature, and avoid moisture.
Check bond by gently testing a corner; only grout once tiles are firmly set.
Grouting and Finishing
Now that your tiles are set, you’ll choose the right grout—sanded for wider joints, unsanded for narrow ones, or epoxy for high-moisture areas—and pick a color that complements your tile.
You’ll apply grout with a rubber float, tool the joints to a smooth finish, and wipe excess clean before it dries.
After curing, seal grout and any porous tiles as needed, then do a final clean, buff, and inspect for chips or gaps.
Choosing grout type and color (sanded vs. unsanded, epoxy)
Because grout affects durability, appearance, and maintenance, you should pick the right type and color for your tile and joint width.
Choose sanded grout for joints 1/8″ or wider and nonabrasive tiles; use unsanded for narrow joints and delicate surfaces.
Consider epoxy for high-moisture, stain-prone areas despite higher cost and difficulty.
Match color to tile or contrast for visual effect.
Grouting technique: application, tooling joints, and cleanup
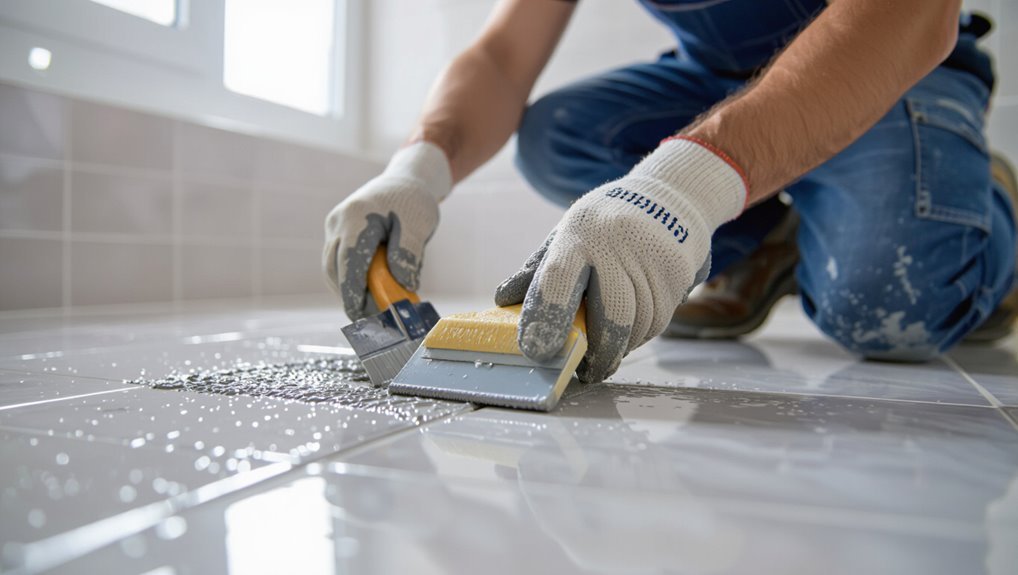
Mix the grout to a creamy, lump-free consistency and spread it diagonally across the tiles with a rubber float so grout fills the joints completely; work in small sections to keep the grout from skinning over.
After filling, tool joints with a rounded or V-shaped grout tool for uniform concavity, then wipe excess with a damp sponge, rinsing the sponge frequently for clean grout lines.
Sealing grout and porous tiles: when and how
If your grout or tile is porous, you should seal it after the grout has cured to protect against stains and moisture; wait the manufacturer’s recommended cure time—usually 48–72 hours—before applying a sealer.
Choose a penetrating sealer for grout and unglazed tile, test in a hidden spot, apply evenly with a brush or applicator, wipe excess, and allow full cure per product instructions.
Final cleaning, buffing, and inspecting for defects
Start by wiping the tiles and grout with a damp sponge to remove haze and leftover grout, then rinse with clean water and let everything dry so you can spot imperfections clearly.
Inspect joints and edges for gaps, chips, or uneven grout lines. Buff tiles with a soft cloth or microfiber pad to restore shine.
Touch up defects with grout or caulk, then seal if needed.
Common Problems, Mistakes, and How to Fix Them
When things go wrong with wall tile—lippage, uneven grout lines, hollow spots, stains, or poor cuts—you’ll want to spot and fix them quickly to avoid bigger repairs.
I’ll show how to prevent and correct lippage and grout inconsistencies, re-bond hollow or loose tiles, treat staining and efflorescence, and patch visible cutting errors.
Follow these tips and you’ll keep your installation looking professional and lasting longer.
Lippage, uneven grout lines, and how to prevent/fix
Although tight tolerances and careful alignment seem tedious, addressing lippage and uneven grout lines early saves you time and money later.
You’ll want to check tile flatness, maintain consistent spacers, and correct any high or low tiles before the thinset sets.
Use a level and straightedge, tap tiles with a rubber mallet, shim low tiles, remove and reset persistently high tiles, and scrape excess thinset for uniform grout joints.
Adhesion failures, hollow tiles, and re-bonding solutions
Once you’ve dealt with lippage and grout consistency, you’ll want to inspect adhesion—tiles that sound hollow or pop loose are more than cosmetic; they indicate a bond failure that can let water in and wreck a whole installation.
Tap suspect tiles, remove loose ones, clean substrate, and reapply appropriate thinset or adhesive.
Use back-buttering, proper trowel, and clamps or wedges until cured.
Staining, efflorescence, and moisture-related issues
Because moisture travels through tiny cracks and porous grout, staining and efflorescence are common signs that water management failed somewhere in your installation.
Inspect waterproofing, replace compromised backing, and remove salts with a stiff brush and diluted vinegar or commercial efflorescence remover.
Reseal grout with a penetrating sealer, improve ventilation, and fix leaks promptly to prevent recurrence and preserve tile appearance.
Mistakes with cuts and how to repair visible errors
If your cuts aren’t square or chips show at the edges, don’t panic—you can usually fix visible mistakes without redoing the whole wall.
Clean the area, glue tiny chips back with epoxy, and fill gaps with matching grout or colored caulk.
Sand rough spots gently, repaint or touch up trim, and swap only the worst tiles using careful scoring and thinset—no full demolition needed.
Pro Tips, Best Practices, and Time-Saving Techniques
Before you start, plan a layout that balances cut tiles and focal lines so the finished wall looks intentional.
Set up your tools and workspace for an efficient workflow, learn basic maintenance to keep grout and tile looking new, and know the signs—complex patterns, uneven walls, or time constraints—when it’s smarter to hire a pro.
These tips will save time and help you avoid costly mistakes.
Layout tricks for visually balanced installations
When you plan your tile layout with a few simple rules—centered focal lines, balanced edge cuts, and consistent grout spacing—you’ll avoid awkward half-tiles and create a polished, professional look.
Measure and snap reference lines, dry-fit rows, and shift layouts to hide tiny edge cuts. Use symmetry around fixtures, stagger seams for rhythm, and keep grout joints uniform to maintain visual balance and symmetry.
Efficient workflow and tool setup for faster installs
Set up your workspace and tools so the job flows—organize tiles, spacers, trowels, buckets, and cuts within easy reach.
Lay out a clear sequence of tasks (prep, dry-fit, adhesive, tile, grout), and stage materials to minimize back-and-forth.
Work in small zones, mix only needed adhesive, keep a wet edge, use a knee pad and cart, label cut pieces, and clean as you go.
Maintenance tips to keep wall tile looking new
You’ve set up an efficient install, and now a little routine care will keep those tiles looking new for years.
Wipe spills promptly, use pH-neutral cleaners, and avoid abrasive pads.
Re-seal grout annually where needed, inspect for cracks or loose tiles, and touch up caulk to prevent moisture.
Maintain ventilation in wet areas to reduce mold and mildew growth.
When to hire a pro vs. DIY
Facing a tile project, ask whether your skills, time, and tools match the job:
Simple backsplashes or single accent walls are great DIYs, but large areas, tricky layouts, structural repairs, or wet-room waterproofing call for a pro.
If you lack experience, precision tools, or patience, hire a licensed tiler to avoid costly mistakes.
DIY when confident and prepared.
Materials and Product Comparison (Quick Reference)
Now you’ll compare the right adhesives and mortars for different tile types and substrates so your installation holds.
You’ll also look at grout varieties and when to use each, plus the pros and cons of ceramic, porcelain, glass, and natural stone on walls.
This quick reference will help you pick materials that suit your project and skill level.
Adhesives/mortars comparison by tile type and substrate
When picking adhesives and mortars, match the tile type and substrate so your installation will bond, move, and cure correctly; different tiles (porcelain, ceramic, natural stone, glass) and surfaces (cement board, plywood, drywall, existing tile) demand specific formulations and open times. Choose thinset, mastic, or epoxy based on porosity and movement.
| Tile | Substrate | Recommended adhesive |
|---|---|---|
| Porcelain | Cement board | Polymer-modified thinset |
| Glass | Drywall | White, non-sag thinset |
| Natural stone | Plywood | Epoxy or medium-bed thinset |
Grout types and recommended use cases
Although grout looks simple, choosing the right type matters for durability, stain resistance, and movement; you’ll pick from cementitious, epoxy, or urethane grout depending on tile material, joint width, and exposure to moisture or traffic. Choose cementitious for dry walls, epoxy for wet areas, urethane for flexibility.
| Type | Best use | Key trait |
|---|---|---|
| Cementitious | Dry walls | Affordable |
| Epoxy | Showers/kitchens | Waterproof |
| Urethane | Movement joints | Flexible |
Tile material pros and cons for wall installations
Picking the right wall tile means balancing look, weight, durability, and cost so you get a finish that lasts and performs where you install it. You’ll weigh porcelain’s toughness against ceramic’s budget, natural stone’s beauty versus maintenance, and glass’s style against fragility. Use this quick reference:
| Material | Pro / Con |
|---|---|
| Porcelain | Durable / heavier |
| Glass | Stylish / fragile |
| Stone | Elegant / high maintenance |
Cost Estimates and Project Planning
You’ll start by calculating materials and labor so you know what the project will actually cost.
Expect different timelines—a backsplash might take a day, a shower a few days, and a full wall up to a week—and plan accordingly.
Set a clear budget, splurge on durable tile and a good installer, and save on grout and trim where it won’t affect longevity.
Calculating materials and labor costs
Before you buy anything, calculate the square footage of the wall area and itemize each material and labor cost so you won’t be surprised by the final bill.
Add 10–15% for waste, list tile, thinset, grout, backerboard, spacers, and trim.
Get labor rates per hour or per square foot, estimate hours, and compare quotes from two or three installers before committing.
Sample project timelines (backsplash, shower, full wall)
When planning tile work, break the job into clear phases—prep, installation, grout, and cleanup—and assign realistic times to each so you can compare projects like a backsplash, a shower, or a full wall on equal footing.
Expect a backsplash: 1–2 days; shower (walls/floor): 3–5 days; full wall: 2–3 days. Factor drying times and inspections into schedules.
Budgeting tips and where to save vs. splurge
Although tile projects can feel expensive, a clear budget keeps choices practical and guarantees you get the look you want without overspending.
Prioritize splurging on quality substrate, waterproofing, and good tile for focal areas; save on trim, grout color, and labor by doing prep or simple installs yourself.
Get multiple quotes and factor a 10–15% contingency for surprises.
FAQ
You probably have a few practical questions about timing, substrate prep, and aftercare—like how long the whole job takes, whether you can tile over existing tile or drywall, and when a shower or backsplash is ready to use.
You’ll also want to know which grout color hides dirt best and how to change it later, plus how to match or replace a broken tile.
I’ll answer each of these so you can plan and troubleshoot confidently.
How long does wall tile installation take from start to finish?
Curious how long a wall tile project will take from start to finish? It depends on scope: a small backsplash can take a day, while a full bathroom wall usually requires 2–4 days including substrate prep, cutting, and adhesive setup.
Allow 24–48 hours for grout curing and another day for sealant and trim. Plan for unexpected delays and inspections.
Can I install tile over existing tile or drywall?
If timing affects your schedule, you’ll also want to know whether you can tile over existing surfaces like old tile or drywall.
You can, but only when the substrate is sound, clean, level, and properly primed. Remove loose tile, repair cracks, and use appropriate bonding primer or thinset.
For drywall, use cement backerboard in wet areas. Consult manufacturer specs for warranties.
How long should I wait before using a tiled shower or backsplash?
After grouting and sealing, wait at least 24–72 hours before light use and 7 days for full water exposure; this lets grout cure and sealers set so the tile and joints resist moisture and staining.
In practice, avoid heavy traffic or constant spraying during that week, keep ventilation on, and follow manufacturer cure times for grout and sealer.
Patience prevents failures and staining.
What grout color hides dirt best and how do I change grout color later?
One simple rule: mid-tone gray grout hides everyday dirt and staining best because it masks both light dust and darker spills without showing water spots or soap scum as quickly as white or very dark grout.
If you want to change color later, use grout stain or colorant after cleaning and sealing; follow product instructions and test a small area first to guarantee even coverage.
How do I match or replace a broken tile after installation?
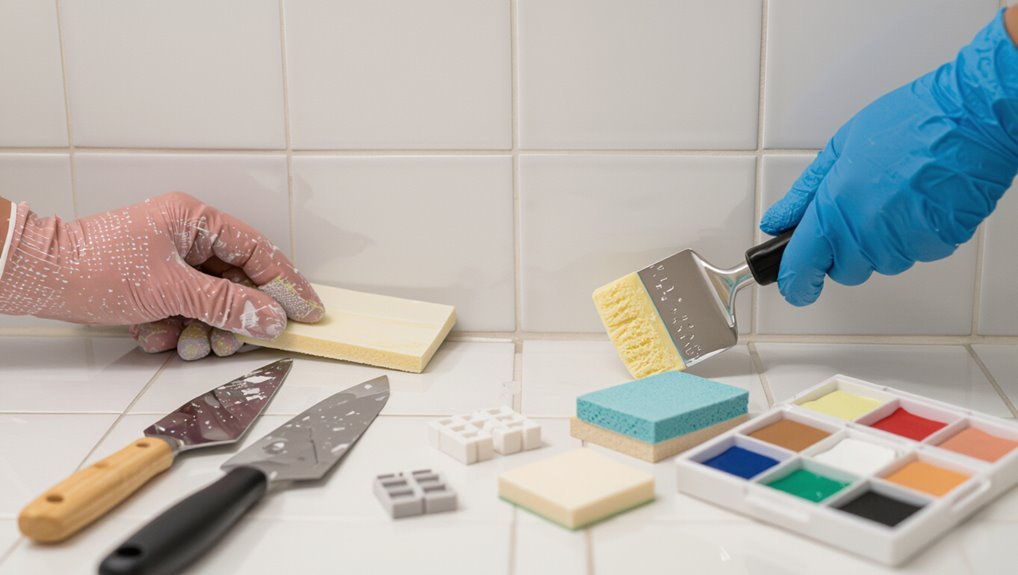
Need to replace a cracked or mismatched tile? Cut out grout around the tile, score and break the tile, then pry pieces away carefully.
Clean the cavity, apply thinset, and bed the new tile level with surrounding ones.
Match glaze by checking manufacturer, salvage extras, or take a sample to tile shops.
Regrout, seal, and cure per product instructions.
