Can You Install Laminate Flooring Over Tile? Here’s What to Consider
Yes — you can install laminate over tile if the tile is flat, firmly attached, and free of cracks or loose grout. You’ll need to clean and repair the surface, address height changes at doorways, and use the right underlayment or vapor barrier for moisture control. Acclimate planks, maintain expansion gaps, and avoid flexible vinyl or badly uneven tiles. Follow manufacturer limits or you’ll void warranties, and keep going to learn the specific prep and product choices.
Can You Install Laminate Flooring Over Tile? Quick Answer
Yes — you can usually install laminate over existing tile, but only if the tile is level, firmly adhered, and free of cracks or loose grout.
It makes sense when you want a quick update without tearing out a sound tile floor, in rentals, or on main-level rooms where height buildup and changes are manageable.
You shouldn’t do it over uneven, water-damaged, or exterior-grade tile without repairs or an underlayment.
Direct short answer (yes/no and caveats)
You can install laminate over existing tile in most cases, but only if the tile is level, firmly bonded, and free of cracks or loose grout.
Yes — you can install laminate flooring over tile, provided you address height differences, underlayment, and moisture concerns.
If tile fails any condition, fix or remove it first to guarantee a stable, warranty-compliant installation.
When it makes sense: common scenarios
If your tile checks the earlier boxes—level, stable, and crack-free—installing laminate over it can make sense in specific situations: you want a fresh look without demo, need faster installation than removing tile, or are covering tile in rooms where moisture is limited.
You’ll also consider resale, floor height changes at thresholds, and whether existing grout lines will telegraph through the new flooring.
Basic Understanding What Is Laminate and How Tile Subfloors Behave
Laminate is a layered, tongue-and-groove flooring that clicks together as a floating floor, so you’ll want to know its installation basics and how different cores handle moisture and wear.
Tile substrates—like ceramic, porcelain, or vinyl tile—each have distinct flatness, porosity, and adhesion traits that affect your prep work.
Since laminate floats, uneven or very hard tile surfaces can cause gaps, squeaks, or stress on joints unless you level and use the right underlayment.
What is laminate flooring: construction and installation essentials
Think of laminate as a multi-layered floor system that mimics wood or stone while relying on a stable core, a photographic decorative layer, and a protective wear layer to handle daily traffic.
You’ll install floating planks that click together over an underlayment, so subfloor flatness, moisture control, and expansion gaps matter.
Cut, acclimate, and follow manufacturer specs for durable results.
Types of tile substrates (ceramic, porcelain, vinyl tile) and their characteristics
Three common tile substrates—ceramic, porcelain, and vinyl tile—each behave differently beneath laminate, so you’ll want to know their key traits before installing.
Ceramic is porous, prone to chips and grout gaps.
Porcelain is denser, more stable and less absorbent.
Vinyl tile is flexible and may compress or telegraph seams.
Each affects underlayment choice and prep.
How floating laminate reacts to uneven or hard surfaces
Those tile differences matter because they change how a floating laminate floor will respond when you lay it over them.
If tiles are uneven, the laminate can bounce, gap, or click as panels flex. Hard, rigid substrates transfer stress to seams and joints.
You should level high spots, fill low areas, and use an appropriate underlayment to stabilize and cushion the floating system.
Key Considerations Before Installing Laminate Over Tile
Before you install laminate over tile, check that the tiled surface is level, sound, and free of excessive deflection so the flooring will float properly.
Consider how the added height will affect door clearances, thresholds, and cabinet fronts, and plan connections accordingly.
Also address moisture risks from grout or below-grade substrates and follow the laminate maker’s warranty and installation guidelines.
Structural and subfloor concerns (levelness, soundness, deflection)
Floor stability matters more than aesthetics when you’re installing laminate over tile, because laminate needs a flat, rigid base to lock and float correctly.
Check for loose or hollow tiles, uneven grout lines, and deflection in joists.
Repair or level low spots, secure loose areas, and guarantee subfloor stiffness meets manufacturer specs to prevent gaps, noise, and premature wear.
Height and transition issues (doorways, thresholds, cabinets)
When you install laminate over tile, you’ll need to plan for the added height at doorways, thresholds, and cabinets so doors still swing freely and changes stay safe and attractive.
Measure clearances, trim or plane door bottoms, and choose low-profile connectors.
Adjust thresholds and cabinet kickboards or add reducers to maintain smooth, code-compliant connectors and avoid trip hazards.
Moisture and vapor concerns (tile grout, substrate, below-grade rooms)
After you handle height and thresholds, you’ll need to tackle moisture and vapor risks that can damage laminate.
Check grout for cracks and seal it; uneven porosity traps moisture.
Verify the tile substrate is dry and stable; use a moisture meter.
Avoid installing over slabs below grade without a vapor barrier or engineered laminate rated for higher humidity to prevent warping and mold.
Manufacturer warranty and installation guidelines
Because manufacturers set specific limits on substrates, underlayments, acclimation, and moisture, you should read the warranty and installation instructions before you start—skipping them can void coverage and leave you responsible for repairs.
Follow their prep steps, approved underlayment types, and room acclimation times. Keep records of materials and installer notes.
If you deviate, expect denied claims.
Step-by-Step Preparation and Installation Process
Start by inspecting the existing tile for cracks, loose tiles, and uneven grout lines so you know what repairs and leveling are needed.
Then clean and prime the surface, pick the right underlayment or vapor barrier, and decide whether to use self-leveler or patching compound where necessary.
Finally, acclimate your laminate, lay planks in a staggered pattern, and leave proper expansion gaps as you install.
Step 1 Inspect and assess the existing tile surface
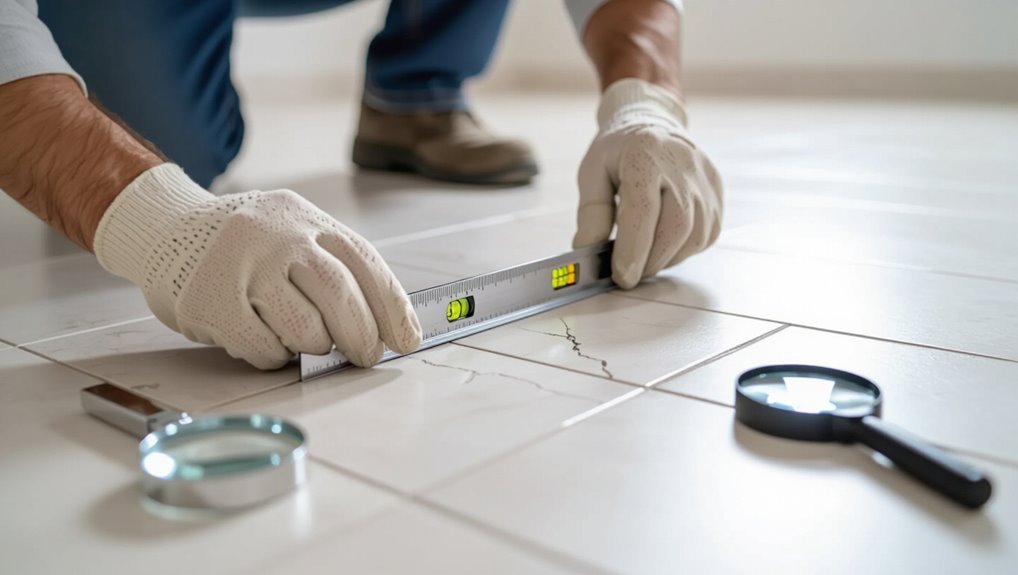
Inspect the tile closely to determine whether it’s flat, stable, and clean enough for laminate.
You’ll check for loose tiles, excessive grout height, and surface contaminants. Measure junctions, note floor slope, and confirm moisture levels.
Make a list of fixes before proceeding so installation goes smoothly.
- Loose or cracked tiles
- High or uneven grout lines
- Dirt, wax, or moisture
Step 2 Repairing and leveling tiles and grout lines (when to use self-leveler or patch)
Preparation matters: before laying laminate, you’ll want to repair loose or cracked tiles and level high or uneven grout so the underlayment and planks sit flat.
Remove loose tiles, fill gaps with patch compound, and grind down high spots. Use a self-leveler for widespread height variations; choose patching mortar for isolated chips or missing grout.
Let cures fully before proceeding.
Step 3 Cleaning and priming the tile for underlayment adhesion
Clean the tile surface thoroughly and prime any porous grout or damaged glaze so the underlayment bonds properly; you’ll want a dust-free, oil-free substrate before rolling out foam or plywood.
Sweep, vacuum, and wipe with a mild degreaser, rinsing and drying completely.
Spot-sand glazed areas for adhesion, then apply a manufacturer-recommended primer to grout and patched spots, allowing full cure before proceeding.
Step 4 Choosing and installing the correct underlayment or vapor barrier
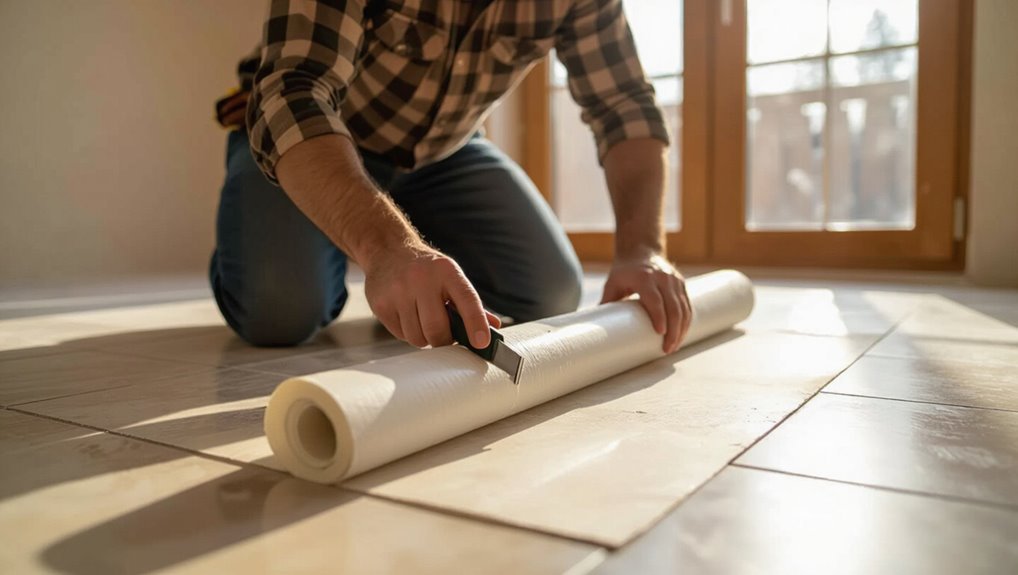
Step 4: pick an underlayment that matches your laminate type, subfloor conditions, and moisture risk, then install it so the floor performs as designed.
You’ll cut, roll out, and seam material per manufacturer instructions, overlap or tape vapor barriers, and trim at edges before installing junctions.
- Use foam for sound and comfort.
- Use cork for thermal and acoustic control.
- Use 6-mil polyethylene for moisture.
Step 5 Acclimating and laying laminate planks (stagger pattern, expansion gaps)
Let the laminate acclimate in the room for 48–72 hours.
Then you’ll lay planks parallel to light, click them tightly, and maintain a consistent 1/4–1/2″ expansion gap at walls and fixed objects.
Stagger end joints at least 12–18″ for stability and appearance.
Use spacers and a tapping block to secure seams without damage.
- Start along the longest wall.
- Stagger joints.
- Maintain gaps.
Step 6 Finishing details (trim, transitions, stair nosing)
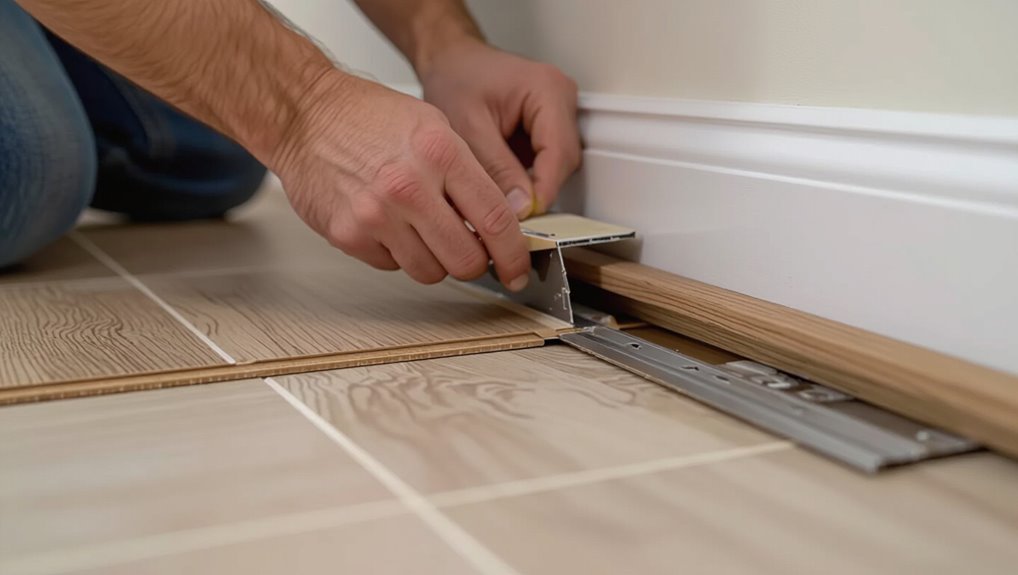
Finish the job by installing trim, changes, and stair nosing so the floor looks polished and functions safely.
Install baseboards or quarter round to hide expansion gaps, and use reducers or T-molding at doorways and different floor heights.
Secure stair nosing to the front edge of steps for grip and code compliance.
Caulk gaps and clean junctions for a finished, professional appearance.
Options and Alternatives (Comparison)
You can either install laminate directly over tile or tear the tile out first, and each choice affects cost, height, and floor stability.
You’ll also weigh whether to float the laminate with underlayment only or add plywood/cement backer board for extra flatness and support.
Finally, consider alternatives like engineered hardwood, luxury vinyl plank, or replacing tile entirely if moisture, height, or aesthetic needs push you that way.
Installing laminate directly over tile vs. removing tile
Whether you’re renovating to update the look or to fix damaged tile, deciding between laying laminate directly over tile or removing the tile first comes down to condition, height, and long-term goals. You can save time by overlaying intact, level tile; remove cracked, uneven tile to avoid telegraphing. Consider subfloor height and changes.
| Option | Pros | Cons |
|---|---|---|
| Overlay | Faster, cheaper | Raises floor |
| Remove | Smooth, lower height | Labor, cost |
| Partial | Compromise | Complex changes |
Using plywood or cement backer board over tile vs. using underlayment only
Deciding between plywood or cement backer board over tile and simply laying underlayment boils down to durability, moisture resistance, and how level your existing surface is.
If tile is uneven or you need structural support, screw down a plywood subfloor or cement board.
If tile’s flat and in good condition, high-quality underlayment can suffice, saving time and height.
Alternatives: engineered hardwood, luxury vinyl plank, or new tile
If the tile beneath your feet makes installing laminate awkward or you want a different look or performance, consider engineered hardwood, luxury vinyl plank (LVP), or replacing the tile altogether with new tile.
Engineered hardwood offers real wood feel and stability over imperfect substrates.
LVP is waterproof, forgiving, and DIY-friendly.
Retiling gives permanence and design flexibility but costs more and requires demolition.
Common Problems and Mistakes to Avoid
Don’t ignore uneven grout lines or varying tile heights, because they’ll telegraph through the laminate and cause gaps or lopsided boards.
Don’t skip a proper underlayment or moisture barrier, and don’t violate manufacturer rules on expansion gaps or warranty conditions.
If you make those mistakes you’ll see squeaks, buckling, and premature wear—so plan and prep correctly.
Mistake: Ignoring uneven grout and tile height
When you skip leveling uneven grout lines and tiles, the subfloor won’t give your laminate the support it needs, leading to gaps, squeaks, and premature wear.
You should inspect for high or low tiles, grind down high spots, and fill low grout joints with a suitable leveling compound.
Addressing unevenness guarantees stable locking joints and extends the floor’s lifespan.
Mistake: Skipping proper underlayment or moisture barrier
Skipping a proper underlayment or moisture barrier risks warping, mold, and a noisy floor because laminate needs a stable, dry base to lock together correctly.
If you skip it, moisture can seep from tile or concrete, causing cupping and adhesive failure.
Install a recommended underlayment with vapor retarder, follow thickness guidelines, and check for moisture before laying planks to protect the floor’s lifespan.
Mistake: Violating manufacturer warranty or expansion gap rules
If you ignore the manufacturer’s warranty terms or fail to leave the required expansion gaps, you can void coverage and create buckling or gaps as the floor expands and contracts.
You should read installation instructions, keep required perimeter and junction gaps, use recommended underlay, and document compliance.
Don’t alter recommended adhesives or finishes—otherwise you’ll lose recourse for defects and repairs.
How these mistakes manifest (squeaks, buckling, premature wear)
Because you’ve cut corners on prep or ignored the manufacturer’s rules, the problems show up fast and clearly: boards squeak underfoot, seams lift or buckle, and the surface can wear unevenly or delaminate long before its expected life.
You’ll hear creaks, see gaps or lifted planks, and notice premature scratches or peeling. Fixing these needs costly pulls, releveling, or full replacement.
Best Practices and Professional Tips
You’ll want to pick a laminate and underlayment specifically rated for hard, uneven surfaces like tile so you get proper cushioning and moisture protection.
Decide whether to hire a pro or tackle it yourself based on your skill level, the room size, and how much time and disruption you can tolerate.
Compare costs, timelines, and warranty differences for both options before you start.
How to choose the right laminate and underlayment for tile subfloors
Choosing the right laminate and underlayment for a tile subfloor starts with evaluating the tile’s condition, levelness, and height so you can match product specs and avoid future problems.
You’ll pick an AC-rated laminate for traffic, low-profile boards if connectors matter, and moisture-resistant underlayment that evens minor irregularities.
- Assess tile flatness
- Match thickness/height
- Choose moisture/impact underlayment
When to hire a pro vs. DIY
If your tile is level, intact, and you’re comfortable with tools and precise measurements, installing laminate yourself can save time and money; however, call a pro when tiles are cracked, uneven, or when complicated alterations, trim work, or moisture issues are present that could compromise the floor.
Choose DIY for straightforward, small rooms and confident installers; hire pros for leveling, adjustments, stairs, or warranty-sensitive jobs.
Cost, time, and disruption considerations for both approaches
While DIY can cut labor costs considerably, you should weigh savings against the time, skill, and disruption involved: you’ll save money but spend weekends, rent tools, and manage prep and waste. Pros finish faster, guarantee work, and minimize mess but cost more. Decide based on budget, schedule, and tolerance for disruption.
| Factor | DIY vs Pro |
|---|---|
| Cost | Lower vs Higher |
| Time | Longer vs Shorter |
| Disruption | Greater vs Less |
Real-World Scenarios and Case Examples
You’ll see different outcomes depending on the situation: a well-installed ceramic tile in a living room often makes a solid base for laminate, while moisture-prone areas like bathrooms or basements can cause problems unless you use proper vapor barriers or choose waterproof products.
In some renovations it’s smarter to remove the tile first to fix subfloor issues or adjust heights.
Below are short case examples that show when each approach works best.
Case 1 Laminate over well-installed ceramic tile in a living room
Because the ceramic tile in this living room was laid flat, firmly, and with intact grout, installing laminate over it becomes a straightforward way to update the space without ripping up the existing floor.
You’ll check level, clean thoroughly, add a suitable underlayment for cushioning and moisture control, then float the laminate.
Changeover pieces at thresholds guarantee a finished, professional look.
Case 2 Problems in moisture-prone areas (bathroom, basement) and solutions
If your bathroom or basement sees frequent moisture, installing laminate over tile demands extra precautions to prevent swelling, mold, and adhesive failure.
You’ll need a vapor barrier, moisture-resistant underlayment, and waterproof-compatible laminate.
Verify tiles are level and sealed, use perimeter expansion gaps, and avoid glue-down systems unless rated for wet areas.
Consider waterproof vinyl instead if humidity remains uncontrolled.
Case 3 Renovation where tile removal is preferable
Though removing tile adds labor, it’s often the smarter choice when you want a truly level, long-lasting laminate installation—especially in rooms with uneven grout lines, hollow-sounding tiles, or tiles bonded with mastic that won’t accept underlayment.
You’ll avoid height buildup, guarantee proper subfloor prep, and fix hidden damage.
Removing tile gives cleaner shifts, better warranties, and fewer long-term issues.
Frequently Asked Questions
You’ll likely have specific concerns—like whether cracked or loose tile can be covered, if the new floor will raise thresholds, or whether underlayment is always needed.
You may also wonder about basement installations and how radiant or heated tile affects laminate.
I’ll answer each question clearly so you can decide what’s safe and practical for your project.
Can I install laminate over cracked or loose tile?
Wondering whether cracked or loose tile can stay beneath new laminate? You shouldn’t leave unstable tile under laminate.
Cracked or loose pieces create unevenness, movement, and potential failure. Remove or firmly reattach and level tiles, repair grout and substrate, then install an appropriate underlayment.
Addressing issues up front prevents squeaks, gaps, and premature laminate damage, ensuring a durable installation.
Will installing laminate over tile raise the floor too much?
How much will your floor height change when you lay laminate over tile?
Expect an increase equal to the tile thickness plus the laminate and any underlayment—typically 3/8″ to 5/8″ for laminate alone, or up to 1″ if tile is thick and you add padding.
That rise can affect door clearances, changes, and threshold heights, so measure before committing.
Is underlayment always required when installing over tile?
Raising the floor by several eighths of an inch can change how your new laminate performs, so you’ll also want to think about underlayment when installing over tile.
You don’t always need underlayment—some laminates have attached pads—but using a thin underlayment improves cushioning, sound reduction, and moisture protection.
Check manufacturer requirements and tile flatness; follow their guidance for warranty and performance.
Can I install laminate over tile in a basement?
Can you install laminate over tile in a basement? Yes, but you’ll need to address moisture, levelness, and insulation.
Test for dampness, repair cracked grout or uneven tiles, and install a moisture barrier plus appropriate underlayment rated for basements.
Use floating laminate with proper expansion gaps and avoid direct contact with sump areas.
Consider a dehumidifier and follow manufacturer warranty requirements.
How does installing over heated tile or radiant heat affect laminate?
If your tile has in-floor heating, you’ll need to confirm your laminate and adhesive (if using glue-down) are rated for radiant heat and that the surface temperature won’t exceed the manufacturer’s limits—typically 85°F (29–30°C) for most laminates.
Heat can dry adhesives, warp planks, or void warranties. Use compatible underlayment, monitor temperatures, and follow installation guidelines to prevent buckling, gaps, or premature failure.