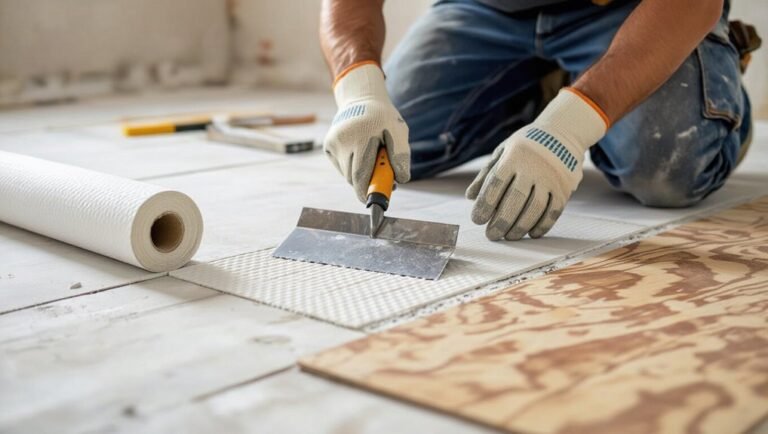
How to Cut Laminate Flooring: Tools, Techniques, and Pro Tips
You’ll cut laminate flooring cleanly by measuring twice, securing the plank, and choosing the right tool: miter saws for accurate crosscuts, circular saws for rip cuts, and jigsaws for curves and notches. Use a fine-tooth carbide blade, clamp a sacrificial board or tape edges to prevent splintering, wear eye and respiratory protection, and control dust with a shop vac. Follow layout and acclimation steps for tight seams, and keep going to pick up pro tips and troubleshooting.
How to Cut Laminate Flooring and What This Guide Covers
You’ll get a clear rundown of the best tools for cutting laminate and the basic steps to use them safely and accurately.
I’ll show you what to expect in each cutting method, from simple handsaw cuts to using a power saw.
Best Tools and Basic Steps
Before you cut a single plank, gather the right tools and learn the basic steps so your cuts stay accurate and waste stays low.
You’ll ask how do you cut laminate flooring? Use measured marking, secure clamping, and steady saw motion.
Essentials:
- Tape measure and pencil
- Straightedge or square
- Circular or miter saw with fine blade
- Clamps and safety gear
What You’ll Learn in This Guide
When you finish this guide, you’ll know exactly which cuts to make, which tools to pick for each job, and how to avoid common mistakes that waste material or ruin a finish.
You’ll learn measuring and marking techniques, straight, angled, and plunge cuts, safe sawing and snapping methods, blade selection, dust control, and simple finishing tips so your installation looks professional and lasts.
Understanding Laminate Flooring Basics
You’ll first want to know what laminate flooring is and how its layered construction affects cutting. The right technique matters for a proper fit, clean finish, and to keep your warranty intact.
Also learn the common edge profiles—beveled, micro-bevel, and square—so you can choose cuts that match the look and locking system.
What Is Laminate Flooring and How It’s Constructed
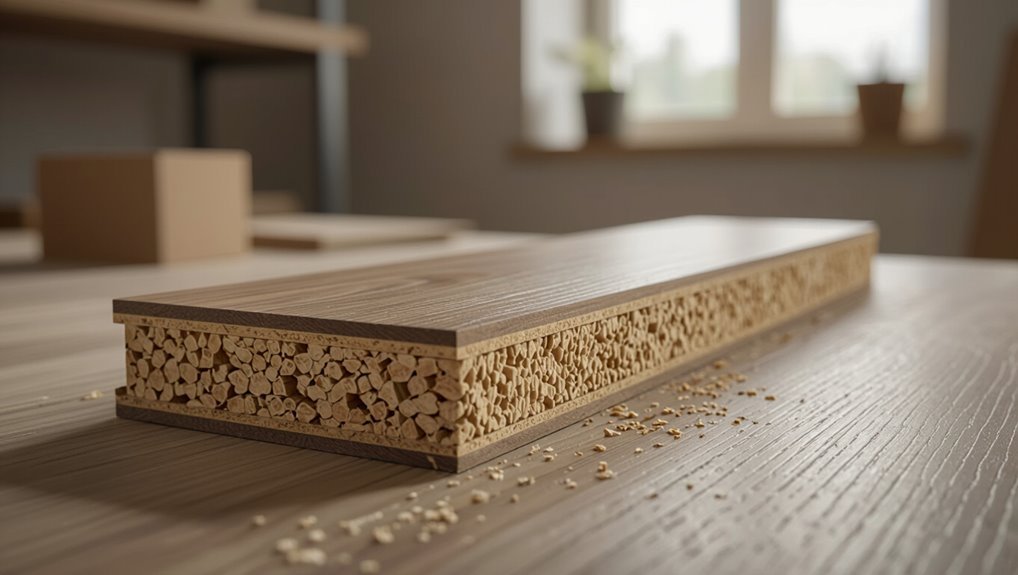
Laminate flooring is a multi-layered product that gives you the look of real wood or stone without the cost and maintenance. Understanding its construction makes cutting and installing it much easier.
You’ll find four main layers: a wear-resistant top, a decorative printed image, a dense fiberboard core for stability, and a backing layer that resists moisture and balances the plank.
Why Cutting Technique Matters (fit, finish, warranty)
Because precise cuts determine how planks meet walls, doorways, and each other, your cutting technique directly affects the floor’s fit, the visual finish, and whether you keep the manufacturer’s warranty.
You’ll reduce gaps, avoid raised edges, and guarantee seamless connections by using proper tools, steady measurements, and correct cutting angles.
Poor cuts can void warranties and ruin the look.
Types of Laminate Edges and Profiles
Edges and profiles matter because they determine how planks lock, how seams look, and which shifts you’ll need at doorways and room changes.
You’ll encounter tongue-and-groove, click-lock, and eased or beveled edges. Click systems snap together for fast installs; tongue-and-groove may need adhesive.
Beveled edges hide uneven cuts but emphasize seams. Match profile to installation method and traffic expectations.
Tools and Materials You Need
You’ll need the right cutting tools—like a circular saw, jigsaw, miter saw, and handsaw—so you can pick the best one for straight cuts, curves, or quick rip cuts and weigh their pros and cons.
Measure and mark accurately with a tape measure, speed square, and pencil, and bring safety gear and dust control like goggles, ear protection, and a shop vac.
Don’t forget consumables and accessories—replacement blades, cutting jigs, and painter’s tape—to keep cuts clean and precise.
Cutting Tools: Pros, Cons, and When to Use Each
When it’s time to cut laminate, choosing the right tool makes the job faster, cleaner, and safer. You’ll pick based on cut type, noise, dust, and skill. Here’s quick guidance:
| Tool | Best for |
|---|---|
| Utility knife | Straight snaps, trim |
| Jigsaw | Curves, notches |
| Circular saw | Long rip cuts |
| Miter saw | Accurate crosscuts |
Measuring and Marking Tools
Once you’ve picked the cutting tool, accurate measuring and clear marks keep each board fitting tight and looking professional.
Use a reliable tape measure, combination square, and carpenter’s pencil for durable, visible lines. A marking gauge or utility knife scores edges for clean breaks.
Consider a chalk line for long runs and a small square for end cuts to guarantee 90-degree accuracy.
Safety Gear and Dust Control Equipment
Safety comes first, so gear up before you cut: wear safety glasses, hearing protection, and a dust mask or respirator rated for fine particles, and use gloves that still let you handle boards safely.
Control dust with a shop vacuum or vacuum-equipped saw and a disposable drop cloth. Stay organized and keep bystanders clear.
- Safety glasses
- Hearing protection
- Respirator or dust mask
- Shop vacuum
Consumables and Accessories (blades, jigs, tape)
After you’ve got your protective gear and dust control set up, gather the consumables and accessories that actually make clean cuts possible: the right blade for laminate, a sacrificial jig or cutting guide, painter’s tape for splinter-prone edges, and replacement blades or sanding pads for cleanup.
Choose a fine-tooth carbide blade, keep extras handy, clamp guides securely, and use tape to reduce tear-out.
Preparatory Steps Before Cutting
Before you cut, measure the room and plan the plank layout so seams fall in logical places and you know how many full and partial boards you’ll need.
Let the planks acclimate in the installation space and store them flat to prevent warping.
Finally, map out a cutting order and set up a stable, well-lit cutting station with clamps and safety gear.
Measuring the Room and Planning Layout

Start by measuring the room’s length and width at several points and note any irregularities like alcoves, doorways, or angled walls so you can plan a layout that minimizes awkward cuts and waste.
Sketch the floor, mark fixed obstacles, and choose a starting wall.
Calculate plank runs, stagger end joints at least 6–8 inches, and estimate leftover pieces to reduce waste and tight cuts.
Acclimating and Storing Planks
Because laminate expands and contracts with humidity and temperature, you should let the planks acclimate in the room where they’ll be installed for at least 48 hours.
72 hours is safer for large or climate-variable spaces.
Store unopened boxes flat, off the ground on pallets or boards, away from direct sunlight and heat sources.
Keep the room’s humidity and temperature stable during acclimation.
Creating a Cutting Plan and Cutting Order
Now that the planks have acclimated, plan your cuts so you work efficiently and minimize waste.
Measure room layout, mark full and partial rows, and sequence cuts from perimeter to center. Group similar cuts to reduce tool changes, note directional grain for aesthetics, and reserve best planks for visible edges.
Sketch a simple cutting map and tally pieces before you start.
Setting Up a Safe Cutting Station
Before you cut a single plank, set up a dedicated, well-lit cutting station with a stable work surface. Clear the area of tripping hazards, and position your tools and safety gear within easy reach.
Check blade guards, clamps, and dust collection. Wear eye, ear, and respiratory protection.
Secure the plank before cutting, measure twice, mark clearly, and keep a fire extinguisher nearby.
Step-by-Step Cutting Methods
Now you’ll learn the specific cutting methods you’ll use on the job.
You’ll see how to make straight crosscuts with a laminate or miter saw, rip planks on a table saw, use a circular saw for long cuts, tackle irregular shapes with a jigsaw, and do precise no-power cuts with a handsaw or pull saw.
Follow each method’s step-by-step instructions and safety tips to get clean, accurate edges.
Method 1 Using a Laminate Flooring Saw / Miter Saw
Start by marking your cut line and clamping the plank firmly so it won’t shift.
Use the miter saw for clean straight cuts, keeping the blade aligned with your mark and cutting slowly for a smooth edge.
For angled or miter cuts, set the saw to the required angle, test on a scrap piece, then make the final cut with steady pressure.
Step 1: Marking and Securing the Plank
Place the plank on a stable work surface and measure twice, marking your cut line clearly on the wear layer with a pencil; secure the board with clamps so it won’t shift when you cut.
Check orientation so the tongue faces away from the blade, note any pattern direction, and support both ends to prevent vibration.
Keep fingers clear and wear eye protection.
Step 2: Making Straight Cuts
Grab your miter saw (or a dedicated laminate flooring saw) and set it up with a fine-tooth, carbide-tipped blade rated for laminate; position the plank with the wear layer up, tongue facing away from the blade, align the marked cut line with the saw’s fence, clamp the board securely, and double-check blade height and fence angle before making the cut.
Cut slowly, let the blade do the work, support the offcut, and deburr the edge with fine sandpaper.
Step 3: Making Angled and Miter Cuts
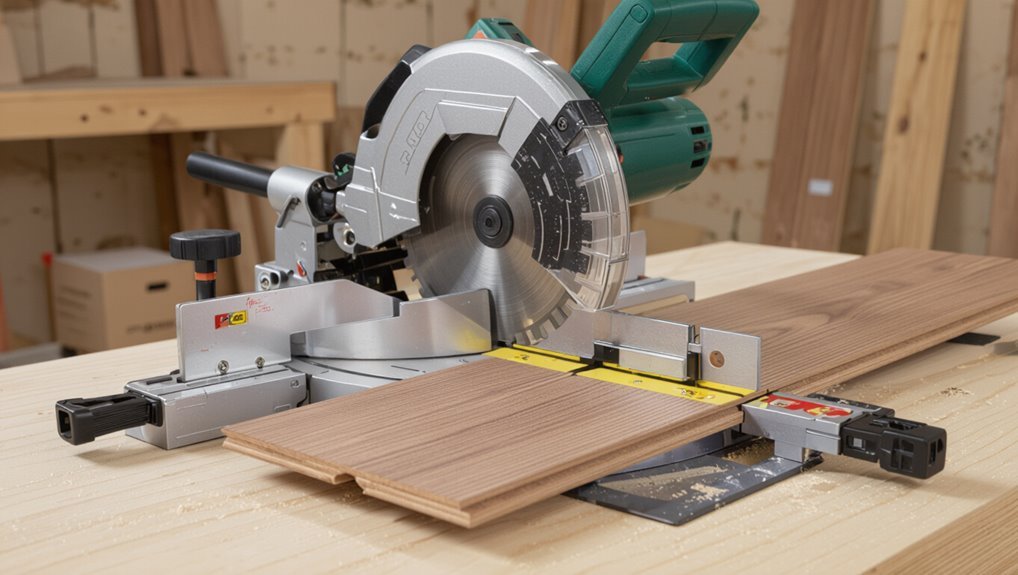
When you need to fit planks around doorways or baseboards, make angled and miter cuts with a laminate flooring saw or miter saw to get clean, precise joints; measure twice, mark the cut line, set the saw angle, and secure the plank.
Use a fine-tooth blade, cut slowly, and test-fit pieces. Sand or trim minor edges for a seamless finish.
Method 2 Using a Circular Saw
When using a circular saw, start by choosing a fine-tooth carbide blade and setting the depth just a hair deeper than the plank thickness.
Decide whether to cut along the face or the back—cutting the back can reduce visible chipping, while cutting the face gives a cleaner finished edge in some situations.
To control tear-out, clamp a sacrificial board or score the cut line and cut slowly with steady pressure.
Step 1: Blade Selection and Depth Settings
Blade choice and depth setting matter more than you might think—pick a carbide-tipped, fine-tooth blade (60–80 teeth) and set the saw so the blade cuts just through the laminate wear layer and substrate, about 1/8″ deeper than the board thickness.
Confirm depth with a test cut on scrap, tighten the guard, and verify blade rotation is away from the cut edge for cleaner slices.
Step 2: Cutting Along the Face vs. Back
Although cutting along the face gives the cleanest visible edge, cutting from the back can prevent chipping on delicate laminates.
So you’ll choose your approach based on which side will show and how much edge finish you can tolerate.
Use a circular saw with the right blade and depth: cut face-down for maximum edge control, face-up for safer backing support and cleaner top surface.
Step 3: Controlling Tear-Out
If you want clean cuts without chipped edges, control tear-out by supporting the plank and choosing the right blade depth before you start sawing.
Clamp a sacrificial backer board to the cut line, score the surface with a utility knife, and cut slowly with a fine-tooth carbide blade spinning away from the wear layer.
Finish by sanding any minor rough spots.
Method 3 Using a Jigsaw for Irregular Cuts
For irregular cuts you’ll use a jigsaw and start by choosing a fine-tooth carbide or laminate blade and setting a medium-to-high speed.
You’ll cut curves and notches slowly, keeping the shoe flat and following a marked line for control.
Finish by sanding any rough edges with fine-grit sandpaper or a file to guarantee a snug, clean fit.
Step 1: Blade Selection and Speed
Choose a fine-tooth, carbide-grit jigsaw blade and set a moderate speed—this gives you clean cuts on laminate without chipping the wear layer.
You’ll hold steady, feed smoothly, and avoid plunging fast. Test on a scrap piece to confirm blade choice and RPM feel.
If you notice burning or tear-out, lower speed or switch to a finer blade for smoother results.
Step 2: Cutting Curves and Notches
When you need to cut curves or notches in laminate, a jigsaw gives you the control and maneuverability to follow irregular shapes precisely; clamp the board firmly, mark your line clearly on the underside, and cut with the laminate face down so the blade’s teeth exit into the core to reduce chipping.
Use a fine-tooth blade, go slow, support cut sections, and pause to clear debris.
Step 3: Smoothing Edges
Smooth the rough edges left by your jigsaw by sanding and trimming carefully so the cut lines blend with the rest of the plank.
Use a fine-grit sanding block, work along the grain, and feather edges until smooth.
Trim tiny high spots with a sharp utility knife.
Clean dust, test fit, and finish with a matching edge sealant if needed to protect and hide the repair.
Method 4 Using a Handsaw or Pull Saw (No-Power Option)
When using a handsaw or pull saw, start by marking your cut clearly and supporting the plank on a stable surface so the line stays accurate.
Position a sacrificial board under the cut and score the laminate with a utility knife to reduce chipping.
Saw slowly with steady, even strokes, keeping the kerf tight to the line to minimize splintering.
Step 1: Proper Marking and Support
Start by measuring and marking each plank where you need to cut. Then clamp or brace the board so it won’t shift as you saw.
Use a square for straight, square lines and a pencil or fine-tip marker for clear marks. Support the offcut end with a scrap block to prevent sagging, and position clamps to keep the plank flush and stable throughout the cut.
Step 2: Techniques to Minimize Splintering
4 simple steps will help you cut laminate with a handsaw or pull saw while keeping the top layer intact:
score the cut line with a sharp utility knife,
clamp a sacrificial scrap board over the cut to support the veneer,
use a fine-tooth pull saw with steady, long strokes,
and finish by sanding the edge lightly to remove any micro-tears before installation.
Method 5 Using a Table Saw for Ripping Planks
When you’re ripping laminate on a table saw, start by using safe ripping techniques like a push stick, featherboard, and keeping the workpiece flat against the fence.
Set the fence for the correct cut width and adjust blade height so it just clears the plank thickness.
Always double‑check measurements and your blade/fence settings before you start the cut.
Step 1: Safe Ripping Techniques
A table saw gives you the cleanest, straightest rip cuts for laminate planks, but you’ll need the right blade, fence setup, and safety gear to do it safely.
Wear eye and hearing protection, use a push stick or push block, keep fingers clear of the blade, and secure the plank flat against the table.
Feed the material steadily—don’t force it—and stop if it binds.
Step 2: Adjusting Fence and Blade Height
Start by setting the fence to the exact width you need and then raise the blade so its teeth barely protrude above the plank—about 1/8 to 1/4 inch—so you’ll get a clean cut without excessive tear-out.
Lock the fence firmly, verify blade parallelism, and adjust blade height for matching thickness.
Feed planks steadily, support long pieces, and recheck measurements before each cut.
Cutting for Special Situations
Now you’ll handle cuts that need extra care: trimming around door jambs and trim, shaping plinths and toe-kicks for cabinets, and fitting boards around pipes and irregular room shapes.
You’ll also learn how to cut for junction strips and thresholds so seams look clean and sit flush.
Follow specific measuring and cutting techniques for each case to get professional results.
Cutting Around Door Jambs and Trim
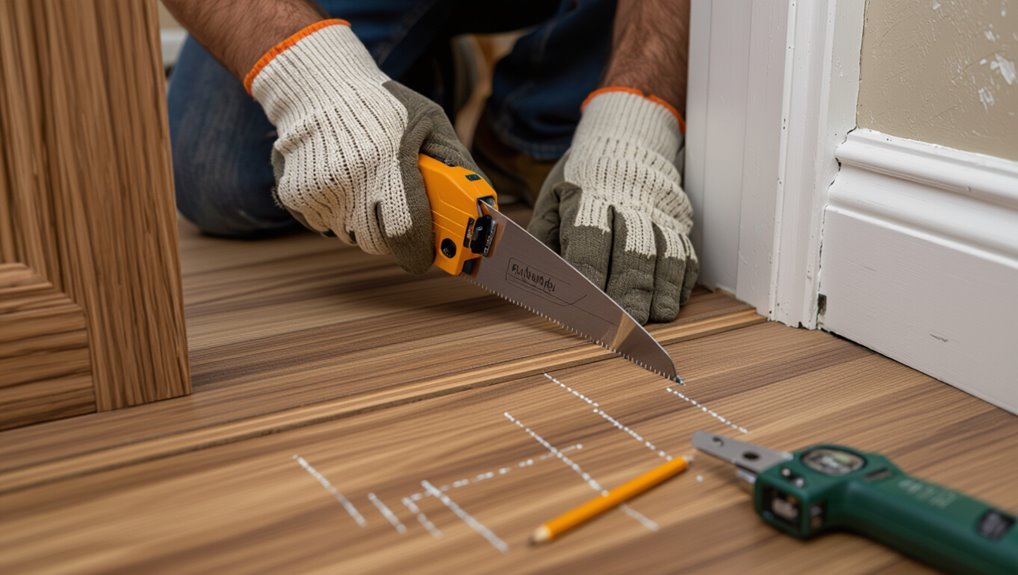
Cutting around door jambs and trim requires careful measuring and clean, controlled cuts so your laminate fits snugly without gaps or damage to the surrounding woodwork.
Use a coping saw or jamb saw for curvature, mark cut lines with a scrap piece as a template, and test-fit before final installation.
Trim minimal material and protect trim with painter’s tape while cutting.
Making Plinth and Toe-Kick Cuts for Cabinets
Fit plinths and toe-kicks precisely by measuring the cabinet base, accounting for the laminate expansion gap and any irregularities in the cabinet face.
Mark cuts on the laminate, allow clearance for the toe-kick profile, and use a jigsaw or trim saw for tight curves.
Test-fit before final installation, trim slowly to avoid chipping, and sand edges for a neat, flush finish.
Cutting for Irregular Room Shapes and Pipes
When rooms have odd angles or pipes protruding from walls, you’ll need to measure and transfer those irregular shapes onto your laminate accurately before cutting.
Use cardboard or kraft paper templates, trace carefully, and mark cut lines. For pipe holes, measure diameter, mark centerlines, and drill starter holes before jigsawing.
Always dry-fit pieces, fine-tune with a file or sanding block, and protect finished edges.
Transition Strips and Threshold Cuts
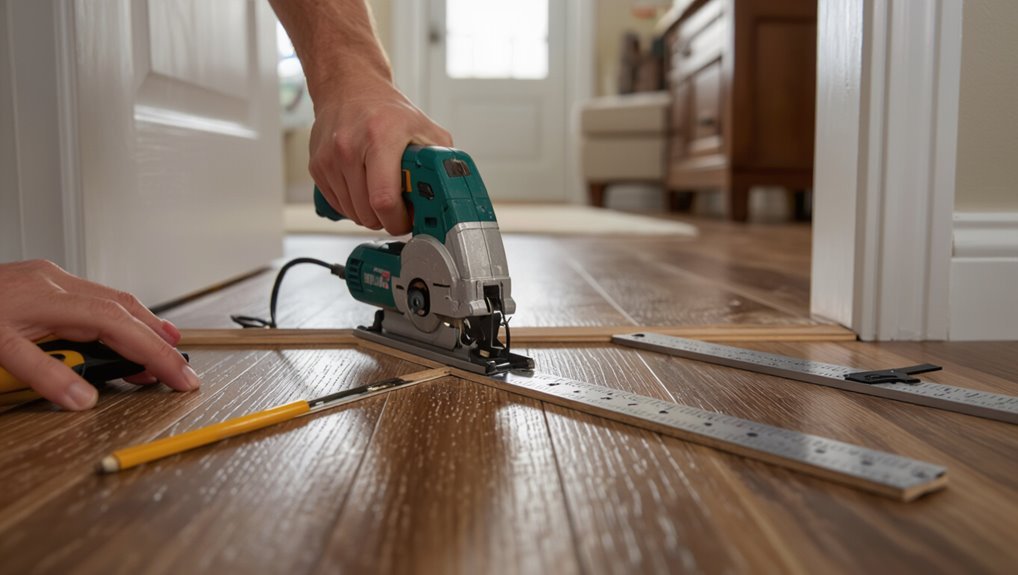
Changeover strips bridge height or material changes and you’ll need to trim them precisely so they sit flush and secure.
Measure overlap and profile, mark cut lines, and use a fine-tooth saw or rotary tool with a cutting wheel.
For thresholds, bevel edges slightly for smooth adjustment.
Test-fit, adjust, and fasten with recommended screws or adhesive so the strip won’t lift or chatter.
Common Mistakes and Problems (and How to Avoid Them)
You’ll run into a few predictable problems when cutting laminate—splintering, measurement errors, wrong blade choice, and damage to the tongue-and-groove—and each has a straightforward fix.
Prevent tear-out by cutting with the finished face up or using masking tape and a sharp fine-tooth blade, and always double-check measurements before you cut.
If you nick the tongue or groove, repair with wood glue and a clamp or replace the plank section to keep the floor locking properly.
Splintering and Tear-Out Prevention and Fixes
Although laminate looks tough, it’s prone to splintering and tear-out if you cut it improperly, so you’ll need the right blades, support, and technique to get clean edges.
Use a fine-tooth carbide blade, cut face-up on a circular saw or face-down on a jigsaw, score before cutting, clamp and support ends, and sand or fill minor chips with matching putty.
Inaccurate Measurements Double-Check Strategies
After you’ve handled splintering and tear-out, make time to verify every measurement before you cut—laminate leaves little room for error.
Measure twice, mark once, then measure again at multiple points along the plank. Use a reliable tape and a square, account for expansion gaps, and dry-fit pieces.
If dimensions don’t match, re-measure instead of guessing; small mistakes compound quickly.
Wrong Blade or Tool Choice Diagnosis and Correction
When you pick the wrong blade or tool, cuts get ragged, edges chip, and you waste both material and time; diagnosing the issue quickly lets you switch to the right setup before more damage occurs.
Inspect the blade for dullness, missing carbide tips, or wrong tooth count. Match blade type to laminate, adjust depth and feed rate, and swap to a fine-tooth or scoring blade immediately.
Damage to Tongue-and-Groove Repair Techniques
If a wrong blade can wreck a plank edge, rough handling or improper cuts can just as easily damage the tongue-and-groove you rely on for tight seams.
Inspect joints, clean debris, and sand minor chips. For broken tongues, use adhesive and a splint or replace the plank.
Test-fit before glue sets, clamp gently, and avoid forcing damaged pieces to prevent gaps and future movement.
Pro Tips and Best Practices
Keep blades sharp and swap them at the first sign of dulling so your cuts stay clean and safe.
You’ll want strategies to cut dust, speed cleanup, and know when to slow down for accuracy versus when you can move faster.
Plan cuts to nest pieces and reduce waste so you get the most out of every plank.
Blade Maintenance and When to Replace Blades
Although a sharp, well-aligned blade might seem like a small detail, it directly affects your cut quality, tool safety, and how long your saw lasts—so regular maintenance and timely replacement aren’t optional.
Clean resin buildup after each use, check teeth for chipping or dullness, and true the blade if wobble appears.
Replace when cuts burn, tear, or require excessive feed pressure.
Minimizing Dust and Clean-Up Tips
When you plan dust control before cutting, clean-up becomes faster and your work area stays safer.
Use a shop‑vac with a HEPA filter attached to your saw, seal off the room with plastic sheeting, and lay drop cloths.
Sweep and vacuum immediately, wipe surfaces with a damp cloth, and empty filters outdoors.
Dispose of scrap responsibly to avoid spreading dust.
Speed vs. Accuracy When to Slow Down
If you want clean, tight seams and minimal wasted planks, slow down on complex cuts and critical runs—measure twice, mark clearly, and make test cuts on scrap before committing to a full pass.
Balance speed and accuracy: go faster on simple straight runs, but take your time at doorways, corners, and visible areas.
Pause to check alignment and blade condition frequently.
Maximizing Material Yield and Reducing Waste
Because every plank you save lowers cost and cleanup, thinking ahead about layout and cuts pays off immediately.
Plan runs to minimize short remnants, stagger seams smartly, and cut usable offcuts for thresholds or closets. Track waste and adjust pattern.
- Measure twice, cut once
- Nest cuts to use scrap
- Save labeled offcuts
- Use trim pieces creatively
Comparison: Best Tools for Different Jobs
You’ll get a quick lookup table showing which tool suits each cut type and how accurate you can expect it to be.
I’ll also give clear recommendations based on your skill level and budget so you can pick the right tool without guesswork.
Use this comparison to match the job to the tool and avoid costly mistakes.
Quick Lookup Table Tool vs. Cut Type vs. Accuracy
When you’re deciding between a quick lookup table tool and choosing a cut type, think about the job’s accuracy needs and speed requirements: a table saw or miter saw gives repeatable precision for straight and angled rip cuts, while a jigsaw or utility knife handles irregular shapes and fine edge scoring with less setup.
| Cut Type | Best Tool |
|---|---|
| Straight rip | Table saw |
| Angled miter | Miter saw |
| Curves | Jigsaw |
| Score & snap | Utility knife |
Recommendations by Skill Level and Budget
Many homeowners find that picking the right tool depends on both their skill level and budget, so match complexity and cost to the job: novices should favor simple, low‑cost options like a utility knife and jigsaw for occasional cuts.
Intermediate DIYers benefit from a miter saw and circular saw for faster, more precise work.
Pros or frequent installers invest in a table saw and dedicated laminate cutter for maximum accuracy and speed.
Choose what fits your needs and practice safe setups.
After-Cutting: Finishing and Installation Prep
Once you’ve made your cuts, smooth and seal the raw edges so they won’t swell or chip.
Dry-fit each plank and make final adjustments to guarantee tight seams and proper spacing before you lock anything down.
Keep cut-offs and leftovers organized and labeled for future repairs or templates.
Smoothing and Sealing Cut Edges
After cutting your laminate planks, sand the exposed edges lightly to remove splinters and uneven chips. Then seal them to prevent moisture absorption and guarantee a tidy fit at seams and junctions.
Use fine-grit sandpaper, wipe dust, and apply a thin coat of matching edge sealant or clear polyurethane. Let it cure fully before handling to maintain durable, neat edges.
Dry-Fitting Planks and Final Adjustments
Before you lock any planks in place, dry-fit rows across the room to check alignment, spacing, and how end joints fall against walls and junctions.
Walk the layout, tapping seams together to confirm fit. Mark any needing trimming, adjust stagger for visual balance, and verify expansion gaps.
Make final edge cuts, test-fit again, then proceed with permanent locking and adhesive where required.
Storing Cut-Offs and Leftovers
With the layout locked and final cuts made, gather your cut-offs and leftover planks and organize them for storage and future use.
Sort pieces by length, color, and quality. Label groups for repairs, changes, or waste.
Stack flat on raised, dry supports to prevent warping. Wrap or cover to keep dust and moisture out, and note remaining quantities for future projects.
Cost and Time Estimates
You can usually make a straight rip or crosscut in under a minute, while trimming and detailed cuts add a few minutes per board.
So plan around 1–3 hours for an average room. Expect upfront costs for a saw and quality blades, plus replacement blades, underlayment, and adhesives as consumables.
I’ll break down typical tool prices and per-room time so you can budget accurately.
Typical Time per Cut and Per Room
A single straight rip or crosscut on a laminate plank usually takes you about 30–90 seconds once the saw’s set and you’re moving through production; factoring measuring, marking, and cleanup, expect roughly 2–5 minutes per cut for typical DIY work.
For a 200–300 sq ft room, plan 3–6 hours including layout, staggered seams, fitting edges, and occasional complex cuts; smaller rooms scale down proportionally.
Cost Breakdown: Tools, Blades, and Consumables
After you’ve estimated cutting time for a room, it’s time to look at what you’ll spend on tools, blades, and consumables so you can budget accurately.
Expect basic hand tools $20–$60, a circular saw $60–$150 (rental cheaper), quality carbide blades $20–$50 each, underlayment and adhesive $15–$40, and miscellaneous (tape, sandpaper, gloves) $10–$30.
Factor in extras for mistakes.
FAQs
You’ll likely have a few quick questions as you cut, like whether a utility knife will work or which side of the plank should face up.
We’ll cover how to avoid splintering, whether you can reuse leftovers for repairs, and if it’s best to cut before or after laying underlayment.
Read on for clear, practical answers so you can get clean cuts and minimal waste.
Can you cut laminate flooring with a utility knife?
Wondering whether you can cut laminate flooring with a utility knife?
You can score and snap very thin laminate or make shallow top-layer cuts for trimming edges, but a utility knife won’t handle full-depth plank cuts cleanly.
Use it for small adjustments, not long rip cuts.
For thicker or dense laminate, switch to a circular saw, jigsaw, or laminate cutter for precise, safe results.
Which side of the plank should face up when cutting?
Which side should face up when you cut laminate planks? You’ll usually place the finished, decorative side up for saw cuts so you see markings and keep measurement errors minimal.
For scoring with a utility knife, put the decorative side down to protect the surface while you snap.
Always support the plank firmly and follow tool-specific guidance for clean, safe cuts.
How do you cut laminate without splintering?
How can you cut laminate without splintering? Use a fine-tooth blade (80–120T) or score-and-snap method, clamp the plank firmly, and cut with the finished side up for saws or down for scoring.
Support both sides near the cut, feed slowly, and avoid dull blades.
Finish edges with a sanding block or file to remove any minor tear-out for a clean edge.
Can leftover laminate be reused for repairs?
Can you reuse leftover laminate for repairs? Yes — if pieces match color, wear, and profile, you can patch dents or replace damaged planks.
Keep offcuts dry and labeled. Trim ends to remove locking damage, test fit before gluing or floating, and use connector strips where needed.
For visible areas, prioritize matched grain and finish to avoid obvious patches.
Is it better to cut laminate before or after installing underlayment?
Why cut your laminate before or after laying the underlayment?
You’ll usually cut panels before installing underlayment to check fit, trim ends, and avoid damaging the cushioning.
For precision around obstacles, lay underlayment first so measurements reflect final height.
Choose based on access and complexity: pre-cut for straightforward rooms, post-cut when floor changes, doors, or uneven subfloors matter.