How Much Does Vinyl Flooring Cost? Full Pricing Guide for Every Budget
You can expect vinyl flooring materials to run about $1–$7 per square foot and $2–$12 per square foot installed, depending on whether you pick sheet vinyl, LVP, LVT or VCT, plus thickness and wear layer. Small rooms might cost $200–$1,200 installed and large rooms $800–$4,800. DIY can cut labor but needs skill; subfloor prep and warranties affect value. Keep going to see room-by-room estimates, installation tips, and savings strategies.
How Much Does Vinyl Flooring Cost?
You’ll typically see vinyl priced from about $1 to $7 per square foot, which works out to roughly $100–$1,400 for a standard room depending on size and installation.
Entry-level sheet or basic LVT sits at the low end, while luxury vinyl plank (LVP) and thicker, embossed options push toward the high end.
I’ll break down what affects those ranges and which types cost what.
Typical national price ranges (per square foot and per room)
Across the U.S., vinyl flooring usually runs between about $1 and $7 per square foot for materials, with installed prices commonly totaling $2 to $12 per square foot depending on product grade and labor. If you’re asking how much is vinyl flooring for rooms, expect:
| Room size | Typical installed cost |
|---|---|
| Small (100 sq ft) | $200–$1,200 |
| Medium (200 sq ft) | $400–$2,400 |
| Large (400 sq ft) | $800–$4,800 |
Short summary of cheapest to most expensive vinyl types
While price varies with quality and installation, vinyl types generally follow a clear cost ladder from cheapest to priciest.
You’ll find basic sheet vinyl and entry-level glue-down planks are most affordable.
Next come luxury vinyl tile (LVT) and thicker luxury vinyl plank (LVP).
High-end, waterproof, embossed or rigid core SPC/XPC options command the highest prices but offer superior durability and realism.
Basic Understanding What Is Vinyl Flooring and Why Cost Varies
To understand vinyl flooring costs, you’ll want to know the main types—sheet, VCT, luxury vinyl plank (LVP), and luxury vinyl tile (LVT)—since each has different price ranges.
Material quality, thickness, and wear layer plus the chosen installation method are the biggest cost drivers.
Also factor in room size, subfloor condition, removal needs, and local labor rates because they’ll change the final price.
Types of vinyl flooring explained (sheet, VCT, luxury vinyl plank (LVP), luxury vinyl tile (LVT))
Vinyl comes in several distinct types—sheet, VCT (vinyl composition tile), luxury vinyl plank (LVP), and luxury vinyl tile (LVT)—and each one affects price, durability, and installation.
You’ll pick based on room use, appearance, and maintenance needs.
Sheet is seamless for wet areas; VCT suits commercial wear; LVP/LVT mimic wood or stone for homes.
- Wet-area performance
- Commercial vs. residential use
- Aesthetic preference
Key cost drivers (material quality, thickness, wear layer, installation method)
Now that you know the main types and where they work best, you’ll see why prices vary so much: the grade of material, plank or tile thickness, the wear layer’s composition and thickness, and how the product is installed all drive cost.
Higher-grade vinyl, thicker cores, and heavier wear layers last longer and cost more.
Glue-down or click-lock systems add varying labor and material expenses.
Other factors that affect price (room size, subfloor condition, removal, location, labor rates)
Although material choice sets the baseline price, several practical factors you control—or that you can’t—will change the final bill: room size affects total square footage and waste; damaged subfloors need prep or replacement; removal of old flooring adds labor; your location influences labor rates and delivery fees; tight layouts or stairs increase time.
Planning and accurate measurements cut unexpected costs.
Detailed Cost Breakdown by Product Type
Now you’ll get a clear cost breakdown by vinyl product type so you can compare prices and features.
I’ll cover sheet vinyl, LVP, LVT, and VCT with typical price ranges, key pros and cons, and common use cases for each.
That way you can pick the option that best fits your budget and project needs.
Sheet vinyl price ranges, pros/cons, typical use cases
Sheet vinyl comes in several product types—luxury sheet, commercial-grade, and homogeneous—that each hit different price points and performance levels, so you’ll want to match choice to budget and use.
Expect $1–$5 per sq ft material; commercial and homogeneous run higher.
Pros: affordable, water-resistant, seamless.
Cons: less durable than rigid vinyl, can dent or fade.
Ideal for bathrooms, kitchens, rentals.
Luxury Vinyl Plank (LVP) price ranges, pros/cons, typical use cases
If sheet vinyl works best for seamless, budget-friendly wet areas, you’ll likely choose luxury vinyl plank (LVP) when you want a more realistic wood look with greater durability and style options.
LVP typically costs $2–$7 per sq ft material, $3–$10 installed. It resists scratches, moisture, and wear, installs floating or glued, and suits living rooms, kitchens, and rentals, though higher-end textures add cost.
Luxury Vinyl Tile (LVT) price ranges, pros/cons, typical use cases
While LVT shares many benefits with LVP, it’s designed to mimic tile and stone and comes in a wider range of rigidities and installation methods, so you can pick the look and performance that suit each room.
Expect $2–$8 per sq ft materials; $4–$12 installed.
Pros: realistic stone/tile looks, durable, waterproof options.
Cons: can be pricier, grout realism varies.
Ideal for kitchens, baths, entryways.
Vinyl composition tile (VCT) price ranges, pros/cons, typical use cases
Vinyl composition tile (VCT) is a commercial-grade flooring made from a blend of natural and synthetic materials that gives you a durable, low-cost option for high-traffic spaces. You’ll pay $0.50–$3.00/ft² plus installation. Pros: cheap, repairable; cons: needs waxing, less design variety. Ideal for schools, retail, offices.
| Price | $0.50–$3.00/ft² |
|---|---|
| Pros | Durable, repairable |
| Cons | Requires waxing |
Installation Cost Breakdown
You’ll compare DIY versus professional installation costs and figure out when tackling the job yourself is realistic.
I’ll break down labor components like site prep, removal, leveling, adhesives, and trim so you know what drives the price.
Finally, we’ll cover regional price variations and how to get accurate local quotes.
DIY vs professional installation cost comparison and when DIY is realistic
Deciding whether to DIY or hire a pro comes down to your budget, skill level, and the room’s complexity—DIY can save you several dollars per square foot, but it also demands time, tools, and careful prep. If you’re handy, simple rooms are realistic DIY; complex layouts, stairs, or big areas usually justify pros.
| Option | Typical Cost | Best For |
|---|---|---|
| DIY | Lower | Small, simple rooms |
| Pro | Higher | Complex or large jobs |
| Hybrid | Mid | Partial DIY with pro finish |
Labor cost components (site prep, removal, leveling, adhesives, trim)
When breaking down installation costs, you’ll find several distinct labor components that each affect the final price: site prep (cleaning and moving furniture), old-floor removal, subfloor leveling, adhesive or locking-system work, and trim and finishing.
You’ll pay for time and skill: demolition, hauling, patching or self-leveler application, adhesive troweling or click-fitting, baseboard and threshold installation, plus cleanup and disposal fees.
Regional price variations and how to get accurate local quotes
Labor line items give you a baseline, but regional market factors can shift those numbers noticeably.
You’ll see labor, material access, licensing, and demand vary by city and neighborhood.
Get accurate local quotes by requesting on-site estimates, comparing at least three licensed installers, checking recent local project photos, and asking for itemized bids with timelines and warranty terms so you can compare apples to apples.
Cost by Room and Project Size
Think about how room size changes your total cost: small spaces like a bathroom or laundry often run low, while medium rooms such as bedrooms or kitchens sit in the midrange.
Large open areas and basements raise the price per project, but you’ll usually get better per-square-foot rates on bigger installs.
I’ll also give a quick whole-house estimate and practical budgeting tips so you can plan confidently.
Small spaces (bathroom, laundry) typical total cost examples
Small rooms like bathrooms and laundry areas usually cost less to re-floor than larger spaces.
You’ll often pay $200–$700 for materials and $150–$450 for installation, so expect totals around $350–$1,150 depending on vinyl type and subfloor prep.
Tight layouts, waterproofing needs, or removing old tile can push costs higher; simple plank or sheet installations stay on the lower end.
Medium rooms (bedroom, kitchen) typical total cost examples
When you’re redoing medium rooms like bedrooms or kitchens, expect total costs to run roughly $600–$2,500 depending on vinyl type, room size, and prep work; luxury vinyl plank (LVP) typically raises material costs while sheet vinyl stays cheaper per square foot.
For a 150–300 sq ft room, materials plus installation usually fall between $600–$1,800 for standard vinyl, $1,200–$2,500 for premium LVP.
Large areas (open plan, basement) typical total cost examples
For large open-plan spaces or finished basements, expect total vinyl flooring costs to scale considerably—typically $1,200–$6,000 or more—because bigger square footage, extra subfloor prep, and premium LVP options drive up both materials and labor.
You’ll pay more for complex layouts, moisture barriers, or soundproofing.
Typical scenarios: straightforward install for 400–800 sq ft, mid-range with prep, and high-end finishes with extensive prep and trim.
Whole-house estimate and budgeting tips
Estimate whole-house vinyl costs by breaking the job into rooms and project types so you can forecast materials, labor, and extras more accurately. Split high-traffic areas, wet rooms, and living spaces, prioritize upgrades, and get multiple quotes. Use contingency (10–15%) for surprises and bulk discounts for larger buys.
| Area | Avg $/sq ft | Notes |
|---|---|---|
| Kitchen | 4.50 | Waterproof options |
| Living | 3.00 | High-traffic grade |
| Bath | 5.00 | Moisture barrier needed |
Long-Term Value Durability, Maintenance, and Lifecycle Costs
When choosing vinyl, you’ll want to compare expected lifespans by type and wear-layer thickness since luxury vinyl plank lasts much longer than thinner sheets.
Factor in routine maintenance costs and common repairs—like seam resealing or plank replacement—to estimate ongoing expenses.
Finally, consider how durability and appearance affect resale value and your likely return on investment.
Expected lifespan by vinyl type and wear-layer thickness
Because vinyl’s construction and wear-layer thickness determine how long it lasts, you should match product type to your home’s traffic and maintenance habits.
Luxury vinyl plank with a 20–30 mil wear layer can last 20+ years in busy areas; 8–12 mil is better for low-traffic rooms and lasts 5–10 years.
Sheet vinyl and thinner budget options typically last under 10 years.
Maintenance costs and common repair expenses
Having matched vinyl type and wear layer to your household, you’ll want to factor ongoing upkeep and occasional repairs into the real cost.
You’ll budget simple maintenance—sweeping, mopping, mild cleaners—at minimal annual expense.
Expect occasional spot repairs, seam resealing, or plank replacement; DIY fixes cut costs, while professional repairs (tile replacement, subfloor issues) raise expenses.
Track warranties and preventive care to lower lifetime outlay.
Resale value and return on investment considerations
If you’re weighing vinyl’s upfront savings against long-term benefits, consider how durability, maintenance needs, and lifecycle costs affect resale value and ROI.
Vinyl’s resilience and low upkeep can appeal to budget-conscious buyers, but high-end alternatives may boost home value more.
Factor expected lifespan, replacement timing, and installation quality to estimate net return and prioritize styles that match local market expectations.
How to Choose the Right Vinyl for Your Budget
Start by evaluating how each room is used and how much foot traffic it gets so you can prioritize durability where it matters.
Then match vinyl thickness and wear-layer ratings to those needs, compare warranties and brand reputation, and factor in installation plus long-term maintenance costs.
Doing this will help you pick the option that fits both performance requirements and your budget.
Step 1: Assess room usage and traffic levels
Because different rooms see very different wear, you should first think about how each space gets used and how much foot traffic it will handle.
Note family rooms, entryways, kitchens and bathrooms see frequent use and potential moisture, while bedrooms and guest rooms are lighter.
Consider pets, kids, furniture movement and appliance traffic to prioritize durability, maintenance needs and budget allocation.
Step 2: Match thickness and wear layer to needs
Once you’ve mapped room use and traffic, match those needs to vinyl thickness and wear-layer ratings to get the right balance of performance and cost.
Thicker vinyl and heavier wear layers resist dents and scratches in busy areas; thinner options suit low-traffic rooms and save money.
Choose 12–20 mil for light use, 20+ mil for high traffic or commercial-style durability.
Step 3: Compare warranties and brand reputation
While thickness and wear layer determine durability, warranties and brand reputation tell you what a manufacturer will actually stand behind—so don’t skip this step.
Check warranty length, what’s covered (wear, staining, waterproofing) and transferability.
Read reviews, compare claim responsiveness, and verify certifications.
A trusted brand with a clear, thorough warranty can save you money and headaches down the line.
Step 4: Factor in installation and long-term maintenance
Step 4 narrows your focus to the real cost of owning vinyl: installation and ongoing maintenance.
You’ll weigh professional vs. DIY installation, underlayment needs, and repair ease. Consider lifespan extensions from proper care and realistic replacement timelines so budgets match expectations.
- Installation: labor, prep, underlayment
- Maintenance: cleaning, refinishing limits
- Repairs: plank replacement, patching costs
Common Mistakes That Increase Vinyl Flooring Costs
Don’t underestimate subfloor prep—you’ll often find hidden repairs that drive up costs.
Picking a thin plank for a busy room or skipping professional installation when it’s needed will shorten lifespan and raise replacement expenses.
Also read warranty terms carefully so you’re not surprised by exclusions that void coverage.
Underestimating subfloor prep and hidden repairs
If you skip a thorough inspection, you’ll quickly turn a straightforward vinyl install into an expensive project—rot, uneven subfloors, moisture issues, and old adhesive all add time and cost.
You’ll face hidden repairs: joist damage, drywall replacement, or leveling compounds.
Budget for inspection, moisture testing, and corrective work; failing to do so leads to delays, contractor change orders, and higher final bills.
Choosing too-thin products for high-traffic areas
After you’ve accounted for subfloor repairs and moisture testing, picking the right vinyl thickness is the next cost decision that’ll affect how long your floor lasts.
If you choose thin wear layers for busy kitchens, entryways, or commercial zones, you’ll face faster wear, scratches, and replacement costs.
Invest in thicker wear layers where traffic’s heavy to extend life and lower lifetime expenses.
Skipping professional installation when needed
When you try to save money by skipping professional installation, you can end up paying more for mistakes like uneven seams, gaps that trap moisture, or poorly aligned planks that wear prematurely.
You might damage underlayment, void product-specific installation requirements, or create trip hazards. Hire a pro for complex layouts, changes, or subfloor prep to avoid costly repairs and shortened warranty-eligible lifespan.
Ignoring warranty terms and exclusion clauses
Because warranties often include strict conditions and exclusion clauses, ignoring them can turn a minor issue into a costly replacement or repair you’ll have to cover yourself.
Read terms carefully before buying, note coverage limits, required installation methods, maintenance duties, and timeframes.
Keep receipts, register products, and document problems promptly.
Following warranty rules prevents denied claims and unexpected out-of-pocket expenses.
Money-Saving Strategies and Best Practices
To keep vinyl costs down, get multiple accurate bids, ask for itemized estimates, and be ready to negotiate on labor and materials.
Consider buying remnants, clearance lots, or bulk runs for big discounts, and time purchases and contractor work for off-peak seasons to save more.
Finally, follow simple preventive maintenance—proper cleaning, runner mats, and prompt repairs—to extend the floor’s life and avoid early replacement.
How to get accurate bids and negotiate costs
Although bids can vary widely, you’ll get the most accurate estimates by preparing a clear scope, documenting measurements, and comparing multiple detailed quotes from installers.
Ask installers about materials, labor, removal, subfloor prep, and warranties. Request line-item pricing, timelines, and deposit terms.
Use competing bids to negotiate discounts or added services, and get everything written before work starts.
When to buy remnants, clearance, or bulk for discounts
Once you’ve collected and compared detailed bids, look for opportunities to cut material costs by buying remnants, clearance, or bulk stock.
Choose remnants for small rooms or trim, but verify color and condition.
Clearance can yield discontinued styles—measure twice and accept limited returns.
Buy bulk only if matching large areas or future projects.
Always factor cutting waste and storage into savings.
Seasonal timing and contractor scheduling tips
If you schedule your vinyl install during the off-season or midweek, you’ll often pay less and get faster service—contractors lower rates and have more open slots in slow months, and manufacturers sometimes run promotions to clear inventory.
Ask contractors about flexible start dates, request bundled pricing for multiple rooms, confirm material lead times, and get written estimates with clear timelines to avoid rush fees and delays.
Preventive maintenance to extend life and reduce replacement costs
Protect your vinyl floor with a simple routine—sweep or vacuum daily to remove grit, mop weekly with a manufacturer-approved cleaner, and immediately blot spills to prevent stains and edge lifting.
Use felt pads on furniture, place mats at entrances, trim pet nails, and avoid harsh chemicals or steam cleaners.
Inspect seams and thresholds regularly, repairing small issues before they require costly replacement.
Comparison Vinyl vs Other Flooring Options (Cost and Value)
Now let’s compare vinyl to other common floors so you can weigh cost and value.
You’ll see how vinyl stacks up against laminate for budget-friendliness, against hardwood for long-term value and aesthetics, and against tile for durability and moisture resistance.
Use these contrasts to decide which trade-offs matter most for your space and budget.
Vinyl vs laminate
When you’re choosing between vinyl and laminate, focus on durability, water resistance, and cost-per-square-foot—those three factors usually determine which fits your home and budget best.
Vinyl resists moisture and cleans easily, so it’s ideal for kitchens and basements.
Laminate often looks more like wood and can be cheaper upfront, but it swells with water and may need replacement sooner.
Vinyl vs hardwood
If you care about long-term value and a real wood look, weigh vinyl against hardwood on durability, maintenance, and upfront cost:
Vinyl stands up to water and heavy traffic with minimal upkeep and a lower price per square foot, while hardwood offers timeless aesthetics and higher resale appeal but costs more and needs refinishing and moisture control.
Choose vinyl for practicality; pick hardwood for lasting prestige.
Vinyl vs tile
Moving from wood to tile, you’ll find a different set of trade-offs between vinyl and tile that come down to moisture resistance, durability, feel, and cost. You’ll save money and get softer, warmer floors with vinyl; tile lasts longer and feels premium but costs more and feels cold.
| Vinyl | Tile | Emotion |
|---|---|---|
| Affordable | Expensive | Comfort |
| Warm | Cold | Pride |
Step-by-Step Guide to Budgeting and Buying Vinyl Flooring
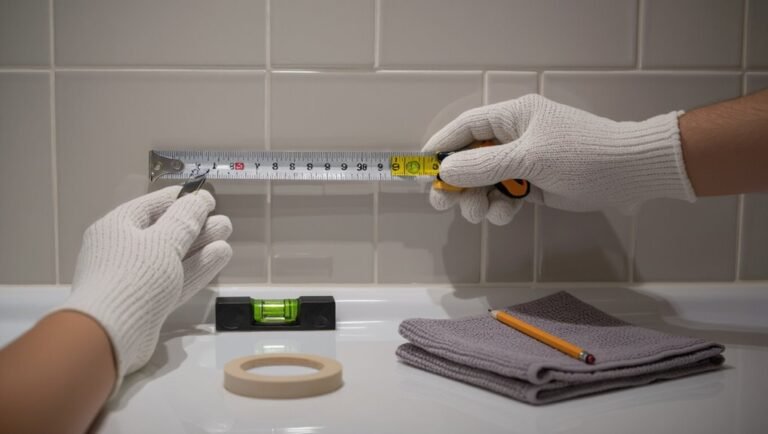
Start by measuring your space so you can calculate exact square footage and material needs.
Then add up all costs—materials, installation, and extras—prioritize features to make a shortlist, and get multiple quotes while checking installer credentials.
Finish with a checklist to confirm fit, warranty, delivery timing, and payment terms before you buy.
Step 1: Measure and calculate square footage accurately
1 simple, accurate measurement can save you money and headaches when budgeting for vinyl flooring. Measure each room’s length and width, multiply for square footage, and add closets or alcoves separately.
Round up by 5–10% for waste and pattern matching. Double-check measurements, note irregular shapes, and record totals clearly so you buy the right amount without costly returns.
Step 2: Determine total project cost (materials + installation + extras)
Now that you’ve got accurate square footage, it’s time to convert that number into a realistic budget by totaling materials, installation, and extras.
Multiply square footage by per-sheet or per-plank cost, add underlayment, adhesives, trims, and disposal.
Get installation quotes (hourly or per-sqft), factor in delivery and permits, then add a 10–15% contingency for waste and unexpected issues.
Step 3: Prioritize features and create a shortlist
Before you pick products, decide which features matter most so you can narrow options efficiently: prioritize durability, water resistance, wear layer thickness, style, and maintenance, then rank them by importance for each room to create a focused shortlist that fits your budget and lifestyle.
Next, compare shortlisted planks’ specs and warranties, note realistic price ranges, and eliminate options that don’t meet your ranked criteria.
Step 4: Obtain quotes and verify installer credentials
Once you’ve narrowed your shortlist, get multiple detailed quotes and check installers’ credentials so you can compare real costs and avoid surprises.
Ask for itemized estimates, timelines, warranties, and materials.
Verify licenses, insurance, references, and recent work photos.
Compare labor rates, removal or subfloor prep fees, and payment terms.
Choose the installer who balances price, reputation, and clear contract terms.
Step 5: Final checklist before purchase and installation
Checklist time: finalize your measurements, confirm materials and accessories, and lock in a realistic timeline so installation goes smoothly.
Double-check quantities, delivery dates, and warranty terms. Prepare the space and confirm access for installers. Keep contact info handy and a payment plan ready.
- Verify square footage plus 10% waste
- Confirm color, plank style, and trim
- Schedule installer arrival and final walk-through
FAQ
You probably have a few quick questions about price and value, like the average cost per square foot and whether vinyl is cheaper to install than laminate or tile.
You’ll also want to know how long luxury vinyl lasts, whether you can fit it over existing floors, and what extra costs to budget beyond the material.
Below are clear answers to help you decide.
How much does vinyl flooring cost per square foot on average?
Curious how much vinyl flooring costs per square foot?
On average, expect $1.50–$7 for basic to mid-range vinyl plank or sheet.
Luxury vinyl tile (LVT/LVP) runs about $3–$12 per sq ft.
Prices vary with brand, thickness, wear layer, and design.
Factor in regional supply and retailer discounts to find the best value for your budget.
Is vinyl flooring cheaper to install than laminate or tile?
Those per‑square‑foot figures matter, but installation costs often swing the final comparison—so is vinyl cheaper to install than laminate or tile?
Generally, yes: vinyl (especially sheet or click‑lock LVP/LVT) installs faster and tolerates imperfect subfloors, lowering labor.
Laminate can be similar if floating; tile demands more prep, grout, and skilled labor, making it the most expensive to install.
How long does luxury vinyl typically last?
Luxury vinyl typically lasts 10 to 25 years in residential settings, depending on wear layer thickness, traffic, and maintenance.
You’ll get closer to 25 years with a thicker wear layer (20 mil+), moderate foot traffic, and regular cleaning.
High-traffic areas or thinner wear layers may wear sooner.
Proper care—gentle cleaners, felt pads, and prompt spill cleanup—extends service life.
Can I install vinyl flooring over existing floors?
Can you install vinyl flooring over your existing floor? Yes—you can in many cases.
Smooth, level surfaces like concrete, tile, or well-adhered vinyl work best. Remove loose debris, fix uneven spots, and guarantee moisture levels are acceptable.
Avoid installing over carpet, cushioned vinyl, or damaged subfloors.
Follow manufacturer guidelines for underlayment and adhesive to maintain warranty and performance.
What additional costs should I expect beyond the material price?
If you decide to install vinyl over your existing floor, plan for costs beyond just the planks or sheets.
Expect underlayment, adhesive or click-system trim, moisture barriers, connector pieces, and trim/quarter-round.
Factor in removal/disposal if demo’s needed, subfloor repairs, floor leveling, and labor.
Add delivery fees, tool rental, and permit or inspection costs where local rules apply.