How to Clean a Linoleum Floor: Easy Methods That Actually Work
You can keep linoleum looking great with simple, regular care: sweep or vacuum loose dirt, mop with warm water and a few drops of mild dish soap, wring the mop well to avoid excess water, then rinse and dry with a microfiber cloth. Tackle stains with diluted hydrogen peroxide, rubbing alcohol, or a baking soda paste; avoid bleach and abrasive tools. Seal or recoat worn finishes as needed, and keep mats at entries—keep going to learn practical steps and tips.
The Easiest Way to Clean a Linoleum Floor
The easiest way is a quick sweep followed by a mop with warm water and a mild cleaner.
You’ll spend about 10–15 minutes per room and should do this once a week for regular rooms, more often in high-traffic areas.
Sticking to that routine keeps the floor looking good with minimal effort.
One-sentence summary of the simplest method
Start by sweeping or vacuuming loose dirt.
Then mop with a warm water and mild dish soap solution.
Wring the mop well to avoid excess water, rinse with clean water, and dry with a soft towel; this simple routine shows how to clean a linoleum floor effectively, removing grime without harsh chemicals while keeping the surface intact and looking fresh.
Time required and frequency recommendation
After you’ve swept and mopped, expect the whole process to take about 15–30 minutes for an average-sized room—most of that time is waiting for surfaces to air-dry—so it’s quick and easy to fit into weekly chores.
Do a light sweep or vacuum twice weekly in high-traffic areas, mop weekly, and deep-clean with a gentle solution every 1–3 months depending on wear.
Basic Understanding What Is Linoleum and Why Care About Its Care
Linoleum is a natural floor made from linseed oil, cork dust, wood flour and pigments, which is different from synthetic vinyl in composition and lifespan.
You’ll also find various finishes—waxed, polished, and factory-sealed—that change how often and what type of cleaning you should use.
Proper cleaning not only keeps the floor looking good but preserves its durability and helps maintain a healthier indoor environment.
What linoleum is made of and how it differs from vinyl
Think of linoleum as a natural, durable flooring made from linseed oil, cork or wood flour, pine resin, and natural pigments pressed onto a jute or canvas backing; it’s biodegradable and ages differently than vinyl.
You’ll notice linoleum feels warmer, can patina over time, and resists some chemicals differently.
Vinyl is PVC-based, non-biodegradable, and typically more water-resistant but less breathable.
Common linoleum finishes and how they affect cleaning
Since linoleum is made from natural oils and fibers rather than PVC, the surface finish you choose will change how you clean and protect it.
You’ll find waxed, oiled, and factory-sealed options. Waxed needs periodic buffing; oiled benefits from oil replenisher; sealed floors tolerate mild detergent and less maintenance.
Always test cleaners in an inconspicuous spot first.
Why proper cleaning matters (durability, appearance, health)
Longevity matters: caring for your linoleum with the right cleaning routine keeps the surface strong, looking fresh, and safer for everyone in your home.
You’ll prevent scratches, discoloration, and premature wear by removing grit and spills promptly. Regular cleaning also reduces allergens, mold, and bacteria, improving indoor air quality and hygiene.
Proper care saves money and preserves your floor’s appearance long term.
Essential Tools and Supplies You’ll Need
You’ll want a few everyday tools—like a soft broom, microfiber mop, and a bucket—for regular upkeep.
Choose gentle, pH-neutral cleaners or simple DIY mixes (vinegar diluted with water) rather than harsh chemicals.
Also avoid abrasive scrubbers, waxes not made for linoleum, and bleach-based products that can damage the surface.
Everyday cleaning tools
Before you start, gather a few reliable tools so routine linoleum cleaning stays quick and effective: a soft-bristle broom or vacuum with a hard-floor setting, a microfiber mop, a bucket, pH-neutral floor cleaner, and a few microfiber cloths or sponges for spot work.
- Sweep or vacuum daily to remove grit.
- Damp-mop weekly with the microfiber mop.
- Spot-clean spills immediately with cloths to prevent staining.
Recommended cleaning solutions (store-bought vs DIY)
While store-bought cleaners offer convenience and consistent pH-balanced formulas, DIY solutions give you control over ingredients and cost; choose whichever fits your schedule and sensitivity needs.
- Mild neutral cleaner: safe, ready-to-use for regular mopping.
- Vinegar solution (1 cup/gal water): cheap, effective for grime—use sparingly.
- Castile soap mix: gentle, biodegradable, good for deeper clean without harsh chemicals.
Tools and products to avoid
Although the right tools make linoleum care easier, some common items can damage the floor or strip its finish.
So avoid abrasive scrubbing pads, ammonia-based cleaners, bleach, and wax removers not labeled safe for linoleum. Also skip steel wool, harsh alkaline degreasers, oil-based polishes, and steam cleaners.
Use soft mops, microfiber cloths, pH-neutral cleaners, and manufacturer-recommended products instead.
Step-by-Step Cleaning Methods
Now you’ll learn clear, step-by-step methods for keeping linoleum spotless.
You’ll get quick daily/weekly mopping steps, a concentrated deep-clean routine for grimy floors, and targeted fixes for wine, ink, grease, and scuffs.
Finally, you’ll see when and how to strip and reseal the finish with simple three-step instructions.
Routine daily/weekly cleaning quick mop method (Step 1, Step 2, Step 3)
1 simple, three-step quick mop routine keeps your linoleum looking fresh between deep cleans.
Step 1: Sweep or vacuum to remove dust and debris.
Step 2: Damp-mop with warm water and a few drops of mild dish soap, wringing the mop well to avoid soaking.
Step 3: Air-dry or buff with a microfiber cloth for a streak-free finish.
Deep cleaning for grimy linoleum concentrated solution method (Step 1, Step 2, Step 3)
When your linoleum’s build-up won’t budge with a quick mop, use a concentrated solution to cut through grime without damaging the floor.
Step 1: mix warm water with a manufacturer-safe concentrated cleaner per label.
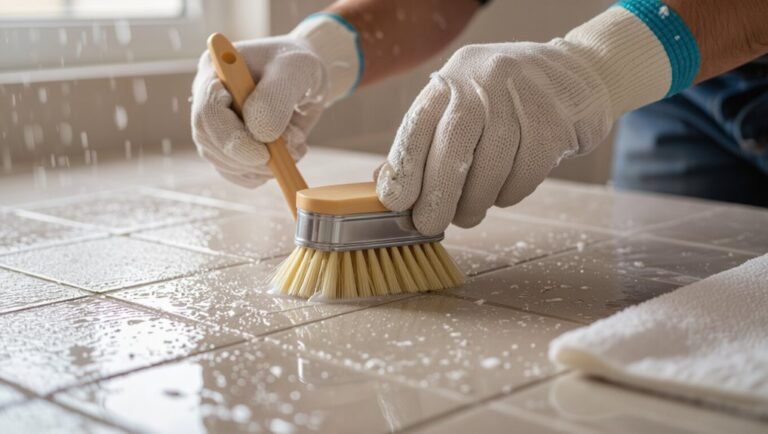
Step 2: apply sparingly, let sit 5–10 minutes, scrub gently with a soft-bristle brush.
Step 3: rinse thoroughly, dry with a microfiber mop to prevent residue.
Removing stubborn stains (wine, ink, grease, scuff marks) targeted treatments
If a spill or mark won’t lift with regular cleaning, tackle it with a targeted approach that matches the stain type and your linoleum’s finish.
- Wine: Blot, apply diluted hydrogen peroxide, rinse, dry.
- Ink: Dab rubbing alcohol, blot outward, rinse.
- Grease/scuffs: Use mild degreaser or baking soda paste, scrub gently, wipe clean.
Stripping and resealing (when and how to restore finish) (Step 1, Step 2, Step 3)
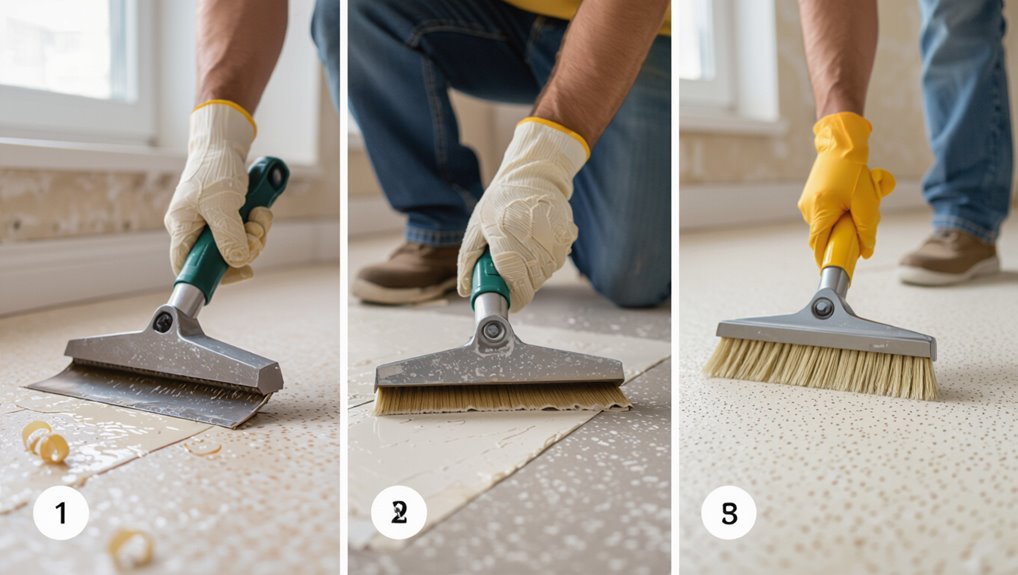
After you’ve tried spot treatments and the finish still looks dull, worn, or uneven, it’s time to restore the floor by stripping and resealing.
Step 1: sweep, mop, then apply a recommended stripper, scrubbing with a soft brush.
Step 2: rinse thoroughly and dry.
Step 3: apply thin coats of linoleum sealer or floor finish, allowing proper curing between coats.
Comparison of Cleaning Solutions and Their Uses
You’ll want to weigh simple soap-and-water or commercial linoleum cleaners for routine jobs, since each balances cleaning power and surface safety differently.
For tougher stains or regular maintenance, consider natural DIY options like vinegar, baking soda, or castile soap, noting their modest effectiveness and potential risks (acid or abrasion) if overused.
Reserve specialized restorers or polish for worn floors or to add shine after cleaning, because they can change appearance and require correct application.
Mild soap and water vs commercial linoleum cleaners
While mild soap and water removes most dirt and won’t harm your linoleum, commercial linoleum cleaners offer stronger stain-lifting power and protective additives for tougher jobs. You’ll choose soap for routine cleaning and a commercial product for set-in stains or added shine. Compare quickly:
| Mild Soap | Commercial Cleaner |
|---|---|
| Gentle, cheap | Stronger, costly |
| Regular use | Spot treatments |
Natural/D-I-Y cleaners (vinegar, baking soda, castile soap) pros and cons
If you prefer simple, inexpensive solutions, DIY cleaners like vinegar, baking soda, and castile soap can handle most linoleum messes without harsh chemicals. Each has strengths—vinegar cuts grease, baking soda lifts stains and deodorizes, and castile soap provides gentle sudsing—so you can pick the right one for the job while being mindful of their limits.
- Vinegar: degreaser, avoid frequent use.
- Baking soda: abrasive spot treatment.
- Castile soap: gentle daily cleaner.
When to use specialized restorers or polish
When general cleaners can’t erase dullness, scratches, or deep-seated stains, it’s time to contemplate specialized restorers and polishes.
These products are formulated to rebuild worn finish, fill fine abrasions, and protect against future wear in ways vinegar or mild soap can’t.
Use restorers for widespread wear, polishes for shine and protection, and always test a small area first to ascertain compatibility.
Common Problems and How to Fix Them
You’ll often run into problems like yellowing or dull spots, and you can reverse them with proper stripping, gentle buffing, or a restorative polish.
Check for water damage by inspecting joints and edges—if you see warping or buckling, dry the area, lift affected sheets if possible, and replace or repair warped sections.
For sticky residue or a cloudy film, use a warm water and mild detergent scrub or a solvent recommended for linoleum to lift the buildup without harming the floor.
Yellowing or dulling causes and reversal methods
Although linoleum is durable, it can yellow or lose its shine from several common causes—sunlight, heat, wax buildup, or harsh cleaners—and you can usually restore its appearance with the right approach.
First, strip old wax with a recommended remover, then clean with a mild pH-neutral solution.
Buff lightly and apply a thin coat of linoleum-safe polish. Repeat as needed for shine.
Water damage and warping detection and remediation steps
If moisture gets under linoleum, it can cause cupping, buckling, or a spongy feel that only gets worse over time.
So spotting early signs like discoloration, curling seams, or a hollow sound when you tap the floor lets you act before replacement is needed.
Dry area thoroughly, lift warped edges, dry subfloor, treat mold with a mild bleach solution, reseal seams, and replace severely warped sections.
Sticky residue or film troubleshooting and removal
When sticky residue or a filmy haze appears on linoleum, it usually comes from soap buildup, old polish, cleaning-product residue, or spilled sugary substances — and tackling it quickly prevents dulling and tackiness.
Start by rinsing with warm water, then mop with a vinegar-water mix (1 cup per gallon).
For stubborn film, scrub gently with a microfiber pad and diluted ammonia, then rinse and dry.
Prevention and Best Practices to Keep Linoleum Looking New
To keep linoleum looking new, stick to simple daily habits like placing mats at entrances, enforcing no-shoe zones, and wiping up spills immediately.
Set a seasonal checklist for deeper cleaning, inspections, and resealing any worn finishes.
Use protective measures—felt pads under furniture, area rugs in high-traffic spots, and only pH-neutral cleaners—to prevent damage.
Daily habits (mat placement, shoe rules, spills)
Around entryways and high-traffic zones, place durable mats to trap grit and moisture before they reach your linoleum; set a no-shoes policy indoors and wipe up spills immediately to prevent stains and water damage.
- Shake or vacuum mats daily to avoid tracked debris.
- Keep a small towel or squeegee handy for quick spill response.
- Encourage guests to remove shoes and use soft-soled slippers.
Seasonal or annual maintenance checklist
Since seasonal changes and heavy use can slowly dull or damage linoleum, you should perform a concise annual maintenance checklist to keep it looking new:
Inspect for seams, cracks, and lifting; tighten threshold strips; deep-clean with a pH-neutral solution; buff to restore shine; reseal worn finish if applicable; check for water damage under appliances; replace damaged sections promptly; document repairs and schedule next review.
Protective measures (pads, rugs, proper cleaning products)
Protect linoleum by using felt pads under furniture legs, low-profile rugs in high-traffic areas, and only pH-neutral cleaners so dirt and abrasion don’t wear down the finish.
Also wipe spills promptly, avoid steam cleaners and harsh chemicals, and lift heavy items instead of dragging.
Rotate rugs to distribute wear, use entry mats to trap grit, and reapply a manufacturer-approved polish when recommended.
Mistakes to Avoid When Cleaning Linoleum
Don’t use harsh chemicals or abrasive tools that can strip or scratch the finish.
Don’t soak the floor or leave it wet, and make sure you dry it properly to prevent warping and residue.
And when buffing or polishing, follow manufacturer guidance so you don’t burn the surface or create uneven shine.
Harsh chemicals and abrasive tools to skip
While it might be tempting to reach for bleach, ammonia, or scouring powders to blast away stains, those harsh chemicals and rough tools can strip linoleum’s finish and damage the backing—so stick to mild cleaners, microfiber mops, and soft-bristled brushes instead.
Don’t use steel wool, heavy-duty scrubbing pads, or oven cleaner. They cause scratches, discoloration, and delamination.
Test any product first in an inconspicuous spot.
Over-wetting and improper drying
If you soak linoleum or leave puddles sitting, water can seep into seams and the backing, causing warping, lifting, or mold growth.
Don’t over-wet when mopping—use a damp, well-wrung mop. Wipe spills promptly and dry with a clean towel or microfiber.
Guarantee good ventilation or a fan so flooring dries fully to prevent damage and mildew.
Incorrect buffing or polishing techniques
Buffing or polishing linoleum the wrong way can strip finish, create uneven shine, or even damage the surface.
Don’t use high-speed buffers, abrasive pads, or harsh polishes made for other floors. Test products in a hidden spot, use soft pads, and follow manufacturer instructions.
Move evenly, avoid overworking one area, and stop at the first sign of dullness or residue.
Quick Maintenance Routines (Cheat-Sheet)
Keep your linoleum looking great with three simple routines: a 1-minute daily sweep, a 15-minute weekly mop and spot-check, and a 1-hour deep-clean when dirt builds up.
You’ll save time and prevent damage by sticking to each schedule.
Follow the steps below for quick, practical actions you can do right away.
1-minute daily routine
Spend just one minute each day on a quick sweep-and-spot routine to prevent dirt buildup and keep your linoleum looking fresh.
You’ll move fast, focus on trouble spots, and keep grit from scratching the surface.
- Sweep high-traffic paths with a dry microfiber mop.
- Wipe spills immediately with a damp cloth.
- Shake doormats and remove debris from corners.
15-minute weekly routine
In about 15 minutes each week, you’ll do a quick but thorough pass that removes dust, tackles sticky spots, and preserves the floor’s finish so dirt doesn’t harden into grime.
- Vacuum or sweep edges and high-traffic paths.
- Spot-clean sticky areas with diluted mild cleaner and a soft cloth.
- Quick mop with warm water, wrung damp, then air-dry to prevent streaking.
1-hour deep-clean routine
When you’ve kept up with the 15-minute weekly pass, plan an hour for a deeper clean that refreshes the whole room and tackles grime the quick routine can miss.
- Sweep, vacuum edges, then mop with warm water and a gentle cleaner.
- Scrub scuffs and sticky spots with a soft brush and baking soda paste.
- Rinse, dry thoroughly, and replace rugs.
FAQ Common Linoleum Cleaning Questions
You’ll find answers to common concerns like whether vinegar is safe, how often to wax or polish, and if steam mops can harm your linoleum.
I’ll also cover how to remove old wax or finish buildup and whether gouges can be repaired or patched.
Read on for clear, practical solutions you can use right away.
Can I use vinegar on linoleum?
Curious whether vinegar’s a safe, effective cleaner for linoleum? Yes — diluted white vinegar (about 1/2 cup per gallon of warm water) cleans grease, grime, and disinfects without harming most linoleum.
Don’t use full-strength vinegar or abrasive scrubbing. Test a small hidden area first, avoid waxed surfaces, and rinse with clean water to remove residue and prevent dulling.
How often should I wax or polish linoleum?
If you’ve been using vinegar and water for regular cleaning, you’ll want to adjust how often you wax or polish based on traffic and finish.
For low-traffic rooms, wax or polish every 6–12 months. High-traffic areas need attention every 2–3 months.
Recoat sooner if shine fades or scuffs appear. Always follow product instructions and test a small area first.
Will steam mops damage linoleum?
Wondering whether a steam mop is safe for linoleum? You should be cautious: high heat and moisture can loosen adhesive, warp edges, or soften older linoleum.
If your floor’s sealed and in good condition, use low-steam settings, keep the mop moving, and dry promptly.
Test a hidden area first. Avoid prolonged steaming, heavy pressure, and repeated treatments to prevent damage.
How do I remove old wax or finish buildup?
When old wax or finish builds up, it makes linoleum look dull and sticky, but you can strip it safely with the right products and a bit of elbow grease.
Use a commercial floor stripper or a mixture of warm water and a few drops of ammonia (ventilate).
Apply, let sit briefly, scrub with a soft-bristle brush, rinse thoroughly, and dry.
Repeat if needed.
Can linoleum be repaired or patched if gouged?

Can you fix a gouged linoleum floor? Yes—minor gouges can be filled with color-matched vinyl repair kits or epoxy putty, smoothed and sealed.
For larger damage, cut out the section and patch with a matching scrap, adhesive, and seam sealer.
If the pattern or substrate’s compromised, consider replacing the sheet or tiles.
Always test repairs discreetly first.