Do You Need Underlay for Vinyl Flooring? Here’s When It Matters
You don’t always need underlay for vinyl flooring — glued or fully adhered vinyl usually skips it, while floating click-lock planks and uneven subfloors benefit from cushioning and moisture protection. Underlay also improves sound, comfort, and thermal insulation, and some manufacturers or building codes require specific types to keep warranties valid. Choose low-compressibility, higher-density underlay for rigid-core planks and vapor barriers for concrete. Keep going to see which underlay fits your situation and installation.
Do You Need Underlay for Vinyl Flooring?
You usually don’t need underlay for glued or fully adhered vinyl, but you’ll need it for floating vinyl planks or when leveling and sound control are important.
Use underlay when installing over uneven subfloors, concrete with moisture issues (with a suitable vapor barrier), or in multi-level buildings that need sound insulation.
If your subfloor is flat, dry, and stable, you can often skip underlay—otherwise it’s required or highly recommended.
One-sentence verdict
Although many vinyl floors can be installed without underlay, you’ll usually get better sound, comfort, and moisture protection by using the right underlay for your specific vinyl type and subfloor.
In short: when you weigh durability, noise reduction, and moisture control, the answer to do you need underlay for vinyl flooring is usually yes—choose an underlay matched to your vinyl and subfloor conditions.
Situations where underlay is required vs optional
The short answer said underlay usually makes sense, but whether it’s required or optional depends on your vinyl type and the subfloor conditions.
You should choose underlay when it protects, levels, or isolates; skip it when manufacturer instructions or a rigid subfloor say no.
- Required: uneven subfloor
- Required: floating vinyl planks needing cushion
- Optional: glued vinyl on smooth concrete
- Optional: existing finished subfloor
What Is Vinyl Flooring and Common Types
Vinyl flooring is a waterproof, low-maintenance option that comes as sheet vinyl, vinyl tile, or vinyl plank, each with different looks and installation methods.
You’ll also find flexible vinyl and rigid-core constructions like WPC and SPC, where rigid cores add stability and better underfoot feel compared with flexible layers.
Understanding these types helps you choose whether underlay is necessary for comfort, sound, or subfloor imperfections.
Overview of vinyl plank, vinyl tile, sheet vinyl
Think of vinyl as a family of resilient, affordable flooring options that suit different rooms and budgets.
You’ll find vinyl plank mimicking wood with long, interlocking boards; vinyl tile offering square or rectangular pieces for patterned layouts; and sheet vinyl providing continuous, water-resistant rolls ideal for bathrooms or kitchens.
Each type varies in installation method, durability, and appearance, so pick based on room needs.
Rigid core (WPC, SPC) vs flexible vinyl construction differences
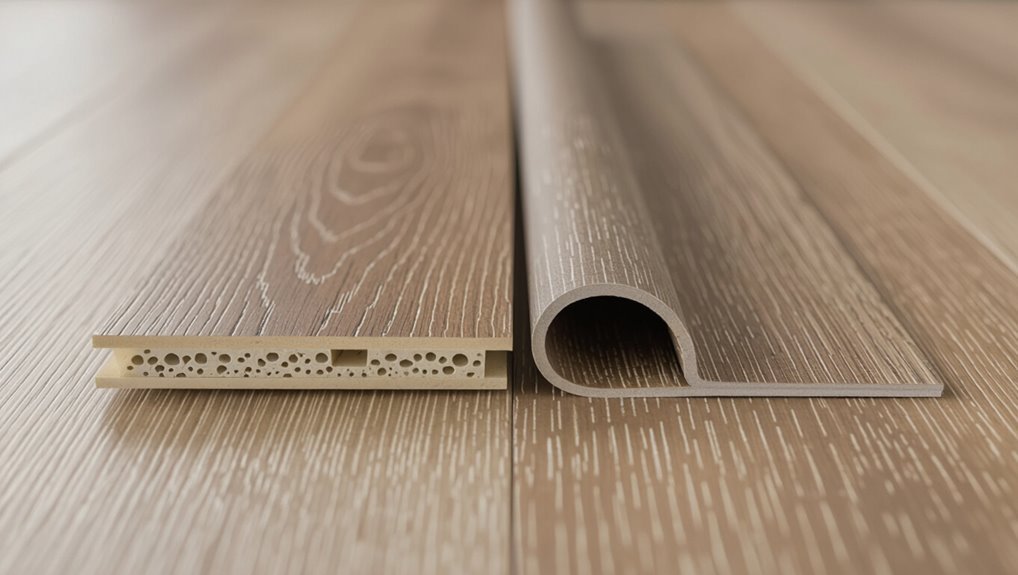
If you’re comparing options, you’ll notice rigid core and flexible vinyl feel and perform quite differently.
Rigid core (WPC, SPC) uses a dense waterproof core that resists denting, offers firmer underfoot, and often requires minimal underlay.
Flexible vinyl is thinner, more pliable, and benefits from cushioning underlay for comfort, sound control, and subfloor smoothing.
Choose based on durability, comfort, and subfloor conditions.
Why Underlay Matters Benefits and Functions
You’ll notice underlay can make a big difference in sound reduction and room acoustics while also adding comfort and thermal insulation underfoot.
It helps smooth minor subfloor imperfections, provides moisture protection or a vapor barrier when needed, and can affect your warranty and installation method.
Knowing these functions lets you choose the right underlay to extend the life and performance of your vinyl floor.
Sound reduction and acoustics
Because sound travels easily through thin vinyl and subfloors, underlay plays a key role in cutting noise and improving room acoustics.
You’ll notice less footfall, echo, and vibration when you choose dense, resilient underlay designed for LVT or sheet vinyl.
It isolates impact sound, prevents hollow resonance, and creates a quieter, more pleasant space—especially important in multi-story homes and open-plan rooms.
Comfort and thermal insulation
While vinyl itself can feel hard and cool underfoot, adding the right underlay gives you a noticeably warmer, softer surface that keeps feet comfortable year-round.
You’ll reduce heat loss through the floor, making rooms feel cozier without raising thermostat settings.
Choose underlay with insulating properties for basements or ground floors, and enjoy improved comfort in every season.
Subfloor leveling and minor imperfections
A thin layer of underlay evens out small dips and bumps in your subfloor so your vinyl lays flat and locks together properly.
It reduces telegraphing from minor cracks, gaps or uneven boards, letting planks click without stressing seams.
You’ll avoid premature wear, squeaks, and visible imperfections, and installation goes faster because you’re working with a more uniform surface.
Moisture protection and vapor barrier functions
If your subfloor can trap moisture or sits over a concrete slab, underlay becomes essential because it adds a built-in vapor barrier that keeps dampness from reaching and damaging your vinyl.
You’ll prevent swelling, mold, and adhesive failure by blocking moisture migration.
Choose underlay rated for vapor protection, guarantee seams are sealed, and confirm compatibility with your vinyl product to protect the floor.
Impact on warranty, installation method, and longevity
Beyond keeping moisture out, underlay affects more than just the floor’s immediate performance — it can determine whether your warranty stays valid, which installation methods you can use, and how long the floor will last.
You should follow manufacturer specs: wrong underlay can void warranty, prevent glue-down or click-lock installation, and reduce wear resistance.
Proper underlay promotes stability, sound control, and lifespan.
When Underlay Is Required Hard Rules and Manufacturer Guidance
Check your manufacturer’s warranty first, because some brands require specific underlay or none at all to keep coverage valid.
You’ll also need different approaches for floating versus glue-down installations, and local building codes or multi-family rules can mandate sound or moisture underlay.
Consider the subfloor—concrete, plywood, OSB, or existing vinyl each present different moisture, flatness, and fastening issues that affect whether underlay’s required.
Manufacturer warranty requirements
Wondering whether you must use underlay to keep your vinyl warranty valid? You should read your warranty; many manufacturers require specific underlay types or deny claims for improper subfloor prep.
Check for thickness, moisture barriers, and approved materials. If you ignore instructions, you risk voiding coverage.
- Read warranty exclusions
- Verify approved underlay specs
- Keep installation records
- Ask manufacturer in writing
Floating vs glue-down installations
After you’ve reviewed warranty rules, you’ll need to evaluate whether your vinyl is floating or glue-down, because that choice often dictates underlay requirements.
If it’s floating, you’ll usually need a compatible underlay for cushioning, moisture and sound control.
Glue-down installations often require minimal or no underlay; manufacturers may demand specific adhesives or thin vapor barriers.
Follow their specs to keep warranties valid.
Building codes and multi-family dwellings
Because building codes and multi-family regulations can impose firm requirements, you’ll need to confirm local standards before choosing underlay for vinyl floors.
Check fire, sound, and moisture criteria; some jurisdictions mandate specific underlay types or none at all.
Also follow manufacturer installation instructions—ignoring them can void warranties and fail inspections.
When in doubt, get written approval from authorities or building management.
Subfloor material scenarios (concrete, plywood, OSB, existing vinyl)
When you’re deciding whether to add underlay, the subfloor material drives the requirement: concrete needs a vapor barrier and often cushioning underlay; plywood usually accepts underlay for sound and minor leveling; OSB may require a moisture barrier and manufacturer approval.
Existing vinyl can sometimes be floated over if smooth, but manufacturers often forbid covering their product—always follow their installation and warranty rules.
Choosing the Right Underlay Types and Properties
Now you’ll compare common underlay options—foam, cork, and rubber—so you can pick the best match for your vinyl.
Pay attention to pros and cons for each, whether the underlay has an integrated vapor barrier or needs a separate one, and key specs like thickness, compressibility, and density.
Those factors determine comfort, sound control, moisture protection, and long-term performance.
Foam underlay: pros and cons
If you’re weighing underlay options, foam underlay stands out for being lightweight, easy to install, and budget-friendly; however, its benefits come with limits you should know.
You’ll enjoy basic cushioning and minimal sound reduction, but foam compresses under heavy furniture, offers limited moisture resistance, and can exaggerate subfloor imperfections.
Choose foam for low-traffic rooms and add a vapor barrier where needed.
Cork underlay: pros and cons
Because cork combines natural resilience with inherent moisture and sound-muffling qualities, it’s a popular underlay choice for vinyl floors where comfort and eco-friendliness matter.
You’ll enjoy improved insulation, cushioning, and reduced foot noise. Cork resists mold and compresses less than foam, but it can be pricier and may crumble under heavy point loads.
Install on clean, dry subfloors for best performance.
Rubber underlay: pros and cons
While rubber underlay adds excellent soundproofing and durability, it’s heavier and often pricier than foam or cork, so you’ll want to weigh its benefits against your budget and installation plans.
You’ll get superior impact noise reduction, excellent compressive strength, and long-term resilience.
Downsides: higher cost, harder cutting and fitting, and potential odor initially.
It’s great for high-traffic or multi-level spaces.
Underlayment with integrated vapor barrier vs separate vapor barrier
Wondering whether to choose an underlayment with an integrated vapor barrier or to lay a separate vapor barrier yourself? You’ll weigh convenience and seams vs flexibility and stronger moisture control. Integrated reduces install steps; separate lets you customize placement and overlap. Consider job specifics, subfloor moisture, and long-term access.
| Option | Pros | Cons |
|---|---|---|
| Integrated | Easier install | Fixed size |
| Separate | Custom fit | More work |
| Both | Moisture defense | Cost/time tradeoff |
Thickness, compressibility, and density considerations
If you want your vinyl floor to feel solid and last, pay close attention to underlay thickness, compressibility, and density—each affects support, comfort, and how the planks lock together.
Choose low-compressibility, higher-density underlay for rigid click-lock vinyl; thin, slightly cushioned options suit flexible vinyl.
Match thickness to manufacturer specs, avoid overly soft or thick underlays that can cause instability or premature wear.
How to Tell If You Need Underlay Assessment Checklist
Before you install vinyl, walk through a quick checklist: inspect the subfloor for levelness and damage, test concrete or wood for moisture, and think about sound transmission based on the room’s use.
Also verify that your chosen vinyl is compatible with any underlay you might use. If any item fails, you’ll know an underlay or repairs are required.
Inspecting the subfloor for levelness and damage
A quick, thorough inspection of your subfloor tells you whether underlay is necessary: check for dips, high spots, soft areas, and visible damage, and use a straightedge and level to measure deviations.
You’ll note issues, decide repairs, and judge padding needs.
- Run a straightedge across multiple directions
- Press to find soft spots
- Mark and measure deviations
- Inspect for cracks and rot
Moisture testing for concrete and wood subfloors
You’ve checked for levelness and soft spots, now check moisture to see whether underlay is needed: high moisture can warp vinyl and encourage mold, so measure concrete and wood subfloors before installation.
Use a reliable moisture meter and follow manufacturer limits—CM or RH tests for concrete, pin or non‑invasive meters for wood. If readings exceed specs, install vapor barrier or moisture‑rated underlay.
Sound transmission and room use considerations
When sound carries between rooms or down to neighbors, underlay can make a big difference, so assess how the space will be used and who’ll be affected by noise.
Consider room function—bedrooms, nurseries, home offices and multiunit dwellings need better acoustic control.
Check impact vs. airborne ratings, test footfall in similar rooms, and prioritize denser or acoustic-specific underlays where noise reduction matters.
Compatibility check with chosen vinyl product
If your vinyl comes with a manufacturer warranty or installation guide, check those documents first—manufacturers often state whether underlay is required, allowed, or prohibited, and following their specs preserves your warranty.
Next, verify product type (LVT, SPC, WPC), thickness, and click vs. glue installation.
Match underlay materials to the vinyl’s indent resistance, moisture tolerance, and acoustic ratings to guarantee compatibility.
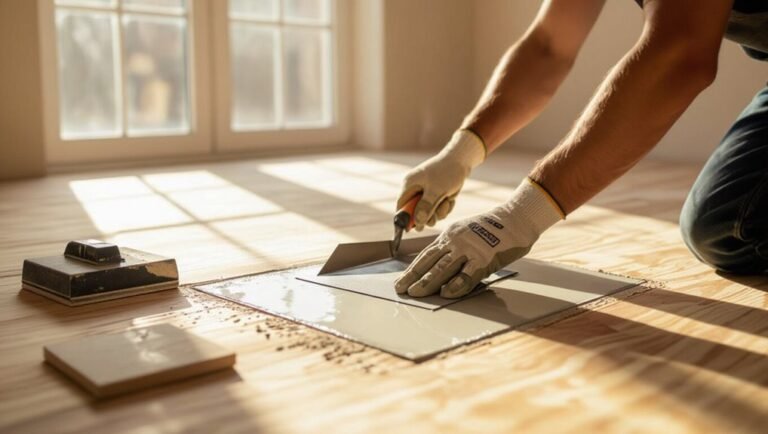
Step-by-Step: Installing Underlay for Vinyl Flooring
Before you start, gather the tools and materials you’ll need—measuring tape, utility knife, underlay, vapor barrier, seam tape, and a straightedge.
First prepare and repair the subfloor, then test for moisture and install a vapor barrier if required.
Next lay and secure the underlay correctly, and finally install the vinyl over it using the key tips for seams and expansion gaps.
Tools and materials needed
Tools and materials you’ll need are straightforward and easy to gather: a utility knife, straightedge or T-square, tape measure, chalk line, adhesive or tape specified for your underlay and vinyl system, a roller or weighted seam roller, underlay sheets or rolls (foam, cork, or felt as recommended), moisture barrier if required, and basic PPE like knee pads and gloves.
- Underlay rolls or sheets
- Adhesive or seam tape
- Roller and straightedge
- Measuring and marking tools
Step 1 Prepare and repair the subfloor
1. You’ll clear the room, remove baseboards, and sweep or vacuum thoroughly.
Inspect the subfloor for loose boards, squeaks, dips, cracks, or moisture. Secure loose boards, sand high spots, and fill gaps or holes with appropriate patching compound.
Confirm the surface is clean, dry, level, and sound before laying underlay so the vinyl performs and lasts.
Step 2 Test and install vapor barrier (if needed)
Now that your subfloor’s secure, dry, and level, test for moisture so you can decide whether a vapor barrier is needed.
Use a moisture meter or tape-and-plastic test, following manufacturer specs. If results exceed limits, roll out a compatible vapor barrier, overlap seams, and seal edges with tape.
Confirm the barrier lies flat and uninterrupted before proceeding to the next installation step.
Step 3 Lay and secure the underlay properly
Before you unroll the underlay, measure the room and plan seams so pieces stagger and end seams fall at least 6–8 inches apart from adjoining rows; this lets you cut efficiently, minimize waste, and keep seams away from high-traffic lines.
Unroll strips with foam side down, butt edges tightly, tape seams with recommended tape, trim at walls, and fasten perimeter as manufacturer suggests to prevent shifting.
Step 4 Install vinyl flooring over underlay (key tips)
With the underlay taped and secured, you’re ready to lay the vinyl planks or sheets directly over it—start by inspecting each piece for defects and acclimating them to the room’s temperature if you haven’t already.
Stagger seams, maintain recommended expansion gaps at walls, snap chalk lines for straight rows, press joints firmly, and roll the floor with a 100-pound roller or hand-roll small sections to guarantee adhesion and flatness.
Common installation mistakes to avoid
While underlay can make your vinyl floor more comfortable and stable, you can undermine those benefits with a few common mistakes, so pay close attention as you work.
Don’t skip moisture testing, overlap seams, or leave gaps.
Avoid uneven subflooring, using wrong adhesive, or installing over loose debris.
Trim improperly and ignore acclimation; these errors cause warping, noise, and premature failure.
Situations Where Underlay Is Not Recommended
You shouldn’t add underlay when the vinyl is meant for direct glue-down over concrete, because the adhesive and subfloor need direct contact.
If the manufacturer specifically says no underlay, follow their instructions to avoid voiding warranties or causing performance issues.
Also skip extra cushioning under click-lock or rigid vinyl—too much give can cause locking failures and premature wear.
Direct glue-down vinyl over concrete
Because concrete provides a rigid, stable base, manufacturers often specify direct glue-down installation for vinyl plank or sheet flooring over concrete.
You shouldn’t add underlay because it can compress, inhibit adhesive bond, and trap moisture.
Clean, level, and dry the slab, use the recommended adhesive, and follow trowel and dwell-time instructions.
That guarantees a secure, long-lasting bond without underlayment.
Manufacturer-specified no-underlay products
If a vinyl product’s manufacturer specifically labels it as “no-underlay” or “direct-install,” follow those instructions—doing otherwise can void the warranty and cause performance problems.
You should install per their guidelines: prepare a flat, clean subfloor, control moisture, and use recommended adhesives or click systems.
Don’t add aftermarket padding or underlayment unless the maker explicitly permits it—warranties and long-term performance depend on compliance.
Issues caused by excessive cushioning (click-lock problems)
When you add overly soft underlay beneath click-lock vinyl, the extra give can stress the locking seams and cause gaps, popping, or separations over time.
Manufacturers design those joints to work with a firm, stable base, so excessive cushioning undermines the system’s integrity. You’ll notice movement, noise, and accelerated wear.
Avoid plush underlays, choose firm padding, and follow manufacturer guidelines to preserve fit and warranty.
Cost, Time, and ROI Is Underlay Worth It?
You’ll pay a bit more in materials and labor for underlay, and installation can add an hour or two per room depending on subfloor prep.
Weigh that upfront cost against long-term benefits like improved comfort, noise reduction, and extended vinyl life to see if it boosts your return on investment.
Skipping underlay to save now can be a false economy if it leads to premature wear or costly repairs later.
Typical costs and labor impact
Installing underlay adds both upfront material costs and modest labor time, but it can boost comfort and longevity enough to affect your project’s ROI. You’ll pay $0.50–$2.00/ft² for materials and roughly $0.30–$0.75/ft² extra labor; DIY reduces labor but adds time. Below is a simple cost-time guide:
| Item | Cost/ft² | Time/100 ft² |
|---|---|---|
| Basic underlay | $0.50–$1.00 | 0.5–1 hr |
| Premium underlay | $1.50–$2.00 | 1–2 hrs |
| Pro install labor | $0.30–$0.75 | 2–4 hrs |
Long-term benefits vs upfront expense
Although underlay raises your upfront cost and adds a little installation time, it can pay back those expenses through improved comfort, noise reduction, and extended floor life.
You’ll enjoy fewer repairs, better warranty prospects, and higher resale appeal.
Over years, lower maintenance and replacement frequency often offset initial outlay, making underlay a pragmatic investment if you plan to keep the flooring long-term.
When skipping underlay is a false economy
If you’re trying to cut costs now, skipping underlay can feel smart—but it often turns out to be a false economy.
You’ll save upfront, then face noise, cold floors, and faster wear that forces repairs or replacement sooner.
Proper underlay reduces damage, improves comfort, and can preserve the manufacturer warranty, so its modest cost usually delivers better ROI over the floor’s lifespan.
Troubleshooting Common Problems After Installation
After installation you may notice squeaks, lippage, or an uneven feel that point to subfloor or underlay problems, and you’ll want to identify the source quickly.
Moisture-related failures, adhesive issues, and sound complaints in multi-story buildings are common causes you can inspect and test for.
I’ll outline practical fixes and remediation steps so you can address each problem effectively.
Squeaks, lippage, and uneven feel
When your new vinyl floor feels uneven, squeaks, or shows lippage between planks, chances are the underlayment, subfloor, or installation technique needs attention.
Check for gaps, loose boards, or high spots in the subfloor and verify the underlayment matches the flooring type.
Tighten or replace fasteners, re-seat planks, and use a roller or tapping block to settle joints.
Moisture-related failures and adhesive issues
Those same subfloor and underlayment issues that cause squeaks and lippage can also let moisture become a hidden problem, undermining adhesives and causing planks to cup, lift, or peel.
You should test subfloors for moisture before installation, use vapor barriers or appropriate underlay, choose adhesive rated for vinyl and damp conditions, and address leaks promptly to prevent costly repairs.
Sound complaints in multi-story buildings
If you’re getting noise complaints in a multi-story building, don’t assume the vinyl itself is to blame—sound issues often come from inadequate underlay, poor perimeter sealing, or improper junction trims that let impact and structure-borne noise transmit between floors.
You should document complaint locations, note walking patterns and footwear, check for loose connections or gaps, and record times to correlate with occupant reports.
Fixes and remediation steps
Complaints about noise often point to underlay or sealing problems, so start troubleshooting by isolating the source: walk the affected areas, check seams, perimeter gaps, and any trim or threshold connections that could be transmitting sound.
Then take these remediation steps:
- Add or replace underlay where gaps exist.
- Reseal seams and perimeter with recommended sealant.
- Tighten or replace loose trim/thresholds.
- Use acoustic adhesive or mats under problematic zones.
Best Practices and Tips for Professionals and DIYers
Before you start, run through a tight pre-installation checklist to confirm subfloor flatness, cleanliness, and moisture levels.
Match any underlay to your vinyl manufacturer’s specs and plan moisture mitigation like vapor barriers or perimeter sealing.
After installation, follow simple maintenance—avoid harsh cleaners, control indoor humidity, and protect high-traffic areas—to keep both the underlay and vinyl performing.
Pre-installation checklist
A clear pre-installation checklist will save you time and prevent costly mistakes, so gather measurements, subfloor details, and product specs before you start.
Verify moisture levels, flatness, and cleanliness of the subfloor. Check door clearances, junction locations, and trim needs.
Confirm tools, adhesive type, and roll direction. Plan acclimation time and a waste allowance for cuts and defects.
Matching underlay to vinyl manufacturer specs
Now that you’ve confirmed measurements, moisture, and subfloor condition, match your underlay to the vinyl manufacturer’s specifications to protect warranty coverage and performance.
Check recommended thickness, compressibility, and compatibility with click-lock or glue-down systems.
Use only approved materials—insulation, soundproofing, or underlayment with vapor barriers—so you don’t void warranty.
Keep documentation and installer notes for future claims.
Moisture mitigation strategies
One of the most important steps you can take is to assess and control moisture sources before laying vinyl—test concrete with a calcium chloride or relative humidity probe, inspect for plumbing leaks, and guarantee grade and drainage direct water away from the structure.
Use vapor barriers where recommended, allow slabs to dry fully, seal cracks and joints, and choose moisture-tolerant adhesives and underlays per manufacturer guidelines.
Maintenance recommendations to protect underlay and vinyl
Having controlled moisture and sealed the substrate, you’ll want to focus on ongoing maintenance that preserves both the underlay and vinyl surface.
Wipe spills promptly, use breathable rugs in high-traffic zones, and avoid steam cleaners.
Check seams and connections periodically for gaps or lifting.
Replace damaged underlay sections beneath damaged vinyl; maintain consistent indoor humidity (35–55%) to prevent swelling or shrinkage.
FAQs
You probably have a few specific questions about underlay, like whether you can lay new vinyl over old without one or if it will soften the floor or affect click-lock joints.
You’ll also want to know about vapor barriers on concrete, the right underlay thickness for SPC/WPC, and whether underlay meaningfully reduces noise for upstairs neighbors.
I’ll answer each clearly so you can pick the best option for your situation.
Can I install vinyl flooring over existing vinyl without underlay?
Thinking about laying new vinyl over old without underlay? You can in many cases, but inspect the existing floor first.
Verify it’s level, firmly glued, clean, and free of damage or cushioning. Remove loose planks, fill seams, and check manufacturer guidelines and warranty terms.
If moisture, height issues, or unevenness exist, add an appropriate underlayment or remove the old layer.
Will underlay make vinyl flooring feel softer or affect the click-lock?
How soft the floor feels and whether the click-lock performs can hinge on the type and thickness of underlay you pick.
Thicker foam or cork adds cushion and reduces sound, making planks feel softer underfoot.
But too-compressible underlay can stress joints, causing clicks or loosening.
Use manufacturer-approved underlay with proper density to preserve locking integrity and comfort.
Do I need a vapor barrier with vinyl on concrete?
Wondering whether a vapor barrier is necessary when installing vinyl over concrete? You usually do when concrete can emit moisture—especially in basements or on-grade slabs.
Many vinyl types tolerate minor moisture, but a barrier protects glue, adhesives, and SPC/WPC cores.
Test slab moisture first; follow manufacturer guidelines. Proper barrier prevents cupping, mold, and installation failures, so don’t skip it.
How thick should the underlay be for SPC/WPC flooring?
Curious about the right underlay thickness for SPC/WPC flooring?
Aim for 1.5–3 mm of high-density underlay for most installations; it offers cushioning, minor subfloor leveling, and compatibility with rigid cores.
Use up to 5 mm only if your subfloor is uneven and manufacturer permits.
Always check the flooring maker’s specs—too thick can void warranties or affect locking systems.
Will underlay reduce noise enough for upstairs neighbors?
Can underlay actually keep your upstairs neighbors from hearing everything you walk and drop? You’ll reduce impact and airborne noise, but underlay alone won’t eliminate loud thuds.
Combine solutions for best results:
- Choose high-impact-rated underlay
- Add carpet or rugs in high-traffic zones
- Use resilient vinyl with thicker core
- Address structural gaps and ceiling insulation