How to Replace Laminate Flooring Planks Without Tearing Up the Whole Floor
You can replace individual laminate planks without ripping up the whole floor if the locking system or edge access lets you remove the damaged boards. Inspect and mark the damaged planks, clear debris and old adhesive, and loosen adjacent rows with a tapping block, pry bar, or careful cuts. Fit matching replacement planks, snap them into the groove, and check expansion gaps. With the right tools and prep you’ll save time and match the finish—keep going to learn exact steps and tips.
Can You Replace Laminate Planks Without Tearing Up the Whole Floor?
You can often replace just a few damaged laminate planks without ripping up the whole floor by cutting out and sliding in replacements if the damaged pieces are at an edge or you can access a removable row.
If planks are glued, locked behind immovable rows, or the damage is widespread, you’ll likely need to remove adjacent rows or the whole floor to get a proper fit.
Start by evaluating access and locking style so you know whether a targeted repair is feasible or a larger removal is necessary.
Short, Actionable Summary
Yes — you can replace individual laminate planks without ripping up the whole floor, as long as you plan carefully and match the new pieces to the existing locking profile, color, and thickness.
Inspect damage, source matching planks, gather tools, and remove the affected boards using proper disengagement techniques.
Fit replacements, check alignment, and reseal edges.
Learn how to replace laminate flooring confidently.
When a partial plank replacement is feasible vs when full removal is necessary
When damage is limited to a few planks and the locking profile, color, and thickness match replacements you can source, it’s usually practical to swap only those boards rather than remove the whole floor.
Replace partial sections when damage is isolated, subfloor is sound, and seams remain intact.
Remove entire flooring if multiple areas, moisture damage, warped planks, or mismatched profiles prevent seamless repairs.
Basic Understanding Laminate Flooring Anatomy and Repair Basics
You’ll want to know that laminate planks are layered—usually with a wear layer, decorative paper, and a core—and they click together with tongue-and-groove or click-lock edges.
Common damage you’ll run into includes water stains and swelling, chips and scratches, and edge separation that prevents a good lock.
Also note whether your floor is a floating system or was glued/staple-down, because that changes how you remove and replace individual boards.
What laminate planks are made of and how they lock together
Think of laminate planks as a four-layer sandwich: a wear layer that resists scratches and stains, a decorative layer that mimics wood or stone, a high-density fiberboard (HDF) core that gives the plank its strength, and a backing layer that stabilizes moisture and shape.
Most planks also have precision-milled tongue-and-groove or click-lock edges that snap together to form a floating floor you can repair or replace without glue. You align edges, angle and press to lock, and use tapping blocks or pull bars for tight seams.
Common plank damage types (water, chips, scratches, swelling)
After you know what laminate planks are made of and how their edges lock, it helps to recognize the kinds of damage those layers and seams can suffer.
You’ll see surface scratches from furniture, chips along edges from impact, swelling where moisture reached the core, and water stains or delamination when spills sit too long.
Identifying each guides your repair choice.
How floating floors differ from glued or staple-down installations
While floating floors click together and rest on underlayment without adhesive, glued and staple-down installations bond the planks to the subfloor or fasten them directly, changing how the floor behaves, sounds, and gets repaired.
You’ll find floating floors are easier to replace plank-by-plank and tolerate minor movement, while glued or stapled systems require prying, cutting, or replacing larger sections and match adhesive or fasteners.
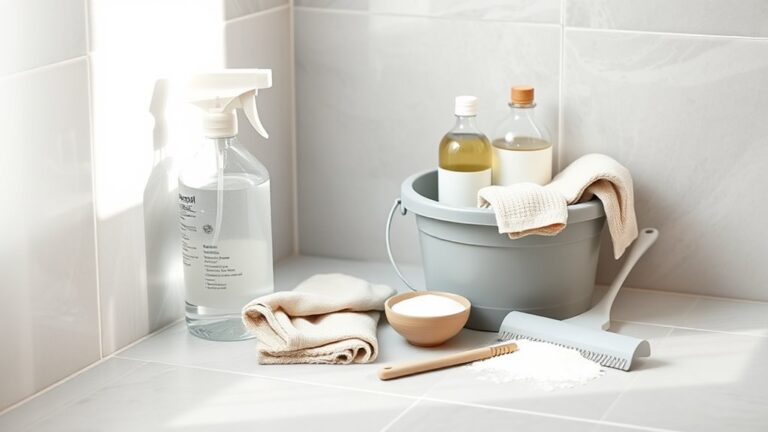
Tools, Materials, and Safety Checklist
Before you start, make a checklist of the essential tools—crowbar, pull bar, tapping block, utility knife, and a saw—for removing and fitting planks.
Pick replacement materials that match the color, bevel, and thickness of your existing floor to guarantee a seamless repair.
Wear safety gear (gloves, eye protection, knee pads) and clear and protect the workspace to prevent damage and injury.
Essential tools for plank removal and replacement
You’ll need a concise set of tools, materials, and safety gear to remove and replace laminate planks efficiently and without damage; gather pry bars and a pull bar, a rubber mallet, a utility knife, tapping block, measuring tape, spacers, replacement planks, underlayment (if needed), wood glue or adhesive, nails or finish strips, and PPE like gloves, safety glasses, and a dust mask.
- Pry bar/pull bar
- Rubber mallet/tapping block
- Utility knife/measuring tape
- Spacers/PPE
Replacement materials and matching tips (color, bevel, thickness)
When you pick replacement planks, match color, bevel, and thickness exactly so new pieces blend with the existing floor; even slight differences in tone, edge profile, or height will stand out.
Bring a sample to stores, compare under room lighting, and check manufacturer codes.
Match wear layer and click profile, keep extra planks for future repairs, and document batch numbers.
Safety gear and workspace prep
Gather a compact set of safety gear and clear the workspace so you can work efficiently and avoid injuries.
Wear safety glasses, knee pads, gloves, and a dust mask.
Have a pry bar, tapping block, rubber mallet, utility knife, measuring tape, and replacement plank ready.
Remove tripping hazards, guarantee good lighting, ventilate the room, and keep a first-aid kit nearby.
Step-by-Step: How to Replace Individual Laminate Planks Without Removing the Whole Floor
Start by inspecting the damaged area to mark the exact planks that need replacing and note their size and profile so you can source matching pieces.
Then you’ll loosen surrounding planks—by tapping, unsnapping, or carefully cutting—so you can remove the damaged plank without harming adjacent pieces.
Finally, remove the plank using targeted techniques, check and repair the subfloor and underlayment if exposed, and fit the new plank snugly.
Step 1 Inspect and identify planks to replace
Before you pull any boards, walk the room and inspect each plank carefully to spot damage, swelling, or uneven seams that signal a replacement is needed.
Mark affected planks with painter’s tape or a pencil.
Check surrounding planks for hidden gaps, moisture stains, or adhesive failure.
Note plank orientation and any pattern or color variations so replacements match when installed.
Step 2 Measure and source replacement planks
Now that you’ve marked the damaged planks and noted patterns, measure each affected piece carefully so replacements blend seamlessly with the rest of the floor.
Record length, width, thickness, groove type and finish. Check batch codes or manufacturer lines for color/texture matches.
Search local suppliers and online retailers, bringing a sample photo. Order extras for mistakes and acclimate new planks before installation.
Step 3 Loosen surrounding planks (methods: tapping, unsnapping, cut out)
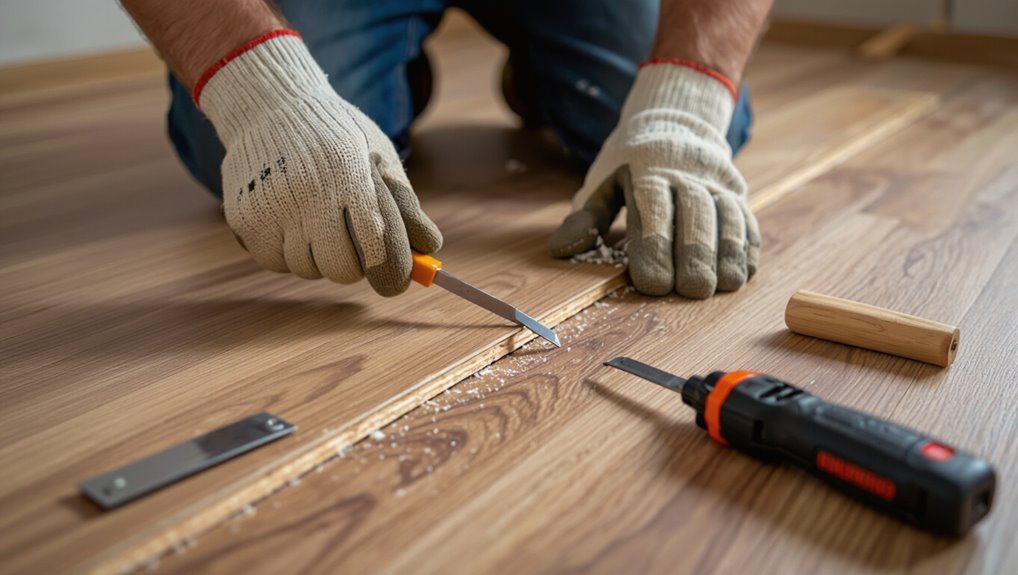
Loosen the planks around the damaged piece so you can remove it without ripping up the whole floor.
Tap joints gently with a rubber mallet and tapping block to break the click-lock, or use a pry bar to unsnap edges carefully.
If needed, cut out a small section with a circular saw set to board thickness.
Keep movements controlled to protect adjacent planks.
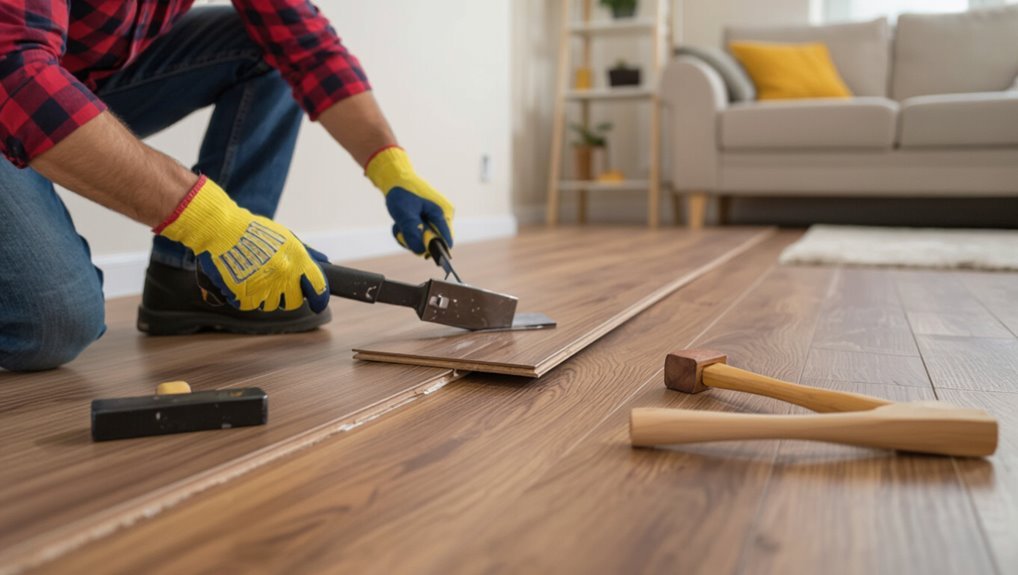
Step 4 Removing the damaged plank(s) without damaging adjacent pieces (detailed techniques)
Once you’ve freed the surrounding planks, you can remove the damaged board with minimal risk to adjacent pieces by working slowly and using the right tools—start by lifting one end of the damaged plank with a flat pry bar or putty knife, sliding a thin shim beneath to protect the tongue and adjacent bevels.
Then gently rock and pull the board out while supporting neighboring planks so they don’t twist or separate.
Use needle-nose pliers to finish gripping and extracting any stubborn fragments carefully.
Step 5 Prepare subfloor and underlayment if exposed
With the damaged plank out, check the exposed area for leftover underlayment pieces, adhesive, or debris that could prevent a snug fit for the replacement.
Remove debris, peel away torn underlayment, and scrape old adhesive with a putty knife.
If the subfloor’s uneven, sand high spots and fill low gaps with floor-leveling compound.
Confirm surface is clean, dry, and flat before proceeding.
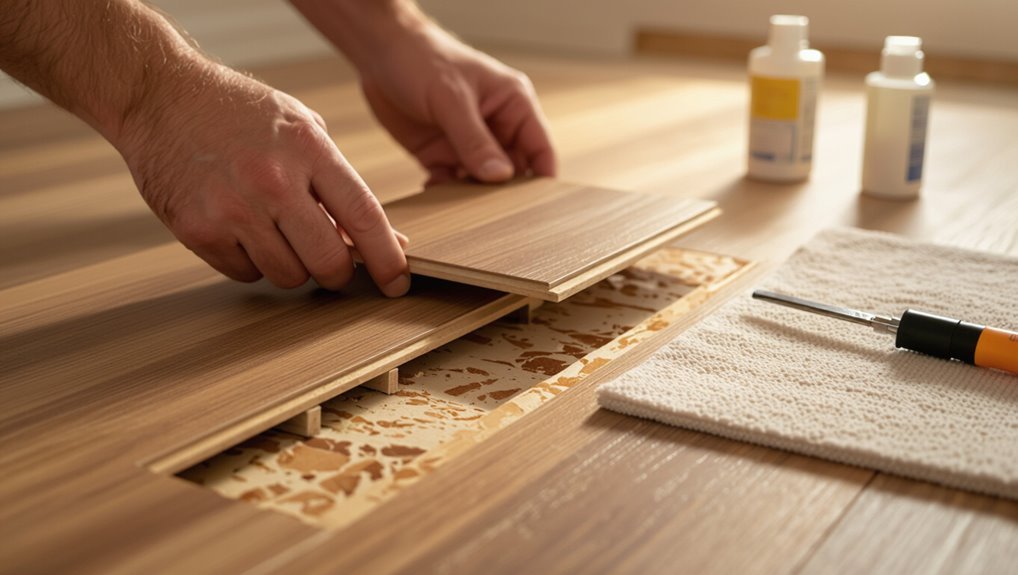
Step 6 Install replacement plank(s) and re-lock seams
Fit the replacement plank into place by aligning its tongue with the groove of the adjacent plank and angling it slightly to engage the locking mechanism.
Lower it gently, pressing along the seam to snap it in. Use a tapping block and mallet for stubborn sections, working from one end to the other.
Check seams for tightness and remove any debris before finishing.
Step 7 Re-seat surrounding planks and ensure expansion gap integrity
Gently press and tap the planks surrounding the replacement to make sure they’re fully seated and that the locking seams have engaged evenly.
Check adjacent rows for gaps or high spots, tapping with a mallet and block as needed.
Confirm the perimeter expansion gap is intact and unobstructed; trim underlayment or debris if it impedes movement so the floor can expand and contract properly.
Step 8 Finishing touches and clean-up
Finish by cleaning up and restoring the area so the repair blends with the rest of the floor.
Remove debris, vacuum, and wipe with a damp cloth.
Reinstall trim or quarter round, ensuring gaps are hidden and expansion space remains.
Touch up seams or minor finish differences with matching marker or filler.
Inspect for stability and test for squeaks before returning furniture.
Alternative Methods When Direct Replacement Isn’t Possible
If you can’t pop out a damaged plank from the middle of the floor, you can often access it from a wall edge or a nearby doorway.
You might remove a single row or use a partial row removal technique to reach and replace the plank without ripping up the whole floor.
When the locking profile is damaged, be prepared to replace multiple planks or a whole section to restore a secure, seamless fit.
Accessing planks from the wall edge or near a doorway
When you can’t remove a damaged plank from the center of the room, you’ll often access it from the wall edge or a nearby doorway. These alternative methods let you work with the flooring’s expansion gap and existing trim to slide planks out without disassembling large sections.
Remove baseboard or door trim carefully, loosen the first row, and slide affected planks toward the opening. Then replace and reseat trim.
Removing a row strategically and reinstalling (partial row removal technique)
If you can’t reach a damaged plank from the edge or a doorway, remove a partial row to create access without dismantling the whole floor.
Cut tongue sections carefully on select planks, lift them toward your opening, and note orientation.
Replace the damaged piece, trim connectors if needed, then reinstall row pieces in reverse order, ensuring tight locks and leaving expansion gaps.
Replacing multiple planks or sections when locking profile is damaged
Sometimes you’ll need to replace several planks because the locking profile is crushed, warped, or stripped and single-plank fixes won’t hold; in those cases you can remove and reinstall a whole section or use cut-and-replace techniques to salvage surrounding pieces.
Measure and mark the damaged area, remove entire rows back to a stable joint, trim edges cleanly, then install replacement planks ensuring tight, aligned locking connections and proper expansion gaps.
Comparison: Floating vs Glued/Stapled Laminate Repairs
You’ll find floating and glued/stapled laminate require different approaches, so consider ease of repair, tools needed, and time/cost before you start. Below is a quick comparison to help you pick the right method for your situation.
| Aspect | Floating vs Glued/Stapled |
|---|---|
| Ease of repair | Floating is usually easier to remove and replace planks. |
| Typical tools required | Floating: pry bar, tapping block; Glued/Stapled: adhesive remover, staple gun or chisel. |
| Time and cost | Floating is generally faster and cheaper; glued/stapled can be slower and pricier. |
Ease of repair
While both floating and glued/stapled laminate can be fixed, floating floors generally make repairs quicker and less invasive because planks lock together and can be taken up and replaced without disturbing the subfloor.
You’ll often remove only affected boards, reseat replacements, and maintain integrity.
Glued or stapled boards demand more effort: you may need to loosen surrounding pieces or cut out sections, increasing time and risk of damage.
Typical tools required
Tools make the job — and the list differs depending on whether your laminate is floating or glued/stapled.
For floating floors you’ll need a tapping block, pull bar, mallet, pry bar, utility knife, measuring tape, and spacers.
For glued or stapled installations add a heat gun, adhesive remover, oscillating multi-tool or circular saw, staple/fastener remover, and safety gear.
Work methodically.
Time and cost comparison
After gathering the right gear for either floating or glued/stapled floors, consider how time and money differ between the two.
Floating-plank repairs are faster and cheaper: you release, swap, and relock planks in under an hour per section with minimal materials.
Glued or stapled repairs take longer, need adhesive or fasteners and patching, and often cost more for labor or specialty tools.
Common Mistakes and How to Avoid Them
Don’t force planks into place—you can snap or split the tongue or groove if you push too hard.
Check batch numbers and finishes so replacement pieces actually match, and always inspect the subfloor and moisture levels before you install.
Finally, preserve expansion gaps and proper perimeter trim to avoid buckling or uneven edges.
Mistake 1 Forcing planks and breaking tongue or groove
Forcefully tapping or shoving planks into place can snap the tongue or chip the groove, leaving you with pieces that won’t lock and a patchy floor.
Don’t force mismatched angles or hit edges with a hammer. Ease planks in at the correct angle, use a tapping block and pull bar, and inspect joints as you go so you catch damage before it spreads.
Mistake 2 Failing to match plank batch/finish
While careful tapping prevents broken tongues, another common error happens before you even install a single plank: mixing batches or finishes.
You’ll notice color, gloss, or texture differences that stand out. Always confirm product codes and compare samples in the room’s light.
Buy extra planks from the same batch, label them, and install matching pieces to keep the floor visually consistent.
Mistake 3 Ignoring subfloor or moisture issues
If you skip checking the subfloor and moisture, you can end up with warped, cupped, or moldy planks after installation.
Don’t assume the surface is sound—inspect for unevenness, rot, and damp spots. Measure moisture with a meter, fix leaks, replace damaged underlayment, and let the area dry fully.
Proper prep prevents failures and saves time.
Mistake 4 Compromising expansion gaps or perimeter trim
Even a tiny gap that’s squeezed shut can make your new laminate buckle or pop as temperatures and humidity change, so don’t compromise the required expansion space or skimp on perimeter trim; leave the manufacturer-recommended gap around walls and fixed objects, and cover it with proper baseboard or junction pieces to allow movement without exposing rough edges.
When replacing planks, reinstall or adjust trim and use spacers so joins remain free to expand.
Prevention, Maintenance, and Best Practices
To keep your laminate looking great longer, you’ll want a simple routine of sweeping, damp-mopping, and prompt spill cleanup plus tips for moisture control and the right underlayment.
Learn quick fixes for scratches and chips and how to tell when damage means you should replace a plank.
I’ll also cover how to find matching planks and store leftovers so repairs stay seamless.
Routine care to extend plank life
While laminate’s durability makes it low-maintenance, regular care will keep planks looking new and prevent common damage. You should sweep or vacuum weekly, wipe spills immediately, and use a damp (not wet) mop with a cleaner made for laminate.
Use felt pads on furniture, avoid high heels and dragging heavy items, control indoor humidity, and clean grit from entryways to minimize scratches and wear.
Quick fixes for minor damage vs when to replace
If a plank shows only surface scratches, small chips, or slight discoloration, you can often fix it yourself with touch-up kits, blending pencils, or a replacement cap strip; save full plank replacement for deep gouges, warped boards, or damage at seams that lets moisture in.
For minor wear, clean, buff, and apply fillers; replace when structural integrity or appearance is permanently compromised.
Moisture control and underlayment recommendations
Minor repairs can keep planks looking good, but moisture and the wrong underlayment will send you back to replacements fast.
Control humidity (35–65%), fix leaks immediately, and use a vapor barrier over concrete.
Choose underlayment rated for laminate and your subfloor—foam with moisture barrier or cork for sound reduction.
Install underlayment seams sealed and follow manufacturer specs to prevent cupping, warping, and mold.
Tips for sourcing matching planks and storing leftovers
Want to avoid a patchwork look later? Track your laminate’s brand, color, and batch code before buying; take a plank to stores for color-matching.
Buy extra from the same lot when replacing sections. Store leftovers flat, in their original packaging, away from moisture and temperature swings.
Label pieces with room and date so you can reuse matched planks for future repairs.
Tools and Materials Cost & Time Estimates
You can expect to spend about 5–15 minutes per plank for removal and replacement if you’re working on small sections, or a few hours for a larger area.
Budget for basic tools (crowbar, pull bar, tapping block, saw) and materials (replacement planks, underlayment, trim), and add a contingency for mistakes.
If you’d hire a pro, factor in labor costs that often exceed materials by two to three times.
Typical DIY time per plank/section
A good rule of thumb is that a single experienced DIYer can remove and replace one laminate plank in about 10–20 minutes, while a beginner should budget 20–40 minutes per plank to account for cutting, fitting, and trimming undercuts.
Work near edges or obstacles takes longer; plan 30–60 minutes per small section (3–6 planks) and longer for tricky patterns or changes.
Budget breakdown: tools, materials, and pro help estimate
Start by listing the tools, materials, and possible pro services you’ll need so you can compare costs and time at a glance. Estimate: pry bar, tapping block, replacement planks, adhesive, underlayment; rent saw if needed. Pros cost more but save time. Quick reference:
| Item | Cost | Time |
|---|---|---|
| Tools | $20–60 | 1–2 hrs |
| Materials | $30–100 | 0.5–3 hrs |
FAQ
You probably have a few quick questions about replacing planks, like whether you need special tools or if water-damaged pieces can be salvaged.
We’ll also cover finding matching laminate when a line’s discontinued, whether a repair affects your warranty, and when it’s time to call a pro.
Read on for short, practical answers.
Can I replace a single laminate plank without special tools?
Can you replace a single laminate plank without special tools? Yes — for small, accessible areas you can manage with basic items: a utility knife, pry bar, tapping block substitute, measuring tape, and adhesive or replacement clips.
You’ll carefully remove adjacent planks if needed, cut the damaged piece out, fit the new plank, and lock seams. Take care to avoid damaging surrounding boards.
How do I find matching laminate if the line is discontinued?
What if the exact laminate line is discontinued — how do you get a close match?
Start by noting plank color, grain, plank width, and bevel type, and photograph samples in natural light.
Check leftover boxes, contact the original manufacturer for equivalent lines, search online marketplaces, reclaimed flooring sellers, or local flooring stores.
If necessary, blend similar planks in low-visibility areas for a seamless appearance.
Will replacing a plank void the flooring warranty?
Will replacing a damaged plank typically void your laminate flooring warranty?
It depends: many warranties allow DIY or professional repairs if you follow manufacturer guidelines and use compatible parts.
You should keep receipts, document the issue, and contact the manufacturer before repairing.
Unauthorized modifications, improper adhesives, or failure to follow instructions can void coverage, so get approval to protect your claim.
Can water-damaged planks be salvaged or must they be replaced?
If the water only reached the surface and the planks dried quickly, you may be able to salvage them by drying and evaluating for warping or swelling; but once joints have cupped, bowed, or the core has expanded, replacement is usually required.
Check seams, feel for soft spots, and inspect under a removed plank for delamination. Minor surface stains or edge swelling sometimes respond to sanding or targeted replacement.
When should I call a professional for laminate plank replacement?
Wondering whether to tackle a laminate plank replacement yourself or call in a pro? If you face complex issues, get help.
Consider a pro when:
- multiple adjacent planks are damaged or warped
- subfloor problems or mold are present
- matching tricky patterns or connections is required
- you lack tools or time; professionals guarantee a clean, lasting install and warranty