How to Measure for Laminate Flooring and Not Buy Too Much or Too Little
Measure the room at its longest and widest points, breaking irregular areas into rectangles/triangles and including closets or alcoves; multiply length × width for total sq ft, then add 10–15% waste (more for diagonal or patterned layouts). Check each box’s coverage and divide your total by that, rounding up to whole boxes and keeping batch numbers for returns. Confirm door swings, thresholds, and cut allowances. Keep notes and photos—keep going to learn practical ordering and layout tips.
How to Measure for Laminate Flooring and Avoid Buying Too Much or Too Little
You’ll calculate exactly how much laminate you need using a simple formula: multiply room length by width, add 10–15% for waste, and factor in the plank coverage per box.
Before you buy, run through a one-minute checklist—measure longest and widest points, note alcoves or closets, and record door swings.
With those numbers you’ll avoid buying too much or too little and keep installation smooth.
How Much Laminate Flooring You Need (Direct Formula)
To figure out exactly how much laminate you need, measure your room’s length and width, multiply them to get square footage, then add waste—usually 5–10% for straight layouts and 10–15% for staggered or diagonal patterns.
To apply the direct formula, calculate: (length × width) × (1 + waste%).
That answers how do you measure for laminate flooring concisely and accurately.
One-Minute Checklist for Accurate Measurements
1 quick checklist will keep your measurements tight and prevent costly overbuying or shortages. Use this one-minute routine before ordering:
- Measure room length and width in feet, record decimals.
- Subtract immovable fixtures, add cut allowance (5–10%).
- Verify door swings and passages; note thresholds.
- Double-check numbers and photos, then calculate boxes needed.
Basic Understanding What Affects Laminate Flooring Quantity
When you measure for laminate, make sure your “square footage” includes closets, alcoves, and any areas under cabinets where you’ll lay planks.
You should also plan for waste — extra boards for cuts, pattern matching, and damaged pieces — so you don’t run out mid-job.
Finally, check board sizes and how many square feet come per box, because plank dimensions and packaging affect how much material you’ll actually need.
What is included in “square footage†for flooring
Although it might seem straightforward, square footage for laminate flooring covers more than the room’s visible floor area; it refers to the total install area you’ll need to account for, including closets, built-in islands, and cutouts around doorways and vents.
You should measure each continuous floor area, add adjoining alcoves and thresholds, and include stair landings or platformed areas to guarantee accurate coverage.
Why waste and extra material are necessary (cuts, patterns, damaged boards)
You’ve measured every nook and added up the total install area, but you still need to order more than that exact number of boards.
You’ll lose material to cuts for edges, doorways and odd shapes, to patterned layouts that waste extra length, and to damaged or defective boards found during install.
Add a contingency percentage to cover these unavoidable losses.
Common packaging and board dimensions that impact calculations
Boards, packs, and measurements all affect how much laminate you’ll need, so understanding common board sizes, plank lengths, and how manufacturers package them helps you calculate more accurately.
Check plank width (commonly 6–9″), lengths (36–48″+), and thickness.
Note square-foot coverage per box and how many boards per pack.
Account for partial boards, end cuts, and connector pieces when totaling boxes.
Step-by-Step Measurement Process
You’ll start by preparing the room and gathering the tools, then measure simple rectangular spaces using length × width.
For irregular rooms you’ll break the area into rectangles and triangles, and remember to note doorways, closets, and built-ins.
Finish by totaling the square footage and converting units to match the flooring coverage.
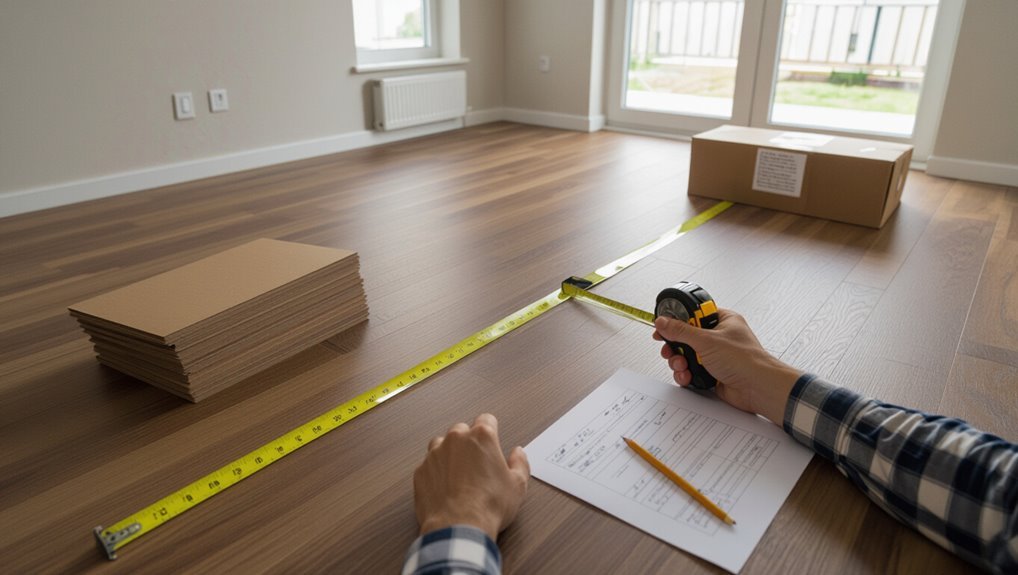
Step 1 Prepare the Room: Tools and Pre-checks
Start by clearing the space and gathering a few basic tools so you can measure accurately and move freely: a tape measure, pencil, notepad, straightedge or level, and a utility knife for threshold trim.
Check for loose boards, trim removal needs, and plan access paths. Mark obstructions and note door swing directions.
- Clear furniture
- Inspect subfloor
- Remove baseboards if needed
- Note obstructions
Step 2 Measure Straight Rooms: Length × Width Method with Example
Once you’ve cleared the room and inspected the subfloor, measure the length and width of the space by running your tape measure along the longest straight walls; record both dimensions to the nearest 1/4 inch so you can calculate square footage accurately.
Multiply length by width to get square feet. Add 10% for waste and pattern matching. Round up to the nearest full box quantity.
Step 3 Measure Irregular Rooms: Break Into Rectangles/Triangles Method with Example
If your room isn’t a simple rectangle, break the space into smaller rectangles and triangles. Measure each shape, then add their areas for a total square footage.
Use a tape measure to get length and width for rectangles (area = L×W) and base and height for triangles (area = 0.5×base×height).
Sum areas, round up to nearest box coverage, and note waste allowance.
Step 4 Account for Doorways, Closets, and Built-ins
4 key areas—doorways, closets, and built-ins—can change your material needs, so measure them separately and subtract or add their areas as appropriate.
Measure each doorway width by the flooring run length, subtract closet floors if you won’t cover them, and add built-in base areas if flooring will wrap under.
Note thresholds and connections; record adjustments per room before totaling.
Step 5 Calculate Total Square Footage and Convert Units
After you’ve adjusted each room for openings and built-ins, add the net areas together to get your total square footage; this gives you the exact coverage needed before factoring in waste.
Convert units if necessary—square feet to square meters or vice versa—using 1 sq ft = 0.092903 sq m.
Round up to two decimals, keep a clear record, and verify calculations before ordering.
Step 6 Determine Required Planks Based on Board Size and Layout
Now you’ll translate square footage into the number of planks by matching your room dimensions and layout to the manufacturer’s board size and pattern; measure the plank length and width, decide your starting direction (along the longest wall or toward the main light source), and calculate how many full and partial boards each row will need so you can estimate total plank count before adding waste.
Then divide room area by board area, round up.
How Much Extra (Overage) to Order Practical Recommendations
You’ll generally add a small overage—about 5-10% for simple, rectangular rooms and closer to 10-15% for spaces with lots of cuts or odd shapes.
If you’re installing diagonal, herringbone, or other patterned layouts, plan on 15-25% extra to account for waste from pattern matching and angled cuts.
Ordering less to save money can leave you short for repairs or matching batches, so only cut the overage below recommended levels if you understand and accept that risk.
Standard Overage Percentages by Room Type and Layout
When ordering laminate, plan for extra material—overage covers cuts, waste, and future repairs—so you don’t run short mid-job. Use typical percentages: 5% for simple, straight rooms; 10% for kitchens and bathrooms with cabinets; 15% for irregular rooms. Adjust slightly for doorways or stairs.
| Room Type | Layout | Overage |
|---|---|---|
| Straight | Simple | 5% |
| Cabinets | Moderate | 10% |
| Irregular | Complex | 15% |
When to Add More: Diagonal, Herringbone, or Patterned Installs
Those standard overage percentages are a good baseline, but patterned installs demand more material—sometimes considerably more—because angled cuts, waste from matching repeats, and starter rows increase loss.
For diagonal layouts add 15–20%.
For herringbone or chevron plan on 20–25%, more if narrow boards or intricate repeats are used.
Always round up and buy whole extra cartons to avoid mid-job shortages.
When to Order Less (and Why it’s Risky)
Although it might seem like ordering just enough boards saves money, cutting overage too close can stall a job and force costly last-minute buys.
You should still order a modest buffer—typically 5–10% for straight installs, more for irregular rooms or tricky cuts.
Ordering less risks mismatched dye lots, damaged boards, and delays. Budgeting a small overage prevents added expense and frustration.
Cost and Purchase Strategies
Check the box labels to see square footage per box and calculate how many boxes you’ll need (round up and include your overage).
Decide whether to buy online or in-store based on return policies, shipping costs, and the risk of color/batch differences to avoid shortages.
Keep and label leftover planks for future repairs and confirm the retailer’s return or exchange rules before purchasing.
How to Read Packaging and Estimate Number of Boxes
A few clear numbers on each laminate box tell you everything you need to estimate how many boxes to buy: coverage per box (usually in square feet or meters), the plank dimensions, and the number of pieces.
Calculate your room area, divide by coverage per box, and round up.
Add 5–10% for waste on straight runs, 10–15% for angled cuts or complex layouts.
Buying Online vs. In-Store: Tips to Avoid Shortages
When you buy laminate online or in-store, plan for lead times, color variations, and return policies so you don’t end up short mid-project.
Compare stock levels, confirm batch/lot numbers, and order from a single production run when possible.
Factor in delivery windows, inspect packages on arrival, and keep a small safety margin to cover cutting waste and unforeseen damage without overbuying.
Handling Returns or Leftover Planks Best Practices
Wondering what to do with surplus planks or a partial rollback on your order?
Keep unused boxes sealed, note batch/lot numbers, and check return policies immediately. Return unopened boxes when possible for credit, or sell/trade matching-lot planks online.
Use leftovers for changes, repairs, or closets.
Label and store flat, dry, and climate-controlled to preserve color and integrity for future use.
Common Measurement and Ordering Mistakes to Avoid
When you measure and order, small mistakes can cost time and money—mixing rough and finished measurements will throw off your totals.
Don’t skip space for expansion and changes, and always factor in extra waste for pattern cuts.
Also check plank dye lots or batch numbers so installed boards match.
Mistake 1 Using Rough vs. Finished Measurements
Because rough measurements don’t account for finished gaps, trim, or irregular walls, they’ll leave you short on planks if you order solely by the rough square footage.
Measure each room’s usable floor area after baseboards and trim are removed, follow the laminate layout pattern, and round up for waste.
Use finished dimensions to calculate boards so you won’t run out mid-project.
Mistake 2 Ignoring Expansion Gaps and Transitions
If you skip expansion gaps and shifts, your new laminate can buckle, lift, or separate as temperatures and humidity change.
You need to plan consistent perimeter gaps (usually 1/4″–3/8″), leave spacing at doorways, and include connector strips between rooms or floor types.
Measure with these gaps in mind so you order enough planks while avoiding overfilling joints that need movement.
Mistake 3 Forgetting Waste from Cut Patterns
Although you’ll measure the room precisely, you’ve got to account for waste from cuts and pattern matching, since straight calculations rarely equal the amount of usable planks you’ll need.
Estimate extra for end cuts, starter rows, angled cuts around obstacles, and pattern repeats. Add 5–15% depending on room complexity, and round up to whole boxes so you won’t run short mid-install.
Mistake 4 Not Checking Plank Dye Lots or Batch Numbers
Once you’ve allowed for waste and pattern matching, check plank dye lots or batch numbers before ordering and again when the shipment arrives.
You’ll avoid noticeable shade or texture variations by confirming all cartons match the same lot. If they don’t, request replacements or adjust your layout plan so visible areas use consistent cartons.
Document lot numbers for any future repairs or additions.
Tips and Best Practices for Accurate Ordering
Start by making a clear sketch or template with dimensions so you know exactly what to order.
Double-check your numbers and have someone else verify them, then order a contingency box of matching planks for repairs or future matches.
Also tell your supplier and installer about your layout and any special cuts so they can confirm quantities and sequencing.
Use a Template or Sketch with Dimensions
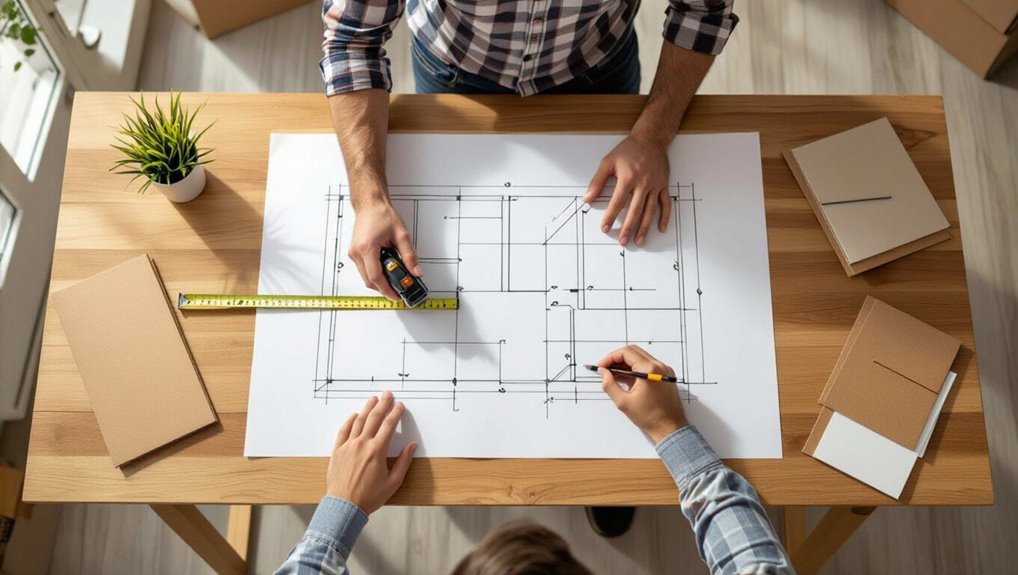
A simple, scaled sketch or cardboard template with clear dimensions will save you time and prevent costly ordering mistakes.
Lay out walls, doors, alcoves and fixed features, noting measurements to the nearest inch or centimeter. Mark plank direction and seam locations.
Use consistent labels (L, W, reference points) and include waste percentage. A clear template guarantees accurate cut lists and ordering.
Double-check Measurements and Have a Second Person Verify
Because small errors add up, have someone re-measure your sketch or template before you order — two pairs of eyes catch missed alcoves, reversed dimensions, and transposed numbers.
Ask your helper to independently measure key lengths and diagonals, compare results, and confirm unit consistency.
Resolve any discrepancies together, mark corrected dimensions clearly, and only then finalize your order to avoid costly returns or shortages.
Keep a Contingency Box for Repairs and Future Matches
Keep a small contingency box of extra planks, trim pieces, and matching fasteners so you can quickly repair chips, replace a warped board, or match future renovations without hunting for the exact batch.
Label the box with product code, color, and purchase date. Store it in a dry, accessible spot.
Keep receipts and a photo of the installed floor to simplify future matching.
Communicate Installation Plan with Supplier/Installer
Start by laying out your installation plan clearly so your supplier or installer knows exactly what to order and prepare.
Explain room dimensions, layout direction, changes, thresholds, underlayment choice, and waste allowance.
Share photos, sketches, and preferred seam locations.
Confirm delivery timing, quantity, and return policy.
Ask for written order confirmation and verify SKU, color lot, and installation notes before work begins.
Cost-Saving Scenarios and When to Order Extra
Think about whether leftover planks can be returned or resold before you decide how much extra to buy.
For small rooms you can order closer to exact, while large open plans usually need a bigger cushion to account for cuts and pattern matching.
Also factor in seasonal demand and supply-chain delays that might make ordering extra now cheaper than reordering later.
When Leftover Material Can Be Sold or Returned
If you’re planning a laminate flooring project, knowing when leftover planks can be returned or sold helps you decide how much extra to order and can cut costs considerably.
Check store return policies, keeping unopened, undamaged boxes and original receipts.
Local classifieds or apps sell surplus by the box.
Factor in restocking fees and buyer interest before ordering extras so you don’t overpay.
Small Rooms vs. Large Open Plans: Strategic Ordering Tips
Knowing when to return or sell leftovers helps decide how much to order for different spaces, because room size and layout change how much waste you’ll generate.
For small rooms, order minimal extra (5–7%) since cuts are predictable.
For large open plans, add 8–12% to cover pattern alignment, staggered joins, and accidental damage.
Keep returnable boxes separate for easy resale.
Seasonal and Supply-Chain Considerations
Because demand and delivery times shift through the year, plan your laminate order around seasonal cycles and supply-chain realities so you can save money and avoid delays.
Order during off-peak seasons for better prices and faster shipping.
Factor in lead times, potential shortages, and staggered deliveries for large projects.
Buy a modest extra 5–10% to cover waste, damage, and future matching needs.
FAQ Measuring and Ordering Laminate Flooring
You probably have a bunch of specific questions—how to measure stairs or landings, whether you can use leftover boxes from another room, and who’s responsible if your installer miscounts.
You’ll also want to know how much extra to order for rooms with many doorways and how to measure for changes and thresholds.
Let’s answer each FAQ so you can order the right amount and avoid costly mistakes.
How do I measure stairs or landings for laminate?
Wondering how to get accurate measurements for stairs or landings when ordering laminate?
Measure tread width and depth for each step, plus riser height if covering risers.
For landings, measure length and width, subtract stair openings.
Note irregular shapes—break them into rectangles or triangles and add areas.
Add 5–10% waste for cuts and pattern matching, more for diagonal layouts.
Can I use leftover boxes from other rooms?
Can you use leftover boxes from another room? Yes—if the batch number, color, and wear layer match exactly.
Lay out a few planks to confirm shade and finish under the room’s lighting. Check plank dimensions and profile to guarantee seamless locking.
Allow for acclimation in the room where they’ll be installed. If anything differs, buy new material for consistency.
What if my installer miscounts—who is responsible?
Who’s responsible if the installer miscounts? You should check your contract and delivery receipts first.
If the installer measured and ordered, they’re typically liable for shortages or excess due to miscount; if you provided measurements or signed off, responsibility may fall to you.
Document measurements, keep invoices, and address disputes with the installer or supplier promptly to seek correction or compensation.
How much extra should I order for a room with many doorways?
For a room with many doorways, plan to order 8–12% extra laminate to cover additional cuts, irregular edges, and connecting pieces; more openings mean more waste from short offcuts and tricky fitting.
Measure each doorway opening and note swing direction so you can plan plank runs efficiently.
Communicate door widths to your installer and round up to the nearest box to avoid last-minute shortages.
How to measure for transitions and thresholds?
When you measure for changes and thresholds, count every doorway, room junction, and change in floor height so you can size each piece correctly and order the right profiles; measure the width of openings, note height differences, and record where T-moldings, reducers, or end caps are needed.
Add a few inches per piece for trimming, and list profile types and lengths for accurate ordering.