How to Install a Grab Bar in a Tile Shower Without Cracking the Tile
You can install a grab bar in a tile shower without cracking the tile by drilling slowly with a diamond or carbide bit, using masking tape to prevent chipping, and anchoring into studs or solid backing with lag screws or rated anchors; cool the bit with water, keep steady pressure, and seal all penetrations with mildew‑resistant silicone to prevent leaks. If studs aren’t available, add blocking behind the tile or use heavy‑duty anchors, and below you’ll find step‑by‑step tips and safety checks.
Can You Install a Grab Bar in a Tile Shower Without Cracking the Tile?
Yes — you can usually install a grab bar in a tile shower without cracking the tile if you use the right drill bits, go slow, and support the area.
If the tile is old, brittle, or the grab bar needs to hit a hidden stud or plumbing, call a professional to avoid damage and guarantee a secure mount.
For straightforward jobs with proper tools and confidence, you can handle it yourself.
Short Direct Answer
You can install a grab bar in a tile shower without cracking the tile by using the right technique and tools—pilot holes, a carbide-tipped or diamond drill bit, and low speed with cooling will prevent damage.
You’ll measure, locate studs or use rated anchors, mark and level, drill slowly with coolant, and secure the bar.
This is how to install a grab bar in a tile shower safely.
When to call a professional vs DIY
Knowing the right technique makes cracking tile unlikely, but you should call a pro if your wall structure is unknown, tiles are antique or fragile, plumbing or wiring runs behind the mount area, or you’re uncomfortable with wet-sawing, diamond bits, and using anchors into cement backer board.
If walls are solidly backed, studs are found, and you have steady hands plus proper tools, you can DIY confidently.
Basic Understanding What a Grab Bar Is and Why Installation Matters
A grab bar is a safety handle you’ll choose as permanent, removable, suction-based, or ADA-compliant depending on how and where you’ll use it.
Your tile type—ceramic, porcelain, natural stone, or large-format—affects the drilling technique and anchor choice.
You’ll also need to plan for structural support by locating studs or adding proper backing behind the tile so the bar can hold weight safely.
Types of grab bars (permanent, removable, suction, ADA-compliant)
While grab bars all aim to improve safety, they come in distinct types that suit different needs and installations. You’ll choose based on permanence, mounting surface, and user needs.
Consider options that match weight capacity and code when needed.
- Permanent: stud-mounted, highest strength
- Removable: bolts into anchors, less invasive
- Suction: temporary, limited load
- ADA-compliant: specific dimensions
- Fold-down: space-saving
Tile types and how they affect installation (ceramic, porcelain, natural stone, large-format)
After you pick the right type of grab bar, the tile you’re working with will dictate how you install it and what tools and anchors you’ll need. Ceramic drills easily; porcelain needs sharper bits; natural stone demands gentle cutting; large-format tiles need careful support.
| Tile Type | Installation Tip |
|---|---|
| Ceramic | Standard carbide bit |
| Porcelain | Use diamond bit |
| Natural stone | Low-speed cutting |
| Large-format | Support tile edges |
Structural considerations: studs, backing, and substrate
1 critical factor for a safe grab bar is solid structural support behind the tile; you’ll need to locate studs or confirm a properly reinforced backing or substrate before drilling.
Use a stud finder and probe to verify framing; where studs aren’t available, install plywood backing or blocking between studs.
Ascertain substrate (cement board or moisture-resistant sheathing) is intact and fasten through tile into solid backing for rated load capacity.
Tools, Materials, and Safety Gear You’ll Need
You’ll want to compare power tools and manual options — like drills with carbide or diamond tile bits and hole saws — so you pick the right bit for porcelain or ceramic.
Decide on mounting hardware (toggle bolts, molly anchors, stud-mounted screws, or backer plates) based on wall construction and load needs.
Don’t forget safety gear and tile protection such as masking tape, rubber pads, and goggles to prevent chips and protect your eyes.
Power tools vs manual tools (drill, carbide drill bits, hole saws)
While you can bore pilot holes and countersinks by hand for light work, drilling through tile for a grab bar almost always calls for power tools.
You’ll want controlled speed, steady pressure, and the right bits to avoid cracks.
- Corded or cordless drill with variable speed
- Carbide or diamond-tipped masonry bits
- Porcelain tile hole saw
- Drill guide or jig
- Safety glasses and masking tape
Mounting hardware options (toggle bolts, molly anchors, stud-mounted screws, backer plates)
Because tile walls rarely line up with studs, choosing the right mounting hardware matters as much as the bar itself: pick anchors rated for the expected load and for use in masonry or hollow walls.
You’ll match hardware to substrate and weight, favoring stud-mounted screws when possible, toggles for hollow areas, mollys for moderate loads, or backer plates for extra support.
- Toggle bolts
- Molly anchors
- Stud-mounted screws
- Backer plates
- Sleeved anchors
Safety equipment and tile protection supplies (masking tape, rubber pads, goggles)
After you pick anchors that match the substrate, protect yourself and the tile before drilling.
Wear safety goggles, cover tile with masking tape to prevent chipping, and use rubber pads or a sacrificial block to stabilize the drill.
Keep a shop vacuum handy for dust. Work slowly and steady.
- Safety goggles
- Masking tape
- Rubber pads
- Sacrificial block
- Shop vacuum
When to use a professional-grade tile bit or diamond bit
Wondering whether you need a professional-grade tile bit or a diamond bit?
Choose a diamond bit for porcelain, glazed, or very hard tiles and for clean, splash-free holes; it lasts longer and reduces chipping.
Use a professional carbide tile bit for softer ceramic or when drilling light pilot holes.
Always run bits with water cooling, steady pressure, and a slow drill speed.
Step-by-Step Installation Guide Secure Grab Bar Without Cracking Tile
Now you’ll walk through a clear, step-by-step plan to place and secure a grab bar without cracking the tile.
First you’ll measure for height and stud locations, mark protected mounting points, and use pilot-hole techniques (tape, low RPM, and coolant) before drilling.
Finally you’ll choose the right bit, drill through tile and substrate carefully, and anchor into studs when possible or use rated wall anchors with proper torque.
Step 1: Plan placement height, length, and locating studs
Start by deciding where the grab bar will do the most good: choose a height and length that match the user’s reach and typical movements, then locate studs to guarantee a solid mount.
Measure reach, test positions, and mark stud locations before drilling. Consider user preference and shower layout.
- Measure vertical and horizontal reach
- Choose 12–36 inch length
- Use stud finder
- Confirm stud depth
- Note obstructions
Step 2: Mark mounting points and protect tile surface
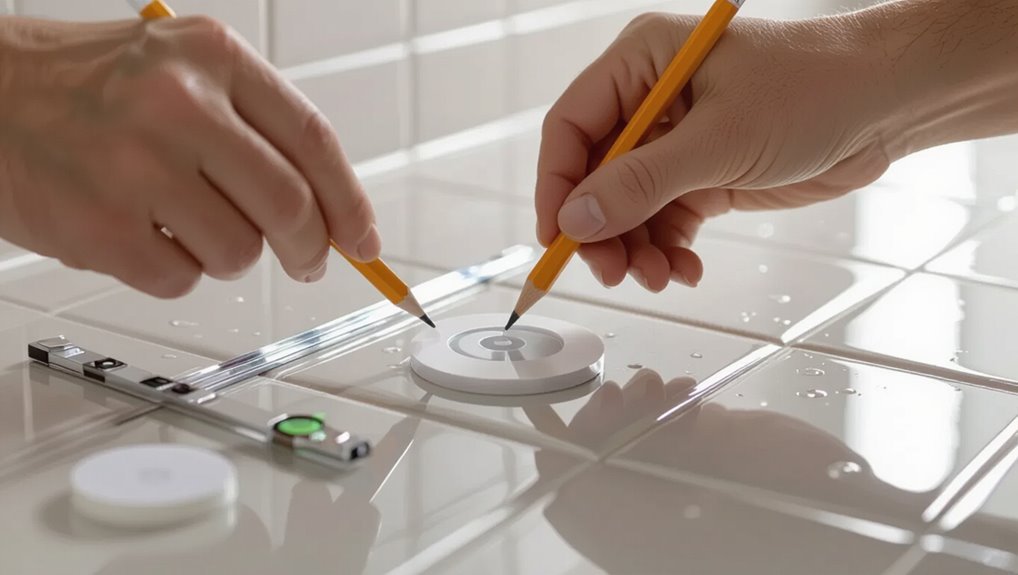
With studs marked and your ideal height chosen, you’re ready to mark the exact mounting points and protect the tile before any drilling.
Use the grab bar bracket as a template, level it, and pencil-mark screw centers.
Apply painter’s tape over each mark to shield glaze and prevent bit wandering.
Recheck alignment and stud engagement before proceeding to drilling.
Step 3: Pilot holes technique to minimize cracking (tape, low RPM, coolant)
Before you drill, take steps that cut vibration and heat so the tile won’t crack: lay down the painter’s tape you already used over each marked center, fit a small center punch or carbide bit to create a shallow guide, and set your drill to a low RPM while keeping steady, light pressure.
- Use tape to stop slips
- Score a tiny starter divot
- Keep drill RPM low
- Pause to cool with water drops
- Apply light, steady pressure
Step 4: Drilling through tile and substrate bit choice and technique
Now you’ll move from prepping to cutting: choose the right drill bit and steady your technique so you pierce the glaze and backing without cracking the tile.
Use a carbide-tipped or diamond-tipped masonry bit for porcelain or ceramic; a soft-start hammer drill at low RPM prevents shock.
Keep steady pressure, withdraw occasionally to clear slurry, and cool with water to reduce heat and stress.
Step 5: Anchoring into studs vs using wall anchors methods and torque recommendations
Having drilled clean holes through the tile, you’ll decide whether to anchor the grab bar directly into studs or use wall anchors; each option affects strength, hardware choice, and how much force you can safely apply.
Use studs when possible; anchors work for tight installs. Torque to manufacturer specs; avoid over-tightening.
- Prefer 3/16–1/4″ lag screws for studs
- Use toggle or sleeve anchors for hollow walls
- Pre-test pull with 100–250 lb force
- Seal holes to prevent moisture
- Mark stud centers before final drilling
Step 6: Installing the grab bar and decorative covers alignment and final tightening
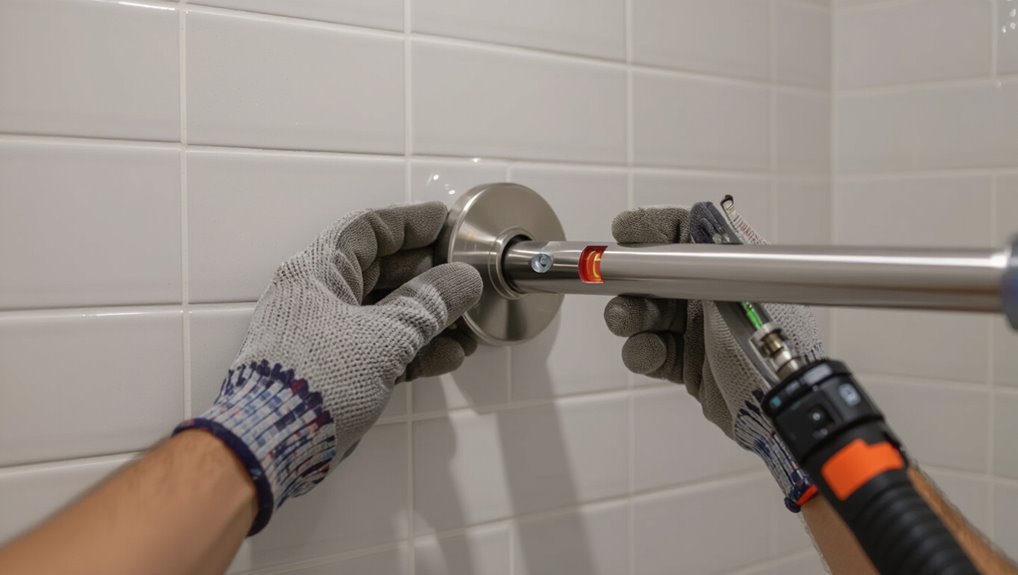
Set the grab bar onto its mounts, align the flanges so the decorative covers will sit flush, and finger-tighten the screws to hold everything in place while you check positioning.
Confirm level and spacing, then use a torque-controlled driver to snug screws evenly, alternating sides.
Snap or slide decorative covers over flanges, ensuring they hide fasteners and sit flush with tile before final light tightening.
Step 7: Waterproofing and sealing penetrations to prevent leaks
With the grab bar aligned and covers in place, you’ll next seal every penetration to stop water from reaching the wall cavity.
Run a continuous bead of silicone-rated, mildew-resistant sealant around each flange and cover edge. Smooth the bead for full contact and neat appearance.
Wipe excess, allow manufacturer-recommended cure time, then test with a gentle water spray to confirm watertightness.
Alternative Installation Options When Studs Can’t Be Reached
If you can’t reach studs, you can still secure a grab bar using reinforced backing plates or wall-reinforcement panels that spread the load behind the tile.
You might also consider adhesive-mounted bars or heavy-duty suction options—I’ll note the pros and cons for strength, surface compatibility, and safety.
For rental or non-invasive fixes, retrofit clamp-on grab bars that attach to shower doors or rails can work, though they’ve different stability trade-offs.
Using reinforced backing plates or wall reinforcement panels
When you can’t reach studs behind tile, use reinforced backing plates or wall reinforcement panels to create a secure mounting surface for your grab bar.
You’ll cut an access behind tile or remove a tile, fit the plate or panel between studs, then fasten it to framing.
Reinstall tile and anchor the grab bar to the reinforced area for strong, code-compliant support.
Adhesive-mounted or heavy-duty suction options pros and cons
Curious about options that don’t require cutting tile or opening walls? You can choose adhesive-mounted bars for a low-profile, permanent feel or heavy-duty suction bars for temporary use.
Adhesives bond strongly but need perfectly clean, non-porous tile and curing time; failure risks damage.
Suction models install fast and move easily but demand periodic checks and won’t hold as much weight as properly anchored bars.
Retrofit solutions: grab bars that clamp to shower doors or rails
Because you can’t always reach studs behind tile, clamp-style retrofit grab bars offer a practical alternative that fastens to shower doors, glass panels, or existing rails without drilling.
You’ll clamp, tighten, and often add rubber pads to protect finishes.
Check weight ratings, compatibility with glass thickness or rail diameter, and secure mounting procedures.
Consider professional fitting for tempered glass or complex frameless systems.
Common Mistakes That Cause Cracked Tile and How to Avoid Them
When you’re drilling into tile, using the wrong bit or too high a speed can crack the glaze, so pick a carbide or diamond bit and go slow.
Don’t skip masking and protective measures, and avoid over-tightening fasteners or applying uneven pressure that stresses the tile.
If you must anchor into hollow tile, use the proper hollow-wall anchors or sleeves rather than relying on screws alone.
Wrong drill bit or incorrect speed
Pick the right drill bit and run it at the correct speed: using a masonry bit meant for cement or glass, or running the drill too fast, is a fast track to cracked tile.
Use a carbide-tipped or diamond-tipped bit designed for tile, set a low speed, apply gentle steady pressure, and let the bit do the cutting.
Cool with water if recommended.
Skipping masking/protective measures
Skipping masking and other protective measures before drilling or installing a grab bar invites chips, scratches, and stress cracks that are easy to avoid.
You should apply painter’s tape over drill points, use a rubber pad under templates, and cover surrounding tile with a soft cloth.
These simple guards stabilize the bit, catch debris, and prevent surface damage without changing your drilling technique or hardware choice.
Over-tightening fasteners and uneven pressure
If you crank down screws or press unevenly against the tile, you can easily create stress points that lead to cracks; tighten fasteners just enough to seat the grab bar and stop, and use a torque-limiting driver or a wrench with feel so you don’t overdo it.
Check alignment frequently, tighten opposite screws incrementally, and use rubber washers or backing plates to distribute pressure evenly across the tile.
Anchoring into hollow tile without proper anchors
Don’t assume tile alone can hold a grab bar—hollow tile needs anchors designed to spread the load behind the surface.
If you use short screws or plain plastic anchors, the tile can crack or the fastener can pull through.
Choose toggle bolts or hollow-wall anchors sized for the bar, follow manufacturer torque limits, and test pullout gently before finishing to prevent failures.
Best Practices and Professional Tips for Durable, Safe Installation
Before you mount the bar, check its load rating and follow ADA recommendations so the installation meets safety standards.
Use backing plates and long screws to spread the load through the tile and into the studs, then test pull strength safely before regular use.
Finally, schedule simple maintenance checks—tighten fasteners and inspect seals—to keep the bar secure long term.
Verifying load rating and ADA recommendations
When you’re choosing a grab bar, verify its load rating and ADA compliance to guarantee it can safely support users—bars rated for at least 250–300 pounds and labeled as ADA or ANSI A117.1 compliant are the industry standard.
Also check mounting hardware specifications, corrosion-resistant finishes for wet environments, and manufacturer installation instructions.
If in doubt, consult a professional to confirm suitability and safe use.
Using backing plates and long screws for distributed load
Adding backing plates and using longer screws spreads forces across the wall and prevents localized failure, so you’ll get a far more durable grab-bar installation than relying on short screws or drywall anchors alone.
Fit stainless-steel backing plates behind tile or between studs, center the bar over them, and drive long corrosion-resistant screws into studs.
Tighten evenly to avoid point loading and check alignment.
Testing pull strength safely before regular use
Although you’ve secured backing plates and long screws, you should always test the grab bar’s pull strength before anyone relies on it—do it methodically, with gradual loads, proper tools, and a helper.
Start with light pulls, increase to body-weight simulations, monitor for movement or creaks, and check fasteners. If anything shifts, stop, reinforce, and retest until the bar remains rock‑solid under expected loads.
Maintenance tips to ensure long-term safety
To keep your grab bar reliable over time, inspect it regularly and address small issues before they become hazards.
Check mounting screws, wall anchors, and sealant for corrosion, looseness, or gaps every few months.
Tighten fasteners, replace worn anchors, and recaulk joints promptly.
Clean with nonabrasive cleaners, avoid harsh chemicals, and document maintenance dates to track needed repairs and guarantee safety.
Troubleshooting Problems, Repairs, and When Tile Is Damaged
If you spot hairline cracks or chips around the grab bar, you can use epoxy fillers and color-matched touch-up kits for quick cosmetic repairs.
If a tile needs replacing after removing the bar, you’ll carefully remove grout, lift the broken tile, set a matching replacement with thinset, and regrout.
Call a contractor or tile specialist if cracks run through substrate, tiles are loose over a large area, or you’re unsure about waterproofing beneath the surface.
Small crack repair options and cosmetic fixes
When you spot small cracks in your shower tile, you can often fix them yourself with minimal tools and expense; assess whether the crack is only in the glaze, the tile body, or the grout, then choose a repair that matches the damage and your skill level.
- Use clear epoxy for hairline glaze cracks
- Fill grout cracks with matching grout or sealant
- Color-matched touch-up pens for surface chips
- Sand and polish glazed scratches gently
- Caulk edges to prevent water intrusion
Replacing a broken tile after grab bar removal overview steps
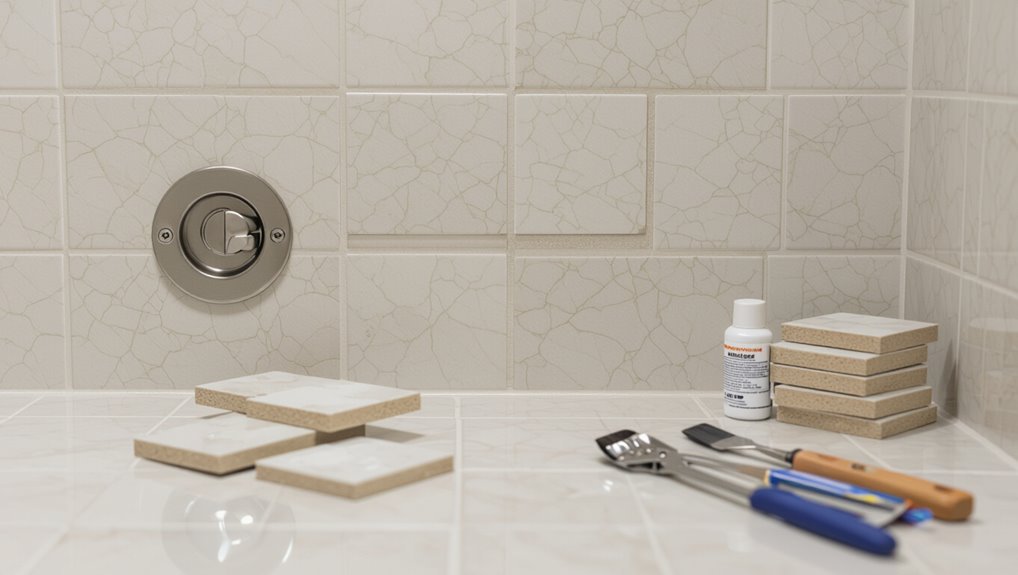
Small grout touch-ups and glaze repairs can keep a shower looking good, but removing a grab bar often reveals deeper damage that needs a full tile replacement.
You’ll remove grout, carefully chisel out the broken tile, clean the substrate, apply thinset, bed the replacement tile, align and level it, then grout and seal.
Allow proper cure times before use.
When to call a contractor or tile specialist
Because tile issues can hide structural problems or create safety hazards, you should call a contractor or tile specialist whenever repair needs exceed your skills, tools, or confidence.
Hire help if you see loose or crumbling substrate, widespread cracks, water damage, mold, or unclear plumbing behind tile.
Professionals assess structural risk, guarantee waterproofing, and install a secure grab bar meeting code and safety standards.
Cost, Time, and Decision Factors
You’ll usually spend $20–$100 on materials for a DIY grab bar (mounting kit, anchors, sealant) versus $150–$400+ for a pro who handles tile repair and secure blocking.
A basic DIY with proper tools can take 1–3 hours, while a pro job that requires finding studs or fixing tile can take 2–6 hours and may cost more for labor.
Use your comfort with tools, the condition of the tile, and the need for guaranteed load-bearing strength to decide whether to do it yourself or hire help.
Typical DIY cost breakdown vs professional installation
Deciding whether to install a grab bar yourself or hire a pro hinges on three clear trade-offs: upfront cost, time investment, and risk (both for damage and safety). You’ll save on labor DIY but buy tools and anchors; pros charge more yet guarantee secure mounting.
| Item | Typical Cost |
|---|---|
| DIY materials | $20–$80 |
| Tools | $0–$60 |
| Pro labor | $150–$400 |
| Total pro | $170–$480 |
Time estimates for each installation scenario
Having weighed costs and risks, it helps to also look at how long each installation path will take so you can plan the project and schedule help if needed.
DIY surface-mount with anchors: 1–2 hours for measuring, drilling, and sealing.
Anchoring to studs or blocking: 2–4 hours plus cutting access if needed.
Pro installation: 1–3 hours, longer if wall repairs are required.
FAQ Common Questions About Installing Grab Bars in Tile Showers
You’ll want clear answers to common concerns like how close anchors must be to studs and whether suction bars are safe long-term.
You’ll also need guidance on using grab bars with natural stone, the right drill bit for glazed ceramic tile, and the weight a correctly installed bar should support.
Let’s address each question so you can install a secure, durable grab bar with confidence.
How close do grab bar anchors need to be to studs?
How close should grab bar anchors be to studs? You should mount anchors directly into studs whenever possible—ideally centered on a stud or within 1/2 inch of its face.
If you can’t hit a stud, use rated toggle or hollow-wall anchors spaced per manufacturer specs and match grab bar length.
Space mounting points to engage solid framing for maximum load capacity.
Can I use a grab bar on natural stone tiles without cracking?
Yes—you can install a grab bar on natural stone tiles without cracking them, but it takes the right approach: use slow-speed drilling with a diamond bit, steady pressure, and cooling (water) to prevent heat and vibration damage.
Anchor into studs or use proper stone-rated anchors and epoxy.
Pre-mark, clamp a template, and avoid hammering; take time and protect the stone surface.
Are suction grab bars safe for long-term use?
Wondering if a suction grab bar can be a reliable long-term solution?
Suction bars offer temporary support and are great for rentals or short-term needs, but they can lose suction with temperature, moisture, or surface imperfections.
For daily, permanent use you should choose wall-mounted grab bars anchored into studs or backing.
Inspect suction devices regularly and never rely on them as your sole safety measure.
What drill bit size and type should I use for glazed ceramic tile?
Which drill bit you pick matters: for glazed ceramic tile, use a carbide-tipped or diamond-tipped masonry bit sized to the diameter of the anchor or screw you’ll install (commonly 1/8″ to 3/8″ for typical grab-bar anchors).
Start with a smaller pilot bit if uncertain.
Drill slowly with steady pressure, keep the bit and tile cool with water, and avoid hammer settings to prevent cracking.
How much weight should a properly installed grab bar support?
After drilling the right-size hole with a carbide- or diamond-tipped bit, you’ll want to confirm the grab bar itself can take the load you expect.
Choose bars rated for at least 250–300 pounds as a minimum; many commercial and ADA-compliant bars are rated 500 pounds.
Guarantee secure anchoring into studs or reinforced backing to achieve that rated capacity and inspect fasteners periodically.