Can You Install Laminate Flooring on Walls? Yes Here’s How
Yes — you can install laminate flooring on walls to create durable, budget‑friendly wood or stone‑look accents in dry areas. You’ll need a flat, stable substrate (furring strips or plywood backer), acclimated planks, and basic tools for measuring, cutting, and fastening. Stagger seams, leave expansion gaps, and finish with trim and caulk. Avoid high‑moisture rooms unless using water‑resistant options, and expect a weekend DIY project or quicker pro install if you want step‑by‑step guidance.
Can You Install Laminate Flooring on Walls? Quick Answer
Yes—you can install laminate flooring on walls, though it’s not ideal for every situation.
It’s best when you want a durable, wood-look accent wall in dry areas like living rooms, hallways, or bedrooms and when the substrate is flat and properly prepared.
Avoid it in high-moisture rooms or where tiles or engineered wood that resist humidity would perform better.
Direct yes/no answer and short summary
Yes — you can install laminate flooring on walls, and it’s a common, budget-friendly way to get a wood-look accent without the cost or maintenance of real wood.
You can attach panels directly to drywall or furring strips, use adhesive or fasteners, and seal edges.
It’s quick, reversible, and offers consistent results when you follow proper prep and installation steps.
Best scenarios when wall installation is recommended
If you liked the quick answer, here’s when installing laminate on walls makes the most sense: use it for accent walls, backsplashes, or wainscoting where you want a wood-look focal point without the cost or upkeep of real wood.
Choose dry rooms, rental spaces, or budget remodels; opt for waterproof planks near sinks; avoid high-touch areas and structural walls.
What Is Laminate and Why Use It on Walls
Laminate is a layered product—typically a fiberboard core with a printed design layer and a protective wear layer—that mimics wood, stone, or tile.
You’ll find it attractive for walls because it’s affordable, durable, and offers consistent finishes without the maintenance real wood often needs.
Still, it won’t match the authenticity of solid wood or the moisture resistance and grout options of tile or some vinyl, so weigh the trade-offs for your space.
What laminate flooring is (materials and construction)
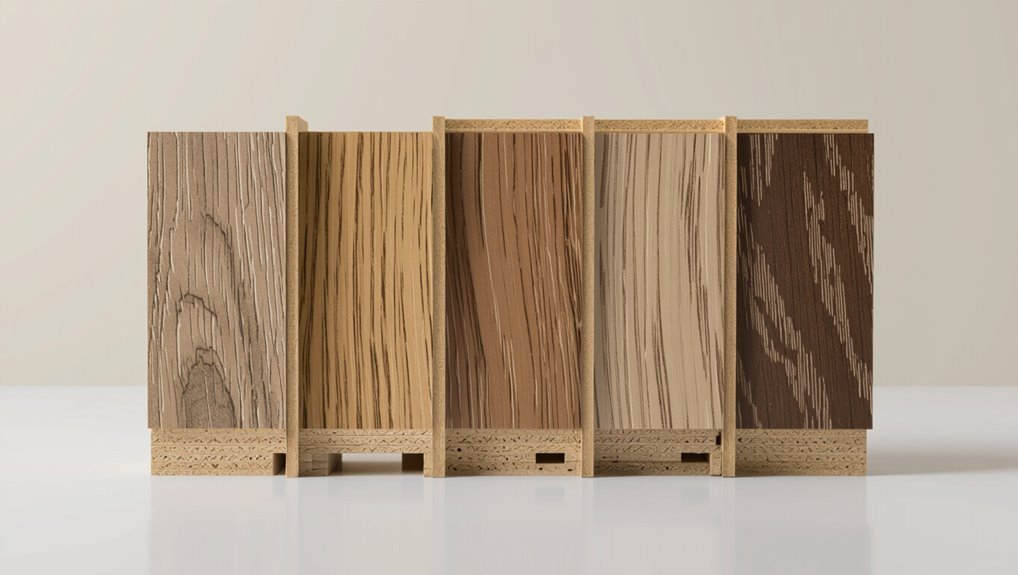
Think of laminate as a smart, layered panel that gives you the look of wood (or stone) without the cost or upkeep.
It’s built from a high-density fiberboard core, a printed design layer, a protective wear layer, and often a backing layer to stabilize the board.
You’ll also find tongue-and-groove edges for click installation and moisture-resistant variants for vertical use.
Advantages of using laminate on walls (appearance, durability, cost)
Because it mimics real wood or stone without the expense and upkeep, using laminate on walls gives you high-impact style with minimal hassle.
You get consistent patterns, easy maintenance, and strong surface resistance to scratches and stains.
Installation is faster and cheaper than many alternatives, and replacement or updates are straightforward, so you’ll refresh rooms affordably while keeping durable, low-maintenance surfaces.
Limitations compared to other wall materials (real wood, tile, vinyl)
While laminate gives you a lot for the price, it still falls short of real wood, tile, or high-end vinyl in several key ways that matter depending on your project.
You’ll notice less authentic texture, lower moisture resistance, limited refinishing options, and seams that aren’t as seamless as tile.
For long-term value or wet areas, choose material suited to the environment.
When to Choose Laminate Walls Use Cases and Design Ideas
You’ll find laminate walls work great for accent or feature walls that add texture without a big renovation.
Consider wainscoting or half-wall installations for durability and easy upkeep in busy rooms or commercial spaces.
Also weigh moisture and climate—choose moisture-resistant laminate for bathrooms and basements to prevent warping.
Accent walls and feature walls
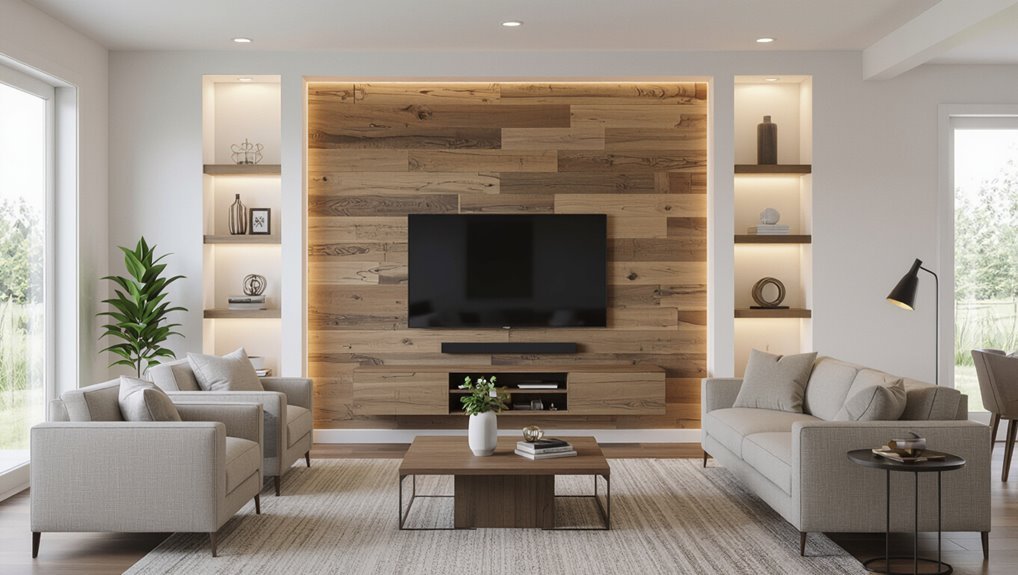
Accent walls let you transform a room without committing to a full remodel, and laminate panels give you the look of wood, stone, or tile with less cost and maintenance.
Use laminate to highlight fireplaces, media walls, or entryways. Choose grain, tone, and plank direction for contrast.
Install vertically for height, horizontally for width, and add lighting or trim to emphasize texture and color.
Wainscoting and half-wall applications
If you’ve used laminate for a focal wall, you can carry that same visual impact down to a lower plane by installing laminate as wainscoting or a half-wall.
You’ll protect walls from scuffs, add texture, and define spaces like dining rooms or entryways.
Choose durable plank profiles, align seams with chair rails, and finish with trim for a polished, cohesive look.
Commercial and high-traffic settings
When spaces get heavy use—like lobbies, restaurants, retail stores, or office corridors—laminate walls give you a tough, low-maintenance solution that still looks professional.
You’ll appreciate scratch resistance, easy cleaning, and fast installation. Choose commercial-grade wear layers and durable finishes, match branding with textures or colors, and protect lower wall areas with impact-resistant trim.
Regular inspections keep surfaces pristine and replaceable.
Climate and moisture considerations (bathrooms, basements)
Because bathrooms and basements often hold more moisture and temperature swings than other rooms, you’ll need to assess both the laminate’s water resistance and the wall assembly before installing.
Choose waterproof or water-resistant rigid-core or vinyl-backed laminate, seal seams and edges, add a breathable moisture barrier, and guarantee proper ventilation.
Avoid direct wet zones and inspect regularly for warping or mold.
Tools, Materials, and Preparation
Before you start, gather the essential tools and materials—saw, level, adhesive or trim, fasteners, underlayment or furring strips, and a moisture barrier.
Inspect the wall for solid studs, sound structure, flatness, and any moisture issues that need fixing.
Then clean and prime the surface, install furring strips or underlayment as needed, and fit a moisture barrier where required.
List of required tools and materials
Although installing laminate on walls looks simple, you’ll need the right tools and materials to get a clean, lasting result.
Gather quality planks, underlayment, and adhesive, then assemble measuring and cutting tools. You’ll also want safety gear and fasteners.
- Laminate planks
- Underlayment/foam
- Construction adhesive or clips
- Tape measure, saw, level
- Safety glasses, gloves
Wall inspection checklist (structure, studs, moisture, flatness)
Now that you’ve gathered your tools and materials, inspect the wall to make sure it can support laminate planks.
Check structural soundness for cracks or sagging, locate studs every 16″ or 24″ with a detector, test moisture with a meter (under 12% ideal), and verify flatness—no more than 1/8″ variance over 4 feet.
Mark problem areas for repair.
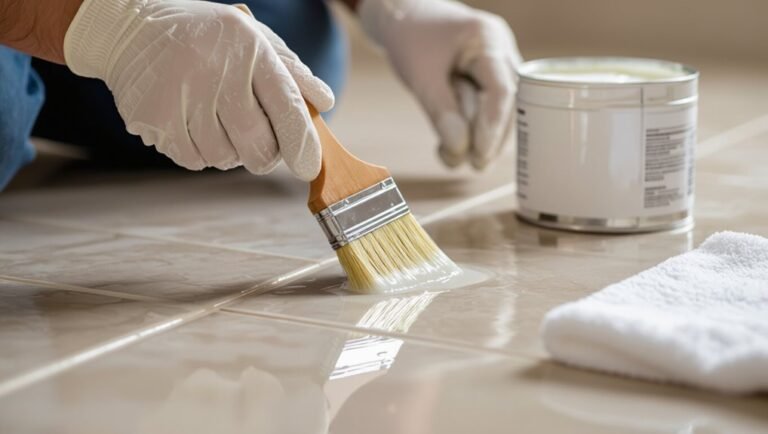
Surface preparation: cleaning, priming, furring strips, moisture barrier
Start by thoroughly preparing the wall so your laminate planks adhere and perform as planned: clean off dust, grease, and loose paint; spot-prime bare or patched areas; install furring strips to create a flat nailable surface where studs are out of plane; and apply a moisture barrier if the wall faces humid spaces or exterior exposure.
Then mark stud locations, level furring, secure with corrosion-resistant screws, and let primer cure.
Step-by-Step Installation Guide
Start by planning your layout and measuring the wall so you know where seams and cuts will fall.
Prepare the wall and mounting substrate, acclimate and organize the laminate planks, then snap a level line and install the first row.
From there you’ll lock panels together, stagger seams, and cut around openings as needed.
Step 1 Planning layout and measuring the wall
Before you cut or click a single plank, lay out your plan and measure the wall precisely so you avoid surprises later.
Take accurate width/height, note outlets, windows, and trim, and plan seams. Consider plank orientation and pattern balance. Use spacers for reveal consistency.
- Measure wall length
- Measure wall height
- Mark obstacles
- Plan seam locations
- Verify plank count
Step 2 Preparing the wall and mounting substrate (furring strips or plywood)
With your layout set and seams planned, you’ll prep the wall so the laminate has a flat, stable surface to attach to.
Remove trim, repair drywall, and verify studs are sound.
Install furring strips vertically or mount 1/4–1/2″ plywood backer screwed into studs for a solid substrate.
Check for plumb, fasten securely, and seal any gaps before installing panels.
Step 3 Acclimating laminate planks and organizing panels
Once you’ve brought the planks into the room, let them acclimate flat and unopened for at least 48 hours so they adjust to the indoor temperature and humidity.
After that, open boxes and sort planks by shade, pattern, and length.
Stage pieces nearest their designated wall, plan joints to stagger seams, and set aside any damaged or mismatched boards before you begin fastening.
Step 4 Installing the first row and maintaining level lines
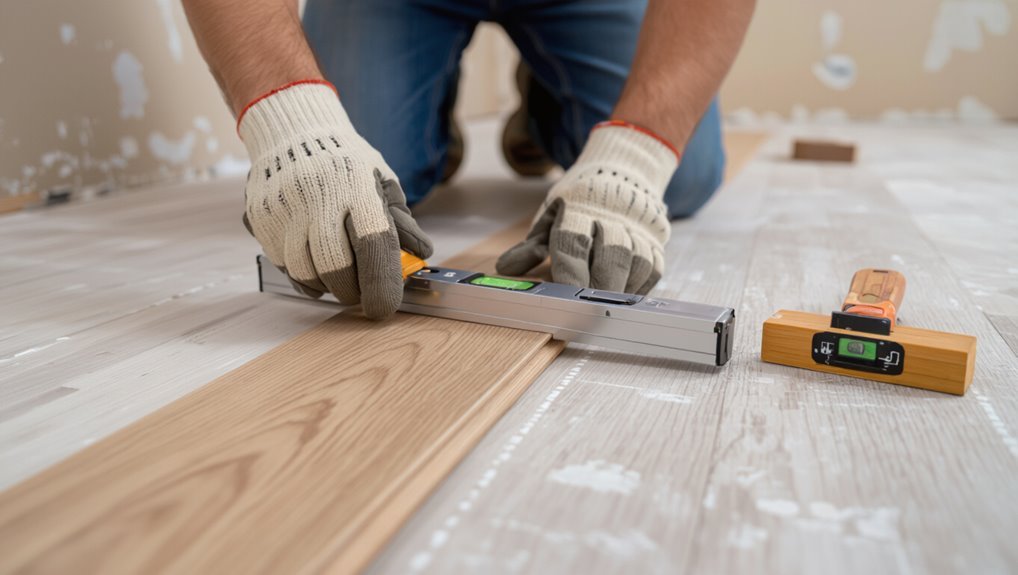
Now that your planks are sorted and staged, pick a starting wall and mark a perfectly level guideline across it—this will keep the first row straight and the rest of the panels aligned.
Fit the first row with tongues facing up, using spacers for a uniform gap at the floor. Check level frequently, shim as needed, and secure the row to the wall.
Step 5 Locking panels, staggering seams, cutting around openings
Start by locking each panel into place along the guideline, angling the tongue into the groove and pressing down until you hear the click.
As you work across the wall, stagger end seams by at least 6–8 inches (or follow the manufacturer’s recommendation) to create a stable, attractive layout.
Measure and cut planks carefully to fit around outlets, windows, and trim—use a jigsaw for irregular openings and a pull bar for tight fits.
Maintain consistent pressure, check alignment frequently, and trim edges precisely so seams remain tight and gaps are avoided.
Step 6 Finishing edges: trim, caulking, transition pieces
Step 6 ties up loose ends: install trim, apply caulk, and fit junction pieces so the wall looks finished and the seams stay sealed.
Measure and cut baseboards or quarter-round to hide expansion gaps, nail or adhesive-mount them.
Run paintable caulk along seams and fastener heads.
Install threshold strips where laminate meets different materials, ensuring tight, even joints for a professional result.
Step 7 Cleaning and final inspection
Before you call the job complete, give the wall a thorough cleaning and a careful final inspection to guarantee every seam, trim piece, and caulk line is tight and neat.
Wipe panels with a mild cleaner, remove dust from grooves, and buff trim.
Check for gaps, loose pieces, or uneven caulk.
Make final adjustments, touch up paint, and confirm everything’s secure and level.
Alternative Installation Methods and Variations
You’ll choose between glue-up, floating, or fastening the planks directly to the substrate based on your wall’s structure and desired permanence.
Decide whether to mount laminate over drywall or add a plywood backer for extra strength and screw-holding.
You can also mix laminate with paint or tile for accents or wainscoting to create a customized look.
Glue-up vs. floating vs. direct nail/screw to substrate
When choosing how to attach laminate planks to a wall, you’ll pick between glue-up, floating, or directly fastening them to the substrate—each method has different strength, permanence, and prep needs. You’ll glue for permanence, float for removability, or nail/screw for max strength. Choose based on wall flatness, substrate, and future removal plans.
| Method | Best for |
|---|---|
| Glue-up | Permanent, smooth walls |
| Floating | Temporary, uneven walls |
Using laminate as cladding over drywall vs. plywood backer
If you want a faster, lighter cladding job, you can install laminate directly over drywall, but for a more durable, stable finish—especially where fasteners or heavy traffic apply—mounting a plywood backer is the better choice.
Drywall installation saves time and weight but limits screw holding and moisture resistance. Plywood provides solid anchoring, flatter substrate, and easier repairs; it costs more and adds labor.
Combining laminate with other wall treatments (paint, tile)
Although laminate makes a bold, low-maintenance focal point on its own, you can blend it with paint or tile to create contrast, define zones, or protect high-wear areas.
Use paint for color fields, tile for splash-prone spots, and laminate for texture.
Plan changes with trim or grout lines, align heights, and guarantee adhesives and sealants suit each material to prevent moisture issues.
Common Problems and How to Avoid Them
You’ll want to watch for warping, buckling, and gaps by allowing proper expansion gaps and using correct fasteners.
Prevent moisture damage with a proper vapor barrier and address any wet spots immediately to avoid molding or delamination.
Check seam alignment and adhesive/fastener bond strength during installation so visible seams and attachment failures don’t ruin the finish.
Warping, buckling, and gaps causes and fixes
When laminate on a wall starts to warp, buckle, or show gaps, it’s usually a sign of moisture, temperature changes, or improper installation. You’ll want to diagnose the root cause before making repairs.
Check fasteners, adhesive, and expansion gaps; resecure loose boards, replace damaged planks, and restore proper spacing.
Address HVAC fluctuations and improve wall insulation to minimize recurrence.
Moisture damage prevention and remediation
Moisture is the most common enemy of wall-mounted laminate, and preventing it starts with spotting risks early and correcting conditions that let water reach the panels.
Seal seams, use moisture-resistant underlayment, keep bathrooms and kitchens well-ventilated, and fix leaks or roof and plumbing issues promptly.
If panels swell, remove affected boards, dry the substrate, treat mold, and replace with dry, acclimated pieces.
Visible seams and pattern misalignment prevention strategies
Because visible seams and misaligned patterns immediately distract from the look you want, plan layout and control tolerances before you install a single panel.
Stagger joints, dry-fit rows, and match grain direction. Use spacers and a straightedge to keep gaps consistent. Trim panels precisely and prioritize full boards at focal areas.
Check frequently from a distance to catch misalignment early.
Adhesion and fastener failures troubleshooting
Once seams and patterns line up, you’ll want to make sure panels actually stay put—adhesion and fastener failures are the most common reasons wall installations fail.
Test adhesive compatibility and cure times, clean surfaces, and use recommended trowel sizes.
Drive screws into studs or backing, pre-drill brittle laminate, and space fasteners per spec.
Recheck bonds after 24–48 hours and fix loose panels immediately.
Best Practices and Maintenance
You should stick to a simple cleaning routine using a soft broom or damp mop and manufacturer-approved cleaners to protect the surface.
If a panel gets damaged, you’ll want to know how to remove and replace sections without harming surrounding boards.
Schedule seasonal checks for gaps, swelling, or loose panels and follow long-term care tips to keep the wall looking new.
Regular cleaning and recommended products
While a wall-mounted laminate is low-maintenance, you should dust and wipe it regularly to prevent grime buildup and preserve the finish. A quick weekly dusting plus monthly gentle cleaning keeps the panels looking new and prevents scratches from trapped grit.
Use a microfiber cloth, mild pH-neutral cleaner diluted per label, and avoid abrasive pads, excessive water, or wax-based products to protect seams and coating.
Repairing damaged panels and replacing sections
Keeping your wall-mounted laminate clean helps prevent many issues, but accidental dings, moisture damage, or settling can still require repairs and panel replacements.
Inspect damage, remove affected boards carefully, and keep matching panels and trim on hand.
Cut out damaged sections, dry the substrate, and fit new panels with proper adhesive or clips.
Seal seams and finish edges for a consistent, durable repair.
Seasonal checks and long-term care tips
Because seasonal shifts and routine wear affect wall-mounted laminate over time, establish a simple inspection and maintenance routine you’ll follow at least twice a year.
Check seams, trim, and fasteners for gaps or movement, test for moisture near bathrooms or windows, tighten loose pieces, clean with a damp cloth and mild cleaner, and touch up scratches or damaged edges promptly to prevent bigger problems.
Cost, Time, and DIY vs Professional Considerations
You’ll want to know the typical cost breakdown—materials, tools, and possible labor—before you start so you can budget accurately.
Expect a DIY wall installation to take a weekend for a small room but plan for less time with a pro, who’ll also bring the right tools and experience.
Consider hiring a professional if you’re short on time, working with tricky walls, or want guaranteed results.
Ask them about their experience, timeline, warranty, and an itemized quote.
Typical cost breakdown (materials, tools, labor)
Budgeting for a wall laminate project means breaking costs into three clear buckets—materials, tools, and labor—so you can decide what to DIY and what to hire out. You’ll pay for planks, underlayment, adhesive; basic tools or rentals; and pro labor if you opt out. Compare quotes and factor waste.
| Item | Low cost | High cost |
|---|---|---|
| Materials | $150 | $800 |
| Tools/Labor | $50 | $1,200 |
Time estimate for DIY vs. pro installation
While a pro crew can usually finish a typical accent wall of laminate in a few hours, tackling the job yourself will add prep, learning, and clean-up time—often stretching a one-day project into a weekend.
Expect pros: 3–6 hours for average walls.
DIY: 8–16 hours across two days for measuring, cutting, adhesive or fastening, trims, and drying.
Add extra time for mistakes.
When to hire a professional and what to ask them
When should you call in a pro? If your wall is uneven, requires structural fixes, or you lack tools/time, hire one.
Expect higher cost but faster, cleaner results. Ask about experience with vertical laminate, licensing, insurance, timeline, detailed estimate, warranty, and cleanup.
Compare quotes and check references. If budget and skill match, DIY; otherwise, let a pro handle it.
Frequently Asked Questions
You probably have a few practical questions before starting, like whether laminate works in bathrooms or humid rooms and if the panels will peel over time.
You’ll also want to know if laminate can be painted or refinished, how to handle outlets and switches, and whether the installation can be removed without damaging the wall.
I’ll answer each of these so you can weigh risks and plan the job confidently.
Can laminate be used in bathrooms or high-humidity rooms?
Can laminate really handle a bathroom’s moisture? You shouldn’t assume standard laminate is suitable; it resists light humidity but swells with prolonged exposure.
Use water-resistant or waterproof laminate designed for wet areas, seal edges, and guarantee excellent ventilation and waterproofing behind panels.
For showers or consistently damp zones, choose truly waterproof materials like tile or PVC panels to avoid damage.
Will laminate on walls peel off over time?
How long it lasts depends on installation quality, adhesive choice, and the wall conditions.
If you prep surfaces, use the right adhesive or click-lock method, and control moisture and temperature, panels should stay put for years.
Poor prep, incompatible glue, or constant dampness can cause lifting or edges to curl.
Inspect periodically and fix loose pieces promptly to prevent wider failure.
Can you paint or refinish laminate wall panels?
Wondering whether laminate wall panels can be refreshed with paint or refinishing? You can repaint or refinish laminated walls, but prep matters: clean, sand lightly where texture allows, and use a high-adhesion primer designed for slick surfaces.
Choose paint formulated for laminate or use bonding primer plus latex or acrylic paint. Test on a scrap piece first to confirm adhesion and appearance before tackling the whole wall.
How do you handle electrical outlets and switches?
When you install laminate on walls, plan outlets and switches before hanging panels so you can cut accurate openings, maintain electrical safety, and keep a neat finish.
Turn power off, remove covers, and use template cutouts for box locations. Fit laminate around boxes, secure jamb extenders if needed, and reinstall devices with proper mounting depth.
Caulk seams and replace trim for a clean look.
Is laminate installation reversible without damaging the wall?
You can usually remove wall-mounted laminate without wrecking the drywall, but the outcome depends on how it was installed.
If you used temporary adhesive, clips, or a floating method, removal is straightforward and leaves minimal residue.
If you glued the panels directly, expect patching and sanding.
Work slowly, pry carefully, and have joint compound and primer ready to restore any damaged spots.