How to Stain Concrete Floors: A Full Walkthrough for Stunning Results
You can turn dull concrete into rich, low‑maintenance floors by choosing the right stain (acid, water‑ or solvent‑based), thoroughly cleaning and etching the slab, repairing cracks, and testing a small patch for porosity and color. Apply stain evenly—work in sections for acid stains and neutralize afterward—then seal with acrylic, epoxy, or polyurethane and maintain with pH‑neutral cleaners. Expect 1–3 year sealer upkeep; keep going to learn step‑by‑step techniques and pro tips.
How to Stain Concrete Floors and What to Expect
You’ll get the best, most durable results by choosing a stain type that matches your concrete’s condition and the look you want.
Staining usually yields translucent, variegated color that enhances texture, while concrete dyes give brighter, uniform tones.
It’s a good choice when you want low-maintenance color on sound concrete, but consider overlays or coatings if the slab is damaged or you need opaque coverage.
One-sentence summary: Best approach and typical results
Although staining concrete takes some prep and patience, the best approach is to thoroughly clean and etch the surface, apply the stain evenly, and seal it so you get a durable, uniform finish that highlights the concrete’s texture and color.
When you ask how do you stain concrete floors, follow those steps, expect rich, lasting color, subtle variations, and improved floor resilience with proper sealing.
When staining concrete is a good idea vs. alternatives
Now that you know the basic steps and typical results of staining concrete, consider when it’s the right choice versus other floor finishes.
Choose staining when you want low-maintenance, durable, and cost-effective color on existing slab, especially for industrial, modern, or high-traffic spaces.
Skip it if you need thick cushioning, soundproofing, extreme waterproofing, or major color/design flexibility—then consider epoxy, tile, or vinyl.
What Is Concrete Staining and Why Choose It
Concrete staining lets you change the look of bare concrete using acid, water-based, or solvent-based stains that each react differently and give varied color effects.
You’ll find staining often wears better and looks more natural than paint or epoxy, while still letting you create mottled, marbled, or patterned finishes.
Consider it for indoor floors, patios, garages, or commercial spaces when you want durable, customizable design without a thick surface coating.
Types of concrete stains (acid stain, water-based, solvent-based)
Whatever finish you want, you’ll choose from three main types of concrete stains: acid-based, water-based, and solvent-based. You’ll pick acid for variegated, natural tones; water-based for consistent color and low odor; solvent-based for deep, durable hues. Match stain to porosity, ventilation, and desired effect to get lasting, appropriate results.
| Type | Key trait |
|---|---|
| Acid | Variegated |
| Water | Consistent |
| Solvent | Durable |
Benefits of staining vs. painting or epoxy
Because staining soaks into the slab instead of sitting on top, it gives you a more natural, longer-lasting finish than paint or surface epoxies.
You’ll get better abrasion resistance, fewer chips or peeling issues, and easier maintenance. Stains won’t hide concrete texture or trap moisture, so breathable, durable results hold color better over time.
Touch-ups blend more seamlessly, too.
Typical applications and design possibilities

Many homeowners and designers choose staining for patios, garages, basements, countertops, and commercial floors because it adapts to nearly any surface and style—whether you want a subtle, variegated tone, a rich mottled look, faux stone or marble effects, or a vibrant, uniform color.
You can accent borders, stenciled patterns, logos, or stained rugs; combine stains with sealers and finishes to control sheen, depth, and durability.
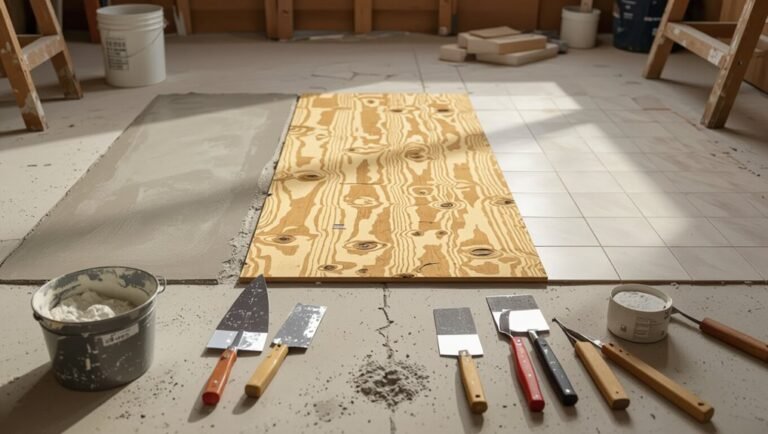
Materials, Tools, and Safety Gear You Need
Before you start staining, you’ll want to gather the right materials—your chosen stain and sealer, cleaners and etchants—to guarantee proper adhesion and color.
You’ll also need the right tools and equipment, like grinders or scarifiers for prep, scrubbers, sprayers and rollers for application.
Finally, make certain ventilation is set up and you’ve got PPE on hand (respirator, eye protection, gloves, and knee pads) to work safely.
Essential materials (stain types, sealers, cleaners)
When you’re ready to stain your concrete, gather the right materials—appropriate stain types, compatible sealers, and cleaners designed for concrete—to guarantee a durable, attractive finish.
- Choose stain: acid, water-based, or penetrating stains for desired tone and permanence.
- Select sealer: solvent or water-based acrylic, polyurethane, or epoxy matched to stain and traffic.
- Use cleaners: degreaser, etcher, and pH-neutral cleaner to prep and maintain the floor.
Tools and equipment (grinders, scrubbers, sprayers, rollers)
Now that you’ve picked your stain, sealer, and cleaners, gather the right tools to apply them properly: concrete grinders and diamond pads for smoothing and profile, rotary scrubbers and pressure washers for cleaning and etching, and sprayers or high-quality rollers for even stain and sealer application.
- Choose grinders sized to job scale.
- Match scrubber pads to coating.
- Use sprayers for large areas, rollers for detail.
Safety and ventilation requirements; PPE checklist
You’ll need proper ventilation and personal protective equipment to protect your lungs, eyes, and skin from dust, fumes, and chemical splashes during grinding, staining, and sealing; guarantee you can introduce fresh air or exhaust contaminated air and have fit-tested respirators, safety goggles, hearing protection, gloves, and protective clothing on hand.
- Respirator (P100 or NIOSH-rated)
- Goggles + ear protection
- Chemical-resistant gloves and coveralls
Preparing Your Concrete Floor Diagnosis and Repairs
Before you stain, inspect the slab for cracks, efflorescence, old coatings, and surface contamination so you know what you’re dealing with.
Test porosity and stain compatibility with a water test and a small sample patch, then plan repairs for cracks, spalls, and uneven spots using the appropriate patching products and methods.
Finally, remove existing coatings, grease, and dust with the right mechanical or chemical cleaners to guarantee the stain bonds evenly.
Inspecting concrete condition: cracks, efflorescence, coatings
Although a clean surface looks promising, you should closely inspect concrete for cracks, efflorescence, and existing coatings so you can diagnose issues that affect stain absorption and adhesion.
Check hairline and wider cracks for movement; note powdery white efflorescence indicating moisture; and identify paints, sealers, or epoxy that block stains.
Document locations, severity, and decide repairs or removal before staining.
Testing porosity and stain compatibility (water test, sample patch)
A quick porosity check tells you how well concrete will accept a stain and whether surface prep needs to be deeper.
Sprinkle water on several spots; puddles that bead mean low porosity, so etch or grind.
Then apply small sample patches of your chosen stain, let them cure, and evaluate color, absorption, and reactions to confirm compatibility before committing to the whole floor.
Repairing cracks, spalls, and uneven areas (products and methods)
Start by evaluating each defect so you can choose the right fix: small hairline cracks, wider fissures, spalls (surface flakes), and low spots all demand different products and methods.
You’ll:
- Use epoxy or polymer crack fillers for structural cracks.
- Patch spalls with cementitious repair mortars, feathering edges.
- Level low spots with self-leveling underlayment, then grind smooth.
Removing existing coatings, contaminants, and dust (mechanical vs chemical)
Before you apply any stain, remove old coatings, grease, and dust so the new finish can bond properly.
Use mechanical methods—grinders, shot blasters, or diamond pads—for durable, uniform profile and to strip coatings quickly.
Reserve chemical strippers for localized spots or stubborn adhesives, neutralize thoroughly, then rinse.
Vacuum and tack-rag to eliminate remaining dust before staining for reliable adhesion.
Step-by-Step Staining Process
Now you’ll follow a clear, step-by-step staining process that starts with deep cleaning and degreasing to remove any contaminants.
Next you’ll etch or profile the surface, apply a primer or conditioner if needed, then mix and test the stain to check color development and neutralization.
Finally, you’ll apply the stain using the proper techniques for acid or water-based products to achieve an even, lasting finish.
Step 1 Deep cleaning and degreasing
Scrub the floor thoroughly to remove dirt, efflorescence, and any grease that would prevent the stain from penetrating evenly.
Use a stiff-bristle brush, a concrete cleaner or degreaser, and hot water; let dwell per product instructions.
Rinse repeatedly until water runs clear and neutralize residues.
Allow the surface to dry fully—moisture or cleaners left behind will interfere with staining.
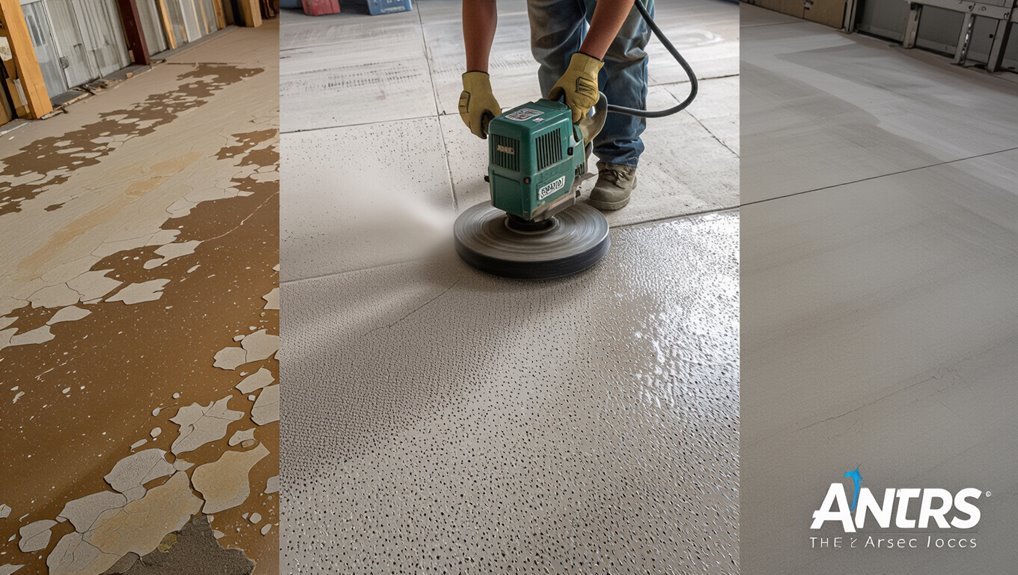
Step 2 Etching or profiling the surface for adhesion
With the floor clean and dry, you’ll need to etch or mechanically profile the concrete so the stain can bond properly.
Choose an acid etch or a diamond grinder based on surface condition; grinders remove sealers and laitance, etches open pores.
Work evenly, keep area damp to control dust, rinse thoroughly, and let the slab dry completely before proceeding to the next step.
Step 3 Applying primer or conditioner if needed
Step 3 is applying a primer or conditioner when the concrete needs extra help bonding with the stain.
Choose a product compatible with your stain type and follow manufacturer directions. Apply evenly with a low-pressure sprayer or roller, avoiding puddles.
Let it cure the recommended time, then inspect for uniform absorption. Proper priming improves adhesion and prevents blotchy, uneven color results.
Step 4 Mixing and testing the stain (color development, neutralization)
Mix the stain exactly as the manufacturer recommends, then test it on a small, inconspicuous patch to confirm color development and any needed neutralization.
Adjust concentration or add neutralizer per instructions if the tone’s off. Record ratios and dwell time for consistency.
Allow full cure on the test area before evaluating final hue and pH, ensuring predictable results across the entire floor.
Step 5 Applying the stain: techniques for acid and water-based stains
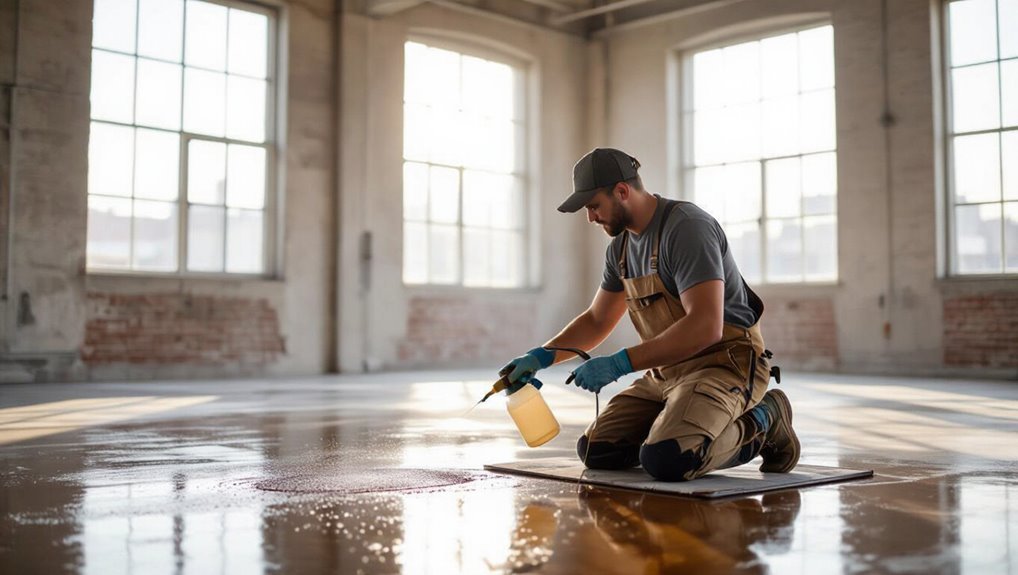
Once you’ve confirmed your test patch, begin applying the stain systematically so you don’t miss spots or create lap marks.
For acid stains, work small areas, mist or brush evenly, let reactive time develop, then neutralize and rinse.
For water-based stains, roll or sprayer-apply in consistent passes, back-roll to even coverage, and allow proper drying between coats before sealing.
Step 6 Creating decorative effects (marbling, mottling, stencils)
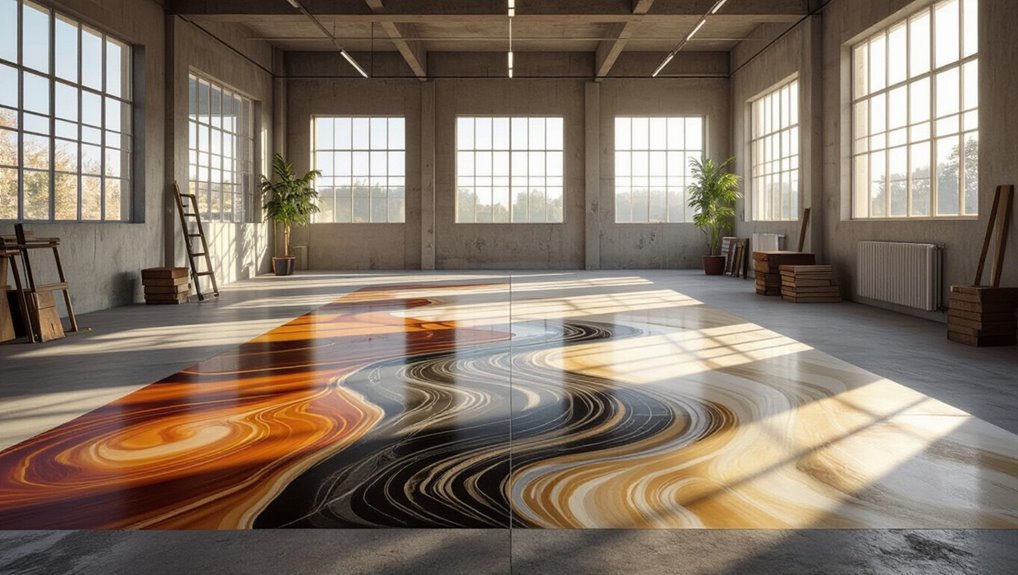
After the base stain is applied and dry, you can create decorative effects like marbling, mottling, or stenciled patterns to give the floor character and depth.
For marbling, dab contrasting stains with sea sponges and soften edges with a damp brush.
For mottling, layer translucent washes.
For stencils, secure templates, spray or roll thin coats, then lift carefully to reveal crisp designs.
Step 7 Neutralizing (for acid stains) and final rinse
Because acid stains chemically etch the concrete as they color it, you’ll need to neutralize the surface before rinsing to stop the reaction and lock in the hue.
Mix a baking soda or ammonia solution per product directions, scrub evenly with a stiff brush, then thoroughly rinse with clean water until pH is neutral and no residue remains.
Repeat if needed.
Step 8 Drying time and curing considerations
With the surface neutralized and rinsed, let the floor dry completely before applying any sealers or returning foot traffic.
Monitor moisture with a meter or tape down plastic sheets for 24–72 hours to check for condensation.
Expect longer curing in cool or humid conditions.
Keep area ventilated and dust-free.
Wait manufacturer-recommended times for stains and concrete to fully cure before normal use.
Step 9 Applying sealer(s): types, coats, and maintenance finish
1. Seal promptly after cure. You’ll choose acrylic, epoxy, or polyurethane based on durability and sheen; apply thin, even coats with a roller, letting each dry fully. Two to three coats are typical. Maintain with gentle cleaners and recoat every few years or as wear shows.
| Sealer | Coats | Maintenance |
|---|---|---|
| Acrylic | 2 | Mild soap |
| Polyurethane | 3 | Recoat 3–5 yrs |
Color Selection, Design Tips, and Visual Effects
Before you pick a color, remember the base concrete tone will change how stains look, so account for undertones and any existing discoloration.
Try layering complementary stain shades, or combining stains with dyes, aggregates, or overlays to build depth and visual interest.
Always test on samples and assemble a color board so you can compare outcomes under your room’s light before committing.
How base concrete color affects final stain outcome
Base concrete color plays a big role in how a stain will look, so you’ll want to assess its tone and undertones before choosing pigments.
Inspect for gray, warm, or cool casts and any existing patches. Lighter bases yield brighter, truer hues; darker or warm bases mute or shift colors.
Test small areas to predict final depth, contrast, and visual warmth.
Choosing colors and layering techniques for depth
When you choose colors for stained concrete, think in layers: start with a mid-tone base, add darker accents for depth, and finish with translucent highlights to create movement and dimension.
Pick complementary hues tied to room lighting and furnishings. Use subtle contrast, limit your palette to three tones, and test samples.
Layer progressively, blending edges for natural shifts and visual richness.
Combining stains with dyes, aggregates, or overlays
If you want richer, more customized concrete floors, combine stains with dyes, decorative aggregates, or thin overlays to expand your palette and texture options.
Mix acid or water-based stains with concentrated dyes for vivid hues, broadcast aggregates for sparkle or grit, and apply microtoppings to create depth or patterns.
Balance colors, test adhesion, and seal appropriately for durable, cohesive results.
Sample testing and creating a color board
Start by making several test patches and a compact color board so you can see how stains, dyes, and finishes will actually look on your floor.
Test under actual light, note drying changes, and compare tones.
Create a simple reference panel with:
- Base stain
- Accent glaze
- Topcoat finish
Use labels and photos so you can reproduce results confidently.
Common Problems, Causes, and Fixes
You’ll run into a few predictable issues—uneven color or blotches, poor adhesion or peeling, and stains that never develop or look washed out.
Check for causes like improper surface prep, moisture or efflorescence, and incompatible products so you can choose the right correction.
Below are practical fixes and prevention steps to get an even, lasting finish.
Uneven color, blotching, or splotches diagnosis and correction
When concrete stain looks patchy or blotchy, you can usually trace the problem to surface contamination, inconsistent porosity, or uneven application.
Diagnosing the root cause lets you choose the right correction—cleaning, profiling, or reapplying—to restore an even finish.
Test small areas: etch or clean to reveal porosity, then use a densifier/acid wash or light grinding.
Reapply thin, even coats and feather edges.
Peeling or poor adhesion causes and remedies
If your stain or sealer is peeling or failing to bond, it’s usually because something’s preventing proper adhesion—contaminants like oil or curing compounds, an overly smooth or dusty surface, moisture vapor drive, or applying product too thick or too soon over a tacky coat.
Fix by aggressive cleaning or degreasing, mechanical profiling (grit blast or diamond grind), testing moisture, allowing full cure, and using compatible primers or thinner coats.
Stain not developing or color too faint troubleshooting
Peeling or poor adhesion often shows you something’s wrong at the surface; the opposite problem is a stain that barely shows up.
If color’s faint, check dilution, insufficient etching, old or incompatible stain, or sealed concrete.
Test on scrap, re-etch if glaze exists, use fresh stain or higher concentration, and follow manufacturer dwell times.
Always neutralize and rinse before reapplying.
Efflorescence, staining from moisture, and mitigation
Because moisture moves through concrete, it often brings dissolved salts to the surface as efflorescence, leaving white, powdery deposits or causing mottled, discolored patches when mineral-laden water evaporates.
You should test for moisture, remove salts with a stiff brush and a mild acid wash, allow full drying, and fix vapor drive with a proper vapor barrier or breathable sealer before staining to prevent recurrence.
Maintenance, Longevity, and When to Refinish
Keep a simple routine—sweep and mop with a pH-neutral cleaner and inspect the finish monthly—to catch wear early.
Learn the signs that you can recoat (worn but intact sealer) versus when you need a full refinish (staining failure, deep etching, or widespread peeling), and use spot repairs to extend the sealer’s life between major work.
With regular care and timely touch-ups you’ll push out the need for a full refinish and keep the floor looking its best.
Routine cleaning and maintenance schedule
A simple, consistent cleaning routine will keep your stained concrete looking its best and extend the life of the finish.
You should:
- Sweep/dust-mop daily and spot-clean spills immediately with mild detergent.
- Wet-mop weekly with pH-neutral cleaner; avoid harsh chemicals.
- Apply a protective sealer maintenance coat every 1–3 years and inspect for wear, then address scratches promptly.
Recoating vs. full refinish: signs and decision guide
After you’ve kept up with regular cleaning and periodic maintenance coats, you’ll eventually face a choice: apply a fresh sealer over the existing finish or strip and refinish the whole floor.
Choose recoating when wear is superficial, adhesion is good, and color is intact.
Opt for full refinish for deep scratches, staining, delamination, or when changing stain color or correcting widespread damage.
Extending sealer life and spot repair techniques
While routine cleaning prevents much damage, you can extend a sealer’s life considerably by minimizing abrasive traffic, using protective pads under furniture, and wiping up spills quickly so chemicals don’t etch or discolor the finish.
Inspect annually for wear, buff and recoat thinly as needed, and spot-sand damaged areas before applying sealer. Use compatible products and test small patches first.
Cost, Timeframe, and When to Hire a Pro
You’ll want a quick cost and time snapshot—typical DIY stains run low hundreds to a couple thousand dollars and usually take a weekend to a few days depending on prep.
Consider hiring a pro if the slab needs repairs, has moisture issues, or you want complex color effects; use that checklist to decide.
When you get quotes, ask about surface prep, warranty, timeline, and what’s included so you can compare apples to apples.
Typical DIY cost breakdown and time estimates
Staining a typical 400–800 sq ft concrete floor yourself can cost anywhere from $1 to $4 per square foot for basic acid or water-based stains and up to $6–$10/sq ft if you include higher-end dyes, decorative overlays, or professional-grade sealers; labor is the biggest variable because DIYers trade cash for time.
| Item | Estimate |
|---|---|
| Materials | $200–$2,000 |
| Time | 1–4 weekends |
| Extras | $50–$600 |
When to hire a professional: complexity checklist
Because complex jobs can quickly eat time and money, know when to call a pro:
If your floor has deep cracks, heavy moisture, uneven slab, or large square footage, hire someone.
Pros save time on surface prep, staining consistency, and sealing. Expect higher upfront cost but faster completion and warranty.
Hire a contractor when the scope exceeds your skills, tools, or schedule.
Questions to ask contractors and comparing quotes
Wondering which contractor gives the best value? Ask focused questions about experience with stains, warranties, and prep methods.
Compare quotes on cost, timeline, and included services. Prioritize clarity and references.
- Request itemized bids and project length.
- Confirm materials, sealers, and cleanup.
- Check insurance, references, and change-order policies before hiring.
Best Practices and Pro Tips for Stunning Results
Before you start, you’ll want a few prep shortcuts—like light etching and small patch tests—that save time without cutting corners.
Plan staining for mild, dry weather and avoid extremes in temperature or humidity that can ruin the finish.
Use the same tools and materials pros trust—pump sprayers, microfiber pads, quality respirators, and manufacturer-recommended stains—to get consistent, stunning results.
Prep and testing shortcuts that don’t sacrifice quality
While you’ll still do the core prep steps—cleaning, etching, and patching—you can save time with a few targeted shortcuts that don’t cut quality:
spot-test etchants on a small area, use an oscillating tool for rapid edge work, and mix patch compounds in small, ready-to-apply batches.
Use disposable applicators, mark tested zones, and keep a moisture meter handy to confirm readiness before staining.
Weather and seasonal considerations for application
Because temperature, humidity, and seasonal patterns directly affect how stains penetrate and cure, plan your concrete staining around predictable weather windows and current forecasts.
Aim for moderate temperatures (50–85°F/10–29°C) and low humidity; avoid staining before rain, freeze, or extreme heat.
Allow longer cure times in cool or damp conditions, and schedule ventilation for indoor projects to speed drying and control fumes.
Tools and materials pros swear by
Once you’ve picked the right weather window and given the slab time to dry, gather the tools and materials that pros rely on to get consistent, lasting results.
You’ll need pH test kits, quality acid or water-based stain, respirator, nitrile gloves, stiff brushes, microfibre pads, a pump sprayer, orbital sander or diamond grinder, densifier, and a breathable sealer.
Use consumables sparingly.
Frequently Asked Questions (FAQ)
You probably have a few quick questions before you start, so let’s cover the essentials.
Learn how long stained concrete lasts, whether you can stain over paint or sealer, and if the surface will be slippery and how to prevent that.
We’ll also explain changing the color later and how soon you can move furniture back onto a newly stained floor.
How long does stained concrete last?
How long will stained concrete keep its color and finish?
It can last decades with proper prep, quality stain, and a durable sealer. Indoor floors typically retain appearance 10–30+ years; outdoor areas face faster fading from UV and wear.
Regular cleaning, occasional resealing, and protecting high-traffic zones extend life. Minor touch-ups refresh appearance without full restaining.
Can you stain painted or sealed concrete?
If your concrete already has paint or a sealer, staining is still possible but requires extra prep.
You’ll need to remove coatings with chemical strippers, grinders, or shot blasting, then rinse and etch to expose bare concrete.
Test a small area to confirm adhesion.
If removal isn’t feasible, consider opaque stains or overlays instead of penetrating stains for durable, attractive results.
Is stained concrete slippery and how to prevent it?
Wondering whether stained concrete gets slippery? It can when smooth or wet, but you can prevent it.
Choose a textured finish, add a non-slip additive to your sealer, or apply a matte sealer with grip.
Keep floors clean and promptly dry spills.
For high-traffic or wet areas, use specialized anti-slip coatings to maintain safety without sacrificing appearance.
Can you change stain color later?
You can change a stained concrete floor later, but the approach depends on the current stain and finish.
If it’s an acid stain, you’ll need to neutralize, etch, or grind before applying a different stain or a topical stain-over.
Water-based stains or dyes can often be layered after light sanding.
Always test a small area, then reseal to lock in the new color and durability.
How soon can furniture be returned to a stained floor?
Most of the time you can move light items back onto a newly stained concrete floor within 24–48 hours, but heavier furniture should wait until the sealer fully cures—typically 72 hours to a week depending on the product and conditions.
Use felt pads under legs, lift instead of dragging, and test a small area before returning heavy pieces.
Humidity and temperature can extend cure time.