How to Clean up Throw up From the Floor Fast and Odor-Free
You can handle vomit fast and without odor: put on gloves, scoop solids into a sealed bag, blot liquids with paper towels, then sprinkle baking soda to absorb smell. Ventilate the room and double-bag waste. Clean the floor with an appropriate cleaner—enzyme product for organic mess—rinse, extract moisture with towels or a wet/dry vacuum, then air dry. Launder any fabrics and use an odor neutralizer if needed; keep going to learn complete step-by-step tips and fixes.
Quick Answer Fast, Odor-Free Cleanup Summary
If you need to act fast, focus on two things: contain the mess and stop the smell within the first 60 seconds.
Grab paper towels or disposable wipes, a sealable bag, and an odor-neutralizing spray or baking soda right away. Those supplies let you remove solids, isolate them, and start neutralizing odors before they set in.
Immediate 60-Second Actions to Contain Mess and Smell
Act fast: block off the area, scoop up solids with a disposable tool, and blot liquids with paper towels so the mess doesn’t spread or stain.
Next, double-bag waste, sprinkle baking soda to neutralize odor, and ventilate the room.
For guidance on how to clean up throw up on the floor later, note contaminated textiles for laundering and avoid rubbing to prevent stains.
Best Immediate Supplies to Grab
When you need a fast, odor-free cleanup, grab these essentials: disposable gloves, sturdy paper towels or disposable cloths, a small dustpan or plastic scoop, sealable plastic bags, baking soda, an enzymatic cleaner (or a mild detergent if unavailable), and a spray bottle of water for blotting.
Use gloves, scoop solids, blot liquids, sprinkle baking soda to absorb odor, then apply enzymatic cleaner and seal waste.
Understanding Vomit Stains and Odor What Makes Cleanup Different
You should know vomit isn’t just messy—it’s a mix of stomach acids, food, and bacteria that can stain and cause strong odors if not handled right.
Different floors react differently: hard surfaces wipe clean more easily, while carpet and rugs trap fluids and smell.
If you skip proper cleaning you risk permanent stains, lingering odor, and bacterial growth.
Composition of Vomit: Stains, Bacteria, and Odor Sources
Because vomit mixes stomach acids, partially digested food, bile, mucus, and saliva, it creates stains, smells, and a bacterial load that all demand different cleanup steps.
You’ll encounter acidic discoloration, oily food residues that trap odors, and microbes that can spread sickness.
Target stains, neutralize acids, break down fats, and disinfect to remove pathogens and persistent smells efficiently.
How Different Floor Types React (hardwood, tile, laminate, vinyl, carpet, rugs)
Stomach acids, fats, and microbes affect floors differently, so you’ll need to change your cleanup approach based on the surface.
On hardwood, blot and use mild cleaner to avoid finish damage.
Tile and vinyl tolerate stronger cleaners and scrubbing.
Laminate needs minimal moisture.
Carpets and rugs require prompt blotting, enzyme cleaners, and possible deep cleaning to lift stains and neutralize odors without overwetting.
Risks of Improper Cleanup (staining, lingering odor, bacterial growth)
When vomit isn’t cleaned up properly, it can leave stains, persistent odors, and a breeding ground for bacteria that keep causing problems long after the mess looks gone.
You’ll risk discoloration on porous surfaces, trapped smells in carpets and grout, and bacterial growth that can cause illness or ongoing odor.
Clean promptly, blot, disinfect, and dry thoroughly to prevent these issues.
Materials and Tools You’ll Need
You’ll want a basic kit—gloves, paper towels or microfiber cloths, a scrub brush, bucket, and appropriate floor cleaner—tailored to your floor type.
For stubborn messes consider optional tools like enzyme cleaners, a steam cleaner, or a wet/dry vac.
Decide whether you’ll use safe DIY solutions (vinegar, baking soda) or a commercial product based on effectiveness and surface compatibility.
Essential Supplies for Every Floor Type
One to three basic kits cover most messes: gather absorbents (paper towels, microfiber cloths), a disposable scoop or spatula, pH-safe cleaners for hard floors, enzyme cleaner for carpets/upholstery, a small bucket, rubber gloves, and plastic bags.
Tailor one kit per floor type, label it, and keep it accessible.
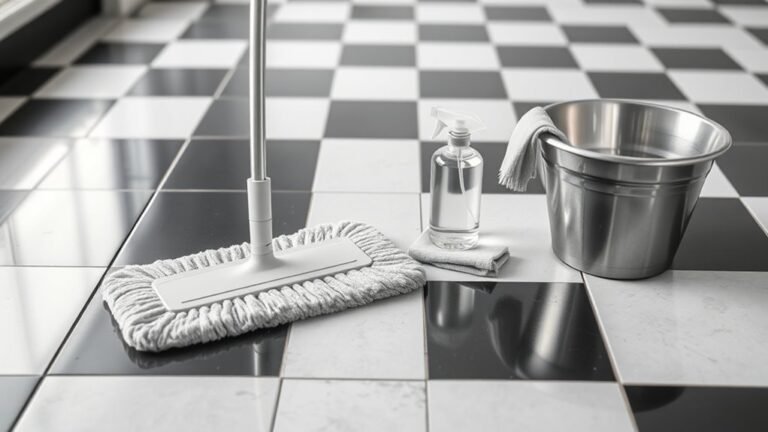
- Hard floors: mop, pH-safe cleaner.
- Carpets: blotters, enzyme spray.
- Vinyl/laminate: gentle mop, sealant-free cleaner.
Optional Tools for Tough Jobs (enzyme cleaners, steam cleaner, wet/dry vac)
If your basic kit doesn’t fully handle stubborn stains or soaked carpets, add a few optional tools that tackle tougher jobs: enzyme cleaners for breaking down organic matter, a steam cleaner for sanitizing and lifting set-in residue on hard floors and upholstery, and a wet/dry vac for extracting liquids and solids from carpets or hard surfaces.
- Enzyme cleaner — targets odors and proteins.
- Steam cleaner — sanitizes without chemicals.
- Wet/dry vac — extracts grime and moisture efficiently.
Safe DIY Cleaning Solutions vs. Commercial Products
While commercial cleaners can save time, DIY solutions often give you control over ingredients and cost—so weigh what matters most for the mess you’re facing. You’ll want gloves, paper towels, mild detergent, baking soda, white vinegar, and enzymatic spot remover for stains. Choose non-toxic DIY mixes for kids and pets; use commercial enzyme cleaners for deep odors.
| Item | Use |
|---|---|
| Gloves | Protection |
| Baking soda | Odor neutralizer |
| Vinegar | Disinfectant |
| Enzyme cleaner | Deep odor removal |
Step-by-Step Fast Cleanup Process (Hard Floors)
Start by cordoning off the spot and protecting nearby surfaces so you don’t spread the mess.
Use a scoop or scraper with gloves to lift solids, then blot liquids with absorbent cloths or paper towels before applying a cleaner formulated for your floor type (I’ll include DIY recipes and product suggestions).
Finish by rinsing, drying thoroughly, and restoring any seal or finish on sealed wood or laminate.
Step 1 Contain and Protect the Area
1. Quickly block off the area so no one steps in it.
Put on gloves and a mask to protect yourself from germs and smells.
Lay down absorbent towels or paper around the spill’s edges to stop spread.
Close nearby doors and move pets or people away.
Open a window or run ventilation to reduce odor while you prepare cleanup supplies.
Step 2 Remove Solids Safely (tools and technique)
Gather the tools—gloves, a dustpan or spatula, disposable bags, paper towels, and an enzymatic cleaner—then approach the spill carefully to avoid smearing.
Use the spatula or dustpan at a shallow angle to lift solids, scraping gently. Deposit waste into a sealed bag, tie it, and dispose.
Wipe remaining residue with paper towels before applying enzymatic cleaner per instructions.
Step 3 Blot and Absorb Liquid Quickly
Act quickly: press paper towels or a clean cloth onto the liquid to soak up as much as you can without spreading it.
Work from the edges toward the center, replacing saturated towels frequently.
For thin films, use a microfiber or absorbent sponge to lift moisture.
Keep pressure steady; don’t rub.
Dispose of used materials in a sealed bag to contain odors and bacteria.
Step 4 Clean with Appropriate Cleaner (recipes and product recommendations)
Choose a cleaner that matches your floor type and the mess: a mild dish soap solution works for sealed wood and most vinyl.
A pH-neutral floor cleaner is best for laminate, and a diluted bleach or disinfectant (follow label directions) can be used on nonporous tile to kill germs.
Mix solutions per label; use microfiber mop or cloth, scrub gently, and change dirty water often to avoid spreading residue.
Step 5 Rinse, Dry, and Restore Finish (for sealed wood/laminate)
Once you’ve cleaned the area, rinse thoroughly with clear water to remove any cleaner residue that can dull or attract dirt.
Wring a microfiber mop or cloth and go over the spot until water runs clear.
Dry immediately with a clean towel or fan to prevent warping.
If finish looks dull, apply a manufacturer-approved polish or restorer sparingly and buff to match surrounding floor.
Step-by-Step Fast Cleanup Process (Carpet and Rugs)
Start by containing the mess and lifting solids off the carpet to prevent them from soaking in.
Then blot up moisture, apply an enzyme cleaner or a safe DIY solution, and extract the liquid before rinsing to neutralize odors.
If stains or smells persist, consider a deep clean with a steam cleaner or call a professional.
Step 1 Immediate Containment and Lifting
1. You’ll act fast: put on gloves, grab paper towels and a dustpan or rigid scraper. Contain the area with towels to stop spread, then scoop up solids gently—lifting rather than smearing.
Transfer waste into a sealed plastic bag. Replace soaked towels with dry ones. Dispose bag immediately and secure lid on any nearby trash can to prevent odors.
Step 2 Blotting Technique to Remove Moisture
Pat the stained area firmly with clean paper towels or a microfiber cloth to soak up as much moisture as you can without rubbing; press down, lift, and repeat with fresh towels until they come away mostly dry.
Then switch to a dry cloth and continue blotting from the outside toward the center, replacing cloths as they dampen, until no more moisture transfers.
Step 3 Apply Enzyme Cleaner or DIY Solution
Choose an enzyme cleaner designed for pet stains or mix a DIY solution (1 tablespoon dish soap + 1 tablespoon white vinegar per 2 cups warm water) and test it on an inconspicuous carpet spot first to avoid color loss.
Apply cleaner liberally to stained area, let enzymes work per label (usually 5–15 minutes), blot gently, and repeat if needed until stain lifts.
Step 4 Extract, Rinse, and Neutralize Odor
Once the stain’s been lifted with enzymes, it’s time to pull out as much moisture and residue as possible before rinsing and deodorizing.
Use a wet/dry vacuum or blot with clean towels, pressing firmly. Rinse the area with cool water, extract again, then apply a neutralizing spray or diluted vinegar solution.
Blot dry and air out until fully odor-free.
Step 5 Deep Cleaning Options (steam clean, professional)
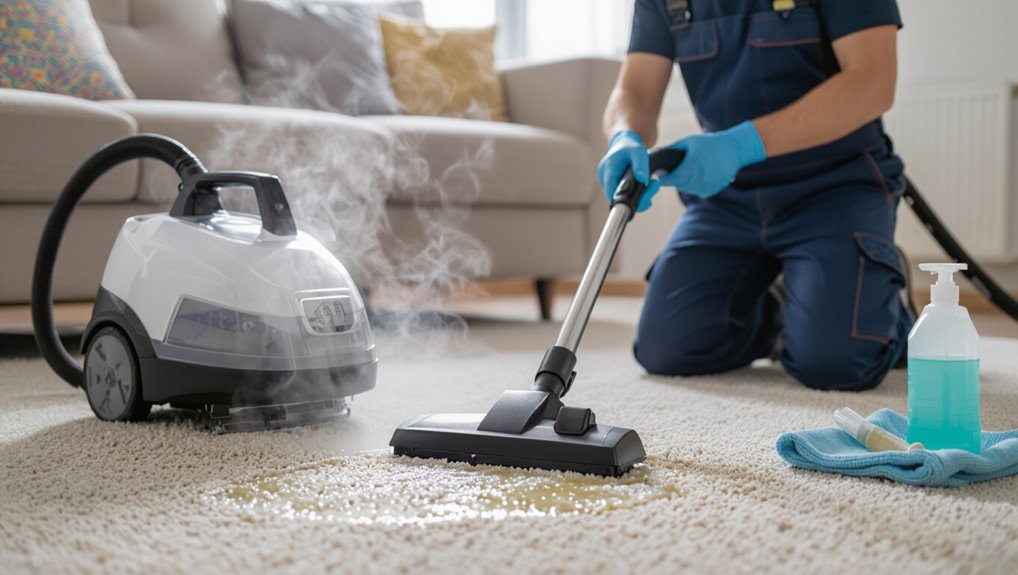
If home methods haven’t removed all traces or the odor still lingers, consider a deep clean with steam extraction or a professional service to thoroughly sanitize and restore the carpet.
You can rent a hot-water extractor or hire pros who use industrial machines and enzymatic cleaners.
Deep cleaning lifts embedded residue, kills bacteria, and removes odors you can’t reach with spot treatments.
Deodorizing Strategies That Work
After you’ve removed the mess, you’ll need the right deodorizing approach: enzyme-based cleaners break down organic odors while odor neutralizers chemically bind and eliminate smells.
You can also use DIY options like baking soda, vinegar, or activated charcoal for mild cases or as follow-up treatments.
Reserve strong odor eliminators for persistent smells and use masking sprays only when you need a quick cover-up, not a fix.
Enzyme-Based Cleaners vs. Odor Neutralizers
While enzyme-based cleaners attack the biological stains and odors at their source, odor neutralizers mask smells or chemically change volatile molecules so they don’t register as unpleasant; knowing the difference helps you choose the right product for vomit cleanup. You’ll use enzymes for deep removal, neutralizers for fast freshening. Choose based on surface and urgency.
| Best for | Action |
|---|---|
| Enzymes | Break down proteins |
| Neutralizers | Alter odor molecules |
DIY Natural Deodorizers (baking soda, vinegar, activated charcoal)
Enzyme cleaners and odor neutralizers work great, but you can also tackle vomit smells with simple, natural deodorizers you probably already have at home.
Sprinkle baking soda over the area, let it sit 15–30 minutes, then vacuum.
Dab diluted white vinegar to neutralize acids, then blot dry.
For persistent odors, place activated charcoal in a bowl nearby to absorb lingering smells.
When to Use Odor Eliminators vs. Masking Sprays
Decide whether to eliminate the odor or just cover it—because the wrong approach can make things worse.
Use odor eliminators (enzymatic cleaners, baking soda, activated charcoal) when vomit soaked into fibers or lingered long—those break down causes.
Use masking sprays only for fresh surface smells or quick cover-ups, but don’t rely on them if staining or bacteria remain; they hide, not remove.
Special Situations and Surfaces
When you’re dealing with upholstery, mattresses, or a car interior you’ll need different tools and cleaners than you use on hard floors.
You should also treat pet and human vomit differently because of odor sources and potential parasites.
For old or dried vomit, rehydrate carefully to lift the residue without spreading stains.
Cleaning Vomit from Upholstery, Mattresses, and Car Interiors
Special surfaces like upholstery, mattresses, and car interiors need a careful, stepwise approach to avoid staining or water damage—start by removing solids, blotting liquids, and working from the outside in to contain the mess.
Sprinkle baking soda to absorb odors, vacuum, then treat with mild detergent or upholstery cleaner.
Rinse sparingly, blot dry, and air out thoroughly to prevent mildew and lingering smells.
Handling Pet vs. Human Vomit Differences
After you’ve tackled upholstery, mattresses, and car interiors, you’ll notice pet and human vomit often need different handling because of odor sources, residue types, and health risks.
For pets, remove fur, use enzyme cleaners to break down proteins, and ventilate to cut odors.
For humans, focus on sanitizing with disinfectant, protect yourself with gloves, and wash contaminated fabrics promptly to prevent bacteria spread.
Old or Dried Vomit: Rehydration and Removal Techniques
Soften dried vomit by gently rehydrating it with a damp cloth or a spray bottle of warm water or a mild enzymatic solution.
Then let it sit a few minutes so the crusted material loosens and lifts without grinding it further into the surface.
Use a plastic scraper, blot upward with paper towels, then clean with enzyme cleaner, rinse, and air-dry; repeat if residue or odor remains.
Common Mistakes and How to Avoid Them
When you clean up throw up, avoid scrubbing—blot gently to prevent spreading and damage.
Don’t grab harsh cleaners for delicate floors, and check for hidden odor sources like soaked padding or baseboards.
If you make a mistake, act fast: re-blot, use a safer cleaner, and treat lingering smells with enzymatic products.
Mistake 1 Scrubbing Instead of Blotting
Though it’s tempting to scrub at puke to get it gone fast, you should blot instead—rubbing spreads the stain, forces vomit deeper into fibers, and can damage delicate fabrics.
Use clean paper towels or a cloth, press gently to lift moisture, replace saturated layers, and repeat until mostly dry.
Finish with a light dab of appropriate cleaner and air-dry to prevent lingering odor.
Mistake 2 Using Wrong Cleaners on Sensitive Floors
If you use the wrong cleaner on wood, laminate, or natural stone, you can strip finishes, etch surfaces, or leave stubborn stains—so pick products made for the specific floor type and follow the label instructions.
Test (cleaners) in an inconspicuous spot first, dilute concentrated solutions, avoid alkaline or acidic agents on sensitive materials, and use microfiber mops to gently lift residue without damaging the finish.
Mistake 3 Ignoring Odor Sources Below Surface
Because foul smells can linger even after the visible mess is gone, don’t assume the job’s done once you’ve wiped up the puke—odors often come from hidden spots like baseboards, padding, grout, or upholstery seams.
Check seams, lift cushions, inspect grout lines and trim. Use enzyme cleaner for porous areas, ventilate, and blot—not rub—so smells don’t soak deeper into fibers or subfloor.
How to Recover If You Made a Cleanup Error
When you realize a cleanup misstep, act quickly to limit stains and smells—hesitation lets vomit penetrate deeper into fabrics and flooring.
Blot fresh spots, reapply enzyme cleaner, and rinse thoroughly. For set stains, repeat treatment or use a steam cleaner.
Replace contaminated padding or carpet if odors persist.
Wear gloves, ventilate the area, and document methods to avoid repeating mistakes.
Prevention and Best Practices
Keep a quick-response kit—gloves, absorbent pads, enzyme cleaner, trash bags—within reach so you can act fast.
Establish simple routine cleaning habits, like regular carpet and upholstery care, to cut down on lingering odors.
If someone gets motion sick often, use preventative meds, motion aids, and seating strategies to reduce incidents.
Quick-Response Kit to Keep on Hand
One compact kit can save you a lot of time and stress after someone vomits, so assemble a small, portable set of essentials you can grab quickly.
Keep it accessible and labeled.
Include:
- Gloves, disposable towels, and a resealable bag.
- Enzyme cleaner spray and paper towels.
- Baking soda, scoop, and airtight container for odor control.
Routine Cleaning Habits to Reduce Odor Buildup
Because odors build up gradually, you’ll stay ahead of smells by establishing a few simple, regular habits: air out rooms after incidents, wipe surfaces with enzyme cleaner, and sprinkle baking soda on fabrics before vacuuming.
Empty trash promptly, launder contaminated textiles in hot water, treat carpets with enzyme spray, and schedule weekly vacuuming and airing to prevent lingering smells.
Tips for Managing Motion-Sick or Sick Household Members
If someone in your household is prone to motion sickness or sudden vomiting, act quickly to reduce discomfort and limit clean-up:
Keep anti-nausea meds, motion bands, and salty crackers on hand; seat them facing forward with fresh air; provide a bowl and damp cloth; limit food until settled; hydrate slowly with small sips; clean spills immediately; launder soiled fabrics and ventilate the area to prevent lingering odors.
When to Call a Professional
If the mess soaks into carpet padding, leaves a lingering odor, or you see stains that won’t come out, you should call a professional restoration service.
They’ll assess damage, explain methods like deep cleaning or pad replacement, and give you a cost estimate before starting.
Expect higher fees for extensive damage or emergency visits, but hiring pros can prevent mold and permanent flooring loss.
Signs You Need Professional Carpet or Floor Restoration
When vomit has soaked deep into your carpet or grout and home remedies aren’t lifting stains or odors, it’s time to evaluate professional restoration.
You’ll save time and prevent lingering damage by calling experts who can assess contamination, structural risk, and the right remediation methods.
Call pros if odors persist after cleaning, padding or subflooring feels damp, stains reappear, or mold and health concerns emerge.
What to Expect from Professional Services (cost, methods)
Once you’ve decided to call in professionals, know what they’ll do and what it’ll likely cost.
They’ll assess damage, extract contaminants, shampoo or sanitize, and deodorize with ozone or enzymatic treatments.
Expect hourly or flat rates: $100–$400 for spot jobs, $300–$1,200 for deep restoration.
Ask for written estimates, guarantees, and post-service care instructions before they start.
FAQ Fast Answers to Common Questions
You’ve got practical questions about smell, stains, and safe cleaners, and we’ll answer them straightaway.
You’ll learn how long untreated vomit odor can stick around, whether bleach or vinegar is safe for different floors, and if enzyme cleaners are pet- and kid-friendly.
We’ll also cover removing brown or yellow vomit stains so you can restore surfaces quickly.
How long does vomit odor usually last if not treated?
A few hours to several days is a typical range for vomit odor to linger if you don’t treat it, though the exact time depends on factors like the surface, temperature, and whether the mess soaked in.
If you leave it, organic material and bacteria keep producing smell; porous floors and warm, humid rooms make odors last longest.
Prompt cleaning cuts duration.
Can I use bleach to disinfect vomit from floors?
If you want to stop vomit odors and kill germs, bleach can work on nonporous floors like tile or sealed linoleum, but you should use it properly and never mix it with other cleaners.
Ventilate the area, wear gloves, dilute household bleach per label directions, apply briefly, then rinse thoroughly.
Don’t use bleach on porous surfaces or near fabrics that can be damaged.
Will vinegar damage my hardwood floors?
Wondering whether vinegar will harm your hardwood floors? You can use diluted white vinegar (one part vinegar to ten parts water) for light cleaning after removing vomit.
However, avoid undiluted vinegar or repeated use—acid can dull finish and damage sealants. Test an inconspicuous spot first.
After cleaning, rinse with plain water and dry thoroughly to protect the wood and finish.
Are enzyme cleaners safe for pets and children?
You can use enzyme cleaners after rinsing up vomit and removing solids, but you’ll want to pick products formulated for homes with pets and kids.
Read labels for non-toxic, biodegradable ingredients and look for vet- or pediatrician-friendly claims.
Keep animals and children away until surfaces dry. Store cleaners securely.
If a pet licks treated areas or shows odd symptoms, contact your veterinarian promptly.
How do I remove vomit stains that turned brown or yellow?
How did that vomit turn into a stubborn brown or yellow stain?
Act fast: scrape dried residue, vacuum any crumbs, then blot with a mix of cold water and mild detergent.
For set-in color, apply hydrogen peroxide (3%) sparingly, let fizz, blot, rinse.
Test first on a hidden spot.
Repeat as needed, then air-dry and deodorize with baking soda.