How to Remove Adhesive Floor Tiles From Concrete Without Damage
You can remove adhesive floor tiles from concrete without damage by evaluating a small area, then using heat, solvents, or careful scraping to soften and lift tiles while protecting the slab. Start by peeling a corner, test a heat gun or adhesive stripper, and work slowly with a wide scraper or floor stripper, keeping tools low angled and clearing debris often. Wear PPE, ventilate, and repair any minor defects; keep going and you’ll find detailed techniques, tool choices, and tips ahead.
Quick Answer Can You Remove Adhesive Floor Tiles from Concrete Without Damage?
You can often remove adhesive tiles from concrete without significant damage if you use the right tools and patience. The job typically takes a few hours to a day depending on tile number and adhesive stubbornness.
If the adhesive is brittle or thin, DIY methods like heat, solvent, and a floor scraper usually work. Call a pro if the glue is epoxy-based, the slab has old sealers, or you’re worried about gouging the concrete.
A pro’s experience and specialized equipment can save time and prevent costly mistakes when conditions are tricky.
Short summary of outcome and time estimate
Yes — in most cases you can remove adhesive floor tiles from concrete without causing damage, but expect some effort and a few hours to a couple of days depending on tile size, adhesive type, and concrete condition.
You’ll learn how to remove adhesive floor tiles from concrete using heat, solvent, scraper, and patience.
Plan for cleanup, repairs, and slower progress on stubborn adhesive.
When to call a pro vs. DIY
If the tiles are small, the adhesive is water-based or familiar, and you’re comfortable with a heat gun, scraper, and elbow grease, you can usually tackle the job yourself and avoid damage by working patiently and testing methods on a small area first.
Call a pro if adhesive is solvent-based, epoxy, extensive, or the concrete’s fragile; pros save time, prevent costly mistakes, and handle disposal.
Basic Understanding What Are Adhesive Floor Tiles and Why They Bond to Concrete
You’ll encounter vinyl and peel-and-stick tiles as well as ceramic tiles set with mastic, each using different adhesives that bond to concrete.
Those adhesives work by seeping into concrete’s pores or gripping its texture, and the type and strength of mastic or glue affects how hard the tile is to remove.
Watch for dark stains, crumbling edges, or powdery concrete under tiles—those are signs the adhesive or removal may damage the slab.
Types of adhesive tiles (vinyl, peel-and-stick, ceramic with mastic)
Adhesive floor tiles come in a few common types—vinyl composition tiles, peel-and-stick vinyl, and ceramic or porcelain set with mastic—and each bonds to concrete for different reasons.
You’ll find VCT is durable and often glued; peel-and-stick has a pressure-sensitive backing you can peel away; ceramic uses mortar or mastic for a rigid, permanent bond.
Removal methods vary by type.
Common adhesives and mastics used on concrete
Because concrete is porous and chemically reactive, several types of adhesives and mastics have been developed to create strong, lasting bonds between floor tiles and slab surfaces.
You’ll encounter pressure-sensitive vinyl adhesives, solvent-based mastics, acrylics, epoxy adhesives, and urethane thinsets.
Each offers different curing times, flexibility, and bond strength, so you’ll choose based on tile type, traffic, and moisture conditions.
How adhesives interact with concrete pores and surface texture
When a tile adhesive meets a concrete slab it doesn’t just sit on the surface — it penetrates and locks into the tiny pores and conforms to the slab’s microscopic roughness, creating both mechanical interlock and chemical bonding.
The amount of penetration and the strength of that bond depend on the adhesive’s viscosity, the concrete’s porosity, and how textured the surface is.
You’ll find low-viscosity adhesives soak deeper, filling pores, while thicker mastics bridge surface peaks, relying more on surface contact and cured adhesion to resist shear.
Signs of potential concrete damage risks
If you pull up tiles and find chunks of concrete stuck to the adhesive or a rough, pitted surface underneath, you’re seeing signs that the bond penetrated the slab and may have pulled away weak or weathered material.
You should also watch for hairline cracks, powdery residue, or uneven areas that suggest delamination, moisture damage, or chemical weakening—conditions needing repair before reinstallation.
Safety, Tools, and Materials Needed
Before you start removing adhesive tiles, you’ll want the right PPE—gloves, eye protection, a respirator, and knee pads—to protect against dust, chemicals, and flying debris.
Gather hand tools like scrapers, chisels, and putty knives plus power tools such as a heat gun, floor scraper, oscillating multi-tool, or grinder for stubborn adhesive.
Have chemical strippers (used with caution), solvents, and surface repair materials and cleaners on hand to finish and restore the floor.
Personal protective equipment (PPE)
For this job you’ll want sturdy PPE that protects your eyes, lungs, hands, and knees: safety goggles, a respirator rated for dust and fumes (N95 or better for dust; a cartridge respirator for solvents), chemical-resistant gloves, and knee pads or a kneeling pad.
Add long sleeves, work pants, and non-slip work boots. Use hearing protection when power tools run, and dispose of contaminated PPE safely.
Hand tools (scrapers, chisels, putty knives)
Grab the right hand tools—scrapers, chisels, and putty knives—to remove adhesive floor tiles efficiently and safely.
Choose stiff-edged scrapers for thin tiles, a cold chisel for stubborn adhesive joints, and narrow putty knives for tight seams.
Keep blades sharp, hold tools at a low angle to protect concrete, and work slowly.
Inspect frequently to avoid gouging the slab.
Power tools (heat gun, floor scraper, oscillating multi-tool, grinder)
Power through tough adhesive with the right power tools and strict safety measures: a heat gun to soften glue, a powered floor scraper for large areas, an oscillating multi-tool for edges and stubborn seams, and a grinder for heavy-duty adhesive or thin-set.
Wear respirator, eye and ear protection, gloves, and knee pads.
Control dust with vacuums and work slowly to avoid concrete damage.
Chemical strippers and solvents (recommended types and cautions)
When mechanical methods don’t fully remove adhesive, chemical strippers and solvents can finish the job—just use them with care.
Choose citrus-based, soy, or low-VOC adhesive removers for safer indoor use; for heavy residues, methyl acetate or commercial adhesive removers may be necessary.
Always ventilate, wear respirator, gloves, and eye protection, test a small area first, and follow manufacturer instructions to avoid concrete damage.
Surface repair materials and cleaners
Prepare the right safety gear, tools, and materials before you start repairing and cleaning the floor so you don’t have to stop mid-job.
Gather patching compound, cement-based skim coat, epoxy or polyurethane primer, and a concrete sealer.
Use a stiff brush, trowel, mixing paddle, and wet vacuum.
Choose pH-neutral cleaner and a mild degreaser; avoid acidic or oil-based products that harm concrete.
Step-by-Step Removal Process
Start by preparing the workspace and protecting nearby surfaces. Then test a small area to see how the tile and adhesive respond.
If tiles lift easily, begin manual removal by prying corners and using scrapers. If they’re stubborn, apply heat with a heat gun or infrared heater and work safely.
For large or resistant areas, switch to mechanical methods like an electric floor scraper or oscillating tool to finish the job.
Step 1 Prepare the workspace and protect surrounding areas
Before you lift a single tile, clear the room and create a safe, organized workspace so cleanup and removal go smoothly.
Remove furniture, secure pets, and ventilate the area. Protect baseboards and nearby surfaces with tape and drop cloths.
Keep tools, garbage bins, and a first-aid kit handy.
- Remove furniture
- Protect surfaces
- Ventilate space
- Organize tools
Step 2 Test a small area to identify tile type and adhesive behavior
Test a small, out-of-the-way section first so you can identify whether the tiles are vinyl, linoleum, or ceramic and how stubborn the adhesive is.
Peel a corner, try gentle scraping, and note residue, crumbling, or gummy glue.
Record what loosens with heat, solvent, or water.
This trial tells you which tools and products to use and prevents surprises across the whole floor.
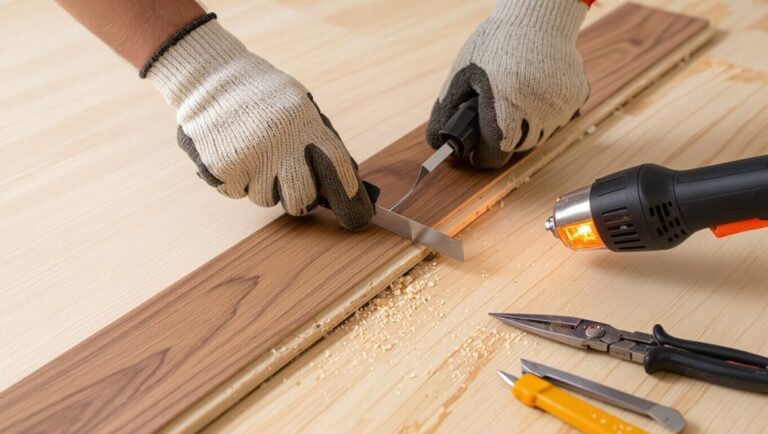
Step 3 Start with manual removal: lifting corners and using scrapers
Work at one tile at a time: pry up a loosened corner with a putty knife or flat bar, then slide a wide scraper beneath the edge and peel the tile away at a low angle to reduce adhesive tearing.
Use steady pressure, working slowly toward the center. For stubborn spots, switch to a floor scraper with a long handle and keep blades sharp to avoid gouging concrete.
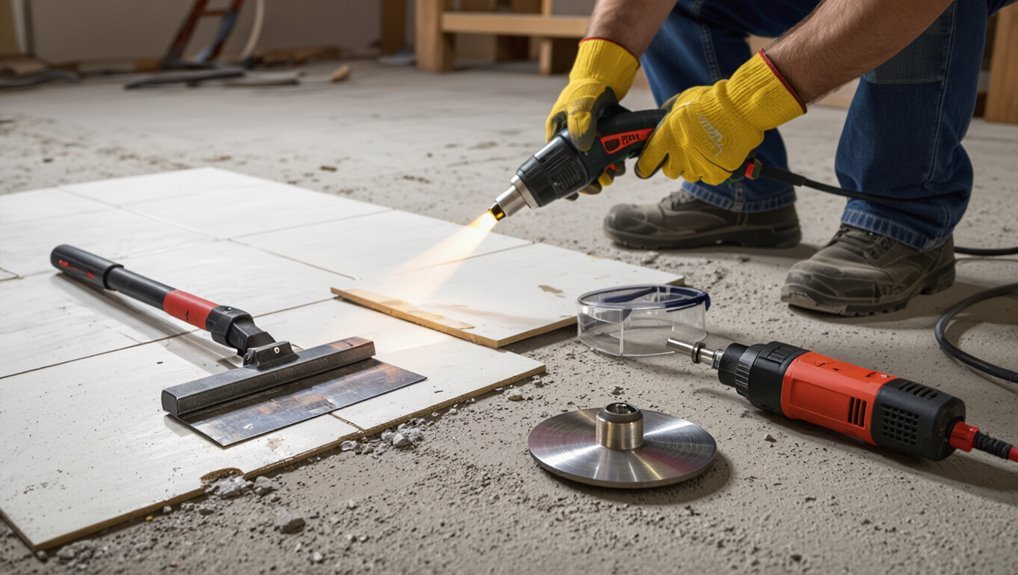
Step 4 Heat-assisted removal: using a heat gun or infrared heater safely
Warm the adhesive with a heat gun or infrared heater to soften it, making tiles lift more cleanly and reducing tearing.
Hold the heat source 6–8 inches away, move steadily to avoid scorching, and test a small area first.
Wear heat-resistant gloves and eye protection, ventilate the room, and pause to let cooled adhesive be scraped away gently until the tile releases.
Step 5 Mechanical removal: electric floor scraper or oscillating tool techniques
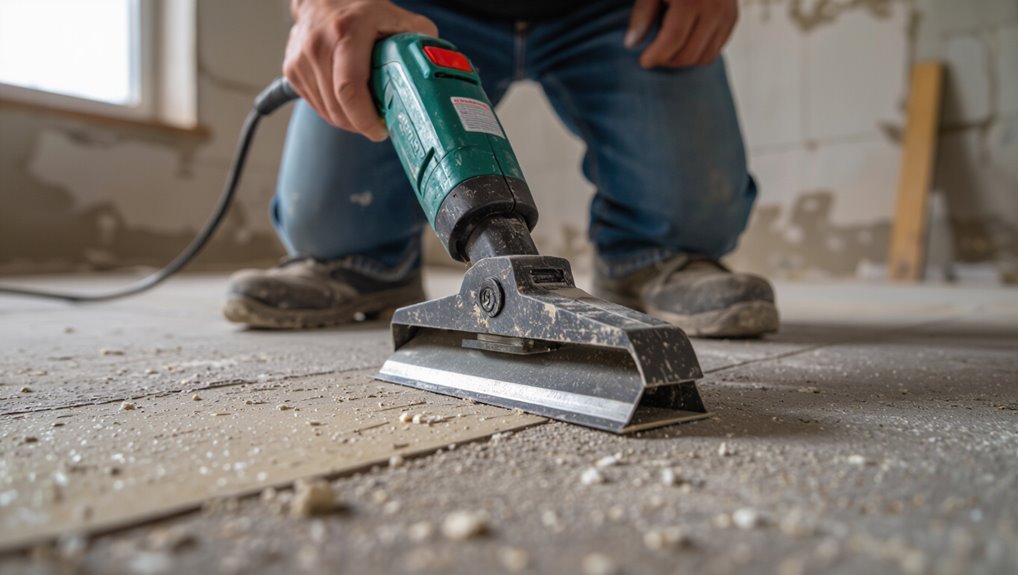
Start by positioning your electric floor scraper or oscillating tool so you have a solid stance and clear path. Then power it on and guide the blade or blade attachment along the grout lines and edges to lift tiles efficiently.
Work slowly, letting the tool do the job; adjust blade angle for leverage, swap to wider blades for adhesive, and stop to clear debris to prevent gouging the concrete.
Step 6 Chemical removal: applying adhesive stripper and dwell times, safe cleanup
Apply a chemical adhesive stripper to soften stubborn glue after you’ve removed the tiles. Then let it dwell the recommended time so the binder breaks down and you can scrape residue away with minimal effort.
Work in small sections, follow label directions, wear gloves/respirator/eye protection, ventilate well, and avoid mixing products.
Neutralize or rinse per instructions, collect waste, and dispose of cleanup materials safely.
Step 7 Removing residual adhesive: grinding, sanding, or using a terrazzo grinder
Move methodically and work in small passes as you tackle the remaining adhesive with a grinder, floor sander, or terrazzo machine.
Use appropriate abrasives, keep the tool moving to avoid gouging, and check progress frequently.
Wear PPE, control dust with a vacuum or shroud, and pause to remove debris.
Finish when adhesive is thin and consistent, ready for final cleaning.
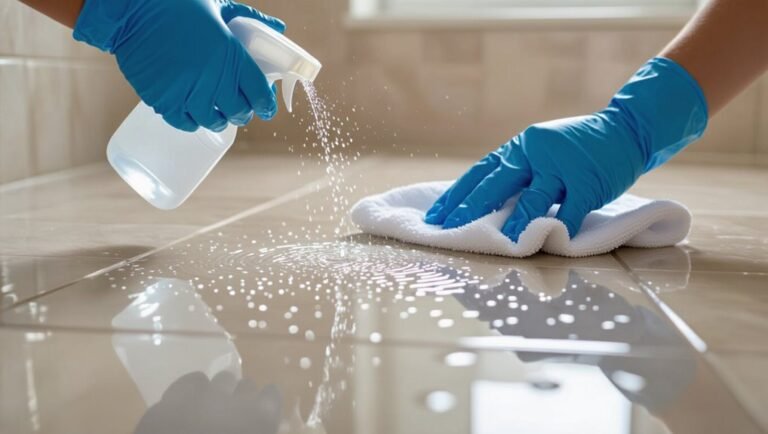
Step 8 Cleaning and neutralizing the concrete surface after removal
Once the adhesive’s been ground down, clean the slab thoroughly and neutralize any remaining residue so your concrete’s ready for whatever finish you’ll install.
Sweep and vacuum grit, then mop with a trisodium phosphate or pH-neutral cleaner per label instructions.
Rinse repeatedly until runoff is clear and pH is balanced.
Allow full drying; use a moisture meter if needed before proceeding.
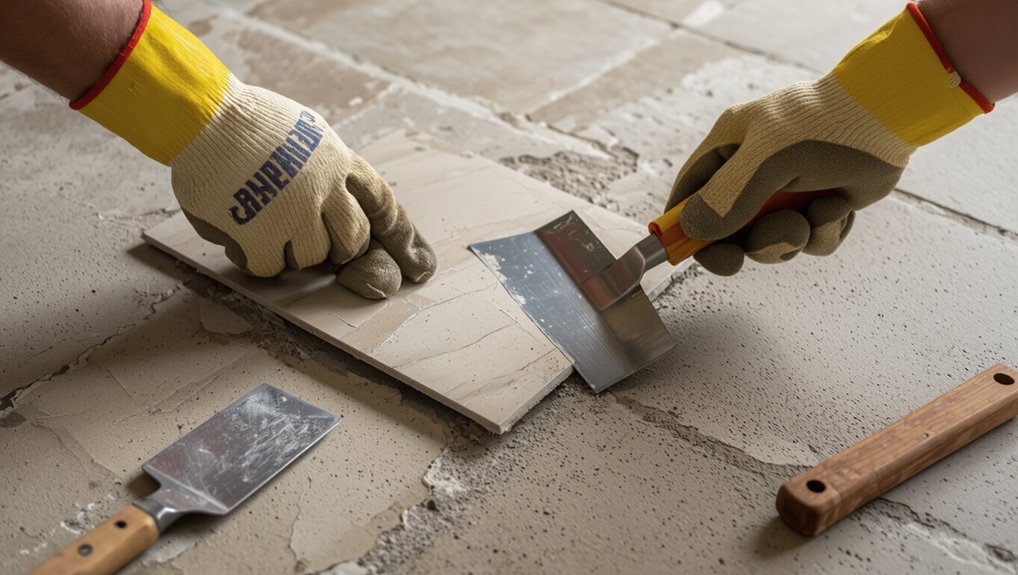
Step 9 Inspecting and repairing concrete imperfections (patching, leveling)
Now that the slab’s clean and dry, inspect it closely for cracks, spalls, low spots, and adhesive remnants that could telegraph through a new floor.
Mark defects, remove loose material, and dust.
Patch small pits with polymer-modified cement; use a concrete repair mortar for larger damage.
Self-leveling compound handles uneven areas.
Follow product cure times, then recheck flatness before installing your new floor.
Decision Guide Choosing the Right Removal Method
You’ll pick the best removal method by weighing tile and adhesive types, the concrete’s condition, your budget, and how quickly you need the job done.
Use heat for heat-sensitive adhesives and small areas, chemicals for stubborn glue on intact slabs, and mechanical grinding or a pro when adhesive is thick, the concrete’s damaged, or you need speed.
Match the method to the specific limits and risks to avoid extra work or repairs.
Factors to consider: tile type, adhesive type, concrete condition, budget, time
Because the best removal method depends on several interrelated factors, you should evaluate tile type, adhesive type, concrete condition, budget, and time before picking a approach. Assess hardness, adhesion strength, and concrete porosity. Match tools and products to limits and cost. Prioritize preserving concrete if needed, and factor in labor time versus expense.
| Tile | Adhesive | Concern |
|---|---|---|
| Ceramic | Mastic | Porosity |
| Vinyl | Epoxy | Damage risk |
When heat is best vs. when chemicals are better
When deciding between heat and chemical removers, weigh tile and adhesive types against safety, speed, and substrate risk: heat works best on heat-softening adhesives like vinyl or old mastic and gives you quick control with a scraper, while chemicals suit stubborn epoxies or porous concrete where excessive heat could damage the slab or release harmful fumes.
Choose heat for fast, localized softening; pick solvents when adhesive resists or heat is unsafe.
When to use mechanical grinding or hire a pro
If heat or chemicals won’t budge the adhesive—or if the floor has heavy, cementitious mastic or epoxy—you should consider mechanical grinding or hiring a pro.
You’ll weigh factors: scope, tool access, dust control, project timeline, and your skill level.
Rent grinders only if experienced and equipped with HEPA vacuums and PPE; otherwise hire a contractor to avoid substrate damage and health risks.
Common Problems and How to Avoid or Fix Them
You’ll run into a few common problems—gouged or chipped subfloors, stubborn adhesive residue, dust and VOC hazards, and hidden moisture or vapor-barrier issues—and knowing how to prevent or fix each will save time and cost.
Use gentle scraping and patching techniques to protect the surface, escalate to solvents or mechanical grinders only when necessary for residue, and contain dust with barriers and HEPA filtration while using low-VOC products.
After tiles are up, always check for and address moisture or vapor-barrier damage before installing new flooring.
Problem Surface gouging or chipping: prevention and repair
Though adhesive removal is often straightforward, scraping too aggressively can gouge or chip your subfloor and leave repairs to fix later.
To prevent damage, use plastic scrapers, score cautiously, and work slowly with a heat gun or solvent.
If chips occur, clean debris, fill with concrete patch or epoxy, sand smooth, and reseal the area before refinishing to restore strength and appearance.
Problem Adhesive residue that won’t come off: escalation steps
When stubborn adhesive won’t budge, don’t escalate with brute force—work through a clear, stepped approach that protects the subfloor and saves time.
Scrape gently with a plastic or floor-safe scraper, apply a recommended solvent or adhesive remover per instructions, let it dwell, then re-scrape.
For persistent spots, use a low-grit sanding pad or rotary tool at low speed, testing first to avoid damage.
Problem Dust, mess, and VOC hazards: containment and mitigation
If you’re removing adhesive floor tiles, expect dust, debris, and solvent fumes—and plan containment before you start.
Seal doorways with plastic, turn off HVAC, and use a box fan exhausting outdoors.
Wear an N95 or respirator for solvents, eye protection, and gloves.
Use wet methods or HEPA-filtered vacuums to reduce airborne particles, and dispose of contaminated rags in sealed bags.
Problem Hidden moisture or vapor barrier issues after removal
Because adhesive tiles can mask dampness and failed vapor barriers, removing them often reveals moisture issues that can rot subfloors or drive mold growth if you don’t address them promptly.
Inspect concrete for efflorescence, damp spots, or a musty smell.
Test moisture levels, fix leaks, repair or install a proper vapor barrier, and allow thorough drying before installing new flooring to prevent recurrence.
Best Practices and Prevention for Future Flooring
Before you install new flooring, test and prep the concrete—check for moisture, level as needed, and apply the right primer.
Choose adhesives and installation methods rated for your floor type and substrate to minimize future removal damage.
Finally, follow manufacturer-recommended maintenance and simple care routines to extend the life of your new floor.
Preparing concrete for new flooring (moisture testing, leveling, primers)
When you’re replacing adhesive floor tiles, preparing the concrete is essential to guarantee your new flooring lasts.
Test moisture with a reliable meter or ASTM-compliant method; high readings require mitigation.
Repair and level cracks or low spots with appropriate cementitious patch.
Clean and roughen surface, then apply a compatible primer or sealer recommended for your new flooring to promote adhesion and prevent future failures.
Recommended adhesives and installation methods to avoid future removal damage
If you want your next floor to come up cleanly years from now, choose adhesives and installation methods that balance strong bond with removability.
Use pressure-sensitive or releasable urethane adhesives for tiles, apply consistent trowel patterns, and avoid full-spread permanent mastics.
Consider peel-and-stick with proper primers on porous concrete, follow manufacturer coverage rates, and install control joints to limit adhesive stress during removal.
Maintenance tips to prolong new floor life
Choosing the right adhesives and installation methods sets you up for easier removal later, but regular care is what keeps a new floor looking and performing its best over years.
Clean spills promptly, use pH-neutral cleaners, and avoid harsh chemicals.
Place protective pads under furniture, use entrance mats to trap grit, and schedule periodic inspections and maintenance to catch wear early and prevent lasting damage.
Tools, Costs, and Time Estimates
You’ll want a basic DIY kit—scraper, heat gun, adhesive remover, knee pads, and optionally a floor stripper or oscillating tool that you can rent if you don’t want to buy.
For time, plan a few hours for small rooms, a day for medium rooms, and one to several days for large or stubborn jobs depending on adhesive and subfloor condition.
Costs vary widely: DIY supplies and rentals often run $50–$400, while hiring pros typically starts around $2–$5 per square foot (or more for difficult removals).
Typical DIY tool list with rental vs. purchase guidance
A compact set of tools will cover most adhesive tile removal jobs, and deciding whether to rent or buy depends on how often you’ll need specialized gear. You’ll want a scraper, heat gun, floor grinder, pry bar, and safety kit—rent grinders for one-offs, buy hand tools if you’ll reuse them.
| Tool | Rent or Buy |
|---|---|
| Scraper | Buy |
| Floor grinder | Rent |
| Heat gun | Buy |
| Pry bar | Buy |
| Safety kit | Buy |
Estimated labor time for small, medium, and large rooms
Estimate labor time by room size to plan tools, costs, and scheduling:
Small rooms (up to ~100 sq ft) often take 2–6 hours.
Medium rooms (100–300 sq ft) typically need a full day (6–10 hours).
Large areas (300+ sq ft) can require 1–3 days depending on adhesive stubbornness and floor condition.
Factor in prep, cleanup, breaks, and unexpected repairs when scheduling and staffing.
Ballpark cost ranges for DIY vs. professional removal
Whether you tackle adhesive tile removal yourself or hire pros, costs vary widely based on room size, adhesive type, and required tools or repairs.
DIY typically runs $20–$150 in materials for small rooms (mostly scrapers, solvents, and rental tools), while professional removal usually costs $2–6 per sq ft for straightforward jobs and $5–12+ per sq ft when adhesive is stubborn or subfloor repairs are needed.
You should budget time, disposal fees, and contingency for hidden damage.
FAQs
You’ll likely have a few common questions as you plan removal, like whether you can skip a heat gun or chemicals and if adhesive cleanup will harm sealed or stained concrete.
You’ll also want clear guidance on disposing of tile and adhesive waste, whether new flooring can go over any leftover adhesive, and how to tell if the slab needs resurfacing.
Below are concise answers to help you decide the safest, most effective next steps.
Can I remove tiles without a heat gun or chemicals?
Want to skip the heat gun and chemicals? Yes — you can.
Use a floor scraper, putty knife, or oscillating multi-tool to pry tiles, working gently to avoid gouging concrete. Soften stubborn adhesive with hot water and dish soap, steam, or a hairdryer.
Take breaks, lift adhesive residue with a stiff brush and adhesive remover alternatives like citrus oil if needed, then clean thoroughly.
Will adhesive removal damage sealed or stained concrete?
Will removing adhesive harm sealed or stained concrete? You can avoid damage by testing a small area first and using gentle methods: soft scrapers, plastic pads, low-strength adhesive removers, and mild mechanical abrasion.
Avoid harsh solvents, aggressive grinders, or excessive heat that can strip sealers or alter stain color.
Reseal after cleaning to restore protection and uniform appearance.
How do I dispose of adhesive and tile waste safely?
How should you handle leftover adhesive and tile debris so it’s safe and compliant?
Collect fragments and scrape excess adhesive into heavy-duty bags. Seal and label bags if adhesive contains solvents.
Check local hazardous-waste rules; some adhesives need special disposal.
Recycle ceramic tiles at construction recycling centers or reuse intact pieces.
Wear gloves and mask when handling waste, and transport materials per local regulations.
Can I install new flooring directly over residual adhesive?
Can you install new flooring over leftover adhesive? You can in some cases, but it depends on the adhesive type, thickness, and the new flooring’s requirements.
Thin, well-bonded residue may be acceptable for some floating floors or engineered planks.
Always clean, level, and test adhesion; use a compatible primer or underlayment when manufacturer guidelines demand it to guarantee warranty and performance.
How to tell if concrete needs resurfacing after removal?
Because old adhesive removal can leave the slab uneven or damaged, you’ll want to inspect the concrete carefully to decide if resurfacing is necessary.
Check for deep gouges, spalling, crumbling edges, large cracks, significant height variations, or persistent adhesive stains that won’t grind out.
Use a straightedge and level; if repairs exceed minor patching, plan for a resurfacer or overlay to restore a sound, smooth surface.