How to Finish Concrete Floors: Options, Costs, and Results
You can transform a bare slab into a durable, attractive floor by choosing from sealed, painted, stained, polished, epoxy, or overlay finishes based on budget, traffic, and moisture. DIY options cost $1–8/ft² while pro work runs higher; epoxy suits garages, polished or stained fit decorative spaces, and heavy-duty coatings work for commercial areas. Prep—cleaning, grinding, patching, and moisture testing—matters most. Keep going to learn specific steps, costs, and maintenance tips.
Quick Answer Best Ways to Finish Concrete Floors
You’ve got several strong options—sealed, painted, epoxy, polished, and stained—each with typical cost ranges from budget-friendly (paint/seal) to higher-end (polish/epoxy).
For a quick pick: use epoxy or sealers for garages, durable paint or sealers for basements, heavy-duty epoxy or commercial coatings for high-traffic businesses, and stain or polish for decorative spaces.
Choose based on budget, durability needs, and the look you want.
Summary of Top Options and Typical Costs
When you’re choosing a finish for concrete floors, the main contenders—stain, paint/epoxy, polish, and overlays—cover most looks and budgets, with typical costs ranging from $1–$8 per sq ft for basic paints and stains up to $3–$12 for slab polishing and $4–$15+ for high-end epoxy or decorative overlays installed by pros. Learn how do you finish concrete floors.
| Option | Cost |
|---|---|
| Paint/Stain | $1–$8 |
| Polish | $3–$12 |
| Epoxy/Overlay | $4–$15+ |
Fast Recommendation Based on Use Case (garage, basement, commercial, decorative)
Now that you’ve seen the main finish options and typical costs, pick the best approach by matching durability, budget, and appearance to the space.
For garages choose epoxy or polyaspartic for chemical resistance and easy cleaning.
For basements use sealed or stained concrete with moisture mitigation.
For commercial use heavy-duty epoxy or polished concrete.
For decorative spaces pick polished, stained, or microtopping for aesthetics.
Basic Understanding What “Finishing” Concrete Floors Means
Finishing concrete means choosing surface treatments and techniques to boost durability, appearance, moisture control, and safety.
You’ll decide whether to finish right after pouring or retrofit an existing slab based on condition and timing.
Consider location, expected traffic, budget, moisture levels, and the substrate when selecting a finish.
Definition and Goals (durability, appearance, moisture control, safety)
Quality matters: finishing a concrete floor means more than smoothing the surface — it’s the set of actions you take to shape the slab’s durability, appearance, moisture performance, and safety.
You choose mixes, trowel techniques, sealers, and coatings to resist wear, control vapor and stains, improve traction, and create the look you want.
Proper finishing extends life and reduces maintenance.
When to Finish New vs. Existing Concrete
Understanding what you want from the slab—durability, appearance, moisture control, safety—helps decide when to act on new versus existing concrete.
If you’re pouring a new slab, you can integrate finishes, reinforcement, and curing practices from the start for best results.
With existing concrete, you’ll assess surface condition, repairs, and compatibility before selecting overlays or coatings to avoid wasted effort and guarantee longevity.
Key Factors That Influence Choice (location, traffic, budget, moisture, substrate)
When you decide how to treat a concrete floor, weigh five practical factors—location, expected traffic, budget, moisture conditions, and the existing substrate—because each one steers the choice of sealers, coatings, or overlays.
Consider indoor vs. outdoor exposure, foot or vehicle loads, cost versus longevity, vapor drive or dampness, and cracks or contamination; match solutions to those constraints for durable, safe results.
Overview of Finish Options and Expected Results
Now that you know what “finishing” means, let’s look at common finish choices and what they’ll give you.
Pick from options that range from simple protection to dramatic transformation:
- Bare and sealed vs. stained (acid or water-based)
- Polished (different grind levels and sheens)
- Coatings, overlays, and toppings (epoxy/polyaspartic thicknesses, microtopping/skim coat)
Bare and Sealed Concrete (penetrating sealers, topical sealers)
Several straightforward options let you keep concrete looking natural while protecting it: you can leave it bare and rely on penetrating sealers that soak in and repel moisture, or apply topical sealers that sit on the surface for higher sheen and easier cleanup.
Penetrating sealers maintain texture and breathability; topicals boost color depth, wear resistance, and make maintenance simpler, but may need recoating.
Stained Concrete (acid stain vs. water-based stain)
If you want rich, permanent color that works with concrete’s natural texture, stained concrete gives you two main paths:
Acid stains, which chemically react with the slab to create variegated, earthy tones, and water‑based stains, which use pigments for a wider, more consistent color palette and better UV stability.
You choose acid for mottled, antique looks; pick water‑based for predictable, vibrant hues and easier layering.
Polished Concrete (grind levels, sheen options)
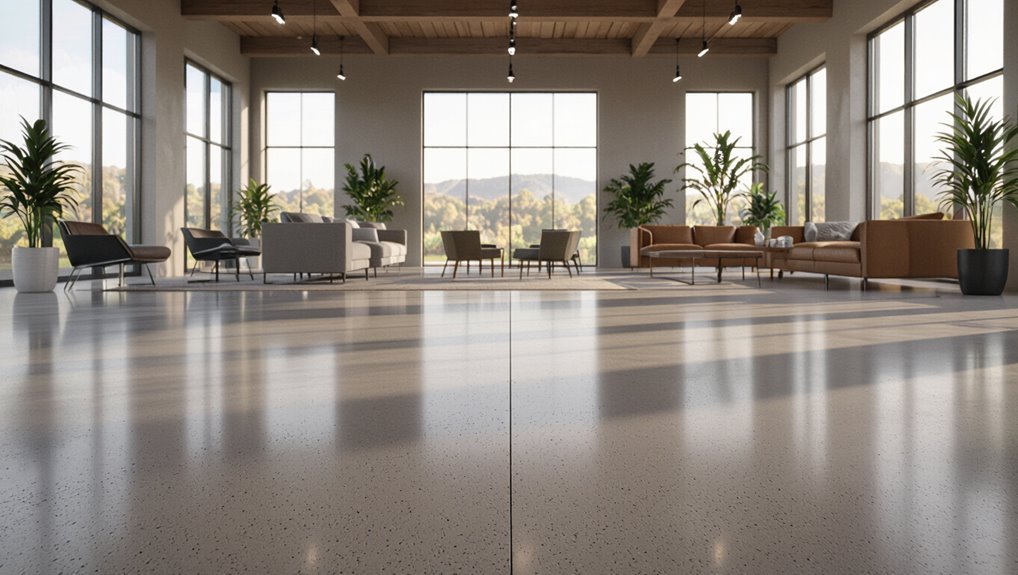
Polished concrete transforms a raw slab into a smooth, durable surface by progressively grinding and honing the top layer to varying grind levels and sheens.
You’ll pick a grind level for surface texture and durability (from light honing to full aggregate exposure) and a sheen for gloss and reflectivity (matte, satin, or high-gloss) to match aesthetics and maintenance needs.
You’ll also consider stain compatibility, slip resistance, and expected traffic.
Epoxy Coatings and Polyaspartic Systems (thickness, layers)
Think of epoxy and polyaspartic coatings as engineered armor for your concrete: they build a protective, decorative layer that’s measured in mils rather than microns and applied in distinct primer, body, and topcoat layers.
You’ll choose thickness by use—2–10+ mils for sealers, 10–30 mils for functional floors, 30–100+ mils for heavy duty—and layer curing times vary by product.
Concrete Overlays and Toppings (microtopping, skim coat)
When you want a fresh, uniform surface without removing much concrete, overlays and toppings give you a thin, workable layer—ranging from featherlight microtoppings to thicker skim coats—that bonds to the slab and lets you control texture, color, and wear characteristics.
You can smooth minor imperfections, add slip-resistant texture, or prep for sealer; expect thinner coatings, modest durability, and simpler repairs compared with full resurfacing.
Stamped and Colored Overlays (decorative concrete resurfacing)
If you want decorative results without pouring new concrete, stamped and colored overlays let you transform a slab into patterns that mimic stone, brick, or tile while adding durable color and texture.
You apply a thin cementitious overlay, press stamps or trowel textures, then stain or integral color and seal.
Results resist wear, cover blemishes, and offer many style choices.
Tile, Carpet, Hardwood over Concrete (covering options and subfloor prep)
Stamped and colored overlays give you decorative results right on the slab, but sometimes you’ll want a completely different surface—tile, carpet, or hardwood—each offering distinct looks, feels, and performance.
You’ll prep concrete by leveling, drying, and sealing or installing a moisture barrier. Tile needs thinset and grout; carpet requires padding and tack strips; engineered hardwood often uses underlayment or floating installation.
Cost Breakdown Materials, Labor, and Lifespan
You’ll want to weigh up upfront costs, ongoing maintenance, and how long each finish will realistically last. Below is a quick comparison to guide decisions on DIY versus pro work, typical maintenance cycles, and hidden expenses to budget for.
| Finish Type | DIY vs Pro Cost Range | Typical Lifespan / Maintenance |
|---|---|---|
| Polished / Sealed | DIY: $2–6/sqft · Pro: $4–12/sqft | 5–25 years; occasional reseal/polish |
| Epoxy / Coating | DIY: $1.50–4/sqft · Pro: $3–8/sqft | 3–10 years; touch-ups and recoats |
| Stain / Overlay | DIY: $1–5/sqft · Pro: $3–10+/sqft | 5–15 years; repair overlays, address moisture |
Don’t forget hidden costs like moisture mitigation, leveling, and unexpected repairs when you’re budgeting.
Typical Cost Ranges by Finish Type (DIY vs. professional)
Costs for finishing concrete vary widely based on the finish type and whether you tackle the job yourself or hire pros; expect DIY approaches to save labor but require more time and potentially pricier tools, while professionals charge more upfront for speed, skill, and guarantees.
Sealed broom finish: DIY $1–3/ft², pro $3–6.
Polished: DIY $3–6, pro $4–12.
Stain/epoxy: DIY $2–5, pro $4–10.
Long-term Value: Maintenance and Replacement Intervals
Those price ranges give you a snapshot of upfront spending, but long-term value depends on maintenance needs and replacement intervals for each finish.
You’ll weigh material durability, expected labor for upkeep, and lifespan—polished concrete lasts decades with periodic resealing, epoxy needs more frequent recoatings, and stained concrete sits between.
Factor routine cleaning and occasional professional maintenance into total cost-per-year to compare options.
Hidden Costs to Budget For (moisture mitigation, repairs, leveling)
When planning a concrete floor project, don’t forget the hidden expenses—moisture mitigation, patching, and slab leveling can add up quickly.
You’ll budget for vapor barriers, epoxy primers, and patch compounds plus skilled labor for testing and repairs.
Expect moisture control to extend lifespan; repairs and leveling reduce finish failures.
Factor material, technician rates, and potential rework into your upfront cost estimate.
Step-by-Step Guide How to Finish a Concrete Floor (Process Flow)
Before you start, assess the slab for flatness, cracks, and moisture so you know what repairs and tests are required.
Then prepare the surface by cleaning, shotblasting or grinding, and patching. Address any moisture with mitigation or a vapor barrier, and choose the finish you’ll apply.
Finally, follow the specific application steps for your finish and respect curing, drying times, and recoat windows.
Step 1 Assess and Test the Existing Slab (flatness, cracks, moisture testing)
Because the condition of the existing slab determines nearly every next step, you should thoroughly assess flatness, locate cracks, and test for moisture before doing anything else.
Inspect visually and with tools, record findings, then decide repairs or mitigation.
Check:
- Flatness: straightedge or laser level measurement
- Cracks: map size, depth, movement
- Moisture: RH or calcium chloride tests
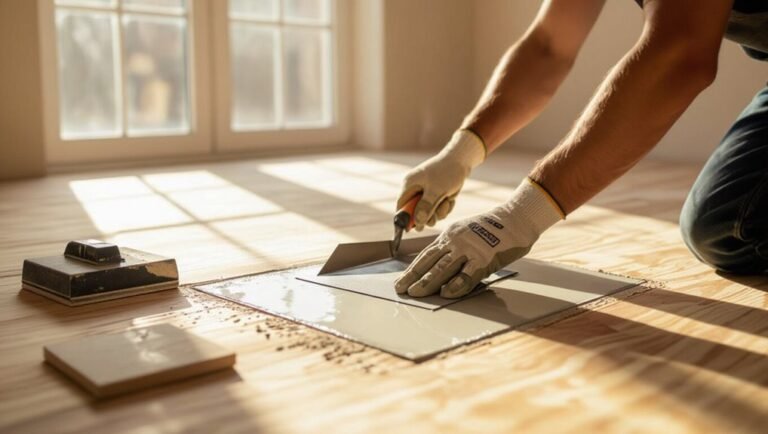
Step 2 Prepare the Surface (cleaning, shotblasting/grinding, patching)
Step 2 gets the slab ready for new finishes: clean it thoroughly, profile the surface with shotblasting or grinding, and patch any defects so coatings or overlays will bond and perform as planned.
You’ll remove dirt, oils, and laitance, abrade to expose aggregate or create a keyed profile, and fill cracks, spalls, and low spots with compatible patching compounds before proceeding.
Step 3 Moisture Mitigation and Vapor Barriers (if needed)
Now that the slab’s clean, profiled, and patched, check for moisture issues that can ruin coatings or overlays.
Test with a calcium chloride kit or relative humidity probes. If readings exceed manufacturer limits, install a vapor barrier or moisture mitigation system—epoxy moisture mats, surface primers, or sheet membranes—followed by proper seams and edge sealing.
Allow full cure before proceeding.
Step 4 Apply Chosen Finish (detailed sub-steps per finish type)
Now you’ll apply the finish you’ve chosen, following specific steps for each method so the result lasts and looks right.
You’ll learn how to apply sealers and densifiers, contrast acid versus water-based stains, and run through the polishing sequence with grit progression and densifiers.
Then you’ll cover epoxy/polyaspartic systems (primers, broadcast aggregates, topcoats) and installing overlays or decorative toppings.
Applying Sealers and Densifiers
Before you seal the surface, decide whether you need a densifier, a topical sealer, or both, since each product type serves a different purpose and will change how the floor looks and performs.
Clean and dry the slab, apply densifier with a low-pressure sprayer or roller, let it penetrate, then tack-free.
Follow with your chosen sealer, applying thin even coats and allowing proper cure times.
Staining Procedure (acid vs. water-based)
If you chose a color finish rather than a clear sealer, staining is your next step and you’ll need to pick between acid and water-based stains based on the look and maintenance you want.
Test small areas first.
Apply acid stains with a sprayer, neutralize and rinse; apply water-based like a paint, allowing even coats and faster curing.
Seal after stain fully dries.
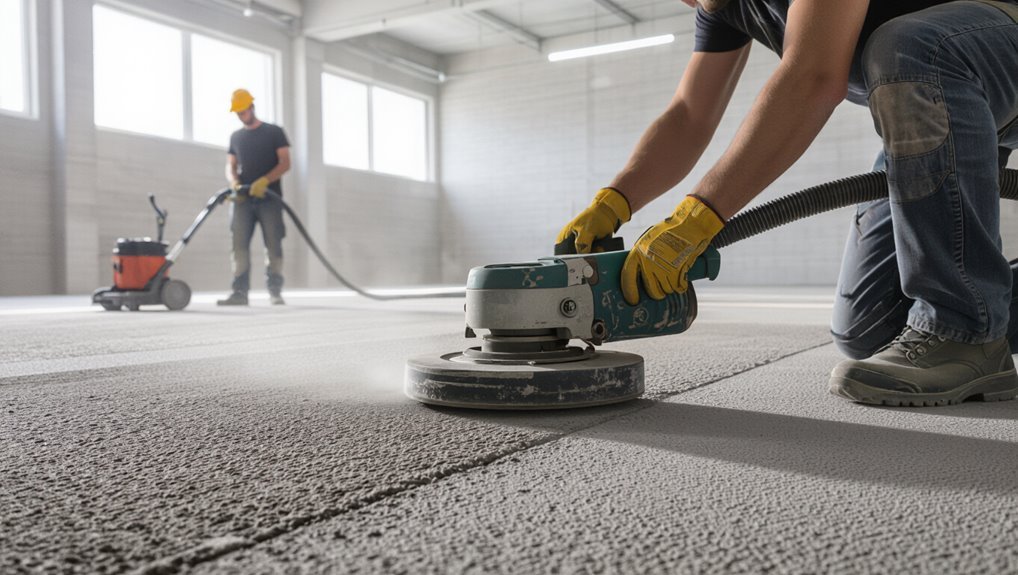
Polishing Process (grit progression and densifiers)
When you choose to polish your concrete, you’ll work through a series of progressively finer grits and apply a densifier to harden the surface—this sequence brings out a durable, glossy finish.
Start coarse to remove imperfections, then move through 50–100, 200–400, and up to 800–3000 grit for desired sheen.
Apply densifier after initial grind, rinse, and dry before final buffing.
Epoxy/Polyaspartic Application (primers, broadcast aggregates, topcoat)
Though epoxy and polyaspartic systems differ in cure time and chemical makeup, both rely on the same basic layers—primer, optional broadcast aggregate, and topcoat—to create a durable, decorative finish you can trust.
You’ll clean and profile concrete, apply primer for adhesion, broadcast colored flakes or quartz if desired, sweep excess, then roll or squeegee a clear topcoat.
Cure, inspect, and reopen when specified.
Installing Overlays and Decorative Toppings
Because overlays and decorative toppings sit on top of your slab instead of becoming the slab, you’ll follow a clear sequence: prepare and repair the substrate, choose the appropriate material (cementitious microtoppings, polymer-modified overlays, stamped overlays, decorative toppings, etc.), mix and apply per manufacturer specs, then finish and cure to achieve the look and performance you want.
Score, prime, feather cracks, set guides, trowel or stamp, texture, seal.
Step 5 Curing, Drying Times, and Recoat Windows
If you want a durable, attractive finish, you’ll need to properly cure the concrete, respect drying times, and follow the recoat window for whatever sealer or finish you’re using.
Keep temps and humidity steady, use curing compounds or wet curing as specified, and wait full recommended times between coats.
Rushing causes blistering, adhesion failure, or cloudy finishes—patience pays off.
Step 6 Final Inspection and Quality Checklist
Once curing and recoat windows are respected, it’s time for a thorough final inspection and quality checklist to confirm the floor meets performance and appearance goals.
Walk the entire area, check adhesion, uniform finish, and sheen. Measure moisture, flatness, and joint integrity.
Test non-slip and repair minor defects. Document findings, sign off, and give maintenance and warranty instructions to the owner.
Comparison Which Finish Is Best for Specific Scenarios
You’ll weigh how different finishes suit a garage, basement, warehouse, or living space and match them to traffic levels, use, and budget.
| Scenario | Best finish type |
|---|---|
| Garage vs. Basement | Epoxy for garage, satin sealer for basement |
| Warehouse vs. Living Space | High-build epoxy or urethane for warehouse, polished or stained for living space |
| High-Traffic Commercial vs. Residential | Durable industrial coatings for commercial, user-friendly sealers for residential |
| Budget vs. Aesthetic vs. Durability | Budget: basic sealers; Aesthetic: stains/polish; Durability: epoxy/urethane |
Think about which trade-offs matter most for your project and choose accordingly.
Garage vs. Basement vs. Warehouse vs. Living Space
While all concrete floors start the same, the right finish depends on how you’ll use the space: a garage needs abrasion resistance and stain protection, a basement benefits from moisture control and warmth, a warehouse requires heavy-duty durability and slip resistance, and living spaces call for aesthetics and comfort.
Choose epoxy or sealer for garages, waterproof coatings and insulating flooring for basements, industrial epoxy or polished concrete for warehouses, and decorative overlays or stained, sealed finishes for living areas.
High-Traffic Commercial vs. Residential Use
After choosing a base finish for the type of space—garage, basement, warehouse, or living area—you’ll need to refine that choice for traffic patterns and user expectations.
For commercial areas, pick abrasion-resistant coatings, denser sealers, and non-slip textures for constant foot and equipment use.
For homes, favor comfort, aesthetics, and easier maintenance—softer sealers, decorative overlays, and moderate slip resistance suit daily living.
Budget vs. Aesthetic vs. Durability Trade-offs
Because every project balances cost, look, and longevity, you should match your finish to the room’s purpose and budget constraints.
Choose epoxy or urethane for garages and commercial spaces where durability matters; polished or stained concrete for living areas when aesthetics matter but moderate wear exists; sealers or paint for temporary, low-cost solutions.
Prioritize longevity in high-use zones and style in low-traffic rooms.
Common Problems and How to Fix Them
You’ll run into a handful of common issues—moisture-related failures like blistering and delamination, cracks and uneven areas, bonding failures, and appearance problems such as streaks or blotching with stains or coatings.
For each you’ll need specific fixes: moisture mitigation and proper primers, patching or leveling, and targeted cosmetic corrections.
Below are practical methods to identify causes and repair each problem so your floor performs and looks right.
Moisture-Related Failures (blistering, delamination) and Solutions
When moisture gets trapped beneath a coating or topping, it can cause blistering, delamination, and other failures that ruin the finish and shorten the floor’s service life.
You should test vapor emission and RH before finishing, remove failed areas, dry and prep the slab, use vapor-retardant primers or moisture-tolerant systems, and improve drainage or vapor barriers to prevent recurrence.
Cracks, Unevenness, and Bonding Failures Repair Methods
Address cracks, unevenness, and bonding failures promptly to keep a concrete floor safe and long-lasting.
Inspect to locate hairline, structural, and delamination areas. Fill cracks with epoxy or polyurethane; route and seal wider joints.
Level dips using polymer-modified mortars or self-leveling compounds.
For poor bonding, scarify surfaces, clean thoroughly, then apply primer and a compatible repair mortar or overlay to restore integrity.
Appearance Issues (streaks, blotching with stains or coatings) and Corrections
Because stains, coatings, and polishing can reveal inconsistencies in the slab, streaks, blotches, and uneven color are common—and they’re usually fixable if you diagnose the cause.
Check moisture, surface contamination, sealant compatibility, and porosity variations.
Clean, etch, or grind to uniform porosity, use a primer or color-enhancing sealer, test patches, and apply thin, even coats.
Recoat or strip if needed.
Best Practices and Pro Tips for Durable, Attractive Results
You want concrete floors that last and look great, so start with the right prep, products, and maintenance.
Consider these quick focus areas to get consistent results:
- Surface prep dos and don’ts
- Choosing the right products and contractors
- Maintenance routines to extend finish life
Follow these points and you’ll avoid common mistakes and keep your floor performing well.
Surface Prep Dos and Don’ts
Start by stripping the slab down to sound, clean concrete—any coating, oil, grease, or weak laitance will ruin adhesion and finish.
Clean thoroughly, use mechanical methods for profiling, and repair cracks and spalls before proceeding.
Don’t skip moisture testing, ignore contaminants, or apply products over damp concrete.
Use proper PPE, follow manufacturer prep specs, and confirm surface profile meets chosen system requirements.
Choosing the Right Products and Contractors
When selecting products and contractors for finishing your concrete floor, prioritize compatibility, proven performance, and clear warranties—these choices determine how long the finish lasts and how it looks.
Check product tech sheets, request samples, and favor UV-, abrasion-, and stain-resistant formulations.
Vet contractors by portfolio, references, licensing, and written scopes.
Get multiple bids, insist on timelines, and confirm warranty transferability.
Maintenance Routines to Extend Finish Life
Picking the right products and contractor gets your concrete finish off to a strong start, but ongoing care keeps it looking and performing its best.
Establish a simple routine: sweep daily, mop with pH-neutral cleaner weekly, and spot-clean spills immediately.
Reapply sealer per manufacturer timelines, inspect for wear quarterly, and address scratches or stains promptly.
Proper maintenance prolongs beauty and reduces costly repairs.
DIY vs. Professional When to Hire a Pro
You can handle many finishing tasks yourself—basic grinding, patching, and applying sealers—if you’ve got the right tools and patience.
Call a pro for complex work like moisture mitigation, large-scale polishing, or any job that affects structural integrity.
When you do hire someone, ask about certifications, warranties, references, and get multiple bids so you can compare scope and cost.
Tasks Suitable for Most DIYers
Although many concrete finishing steps are straightforward, it’s smart to decide which tasks you can handle safely and which call for a pro.
You can prep, clean, patch small cracks, grind minor high spots, and apply sealers or paints.
Rent tools for sanding or edging, follow manufacturer instructions, and work in ventilated areas.
Stop and consult a pro for structural or complex moisture issues.
Jobs Requiring Professional Expertise (moisture mitigation, large-scale polishing)
When moisture issues, large-area polishing, or structural repairs are on the table, call a pro—these jobs need diagnostic tools, specialized equipment, and experience to avoid costly mistakes.
You should hire experts for moisture mitigation, slab-leveling, epoxy systems over damp concrete, and industrial-scale polishing.
Pros manage testing, vapor barriers, grinders, and dust control safely, saving time and preventing failures you’d risk tackling alone.
How to Vet and Compare Contractors (questions, certifications, warranties)
After you’ve decided a pro is the right move for moisture mitigation or large-scale polishing, start vetting contractors with targeted questions and documentation checks.
Ask about experience, references, portfolio, timelines, and cleanup. Verify licenses, insurance, and manufacturer certifications.
Request written estimates, scope, materials, and a warranty.
Compare value, not just price, and get everything in writing before you sign.
Materials, Tools, and Safety Checklist
Now that you know whether to DIY or call a pro, it’s time to cover the specific tools, materials, and safety gear you’ll need.
Here’s a quick checklist to guide the job:
- Essential tools by finish type (grinders, trowels, sprayers)
- Recommended materials and consumables
- Safety gear and jobsite safety considerations
Essential Tools by Finish Type (grinders, trowels, sprayers)
Choose the right tools for the finish you want—grinders for polishing and leveling, trowels for smoothing and burnishing, and sprayers for applying sealers or epoxy—and you’ll work faster and get a more durable result.
Match grinder grit and pad type to surface and damage, pick trowels (hand or power) for reach and finish, and use adjustable sprayers for even coverage and control.
Recommended Materials and Consumables
Gathering the right materials, consumables, and safety gear before you start will save time and prevent costly delays.
Stock quality primers, patching compounds, bonding agents, sealers, and chosen finish coatings.
Have sanding discs, pads, mixing buckets, trowel blades, brushes, rollers, and replacement blades.
Pack rags, cleaners, masking tape, and disposal bags.
Keep a basic repair kit and consumable inventory checklist.
Safety Gear and Jobsite Safety Considerations
With your materials and consumables organized, turn attention to personal protection and site safety so you can work efficiently and avoid injuries.
Wear NIOSH-approved respirators for dust, safety glasses, hearing protection, gloves, knee pads, and steel-toe boots.
Use ventilation, dust control (wet cutting/vacuum), barriers, and clear signage.
Keep fire extinguisher, first-aid kit, and emergency contacts accessible; inspect tools and cords before use.
Frequently Asked Questions
You probably have practical questions before you start, like how long each finish lasts and whether you can apply a finish over existing floor coverings.
You’ll also want to know if finishing addresses moisture or radon, how soon after pouring you can work the slab, and what maintenance stained or polished concrete needs.
Keep reading and I’ll answer each of these clearly and concisely.
How long does each finish typically last?
How long will each concrete finish last depends on the type of finish, the quality of prep and application, and how much traffic and maintenance it gets.
Polished concrete can endure decades with proper care; epoxy and urethane coatings last 5–15 years depending on wear.
Stains and dyes are permanent but surface protection may need reapplication.
Overlays and microtoppings last 5–20 years with timely repairs.
Can I finish over existing floor coverings or do they need removal?
Durability varies by finish, but another practical question is whether you can apply a new finish over existing floor coverings or must remove them first.
You can sometimes coat well-adhered, sound materials (thin-set tile, terrazzo) after proper cleaning and etching, but most coverings—carpet, vinyl, loose tile—should be removed.
Adhesion tests, surface prep, and moisture checks guide your decision; consult pros for tricky cases.
Will finishing concrete prevent moisture or radon issues?
Because concrete is porous, finishing it won’t automatically stop moisture or radon, but the right products and installation can greatly reduce those risks.
You should test for moisture and radon first. Use vapor barriers, waterproof membranes, epoxy or polyurethane coatings, and proper sealants applied by qualified installers.
These measures cut vapor transmission and radon entry but don’t guarantee complete elimination—ongoing monitoring and mitigation may still be needed.
How soon after pouring can a concrete slab be finished?
When can you walk on and finish a newly poured slab? You can usually walk on it after 24–48 hours, but finish work—troweling, polishing, staining—should wait until concrete reaches sufficient strength.
For light finishing, wait 7 days; for heavy grinding or polishing, wait 28 days to achieve near-design strength and minimize cracking.
Always follow cure recommendations and check moisture levels before final treatments.
What maintenance is required for stained or polished concrete?
If you want stained or polished concrete to keep looking its best, you’ll need a simple, regular maintenance routine:
Sweep or vacuum daily, damp-mop with pH-neutral cleaner weekly, and wipe spills promptly to avoid staining.
Reapply topical sealer or densifier as manufacturer recommends—usually every 1–5 years.
Use nonabrasive pads, felt furniture glides, and rugs in high-traffic or entry areas.