How to Install a Tile Shower Floor From Scratch (Step-by-Step)
You can replace an old shower floor and build a properly sloped, waterproofed tile pan yourself by removing the old base, inspecting and repairing the subfloor, and roughing in the drain. Choose between a mortar bed, prefab pan, or foam system, install a waterproofing layer, then set tile with thin-set and grout, allowing proper cure times. Expect 2–4 days for a typical DIY job, and keep going to learn detailed steps, tips, and pitfalls that save time.
Quick Answer Can You Install a Tile Shower Floor From Scratch and How Long It Takes
You can install a tiled shower floor by removing the old base, building a proper slope with mortar or a pre-formed pan, waterproofing, and then setting tile and grout.
Expect a DIY job to take a weekend to a few days depending on skill, cost roughly $150–$800 for materials (plus tools), and moderate DIY ability; hire a pro if you’re unsure about waterproofing, drain slope, or local code.
If you can’t confidently check for leaks, want a warranty, or the job involves complex plumbing or a curbless entry, call a contractor.
One-sentence summary of the process
Yes — you can install a tile shower floor from scratch: strip the old materials, build a proper sloped mortar or prefabricated pan over a waterproof membrane, lay tile with thinset, grout and seal, and expect the job to take a competent DIYer 2–4 days (longer if curing times, custom drain work, or inexperience add complexity).
You’ll follow clear steps for how to install a tile shower floor efficiently.
Typical time, cost range, and skill level required
A typical DIY tile shower floor takes a competent homeowner about 2–4 days of hands-on work (plus additional cure times).
It costs anywhere from roughly $200–$1,200 for materials depending on tile and drain choice, and requires intermediate carpentry and tiling skills—basic plumbing knowledge and comfort with mixing mortar, cutting tile, and creating a proper slope are essential.
You’ll need patience, accurate measuring, and steady hands.
When to hire a pro (quick checklist)
Wondering whether to tackle the tile shower floor yourself or call in a pro? Use this quick checklist: hire a pro if you lack experience with waterproofing or plumbing, face complex slopes or niches, need ADA compliance, spot structural damage, or want a guaranteed warranty.
If you’re short on time, unsure about local codes, or uncomfortable with cutting drains, call a pro.
Basics What a Tile Shower Floor Is and Why Proper Installation Matters
A tile shower floor is the layered system under your tiles — the pan, mortar bed or foam/Wedi base, waterproofing, tiles, and drain — all working together to move water safely to the drain.
You’ll choose between preformed pans, traditional mortar beds, or foam/Wedi systems depending on budget, skill, and design.
Get the slope, waterproofing, and durable tile installation right and you’ll avoid leaks, failures, and ugly repairs.
Components of a tile shower floor (pan, mortar bed, waterproofing, tile, drain)
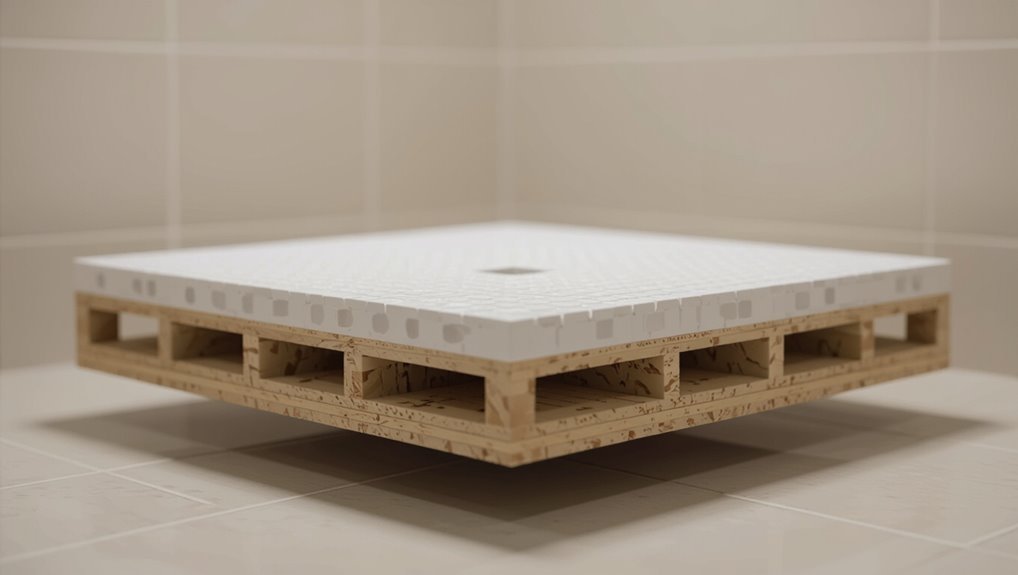
Think of the shower floor as a system: the pan, mortar bed, waterproofing, tile, and drain all have to work together to keep water moving away and out without leaking.
You’ll rely on a sturdy pan to direct flow, a sloped mortar bed for drainage, reliable waterproofing to protect structure, properly set tile for durability, and a sealed drain to carry water away.
Common shower floor types (preformed pans, mortar bed, wedi/foam systems)
One of the first choices you’ll make is the type of shower floor—preformed pans, traditional mortar beds, or modern foam systems like wedi—because that decision shapes how you waterproof, slope, and tile the floor. Choose based on skill, budget, and renovation constraints.
| Type | Pros | Cons |
|---|---|---|
| Preformed | Quick, waterproof | Limited sizes |
| Mortar bed | Custom slope | Labor intensive |
| Wedi/foam | Lightweight, versatile | Higher material cost |
Key performance goals: waterproofing, slope, durability, aesthetics
Choosing the right shower floor type sets the stage for meeting four key performance goals: waterproofing, slope, durability, and aesthetics.
You’ll guarantee waterproofing by using proper membranes and sealed joints, create correct slope (1/4″ per foot) toward the drain, select durable materials and installation methods, and balance tile choice, grout color, and layout for a pleasing, low-maintenance finish that resists stains and wear.
Tools and Materials Needed
You’ll need a set of tools—tile cutters, notched trowels, a level, drill, grout float, and the usual measuring and marking gear—to work accurately.
Choose materials based on your method: cement mortar for a mud bed, a preformed pan, or a foam tray system, plus thinset, tile, and grout.
Don’t forget safety gear (glasses, gloves, mask) and site-prep supplies like waterproofing membrane, backerboard, and drop cloths.
Tools list (cutters, trowels, level, drill, grout float, etc.)
Tools and materials make the job smooth and safe, so gather them before you begin: a wet saw or tile cutter, notched trowels, a level, drill with mixing paddle, grout float, spacers, a rubber mallet, measuring tape, and safety gear like gloves and goggles.
You’ll work confidently with the right tools; prepare them, inspect for damage, and keep them close.
- Pride
- Relief
- Focus
- Satisfaction
Materials list by method (mud bed vs. preformed vs. foam tray)
There are three common shower-floor systems—mud bed, preformed pans, and foam trays—and each demands a distinct set of materials so you can plan purchases and prep work accurately.
For mud bed, you’ll need cement, sand, wire lath, and waterproof membrane.
Preformed pans require the pan, drain assembly, and sealant.
Foam trays use foam base, bonding adhesive, and thinset.
- Choose confidently
- Feel secure
- Save time
- Enjoy the result
Safety gear and site-prep supplies
Before you start demo or mix anything, kit yourself with the right safety gear and prep supplies: a respirator or N95 mask for dust, safety glasses, ear protection, cut-resistant gloves, and knee pads, plus a utility knife, pry bar, heavy-duty trash bags, drop cloths, and painter’s tape to protect surrounding surfaces.
Also grab a shop vacuum, broom, bucket, scrub brush, marking pencil, and flashlight to keep the site clean and safe.
Planning and Preparation
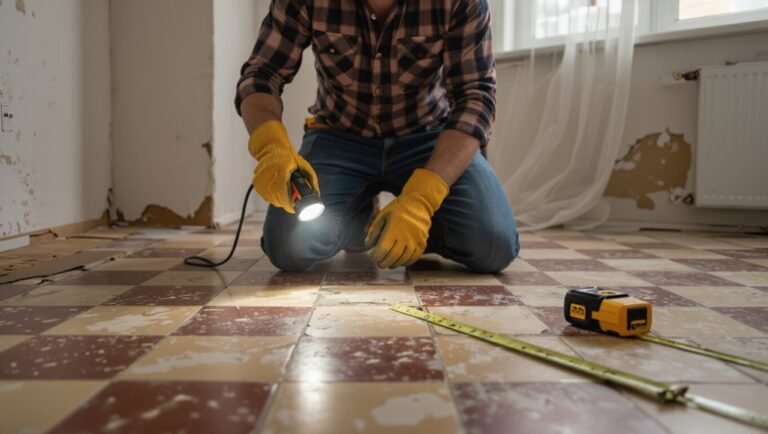
Before you start, check the existing subfloor for soundness and any structural issues that could affect waterproofing.
Measure and plan the slope and tile layout, decide on tile size and grouting, and choose a center or linear drain that fits your design and slope needs.
Finally, confirm permit, plumbing access, and local code requirements so your work meets inspections and avoids costly rework.
Assessing the existing subfloor and structural considerations
A solid subfloor is the foundation of a durable tile shower floor, so you’ll need to inspect its condition, thickness, and fastening to the joists before you proceed.
Check for rot, soft spots, or water damage; replace compromised plywood.
Verify joist spacing and deflection limits; reinforce or sister joists if there’s bounce.
Guarantee a stable, flat surface and proper fastening to prevent movement.
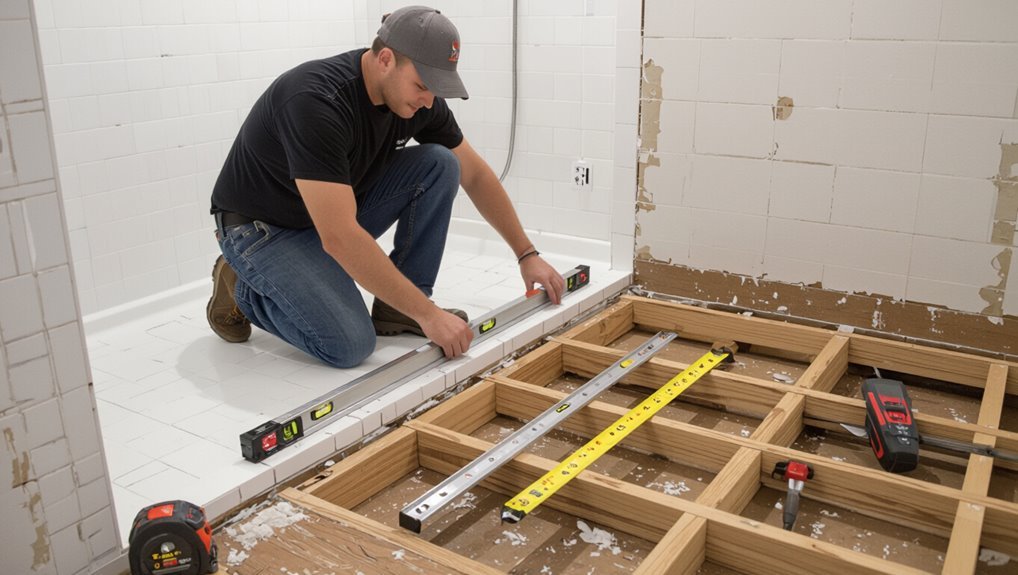
Measuring and calculating slope and tile layout
When you plan the slope and tile layout, measure carefully so water drains reliably and tiles line up neatly; aim for a 1/4 inch per foot slope toward the drain and mark reference lines from the drain outward to guide both mortar bed thickness and tile placement.
Measure floor dimensions, calculate total drop from perimeter to drain, plot high points, and snap grid lines for tile alignment.
Choosing tile and drain type (center vs. linear)
If you pick the right tile and drain now, you’ll avoid costly rework and get a shower that drains reliably and looks intentional; decide whether a center drain or a linear drain suits your layout, tile size, and aesthetic. Choose small mosaic for slopes, large tiles for linear drains. Visual guide:
| Feature | Choice |
|---|---|
| Slope | Center = radial |
| Tile size | Linear = large |
| Look | Center = traditional |
| Installation | Linear = directional |
Permits, plumbing access, and local code considerations
Before you tear out the old floor, check local permitting requirements and plan how you’ll access the plumbing so you don’t hit unexpected stops later; most jurisdictions require a permit for altering plumbing or waterproofing, and inspectors will want to see proper drain placement, slope, and accessible shutoffs.
Confirm code for waterproofing methods, ventilation, and fixture clearances, and schedule inspections before covering work.
Step-by-Step Installation Build a Tile Shower Floor From Scratch
Now you’ll walk through the full build: demo the old floor and waterproofing, inspect and reinforce the subfloor and framing, and rough‑in the drain so the flange sits at the correct height.
Then choose and install a waterproofing system—bonded or sheet membrane, liquid, or a foam tray—before you form and trowel a mortar (mud) bed.
Make the mud bed with a consistent 1/4‑inch per foot slope to the drain to guarantee proper runoff.
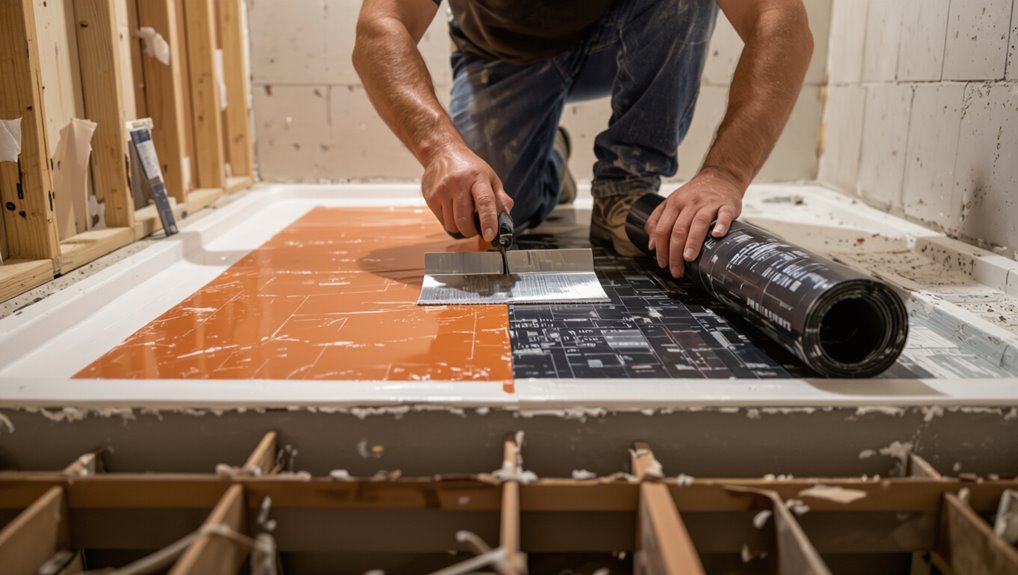
Step 1 Demo and remove old flooring and waterproofing
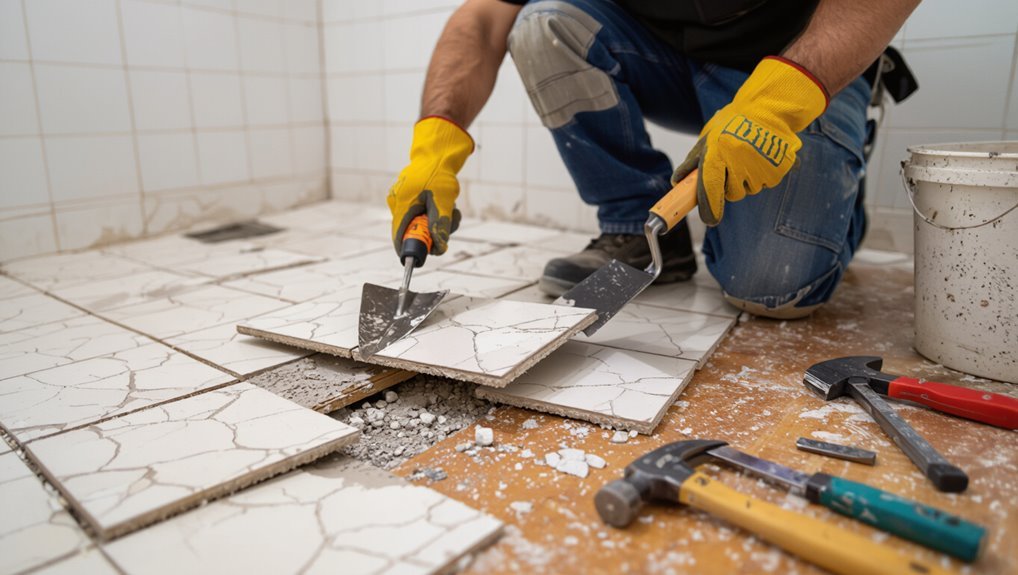
Start by stripping the old floor down to the substrate so you can inspect for damage and plan the new waterproofing layout.
Remove tile, mortar, and old membrane carefully with a hammer, chisel, or oscillating tool.
Vacuum debris, pull up nails, and clear adhesive residue.
Dispose materials properly and protect adjacent areas.
Leave the substrate clean and dry for the next step.
Step 2 Inspect and repair or reinforce subfloor and framing
1. Inspect the exposed subfloor and framing for rot, soft spots, movement, or insect damage.
Probe with a screwdriver, look for sagging joists, and check fastener integrity.
Replace any compromised plywood or joists, sister weak joists, and shim gaps to create a flat, solid base.
Secure with proper screws and blocking so the shower floor won’t flex under tile.
Step 3 Rough-in drain and ensure proper flange height
Before you set the mortar bed, rough-in the drain and confirm the flange sits at the correct height so the finished tile and thinset meet drain level without gaps or overhang.
Dry-fit the drain assembly, adjust pipe depth, and secure the flange to the subfloor.
Verify slope toward the center, check for wobble, and trim or shim as needed before proceeding.
Step 4 Install waterproofing method (options: bonded membrane, sheet membrane, liquid-applied, foam tray)
Once you’ve confirmed the drain flange and slope, choose a waterproofing system and install it so the substrate and drain are fully sealed from moisture.
Pick bonded membrane, sheet membrane with taped seams, liquid-applied coating, or a preformed foam tray.
Follow manufacturer directions, seal around the drain with appropriate clamping ring or flange, and test for continuity and leaks before proceeding.
Step 5 Build mortar (mud) bed and form proper 1/4 per foot slope to drain
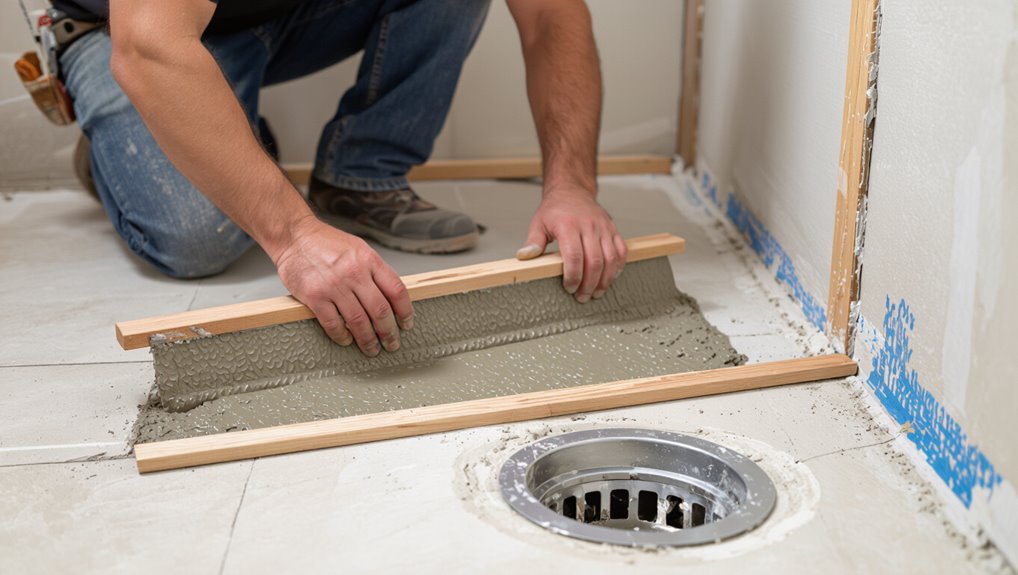
Start by mixing a stiff, sand-and-portland mortar (often called a “mud” bed) and shape it so you get a uniform 1/4-inch-per-foot slope from the shower perimeter down to the drain.
Pack and screed the mud, tamping toward the drain with a straightedge and float.
Keep compacted thickness consistent, avoid hollows, and form a smooth, even surface ready for bedding tile.
Step 6 Cure time and testing the pan for leaks
Give the mud bed at least 48–72 hours to cure so it gains strength and the mortar bond stabilizes; during this time avoid walking on it or placing weight that could create depressions.
After curing, plug the drain and fill the pan with water to the overflow.
Check for level drops and visible leaks for several hours.
Repair any leaks before tiling.
Step 7 Apply thin-set and install tile (layout, cuts, spacers)
Mix a fresh batch of thin-set to a creamy, peanut-butter consistency and spread it evenly over the cured mud bed with a notched trowel.
Then set your first tiles following the layout lines you marked earlier. Press each tile firmly, use spacers for uniform joints, cut edge pieces to fit with a wet saw, and check level frequently as you work toward the drain.
Step 8 Grouting, sealing grout, and finishing edges
Now grout the joints once the tiles have fully cured—this seals gaps, locks tiles in place, and gives the floor a finished look.
Mix grout to manufacturer specs, force it into joints with a rubber float, and wipe excess with a damp sponge.
After grout cures, apply a penetrating sealer to protect against stains, then trim and finish tile edges with matching trim or a neat bevel.
Step 9 Final clean-up, caulking, and cure timeline before use
With grout sealed and edges finished, you’ll move on to the final clean-up, caulking, and the cure timeline before using the shower.
Remove haze with a damp sponge, then a microfiber cloth.
Apply silicone to joints, smooth with a caulk tool, and label cure times.
Wait 24–48 hours for silicone and 7 days for grout sealers before heavy use; ventilate throughout.
Method Comparison Mortar Bed vs. Preformed Tray vs. Foam Backer
You’ll weigh the pros and cons of a traditional mortar bed, a preformed shower tray, and a foam backer to pick the right approach for your project.
Consider which method fits your budget and schedule, which tile types and drain styles each supports, and where each shines—durability, ease of install, or waterproofing.
I’ll compare cost, time, compatibility, and performance so you can choose confidently.
Pros and cons of each method
Although each shower-floor method can produce a durable, watertight result, they differ in weight, cost, installation skill, and long-term repairability—so you’ll want to match the method to your project’s priorities.
You get heavy, customizable mortar; lightweight, fast trays; or insulated, easy-to-form foam. Trade-offs: mortar is durable but laborious; trays are simple but limited; foam balances shape and warmth but needs precise sealing.
| Method | Pros | Cons |
|---|---|---|
| Mortar bed | Durable, customizable | Heavy, skilled labor |
| Preformed tray | Quick, simple | Limited layouts |
| Foam backer | Lightweight, warm | Needs careful sealing |
Best use cases and cost/time differences
Now that you’ve weighed pros and cons, pick the method that fits how you use the space and how much time and money you can spend.
Use mortar bed for custom slopes, durability, and higher labor/time costs.
Choose a preformed tray for fastest, lowest-skill install and modest expense.
Pick foam backer for easier tiling, mid-range cost, and quicker installation than mortar.
Compatibility with different tile types and drains
When choosing between a mortar bed, preformed tray, or foam backer, think about the tile material and drain type first, because some systems work better with certain tiles and fittings.
Use mortar beds for large-format or natural stone to support weight and custom drains.
Preformed trays suit small ceramic with integrated drains.
Foam backers work for lightweight mosaics but need compatible clamping drains and waterproofing.
Common Mistakes and How to Avoid Them
Watch for a few common mistakes that can undo a shower floor: incorrect slope that causes pooling, gaps or bad seams in the waterproofing, and misaligned drains or flanges.
Also avoid using the wrong thin-set or grout and never rush cure times or skip leak testing.
Catching these issues early will save you from costly repairs and rework.
Incorrect slope and pooling water
If your shower floor doesn’t slope correctly toward the drain, water will pool and create leaks, mold, and slippery conditions.
Check slope with a level and straightedge before setting mortar. Aim for a 1/4 inch per foot pitch toward the drain, feathering smoothly from walls.
Rebuild any low spots, compact the mortar bed, and retest slope to prevent standing water.
Insufficient waterproofing or improper membrane seams
Because a shower’s membrane is your last line of defense, any gaps, improperly lapped seams, or missed fasteners will let water reach the substrate and cause rot or mold.
Inspect seams, follow manufacturer overlap and sealing instructions, use compatible sealants or tapes, and fasten per specs.
Test the membrane with a flood test before tiling so you catch leaks early and avoid costly repairs.
Poor drain installation and flange alignment
When the drain and its flange aren’t installed level and at the correct height, water won’t flow to the outlet and you’ll get pooling, slow drainage, or tile damage; preventing that starts with setting the flange flush with the finished shower floor, verifying the drain body is plumb and secured, and aligning the weep holes so they remain clear.
Check slope to drain, torque bolts evenly, test with water before tiling.
Using the wrong thin-set or grout for shower floors
Although it might seem convenient to grab whatever thin-set or grout you find at the store, choosing the wrong products for a shower floor will lead to bonding failures, staining, or premature cracking.
Use polymer-modified, ANSI-rated thin-set for wet areas and epoxy or urethane grout where moisture and staining are concerns.
Read labels, match tile type, and prioritize waterproof, mildew-resistant formulations.
Rushing cure times and testing
If you rush cure times or skip proper testing, you’ll undermine the strength and waterproofing of the shower floor and risk tile loosening, grout cracking, or hidden leaks.
Wait full manufacturer cure times for mortar, thin-set, waterproof membranes, and grout.
Perform a water test and inspect seams before tiling.
Never accelerate cures with heat or traffic; allow proper drying to guarantee longevity and leak-free performance.
Best Practices and Pro Tips
To get a shower floor that lasts, you’ll want to focus on a consistent slope and watertight seams from the start.
Use layout tricks on small floors to make the space look larger, pick grout and sealers that balance longevity with slip resistance, and keep up with simple routine maintenance.
I’ll walk you through practical tips for each so you can avoid problems before they start.
Achieving a consistent slope and leak-proof seams
When you build the slope carefully from the start, water runs reliably to the drain and seams stay watertight; use a consistent mix and check elevations frequently so you don’t end up correcting problems after the tile goes down.
Trowel in uniform layers, screed to reference points, pack mortar tightly at junctions, and tape or seal all seams with membrane.
Test with water before tiling.
Tile layout tips for small shower floors (visual tricks)
After you’ve confirmed the slope and waterproof seams, think about how tile patterns and grout lines can actually make a small shower feel larger and cleaner.
Use larger-format tiles or elongated subway tiles to reduce grout clutter, run tiles lengthwise toward the drain or entry to elongate sightlines, and keep grout color close to tile tone.
Minimize busy patterns to avoid visual crowding.
Choosing grout and sealers for longevity and slip resistance
Because grout and sealers do the heavy lifting for longevity and safety, you’ll want to choose products that balance durability, water resistance, and slip control.
Use epoxy or high-performance cement grout for wet areas, pick a penetrating sealer for natural stone, and a film-forming sealer for glazed tile where needed.
Select a grout color that hides stains and add a non-slip additive to sealer sparingly.
Routine maintenance tips to extend lifespan
If you keep up with a few simple habits, your tile shower floor will stay watertight, slip-resistant, and attractive for years.
Wipe down after each use, squeegee walls and floor, and ventilate to prevent mold.
Clean grout monthly with a pH-neutral cleaner, reseal grout annually, fix grout cracks immediately, and replace damaged tiles to avoid leaks and preserve integrity.
Troubleshooting Common Problems Post-Installation
After your tile shower is in use, you’ll want to spot and address common issues like slow drainage, hidden leaks under the tile, and cracked tiles or failing grout before they get worse.
Start by checking the drain and trap for clogs, inspecting grout lines and tile for hairline cracks, and watching for soft spots or water stains that suggest a leak beneath the surface.
If you find extensive water damage, persistent leaks, or structural concerns, call a professional to assess and remediate the problem.
How to identify and fix slow drainage
When your tile shower starts draining slowly, you’ll notice water pooling around your feet or taking longer than usual to disappear—signs that mean you should act before grout and mortar sustain damage.
Check the drain cover and hair trap, remove debris, flush with hot water and baking soda/vinegar, and use a plumber’s snake if needed.
Test flow; repeat until clear.
Detecting and repairing leaks under the tile
Slow drainage can sometimes signal a deeper problem: a leak beneath the tile that’s quietly sending water into the subfloor.
Check for soft spots, musty odors, or water stains; press tiles to find hollow sounds.
Shut off water, remove grout and suspect tiles, inspect and dry the subfloor.
Replace damaged backerboard or waterproof membrane, re-bed tiles, and reseal to prevent recurrence.
Dealing with cracked tiles or grout failure
If a tile cracks or the grout starts failing, you’ll want to tackle it quickly to stop water intrusion and larger repairs.
Remove loose grout, chisel out broken tile, and clean the substrate.
Replace tile with thinset, guarantee proper slope and waterproofing overlap, and regrout with appropriate epoxy or cement grout.
Seal grout and monitor for recurring movement or moisture.
When to call a professional for remediation
Although small cracks and grout issues you can patch yourself, you should call a professional as soon as you notice persistent leaks, recurring tile movement, foul odors, or mold growth—signs that the waterproofing or substrate may be failing.
A pro will diagnose membrane or drain problems, prevent structural damage, and guarantee proper remediation. Don’t delay if issues recur or water spreads beyond the shower.
Materials and Cost Breakdown
You’ll get a clear tally of what each installation method costs, including materials and tool rentals, so you can compare DIY versus pro options.
I’ll also cover how upgrades—like heated floors or premium tile—affect your return on investment and resale appeal. That way you can decide which improvements are worth the extra upfront cost.
Detailed cost estimates by method (materials + tool rental)
Below are realistic cost ranges for each common tile-shower floor method, showing materials and typical tool rentals so you can compare true installed costs at a glance.
You’ll see material totals plus common rental fees; pick based on budget, skill, and desired durability.
| Method | Cost (materials + rental) |
|---|---|
| Pre-sloped mortar | $200–$500 |
| Mortar + liner | $300–$700 |
| Prefab pan | $150–$400 |
| DIY curb kit | $120–$350 |
ROI considerations and when upgrades are worth it
When weighing upgrades, focus on how each choice affects resale value, longevity, and maintenance costs so you can decide which investments actually pay off.
Choose durable waterproofing and quality tile for high ROI in resale markets; luxury finishes yield smaller returns.
Prioritize long-term savings: better membrane, proper slope, and stainless fixtures reduce repairs.
Skip trendy tiles if budget’s tight; they age faster.
Project Timeline and Checklist
Plan your timeline before you start so you know if this will fit a weekend DIY or needs a multi-day pro schedule.
Follow a clear pre-install checklist—tools, waterproofing, drain prep—so you don’t hit delays.
Finish with a final inspection checklist to confirm slope, waterproofing, grout curing, and proper drain function.
Sample weekend DIY timeline vs. multi-day professional schedule
Tackle this project in a weekend if you’re handy and organized, but expect pros to spread the same work over several days for curing times and fine-tuned installation.
You’ll hustle through demo, waterproofing, tiling, grout, and sealant in two intense days, while pros phase each step for quality and inspections.
- Exhaustion
- Relief
- Pride
- Patience
Pre-install checklist and final inspection checklist
Before you lay a single tile, confirm materials, tools, and site conditions so nothing stalls the job—for example, check your waterproofing membrane, drain assembly, slope, tile quantity, thinset type, grout color, and that your subfloor is flat and secure.
Then follow this quick emotional checklist to feel confident and proud:
- Breathe — you’ve planned thoroughly.
- Inspect — nothing’s missed.
- Test — drain and slope work.
- Celebrate — job’s ready for tile.
FAQ Frequently Asked Questions
You probably have a few quick questions before you start, like whether you can tile over plywood, how much slope the floor needs, and if a preformed pan beats a mud bed for waterproofing.
You’ll also want guidance on the best tile size for a shower floor and how long to wait before using the shower after grouting.
Read on for concise answers to each of these common concerns.
Can I tile a shower floor directly over plywood subfloor?
Can you tile a shower floor directly over plywood subfloor? You shouldn’t.
Plywood alone isn’t waterproof or stable enough for direct tile installation. Install a proper shower pan system or a bonded waterproof membrane over cement backer board or a mortar bed.
That prevents rot, movement, and tile failure. Follow manufacturer instructions for waterproofing, drainage, and framing to guarantee a durable, safe shower floor.
How much slope does a shower floor need?
Most shower floors need a 1/4-inch drop per foot toward the drain to guarantee water drains properly and prevents pooling.
You’ll layout slope uniformly from the perimeter to the drain, keeping the pitch consistent. For larger showers use multiple slopes directing to central or linear drains.
Check local codes—some allow 1/8-inch per foot for tiles with specific underlayments—and measure carefully.
Is a preformed pan or a mud bed more waterproof?
After setting the proper slope, you’ll want to decide how to make the floor watertight: a preformed fiberglass or acrylic pan, or a traditional mortar (mud) bed with a liner.
Preformed pans are inherently waterproof and quicker to install, reducing leak risk.
Mud beds rely on a continuous waterproof liner beneath; they’re durable if installed perfectly but demand more skill and inspection to guarantee long-term watertightness.
What size tile is best for a shower floor?
Wondering what tile size works best for a shower floor? You’ll usually choose small-format tiles—1×1 to 4×4 inches or mosaics—because they conform to the pan slope and create more grout lines for traction.
Larger tiles need more cuts and can feel slippery unless textured. Prioritize slip resistance, grout spacing for drainage, and compatibility with your drain and slope.
How long before I can use the shower after tiling?
Once you’ve picked the right tile size and layout for traction, you’ll want to know how long before you can use the shower.
Wait at least 24–48 hours for thinset to cure enough for light use, but give grout a full 72 hours before heavy use.
Seal grout after 7 days, and avoid full water saturation for 7–14 days to guarantee longevity and proper bonding.
Visual Resources and Reference Guides
You’ll want clear diagrams and step-by-step videos that match the techniques you’re using so you can follow along visually.
Check manufacturer installation guides for your shower pan, waterproofing products, and tiles, and cross-check local code references to stay compliant.
Keep bookmarked links or printed pages handy while you work.
Recommended diagrams and instructional videos to follow
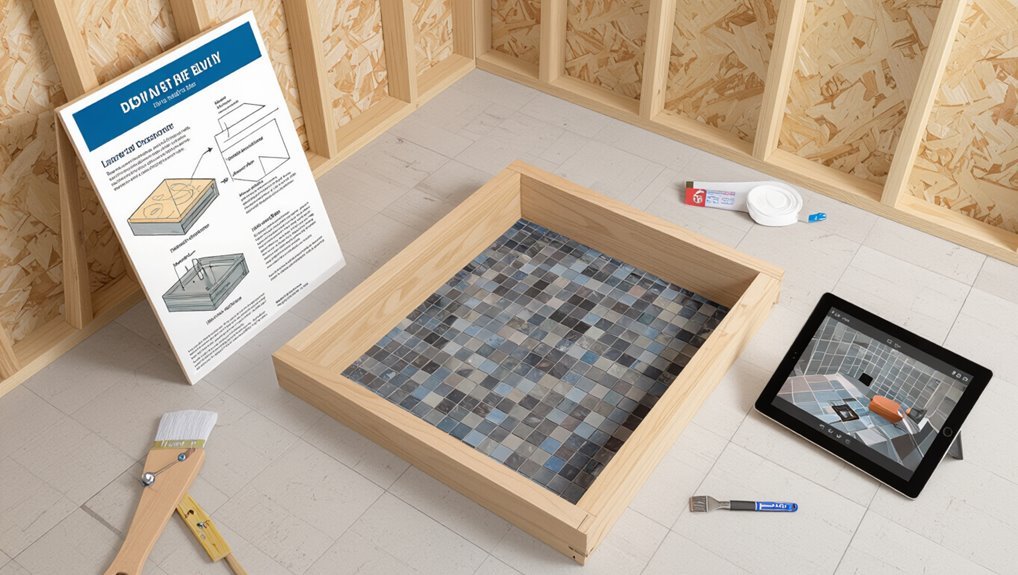
Which diagrams and videos should you trust when installing a tile shower floor?
Pick step-by-step tutorials from licensed plumbers, tile contractors, or reputable trade schools; prioritize content that shows full builds, waterproofing layers, slope measurements, and drain installation.
Use videos with clear tool lists, close-up technique shots, and measured time-lapse.
Save a few diagrams for quick reference during each installation stage.
Manufacturer installation guides and code references
Because manufacturer instructions spell out the products’ tested methods, follow their installation guides and local code references closely to guarantee your tile shower floor performs as designed.
You’ll protect warranties, prevent leaks, and meet inspections.
Read specs, note required materials, and record referenced code sections before starting.
- Confidence
- Relief
- Pride
- Security