How to Etch a Concrete Floor for Paint, Epoxy, or Stain
You’ll need to etch concrete so paint, epoxy, or stain will bond and last instead of peeling or wearing unevenly. Start by inspecting for sealers, oil, cracks, and moisture; remove contaminants and degrease spots. Choose chemical etching for uniform texture in tight areas or mechanical grinding for heavy laitance. Follow PPE, containment, mix and application instructions, then rinse and neutralize fully. Do the proper tests and cure times, and keep reading to learn detailed steps and tips.
Quick Answer Can You Etch a Concrete Floor for Paint, Epoxy, or Stain?
Yes — you can etch a concrete floor for all three finishes, but your approach changes by product: etch for paint to improve adhesion, always etch before epoxy to guarantee a strong bond, and etching for stain is optional depending on how porous and clean the slab is.
If the surface is smooth, sealed, or contaminated, you’ll need to etch or mechanically prepare it; if it’s already porous and clean, stain may accept color without etching.
Start by testing a small area so you can confirm whether etching is necessary for your specific floor and finish.
Short, direct recommendation for each finish (paint, epoxy, stain)
Choose the right etching approach based on the finish you plan to apply:
for paint, use a mild acid etch or mechanical grinding to create a clean, slightly rough profile;
for epoxy, go with thorough mechanical preparation (diamond grinding or shot blasting) to guarantee proper adhesion and remove contaminants;
for penetrating stain, a light acid wash is usually sufficient to open the pores without over-roughening the surface.
How do you etch a concrete floor?
When etching is required vs. optional
You picked the right preparation method for your finish, now ask whether etching is actually required.
If concrete’s porous, dusty, or has old sealer, etch before paint or epoxy for adhesion.
For penetrating stains, etching’s optional—cleaning may suffice to open pores.
Smooth, well-prepped slabs sometimes need only a degrease and acid rinse.
Test a small area to decide.
What Is Concrete Etching and Why It Matters
Etching is the process you use to roughen concrete either chemically or mechanically so coatings can bond properly.
It directly affects adhesion and the long-term appearance of paint, epoxy, or stain, so skipping it can lead to peeling or uneven wear.
Don’t etch new concrete, surfaces that are already sealed, or floors with specialty coatings that require a different prep method.
Chemical vs. mechanical etching explained
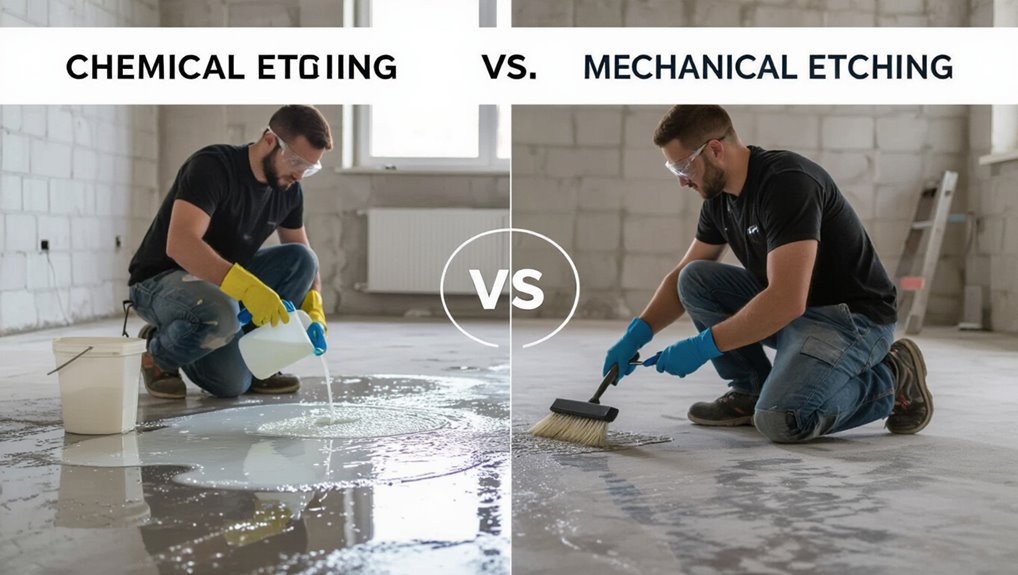
When preparing a concrete floor for coatings, you’ll pick between chemical and mechanical etching methods based on how deep you need to open the surface and how much dust or cleanup you can handle.
Chemical etching uses acids or cleaners to roughen pores with minimal dust but requires rinsing and neutralizing.
Mechanical etching (grinding/scarifying) removes more material, creates consistent profile, and produces dust to manage.
How etching affects adhesion and finish longevity
Because a coating can only grip what’s available at the surface, properly opening the concrete’s pores and profile directly determines how well coatings bond and how long they’ll last.
When you etch, you create micro-anchors and remove weak laitance so paint, epoxy, or stain penetrates and adheres.
Better adhesion reduces peeling, blistering, and premature wear, extending the finish’s service life.
When not to etch (new concrete, sealed surfaces, specialty coatings)
Although you might think etching is always necessary, there are clear situations where you shouldn’t—specifically with fresh concrete, surfaces already sealed, or certain specialty coatings—because etching can harm adhesion or be redundant.
Don’t etch new concrete until it cures (typically 28 days).
Avoid etching glossy or intact sealers and manufacturer-specified coatings like moisture-control membranes or some acrylic overlays.
Tools, Materials, and Safety Equipment Needed
Before you start etching, you’ll need to choose the right chemicals—muriatic acid or safer phosphoric/etching solutions—or opt for mechanical methods like a diamond grinder, shot blaster, or floor buffer with a stripping pad.
You’ll also need proper PPE (acid-resistant gloves, goggles, respirator) and good ventilation to protect yourself.
Finally, have cleanup and neutralizing materials on hand to safely neutralize residues and dispose of waste.
Chemicals (muriatic acid, phosphoric acid alternatives, etching solutions)
When you’re prepping to etch a concrete floor, pick the right chemicals and safety gear first: common choices include muriatic acid, phosphoric-acid alternatives, and commercial etching solutions, and each demands specific PPE, dilution, and neutralization steps.
- Wear acid-resistant gloves, goggles, and a respirator.
- Follow manufacturer dilution and dwell-time instructions.
- Neutralize and rinse thoroughly; dispose of runoff per local regulations.
Mechanical options (diamond grinder, shot blaster, floor buffer with stripping pad)
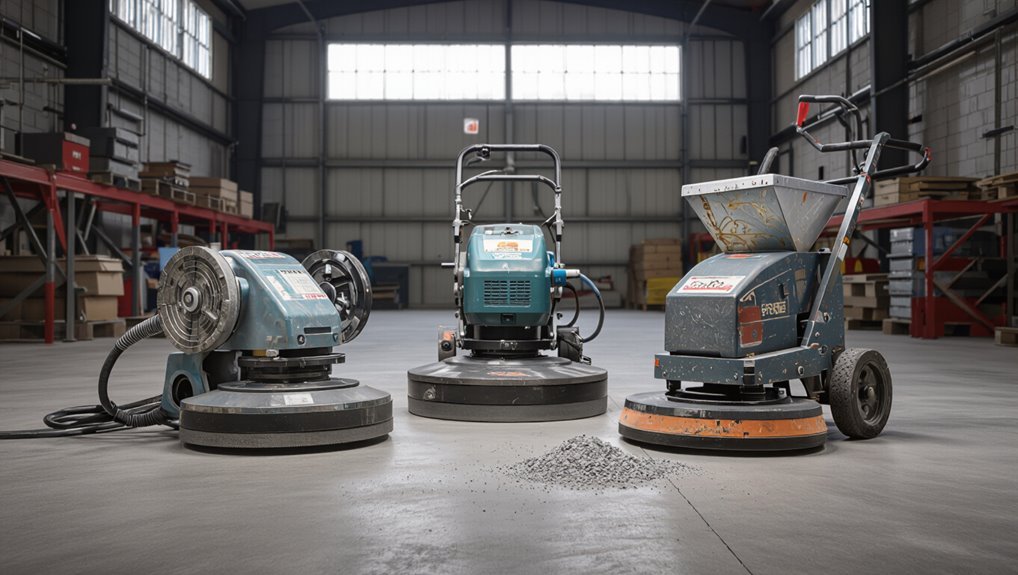
Choose the mechanical tool that matches your floor’s condition and the finish you want: diamond grinders quickly remove coatings and level high spots with carbides or diamond tooling.
Shot blasters aggressively profile and clean large areas without dust on many setups, and floor buffers fitted with heavy-duty stripping pads offer a low-cost, low-impact option for light scuffing or adhesive removal.
- Use a grinder for heavy leveling and coarse profiling.
- Pick a shot blaster for fast, deep texture on big jobs.
- Choose a buffer for spot prep, thin adhesive removal, or delicate surfaces.
Personal protective equipment and ventilation requirements
Because etching concrete kicks up dust, grit, and chemical fumes, you’ll need proper personal protective equipment and ventilation to protect your lungs, eyes, skin, and hearing.
Wear gear, guarantee airflow, and avoid enclosed exposure.
- NIOSH-rated respirator (P100 or appropriate cartridge)
- Safety goggles, face shield, and chemical-resistant gloves
- Hearing protection and cross-ventilation or exhaust fan to remove fumes
Cleanup and neutralizing materials
Gather the right cleanup and neutralizing materials before you finish etching so you can safely and efficiently remove acid residues and slurry.
Have neutralizer (baking soda or commercial neutralizer), plenty of water, stiff push broom, mop, wet vacuum, plastic buckets, and disposable rags.
Use corrosion-resistant gloves and eye protection while rinsing.
Dispose of slurry per local regulations and ventilate until floor is dry and neutral.
Preparing the Concrete Floor Inspection and Pre-Work
Before you start etching, inspect the slab for cracks, moisture, old sealers, paint, grease, or efflorescence that could interfere with adhesion.
You’ll test for moisture with a meter and a plastic sheet test to make sure the slab is dry enough.
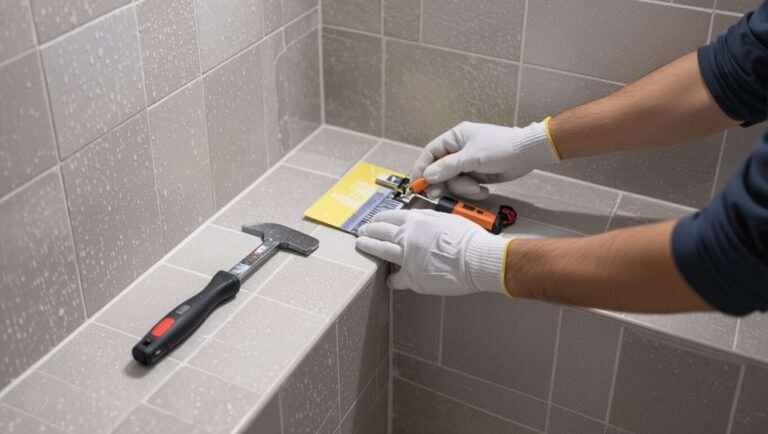
Remove any sealers, coatings, grease, and salt deposits using the appropriate strippers, degreasers, scrapers, or mechanical methods before etching.
Inspecting for cracks, moisture, sealers, and contamination
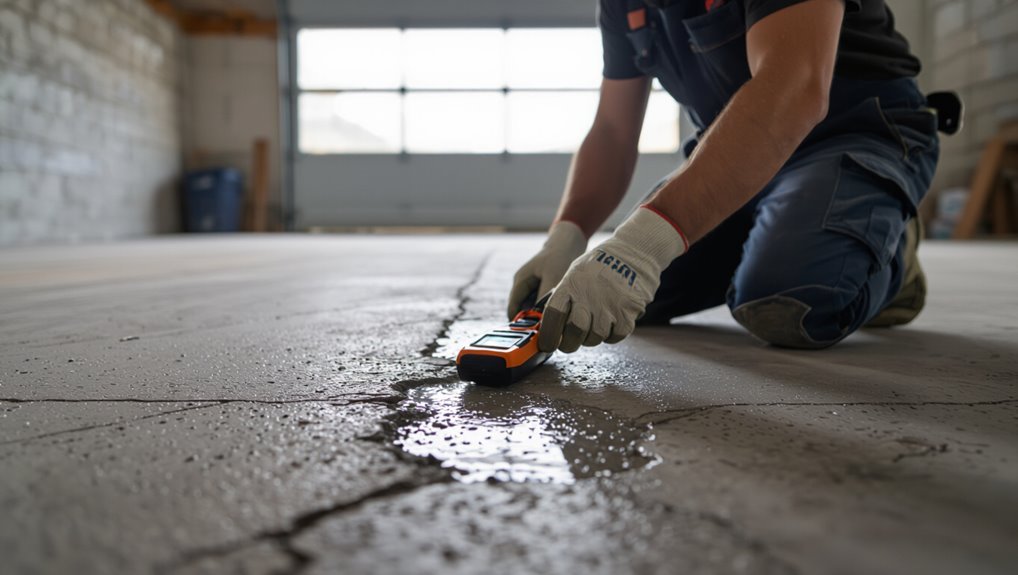
A thorough inspection lets you catch cracks, moisture issues, old sealers, and contamination that will compromise etching.
Walk the floor systematically, looking for hairline to structural cracks, efflorescence or damp spots, soft or peeling finishes, and any oils, paints, or residue that could block the etchant.
Mark defects, note repair needs, remove contaminants with appropriate cleaners, and identify areas needing sealer stripping before etching.
Testing for moisture (moisture meter, plastic sheet test)
When you’re checking a concrete floor for etching, confirm moisture levels with both a moisture meter and the plastic sheet (or calcium chloride) test so you don’t miss latent damp that will ruin coatings.
Use both methods, compare results, and wait or remediate if readings exceed manufacturer limits.
- Spot-check with a concrete moisture meter.
- Do 24–72 hour plastic sheet tests.
- Compare against product specs.
Removing sealers, paints, grease, and efflorescence (products and methods)
Strip away coatings and contaminants so etching can penetrate and concrete coatings will bond properly.
Use a grinder with diamond cup wheels or chemical strippers for paint and sealers; follow safety and disposal rules.
Remove grease with degreasers or trisodium phosphate, scrubbing and rinsing thoroughly.
Treat efflorescence by dry brushing, mild acid rinse, or commercial efflorescence remover; neutralize and rinse.
Step-by-Step Etching Process
Now that your floor’s been inspected and prepped, you’ll move through a clear etching sequence: clean and degrease the surface, choose chemical or mechanical etching, and set up safety and containment.
If you pick chemical etching, you’ll mix the solution, apply it, let it dwell, and agitate as needed; if you choose mechanical etching, you’ll use grinding or blasting techniques.
Follow each step methodically to guarantee an even profile and safe work conditions.
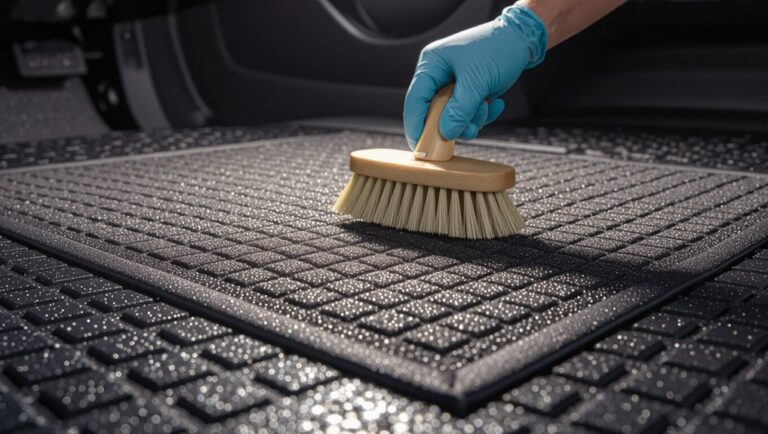
Step 1 Surface preparation: cleaning and degreasing
Begin by clearing the area and removing loose debris so you can see the surface clearly and identify stains or grease spots.
You’ll degrease, scrub, and rinse before etching. Focus on complete removal of contaminants to guarantee adhesion.
- Use a concrete cleaner or degreaser and stiff broom.
- Scrub oil spots with a brush and solvent.
- Rinse thoroughly and let dry fully.
Step 2 Choosing etching method (chemical vs mechanical)
Before you choose an etching method, weigh the pros and cons of chemical vs. mechanical approaches so you pick the one that fits your concrete condition, schedule, and safety limits. You’ll prefer chemicals for uniform texture and tight spaces; pick mechanical for heavy laitance or fast, no-chemical work. Compare quickly:
| Method | Best for | Trade-off |
|---|---|---|
| Chemical | Light etch | Longer cure |
| Mechanical | Heavy prep | Dust, gear needs |
Step 3 Setting up safety and containment
Step 3 is where you secure the work area and protect yourself: put on chemical-rated gloves, eye protection, a respirator if using acids or producing dust, and non-slip boots.
Then seal off the space with plastic sheeting, tape vents and doorways, and post warning signs to keep others clear.
Ventilate well, set up spill containment, keep neutralizer and water nearby, and limit foot traffic.
Step 4 Performing chemical etch: mix, apply, dwell time, agitate
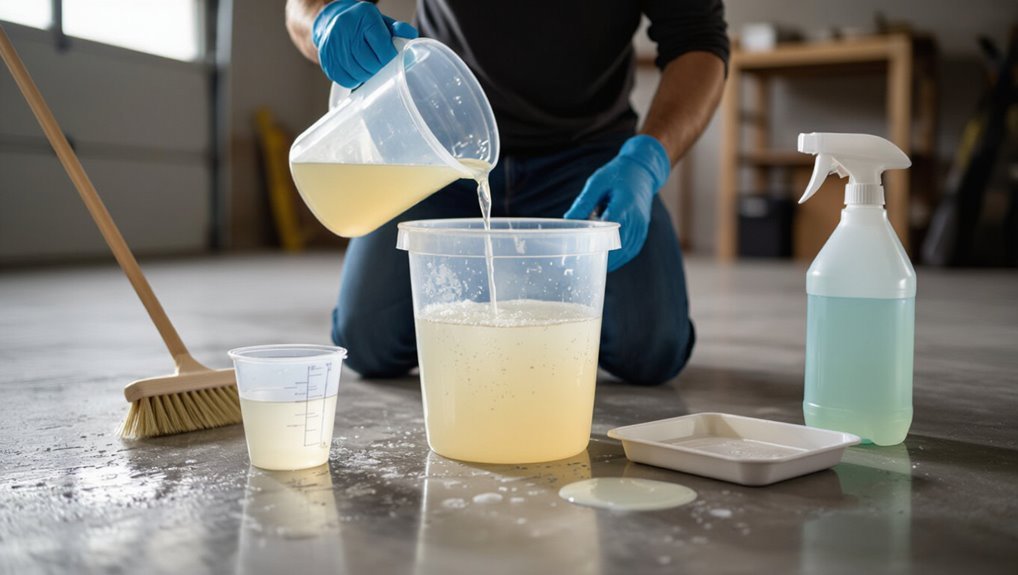
Mix the etching solution exactly to the manufacturer’s ratio, apply it evenly with a pump sprayer or wide brush, and let it work for the specified dwell time while you lightly agitate stubborn areas with a stiff nylon brush or broom.
- Rinse thoroughly with a pressure washer or clean water.
- Neutralize if required by the product.
- Inspect for uniform profile before drying.
Step 5 Performing mechanical etch: grinding or blasting technique
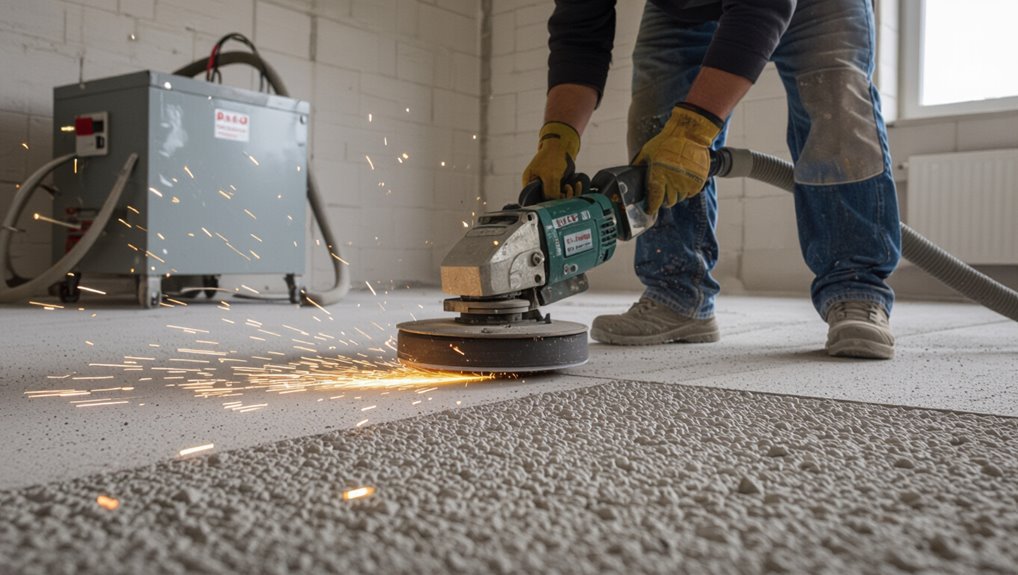
Start by choosing the right mechanical method—grinding with diamond cup wheels for controlled profile or abrasive blasting for faster, coarse removal—so you match the tool to the concrete condition and the coating you plan to apply.
Wear PPE, run equipment steadily, overlap passes, and remove contaminants. Aim for uniform texture and visible aggregate where required.
Vacuum debris thoroughly before proceeding.
Step 6 Neutralizing, rinsing and drying times
Once you’ve finished etching, neutralize the surface promptly to stop the chemical reaction and prevent future adhesion problems; use the manufacturer-recommended neutralizer or a mild baking soda solution.
Apply evenly, scrub if needed, then rinse thoroughly with clean water. Blot excess water, then let the floor air-dry.
Expect 24–72 hours depending on humidity and temperature; use fans and dehumidifiers to speed drying.
Step 7 Final profile check and adhesion tests (tape test, water beading)
Now you’ll confirm that the etch produced the right profile and that coatings will stick—two quick checks that catch problems before you apply any sealer or paint.
Test by eye and touch, then do simple adhesion checks:
- Tape test: press heavy tape, rip; look for concrete pull-off.
- Water bead: droplets should flatten, not bead.
- Spot patch: apply tiny epoxy, cure, pull.
Etching for Different Finishes: Paint, Epoxy, and Stain
When you prep concrete for paint, aim for a uniformly porous surface so primers can grip and seal properly.
For epoxy, you’ll need a clean, profiled surface with strict moisture limits to guarantee adhesion and prevent blisters.
Penetrating stains and dyes require open pores and a natural texture so the color soaks in evenly rather than sitting on the surface.
Etching requirements for concrete paint (porosity targets, primer needs)
Prepare the surface to achieve the right porosity for paint: etching should open the concrete enough for primer to penetrate but not leave a powdery or overly rough texture.
You should aim for uniform, slightly abrasive pores so water and primer absorb evenly.
Rinse thoroughly, let dry, then apply a compatible primer designed for masonry to seal pores and improve paint adhesion.
Etching requirements for epoxy coatings (surface profile, cleanliness, moisture limits)
Because epoxy bonds far more rigidly than paint or stain, you must create a consistent surface profile, spotless substrate, and low moisture before coating.
Etch to expose aggregate and achieve a 1–3 mil profile, remove all dust, grease, and laitance, and vacuum thoroughly.
Test moisture (≤4% by weight or per product spec); if higher, fix vapor drive before applying epoxy.
Etching requirements for penetrating stains and dyes (open pores vs. surface texture)
Although penetrating stains and dyes don’t need the aggressive tooth required for epoxy, you still need to open the concrete’s pores rather than just roughen its surface texture.
You should etch gently—acid etch or diluted muriatic solutions—to increase porosity and remove sealers, contaminants, and laitance.
Test small areas, verify even absorption, neutralize residues, and let the slab dry fully before applying stain or dye.
Common Problems and Mistakes When Etching
When etching your concrete, you’ll run into a few common mistakes that can ruin adhesion and finish if you don’t watch for them.
You might over-etch the surface, fail to neutralize and rinse properly, or accidentally etch a sealed or painted area.
Also check for moisture problems before coating and use proper PPE and handling for acids to avoid safety and chemical errors.
Over-etching and excessive surface profile
If you push the etching process too far, you’ll create an overly aggressive surface profile that can weaken the concrete and cause bonding issues with coatings or sealers.
You’ll see friable, powdery concrete and an uneven texture that traps air and prevents uniform adhesion.
Stop etching once the surface is clean and slightly rough; excessive depth forces repairs, fillers, or even slab replacement.
Inadequate neutralization or rinsing
Failing to neutralize and rinse properly leaves acidic residue that keeps eating the concrete and interferes with coatings.
So you’ll often see discoloration, mottling, or poor adhesion later on. You must neutralize with the correct solution, scrub thoroughly, and rinse until runoff tests neutral.
If residue remains, coatings won’t bond and deterioration continues—repair costs and rework increase.
Etching sealed or painted surfaces by mistake
Although you’re focused on preparing bare concrete, it’s easy to accidentally etch over sealed or painted areas. That mistake can ruin finishes and cause patchy adhesion.
Check for coatings, trims, and adjacent walls before you start. Mask or remove painted sections, test a small spot, and use gentler prep methods where coatings remain.
Repair any damaged coating before applying new finish.
Ignoring moisture issues before coating
Because moisture trapped in concrete can wreck a new coating, you need to check for it before etching or sealing.
Use a moisture meter or tape-and-plastic test to confirm dry conditions. Ignoring dampness leads to bubbling, peeling, and failed adhesion.
If moisture exists, resolve sources—fix leaks, improve drainage, or install a vapor barrier—before applying primer or finish.
Safety oversights and chemical handling errors
When you skip safety steps or mishandle etching chemicals, you’re risking burns, toxic fumes, and costly damage to surfaces or belongings.
You must wear proper PPE, ventilate well, and follow label instructions precisely.
Never mix acids or cleaners, keep children and pets away, neutralize and dispose of residues correctly, and store chemicals securely.
Small shortcuts cause big hazards and repairs.
Best Practices, Tips, and Optimization Strategies
Decide whether a chemical or mechanical etch suits your garage, basement, or patio by weighing surface condition, cleanup, and finish goals.
Check timing and conditions—temperature and humidity affect cure and adhesion—then weigh renting tools against hiring a pro based on cost, skill, and job complexity.
Always run a small adhesion test patch before treating the whole floor.
How to choose between chemical and mechanical etch for your garage, basement, or patio
Wondering whether to use a chemical or mechanical etch? You’ll weigh surface condition, coating type, and time.
Use chemical etch for light laitance, tight budgets, and gentle profiles; it’s simple but less aggressive.
Choose mechanical grinding or shot blasting for heavy contamination, thick coatings, or deeper profile needs; it’s faster for large areas and guarantees better adhesion for epoxy and heavy-use floors.
Timing and environmental conditions (temperature, humidity)
Although etching sounds simple, timing and environmental conditions directly determine how well the surface will accept coatings and how safe the process will be.
Work when temperatures are within manufacturer recommendations (usually 50–85°F) and humidity is low to moderate. Avoid freezing or very humid days; moisture prevents proper bonding.
Start etching early in the day, guarantee good ventilation, and allow full drying before coating.
Tools rental vs. hire a pro cost and complexity considerations
If you’ve got experience with power tools and a tight budget, renting etching equipment lets you control timing and saves money; if not, hiring a pro reduces risk and guarantees consistent surface prep. Weigh cost, time, and skill: rent if you’ll do prep carefully; hire for speed and warranty.
| Option | Cost | Risk |
|---|---|---|
| Rent | Low | Moderate |
| Pro | High | Low |
How to test adhesion before full application
Before you commit time and materials, verify that coatings and sealers will bond to your etched concrete by running simple adhesion tests on small, inconspicuous areas.
Clean and dry the spot, apply your product per instructions, and let it cure.
Use a tape pull test or crosshatch and peel to check bond. If failure occurs, re-etch or try a primer and retest.
Maintenance After Etching and Coating
After etching and coating, you’ll need to respect the manufacturer’s cure times before allowing foot or vehicle traffic so the surface hardens properly.
Keep painted, epoxy, and stained floors clean with gentle sweeping, pH-neutral cleaners, and spot-treat spills to preserve finish and slip resistance.
Check the surface periodically for wear—if coatings dull, chip, or allow staining, plan to recoat or reseal.
Cure times before foot and vehicle traffic
While the coating may seem dry to the touch within hours, you should wait the full manufacturer-recommended cure time before allowing foot or vehicle traffic to protect adhesion and finish longevity.
Follow label guidance—often 24–72 hours for foot traffic and 7–14 days for vehicles.
Temperature and humidity affect cure; colder or humid conditions extend times.
Use barriers and signage until fully cured.
Routine cleaning and care recommendations for painted, epoxy, and stained floors
If you want your painted, epoxy, or stained concrete to keep looking its best, establish a simple, regular cleaning routine that removes grit and spills without damaging the finish.
Sweep or vacuum daily, damp-mop weekly with pH-neutral cleaner, and wipe spills immediately.
Use soft-bristle tools, avoid harsh solvents or acidic cleaners, and protect high-traffic areas with mats to reduce wear.
When to recoat or reseal
1 key sign you should recoat or reseal is visible wear—fading, peeling, or areas that no longer shed water—so check your floor every 1–3 years and after any heavy use or chemical exposure.
If scratches, stains, or loss of gloss appear, clean thoroughly, repair damage, then apply a fresh coat or sealer.
Prompt maintenance prevents deeper deterioration and extends the coating’s life.
FAQs
You’re likely to have specific questions about timing, tools, and materials after etching—like when you can paint or epoxy, whether you should DIY or hire a pro, and if muriatic acid is your only choice.
You’ll also want to know what to do if the surface is too smooth or dusty and how moisture vapor can affect epoxy adhesion.
Below are clear answers to those common concerns.
How long after etching can I apply paint, epoxy, or stain?
Because etching both cleans and opens the concrete’s surface, you can usually apply paint, epoxy, or stain after it’s fully dry—typically within 24 to 48 hours depending on temperature and humidity.
Before coating, verify dryness by touch and check for moisture with a damp-cup or moisture meter. If any damp spots remain, wait longer; otherwise proceed with primer and follow manufacturer cure-time instructions.
Can I etch concrete myself, or should I hire a professional?
Once the slab’s dry and you’re ready to coat it, you’ll likely ask whether etching is a job you can handle yourself or if you should call a pro.
You can DIY etch with proper prep, safety gear, and patience for small areas.
Hire a pro for large, uneven, or contamination-prone floors to guarantee consistent profile, correct neutralization, and warranty-backed results.
Is muriatic acid the only option for etching?
Curious if muriatic acid is your only choice for etching? You don’t have to use it.
Alternatives include concrete etching cleaners (phosphoric or citric-based), mechanical methods like diamond grinding or shot blasting, and commercial etching solutions labeled for concrete.
Each option has trade-offs in safety, odor, cost, and surface profile—choose based on your skill, ventilation, and desired finish.
What if my concrete is too smooth or too dusty after etching?
If your concrete still seems too smooth after etching, or it’s powdery and dusty instead of accepting coatings, you’ve got a few quick checks and fixes to try:
Test adhesion with tape, check for curing compounds or sealers, and clean thoroughly with a degreaser.
Mechanically profile the surface—grit blasting, diamond grinding, or scabbler—then vacuum and wipe before recoating.
How does moisture vapor emission affect epoxy adhesion?
After you’ve handled surface profile and contaminants, the next big hurdle is moisture vapor emission from the slab, because excess moisture can ruin epoxy adhesion even on a properly prepared surface.
You should test vapor emission (MVER or calcium chloride) and relative humidity in-situ. High readings mean you’ll need a moisture mitigation system or a vapor-tolerant coating; don’t skip verification.