How to Remove Vinyl Plank Flooring Without Cracking the Planks
You can remove vinyl plank flooring without cracking the planks by working slowly and using the right approach for the installation. Start by identifying whether it’s floating, click-lock, loose-lay, or glue-down. Loosen seams with a utility knife, lift edges with a pry bar or putty knife, and apply gentle heat or adhesive remover when needed. Support each plank as you lift to avoid stress fractures and stack them flat for storage. Keep going to learn detailed, step-by-step techniques.
How to Remove Vinyl Plank Flooring Without Cracking the Planks
You can often remove vinyl planks intact, but whether it’s realistic depends on the installation type and how long they’ve been down.
It’s usually worth trying to preserve planks if they’re in good condition and you plan to reuse them or sell them.
Next, we’ll compare the basic removal methods for floating, glue-down, and click-lock systems so you know what to expect.
Quick Answer Can You Remove Vinyl Planks Intact?
Wondering if vinyl planks can be removed intact? You often can, but success depends on installation type, adhesive strength, and floor condition.
When you follow proper how to remove vinyl plank flooring steps—loosen edges, use pry tools gently, apply heat or adhesive remover—you’ll minimize cracking.
Work slowly, support planks, and stop if they resist; forced removal causes damage.
When It’s Worth Trying to Preserve Planks
If the planks started coming up largely intact during removal, it’s worth trying to preserve them for reuse or resale—especially when they’re high-quality, in good condition, or match remaining flooring.
You should preserve planks if damage is minimal, adhesive release is clean, and replacement cost is high.
Prioritize salvage when patterns, warranties, or limited stock make originals valuable for future repairs or sale.
Overview of Methods (Floating vs. Glue-Down vs. Click-Lock)
Because removal technique depends on how the planks were installed, you’ll need to pick the right approach for floating, glue-down, or click-lock floors to avoid cracking or wasting salvageable pieces.
For floating floors, lift from a seam and work sections loose.
For glue-down, soften adhesive with heat or adhesive remover and pry gently.
Click-lock pulls apart at joints; use a tapping block and pry bar carefully.
Basic Understanding Vinyl Plank Types and Attachment Methods
Before you start, know the common vinyl plank types and the main installation methods: floating/click-lock, glue-down, and loose-lay.
Each attachment style changes how the planks come up and what tools or prep you’ll need. Understanding the method under your feet lets you pick the safest, fastest removal strategy.
Types of Vinyl Plank Flooring
Vinyl plank flooring comes in a few distinct types and attachment styles, so you’ll want to know their differences before you start removing anything.
You’ll encounter solid vinyl (rigid core, durable), SPC and WPC (stone or wood-plastic composite cores), thin flexible planks (sheet-style cut into planks), and tile-look designs.
Each varies in thickness, wear layer, and edge profile, affecting removal care.
How Planks Are Installed: Floating, Click-Lock, Glue-Down, Loose-Lay
Understanding how planks attach to the subfloor helps you choose the right removal method and avoid damage.
You’ll encounter floating floors that lock together without adhesive, click-lock systems with interlocking edges, glue-down planks adhered directly to the substrate, and loose-lay pieces held by weight and friction.
Knowing these types lets you identify fasteners and tools needed before you start prying or cutting.
How Attachment Method Affects Removal Strategy
Because each attachment type behaves differently during removal, you’ll pick different tools and tactics for floating, click-lock, glue-down, and loose-lay planks. You’ll pry floating and click-lock seams, use heat or solvent for glue-down, and gently lift loose-lay. Match tools to attachment to avoid cracking.
| Type | Tool | Technique |
|---|---|---|
| Floating | Pry bar | Separate seams |
| Click-lock | Puller | Release joints |
| Glue-down | Heat/solvent | Soften adhesive |
| Loose-lay | Hands | Lift gently |
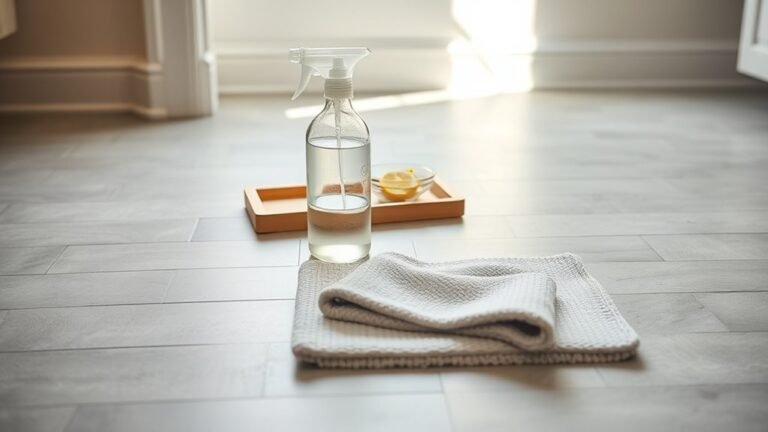
Required Tools, Materials, and Safety Precautions
Before you start pulling up planks, gather essential tools like a pry bar, utility knife, hammer, putty knife, and a floor scraper.
Add helpful extras—like a heat gun, pry block, adhesive remover, and floor protectors—to minimize damage and speed the job.
Wear PPE (gloves, knee pads, eye protection, and a dust mask) and clear and ventilate the workspace for safety.
Essential Tools List
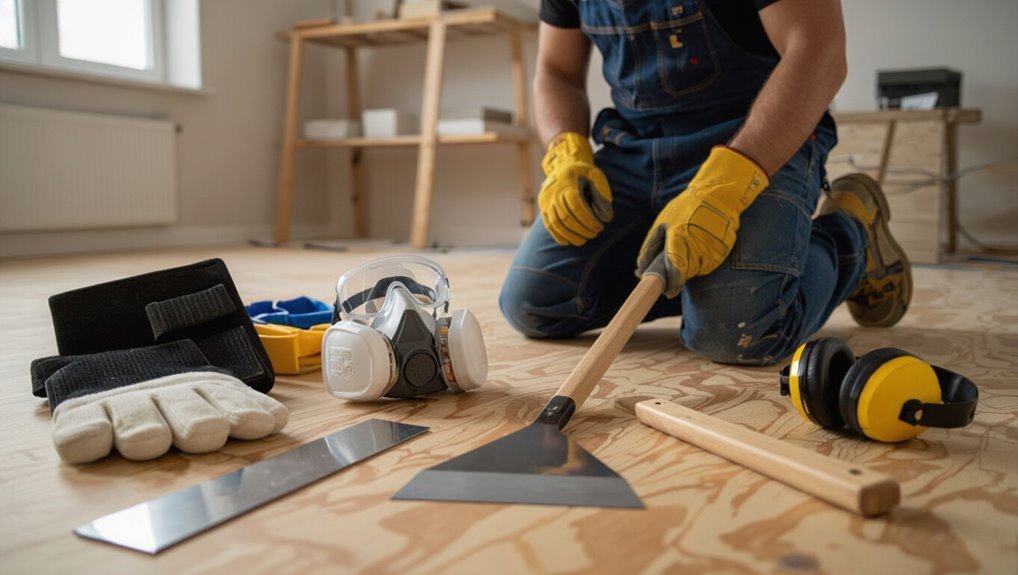
You’ll need a concise set of tools, materials, and safety gear to remove vinyl plank flooring efficiently and without injury.
Gather quality items and prioritize protection.
Checklist:
- Pry bar, flooring puller, utility knife
- Gloves, knee pads, safety glasses, dust mask
- Hammer, scraper, adhesive remover, trash bags
Work methodically, keep tools handy, and protect yourself from sharp edges and dust.
Helpful Extras to Reduce Damage
When you want to minimize damage to subflooring and adjacent trim, add a few thoughtful extras to your toolkit: a furniture dolly and moving blankets to protect nearby items, a shim set and trim puller for removing baseboards cleanly, a heat gun to loosen stubborn adhesive without gouging, and adhesive-safe plastic scrapers that won’t nick plywood.
Keep spare threshold strips, low-tac painter’s tape, wood glue, and a small rubber mallet handy.
Personal Protective Equipment and Workspace Prep
Gather the right PPE and prep the workspace so you can work safely and efficiently: safety glasses, N95 or P100 respirators for dust and adhesive fumes, nitrile gloves to protect skin from solvents and splinters, and knee pads for extended kneeling.
Clear furniture, ventilate, seal doorways with plastic, lay down drop cloths, keep a fire extinguisher nearby, and have first-aid and proper lighting ready.
Step-by-Step Removal Process Click-Lock / Floating Planks
Start by clearing the room and removing baseboards or junction strips so you can access the starter row.
Find the starter row and seams, then gently loosen the first planks without forcing them to avoid damage.
Work row by row to disengage the tongue-and-groove joints, stacking intact planks neatly for reuse or storage.
Step 1: Prepare the Room and Remove Trim/Molding
Before you lift a single plank, clear the room and remove baseboards or quarter-round molding so you can access the plank edges and expansion gaps.
Move furniture, curtains, and rugs out or to the center covered with drop cloths. Label removed trim pieces and keep fasteners in a bag.
Sweep and vacuum to remove grit that can scratch planks during removal.
Step 2: Locate the Starter Row and Seams
Once you’ve cleared the room and removed trim, identify the starter row—the first full row of planks laid against the longest wall—and scan the floor to find the seams and any end joints you’ll need to disengage.
Note plank direction, locate staggered joints, and mark any glued or snapped connections.
Check for underlayment edges and trim obstacles before you begin lifting.
Step 3: Loosen and Lift the First Planks Without Forcing
Now that you’ve identified the starter row and seams, focus on loosening the first planks gently so you don’t damage the locking edges.
Slide a thin pry bar or putty knife into the seam, tap lightly with a mallet, and work along the joint. Lift incrementally, releasing clips rather than forcing.
If resistance persists, backtrack and check for hidden fasteners or adhesive.
Step 4: Disengage Tongue-and-Groove Joints Row by Row
Work row by row to disengage the tongue-and-groove joints so you don’t bend or snap the edges.
Starting at one end, lift each plank slightly and angle it toward the seam to release the tongue. Use a tapping block and mallet for stubborn joints, working steadily along the row.
Keep removed planks flat to prevent warping or edge damage.
Step 5: Store or Stack Intact Planks Safely
5. After removing planks, stack them flat and alternate ends to prevent warping.
Keep protective layers—cardboard or felt—between rows to avoid scratches.
Store stacks off the ground on pallets or slats to allow air circulation and reduce moisture.
Label each pile by room and orientation for easier reinstall.
Keep stored planks in a climate-controlled area away from direct sunlight.
Step-by-Step Removal Process Glue-Down Vinyl Planks
Start by testing a small area to see how stubborn the adhesive is so you can choose the right removal method.
You’ll soften remaining glue with heat or an appropriate solvent, then use pry bars and scrapers to gently lift planks.
For tough sections use a floor scraper or oscillating tool while protecting plank edges, and finish by cleaning residual adhesive without harming the plank undersides.
Step 1: Test a Small Area to Assess Adhesive Strength
Pick a small, inconspicuous spot—like a corner or behind a doorway—to test how firmly the glue holds the vinyl plank.
Gently lift an edge with a putty knife or thin pry bar; note resistance and whether the plank peels cleanly or tears.
Record results and take photos. This tells you if you’ll need stronger tools or slower, more careful removal.
Step 2: Use Heat and Solvent Techniques to Soften Adhesive
Soften the adhesive with a combination of heat and solvent to make the planks lift more easily:
Apply a heat gun on low, keeping it moving to warm adhesive without warping vinyl.
Use a concrete-safe adhesive remover or citrus solvent sparingly, let it penetrate per product instructions, then wipe residue.
Ventilate the area, wear gloves and goggles, and retest to confirm the bond has weakened.
Step 3: Use Pry Tools and Scrapers to Gently Separate Planks
Work methodically with a pry bar, putty knife, or floor scraper to lift softened glue-down planks without damaging the subfloor.
Slide thin scrapers under edges, working slowly along seams. Pry near a plank end, lift incrementally, and use a rocking motion to free adhesive.
Keep tools angled to avoid gouging; wipe away loosened adhesive and repeat until each plank releases cleanly.
Step 4: Mechanical Removal Options (Floor Scraper, Oscillating Tool) While Preserving Edges
Once you’ve loosened and lifted sections by hand, bring in mechanical tools to speed removal and protect exposed edges.
Use a floor scraper with a sharp, replaceable blade at low angle, pushing steadily. For tight spots, switch to an oscillating tool with a rigid scraper attachment, working slowly along plank seams.
Clamp or tape adjacent planks to prevent edge chipping as you proceed.
Step 5: Clean Residual Adhesive Without Damaging Plank Underside
Before you start scraping, test an inconspicuous plank underside and the subfloor to choose a solvent or heat method that will remove adhesive without harming the vinyl backing.
Use a plastic scraper and mild solvent (citrus or isopropyl) or low-heat gun; work gently from edges toward center.
Wipe residue with clean rag, neutralize solvent per instructions, and let area dry before reinstalling or storing planks.
Step-by-Step Removal Process Loose-Lay and Peel-and-Stick
Start by lifting an edge and peeling slowly to keep planks intact and reduce tearing.
If some planks stick from wear or leftover adhesive, use a scraper and adhesive remover to free them.
Take care with heat-sensitive backings by avoiding high heat and using gentle warming or mechanical methods instead.
Step 1: Edge Lifting and Slow Peeling Technique
Lift a corner of the plank and work slowly along the edge, peeling back at a low angle to reduce tearing and adhesive residue.
Use a putty knife or thin pry bar to support the underside as you go, keeping pressure even.
Pull steadily, not sharply, and stop if resistance spikes.
Rotate the plank slightly to follow its grain and prevent cracking.
Step 2: Managing Planks Adhered by Wear or Residue
If a plank won’t peel cleanly and feels stuck from wear or old residue, you’ll need to change tactics for loose‑lay and peel‑and‑stick types.
Work slowly with a putty knife to pry edges, applying solvent or adhesive remover sparingly to softened spots.
Scrape residue gently, wipe with a damp cloth, and avoid twisting the plank to prevent cracking.
Step 3: Dealing with Heat-Sensitive Backings
Heat-sensitive backings need extra care to avoid melting or warping, so you’ll work slowly and keep temperatures low when loosening loose‑lay or peel‑and‑stick planks.
Use a low-heat setting on a heat gun or a hair dryer held well back, test a scrap, and peel incrementally.
Warm adhesive gently, lift with a thin spatula, and stop if backing softens or stretches.
Common Problems and How to Avoid Cracking
When you pull up vinyl planks you can crack them by prying at the wrong angle, forcing stuck edges, or using dull tools.
Use steady, even pressure, support the plank near the pull point, and score glued seams to prevent splitting and edge damage.
If a plank cracks mid-removal, stop, assess whether you can salvage the section for patching, or remove the pieces carefully to avoid damaging adjacent planks.
Causes of Cracked or Broken Planks During Removal
Although vinyl plank removal looks straightforward, planks often crack or break when you use the wrong tools, apply uneven force, or try to pry up adhesive-bonded pieces without softening the glue first.
You’ll also cause damage by rushing, lifting from weak joints, or working in cold conditions that make vinyl brittle.
Inspect seams, loosen adhesive, and support plank ends to reduce breakage.
Techniques to Prevent Splitting and Edge Damage
Cracked or chipped edges usually happen when you pry too hard, lift at weak joints, or try to pull adhesive-bound planks without softening the glue first.
What to Do If a Plank Cracks Mid-Removal
If a plank cracks while you’re removing it, don’t panic — stop pulling and reassess so you can salvage the piece and protect surrounding boards.
Inspect the fracture: if small, glue and clamp or use a vinyl repair compound; if severe, remove remaining sections carefully, avoiding stress on neighbors.
Replace the broken plank with a matching piece and clean the area before reinstalling.
Tips, Best Practices, and Efficiency Hacks
You’ll speed up removal and protect reusable planks by using heat, solvents, and lubricants carefully—keep temperatures moderate and test chemicals on a scrap first.
Use proper leverage and tool angles to lift without stressing edges, and tackle doorways, cabinets, and openings slowly to avoid damage.
Label, stack, and store salvaged planks flat and dry for easy transport and reinstallation.
How to Use Heat, Solvents, and Lubricants Safely
When removing stubborn vinyl planks, using controlled heat, targeted solvents, and the right lubricants can speed the job without damaging subfloors or releasing toxic fumes—so plan each step, work in well-ventilated areas, and test methods on a scrap plank first.
Use a low-temp heat gun, apply solvent sparingly, wear gloves and respirator, protect surrounding finishes, and wipe residues promptly to prevent adhesive reactivation.
Proper Leverage and Tool Angles to Minimize Stress
After softening stubborn planks with heat or solvent, use leverage and proper tool angles to lift them cleanly without stressing the subfloor.
Slide a thin pry bar under seams, rocking gently at a shallow angle to reduce pry force. Support removed edges with a scrap board to spread load.
Adjust blade tilt to follow plank grain and avoid sudden jerks.
Working With Difficult Areas: Around Doorways, Cabinets, and Transitions
Tackle tricky spots like doorways, cabinets, and shifts by planning each cut and support before you pry—measure clearances, mark cut lines, and score seams so you can remove narrow strips without damaging surrounding trim or the subfloor.
Use a pull bar and thin pry bar for tight gaps, loosen adhesive with a putty knife or heat, protect adjacent trim with scrap wood, and work slowly to preserve plank edges.
Storing, Transporting, and Reinstalling Salvaged Planks
Because you’ll want usable planks later, sort and label each salvaged piece right away—note location, orientation, and any damage—then stack them flat on a dry, level surface with spacers between layers to prevent warping.
Wrap ends, keep packs off damp floors, and transport upright in a padded rack.
Before reinstalling, acclimate planks to room humidity, check tongues/grooves, and replace damaged pieces.
Comparison: Preserving Planks vs. Full Replacement
When deciding whether to preserve planks or replace the whole floor, you’ll weigh time, cost, and labor—preserving can save money but often takes longer and requires careful removal.
If planks are heavily damaged, warped, or permanently glued down, preservation becomes impractical and full replacement is usually faster and more reliable.
Consider your budget, schedule, and the condition of the flooring before choosing a path.
Time, Cost, and Labor Tradeoffs
Although preserving individual planks can seem quicker and cheaper up front, you’ll want to weigh the time, cost, and labor tradeoffs against a full replacement to decide which approach makes sense for your situation. Consider durability, salvageability, and labor intensity when choosing.
| Option | Upfront Cost | Labor Time |
|---|---|---|
| Preserve | Low–Med | Medium |
| Replace | High | High |
| Hybrid | Med | Medium |
Situations Where Preservation Is Impractical
If the planks are warped, water-damaged, or glued down with heavy adhesive, trying to preserve them can cost you more time and trouble than a full replacement—you’ll spend hours prying, cleaning, and repairing pieces that may never look right.
Choose replacement when multiple boards are compromised, subfloor damage exists, or adhesive removal risks breaking surrounding planks—it’s often faster, cheaper, and gives a consistent finish.
Mistakes to Avoid
Don’t rush the job or you’ll gouge subflooring or ruin salvageable planks.
If you hit unexpected mold, extensive adhesive, or structural damage, stop and call a professional.
Knowing common DIY mistakes helps you decide when to keep going and when to hand it off.
Common DIY Errors That Cause Damage
When you rush the job or skip proper prep, vinyl plank installations can easily get ruined, costing you time and money.
Avoid common DIY errors that cause damage by staying careful and methodical:
- Using too much force when prying planks, which cracks edges.
- Ignoring adhesive residue, leading to uneven new installs.
- Cutting without measuring, wasting material and creating gaps.
When to Stop and Call a Professional
You’ve learned the mistakes that cause damage, but some problems go beyond basic fixes and should make you stop and call a pro.
If you find widespread water damage, mold, warped subflooring, stubborn glued planks, or structural issues, don’t keep improvising.
Calling a flooring contractor or structural specialist prevents costly mistakes, preserves salvageable planks, and guarantees safe, code-compliant repairs rather than risky DIY attempts.
Tools and Method Comparison (When to Use Each)
You’ll want to weigh hand tools against power tools by considering speed, control, and the risk of damaging subflooring.
For adhesive removal, choose heat, chemicals, or mechanical methods depending on the adhesive type, ventilation, and how fast you need the job done.
I’ll walk you through the pros and cons and when each approach makes the most sense.
Hand Tools vs. Power Tools: Pros and Cons
Although both hand and power tools can get vinyl plank flooring out, each has clear trade-offs you should weigh before you start:
Hand tools—crowbar, pry bar, putty knife—give precision, low cost, and minimal surface damage, but they’re slower and more physical.
Power tools—oscillating multi-tool, floor scraper—speed removal and handle stubborn areas, yet risk plank cracking, heat buildup, and require skill and safety gear.
Heat vs. Chemical vs. Mechanical Adhesive Removal
When adhesive’s holding power leaves planks stubbornly stuck, you’ll choose between heat, chemicals, or mechanical methods based on the glue type, substrate, and your tolerance for mess, time, and risk. Use heat for softening, solvents for stubborn residue, and mechanical for thick mastic.
| Method | Best for | Drawbacks |
|---|---|---|
| Heat | Vinyl with old glue | Burns, slow |
| Chemical | Residue removal | Fumes, prep |
| Mechanical | Thick mastic | Dust, substrate damage |
FAQ
You probably have quick questions like whether planks can come up intact and if heat will harm the finish.
You’ll also want to know how to remove adhesive without wrecking the backing, whether planks are reusable and how often, and how long a safe removal takes for a typical room.
Read on for concise answers and practical tips.
Can all vinyl planks be removed intact?
Can most vinyl planks come up intact? Not always.
You can often remove click-lock or loose-lay planks with minimal damage, but glued, heavily aged, or vinyl with rigid cores may tear or delaminate.
Success depends on adhesive type, installation method, subfloor condition, and your technique.
Test a small area first, use proper tools, work slowly, and expect some replacements.
Will using heat damage the plank finish?
If you apply heat to loosen vinyl planks, expect some risk to the wear layer and printed finish—especially with high temperatures or prolonged exposure.
You can use moderate, controlled heat to soften adhesive, but avoid direct flames or industrial heat guns.
Test a hidden plank first, keep heat moving, and stop if you see gloss loss, bubbling, discoloration, or softening to prevent irreversible finish damage.
How do I remove adhesive without ruining the plank backing?
1 smart approach is to start with gentle, non-abrasive methods and only step up to stronger treatments as needed, so you protect the plank backing.
Use a plastic scraper, warm soapy water, and a microfiber cloth first.
For stubborn residue, try a citrus-based adhesive remover applied sparingly and wiped quickly.
Test a hidden area, work slowly, and avoid metal tools or harsh solvents.
Can I reuse vinyl planks after removal and how many times?
Wondering whether you can reuse vinyl planks after removal? You can, but reuse depends on condition: undamaged locking edges, intact backing, and minimal adhesive residue.
Floating click-lock planks survive removal best; glued planks rarely reuse well.
Inspect each piece, clean edges, and test fit before reinstalling. Expect reuse for a few times at most—quality and installation stress determine longevity.
How long does safe removal usually take for a typical room?
How long will safe removal take for a typical room?
You can expect 2–6 hours for a 10×12 room if you work steadily and use the right tools.
Prep and adhesive removal add time; plan an extra 1–3 hours for heat, scraping, and cleanup.
If planks are glued or subfloor repairs are needed, budget a full day or more.