Does Vinyl Flooring Need Underlayment or Can You Skip It?
You can often skip separate underlayment for modern vinyl, especially rigid-core planks with attached backing, but you shouldn’t do it blindly. Check the manufacturer’s instructions and warranty first, confirm the subfloor is flat, dry, and structurally sound, and consider underlayment for sound, comfort, or minor leveling. Thin foam, cork, or rubber add cushioning and noise control, while plywood and leveling compounds fix imperfections. Keep going to learn when underlayment truly matters and how to choose it.
Quick Answer Do You Need Underlayment for Vinyl Flooring?
If you’re installing vinyl plank or luxury vinyl tile, you usually do need an underlayment for cushioning and sound control, but many rigid core (SPC/WPC) products include attached underlayment so you can skip it.
You can also skip additional underlayment over a perfectly flat, dry, and level subfloor if the manufacturer allows it.
Always check the product specs and warranty before deciding.
Short direct answer for common vinyl types
Most vinyl types already include or don’t require a separate underlayment—luxury vinyl plank (LVP) and vinyl sheet usually have built-in backing, while rigid core vinyl (WPC/XPC) and some click-lock LVP benefit from an underlayment for sound, comfort, and minor subfloor leveling.
If you’re asking does vinyl floor need underlayment, check the product specs and your subfloor condition before deciding.
When you can skip underlayment
When your subfloor is smooth, level, dry, and the vinyl product specifies no extra underlayment, you can usually skip adding one; check manufacturer guidelines and local building codes to be sure.
You can skip underlayment if the vinyl is rigid and designed for direct glue or floating install, the subfloor is structurally sound, and moisture levels are within acceptable limits.
Follow supplier instructions precisely.
Basic Understanding What Is Underlayment and Why It Matters
Underlayment is the thin layer you install beneath vinyl to cushion, level, and reduce noise and moisture.
You’ll choose from materials like foam, cork, rubber, plywood, or peel-and-stick based on the subfloor and performance needs.
Different vinyl types—LVP/LVT, vinyl plank, sheet vinyl, SPC/WPC—have varying thickness and rigidity that affect which underlayment works best.
Definition and functions of underlayment
Think of underlayment as the invisible support layer beneath your vinyl floors that cushions, levels, and protects the surface above.
It sits between subfloor and vinyl, improving comfort, sound, and durability while addressing minor irregularities and moisture concerns.
You’ll get a smoother install and longer-lasting floor when you choose the right underlayment.
- Improves comfort underfoot
- Reduces impact and airborne noise
- Smooths minor subfloor imperfections
- Provides moisture buffering
Types of underlayment materials (foam, cork, rubber, plywood, peel-and-stick)
Choosing the right underlayment material can make or break your vinyl floor’s performance, so it helps to know the main options. You’ll pick foam for cushioning, cork for natural warmth, rubber for sound and durability, plywood for subfloor repair, or peel-and-stick for easy installs.
| Material | Feeling |
|---|---|
| Foam | Soft comfort |
| Cork | Warm calm |
| Rubber | Solid confidence |
| Plywood | Reliable stability |
Types of vinyl flooring (LVP/LVT, vinyl plank, sheet vinyl, SPC/WPC) and how they differ
When you’re picking vinyl flooring, you’ll first want to understand the main types—LVP/LVT, vinyl plank, sheet vinyl, and rigid-core (SPC/WPC)—because each pairs with underlayment differently and affects comfort, sound, and stability.
LVP/LVT and plank need cushioning for feel and noise; sheet vinyl often requires smooth subflooring and minimal underlayment; SPC/WPC is stiffer, tolerates thinner underlay, and controls expansion.
When Underlayment Is Required vs. Optional
You should always check manufacturer requirements and warranty rules before deciding on underlayment, because skipping it can void coverage.
If your subfloor is uneven, concrete, has radiant heat, or shows moisture issues, underlayment is usually necessary to protect the vinyl and guarantee a stable installation.
Conversely, factory-attached backing like pre-attached foam or cork often suffices, so you won’t need a separate underlayment in those cases.
Manufacturer requirements and warranty considerations
Because manufacturers set specific installation rules, following their underlayment requirements is essential to keeping your vinyl flooring warranty valid.
Check the installation guide before you install: some brands mandate specific underlayment types or acoustical pads, and others void warranties if you skip required layers.
Keep receipts, document installation, and contact the manufacturer for approval if you plan deviations to avoid losing coverage.
Subfloor conditions that make underlayment necessary (uneven, concrete, radiant heat, moisture)
If your subfloor is uneven, concrete, exposed to moisture, or over radiant heat, underlayment often isn’t optional—it’s necessary to protect the vinyl and guarantee a stable installation.
You’ll need underlayment to level minor dips, provide a moisture barrier on concrete, and offer thermal buffering over radiant systems.
Skip it only when the subfloor is flat, dry, and compatible with the vinyl’s specifications.
When factory-attached underlayment suffices (pre-attached backing, attached cork/foam)
Think of factory-attached underlayment as a convenience feature: when your vinyl comes with a bonded backing—cork, foam, or felt—it’s often all you need for smooth, sound performance on a flat, dry, and level subfloor.
You can usually skip extra layers unless you need added cushioning, extra soundproofing, or moisture protection beyond the product’s specifications.
Check manufacturer guidelines and warranty limits first.
How to Choose the Right Underlayment for Vinyl Flooring
To pick the right underlayment, you’ll match the product to your vinyl type and installation method—floating, glue-down, or loose-lay each have different requirements.
Consider sound reduction (IIC/STC), comfort, and whether a moisture or vapor barrier is needed for concrete subfloors.
Also check thickness and compressibility limits to guarantee dimensional stability and proper performance.
Matching underlayment to vinyl type and installation method (floating, glue-down, loose lay)
Because each vinyl type and installation method places different demands on the subfloor and seams, you should pick an underlayment designed for that specific combination.
For floating SPC/LVT, use moisture-resistant, compressible pads that allow locking.
For glue-down, choose thin, dense underlayments or directly bond to the substrate.
For loose-lay, select stable, non-slip underlayments that prevent shifting without affecting adhesion.
Sound reduction and comfort considerations (IIC/STC ratings)
Beyond matching underlayment to vinyl type and installation method, you’ll also want to contemplate how it affects sound and comfort.
Choose underlayment that improves IIC/STC ratings to reduce impact and airborne noise, and adds cushioning for standing comfort.
- Thicker foam boosts impact insulation
- Dense cork absorbs airborne sound
- Rubber offers both damping and resilience
- Combination layers balance comfort and ratings
Moisture and vapor barrier requirements for concrete subfloors
Moisture is the silent threat to vinyl on concrete, so you need an underlayment that stops vapor and prevents adhesive failure, cupping, and mold.
Test slab moisture with a calcium chloride or relative humidity test. Choose underlayment with a certified vapor retarder or install a separate 6-mil polyethylene barrier where required.
Guarantee seams are sealed and follow manufacturer limits for moisture vapor emission.
Thickness and compressibility guidelines
Thickness and compressibility determine how your vinyl feels underfoot and how well it stands up over time, so pick an underlayment that matches your vinyl type and traffic loads.
Choose thin, firm underlayments (1–2 mm) for rigid luxury vinyl planks to preserve locking profiles.
For softer, thicker vinyl, use slightly compressible pads (2–3 mm) to absorb impact without causing instability.
Step-by-Step Installation Guidance (If Using Underlayment)
Before you begin, inspect and prep the subfloor for level and moisture issues. Then select and acclimate your underlayment and vinyl.
Lay any required vapor barrier and install the underlayment with proper seams and adhesives. Then put down the vinyl according to whether it’s floating or glue-down.
Finish with trim, connectors, and correct expansion gaps to guarantee a clean, long-lasting result.
Step 1: Inspect and prepare the subfloor (leveling, moisture testing)
Because a stable, dry subfloor is the foundation of any lasting vinyl installation, you should start by inspecting for level, damage, and moisture before laying underlayment.
Check flatness with a straightedge, repair low spots with patching compound, replace rotten or soft areas, and test moisture using a meter or plastic sheet test.
Confirm readings meet manufacturer limits before proceeding.
Step 2: Select and acclimate materials
Choose underlayment that matches your vinyl type, subfloor conditions, and the manufacturer’s specifications, then bring all materials into the room to acclimate.
Let the underlayment and vinyl sit unopened for 48–72 hours at normal indoor temperature and humidity.
Check rolls for damage, verify thickness and warranty requirements, and confirm compatibility with any adhesives or radiant heat systems before you begin installation.
Step 3: Install vapor barrier and underlayment (seams, adhesives)
Start by laying out the vapor barrier across the entire subfloor, taping seams tightly and trimming excess so the barrier runs up any walls a few inches.
Then roll out the underlayment over the barrier, aligning seams according to the manufacturer’s instructions and securing them with the recommended adhesive or seam tape.
Overlap or butt seams as directed, press seams flat, and allow adhesives to set before proceeding.
Step 4: Install vinyl flooring over underlayment (floating vs. glue-down specifics)
Once your underlayment and vapor barrier are set, decide whether you’ll float the vinyl or glue it down and follow the manufacturer’s layout lines:
- For floating: click-lock seams, stagger joints, leave expansion gap per instructions.
- For glue-down: trowel adhesive, work in sections, press planks firmly.
Check alignment frequently and trim starter row as needed.
Roll the floor with a weighted roller for proper bond.
Step 5: Finishing touches (trim, transitions, expansion gaps)
After the planks are secure, finish the job by installing trim, connections, and properly sized expansion gaps so the floor looks polished and can move as designed.
Fit baseboards or quarter-round without pinching the planks, and use threshold strips at doorways and differing floor heights.
Maintain manufacturer-recommended gap around walls and at thresholds, then caulk or seal only where specified to allow movement.
Comparison Underlayment vs. No Underlayment
When you compare using underlayment vs. skipping it, focus on how each affects durability, comfort, and sound control.
Consider the trade-offs in cost and installation time, and how those choices can influence your warranty and resale value.
We’ll weigh the practical performance differences so you can pick what’s best for your space.
Performance: durability, comfort, sound
Think of underlayment as the unseen layer that protects your vinyl: it boosts durability, adds comfort underfoot, and cuts down on noise compared with installing vinyl directly over the subfloor. You’ll notice less wear, softer steps, and quieter rooms with underlayment. Compare performance metrics:
| Feature | With Underlayment | Without Underlayment |
|---|---|---|
| Durability | High | Lower |
| Comfort | Improved | Firm |
| Sound | Reduced | Echoey |
Cost and time implications
Installing underlayment adds a modest upfront cost and a bit of time to your vinyl project, but it can save you money later by extending the floor’s life and reducing repairs.
Skipping it cuts immediate expense and speeds installation, yet often increases long-term maintenance and noise-related complaints.
You’ll spend more on foam or cork and labor now, but avoid premature replacement and annoying squeaks down the road.
Warranty and resale impact
Because manufacturers and buyers often look for professional installation and proper substrate prep, using recommended underlayment can protect your warranty and boost resale appeal.
Skipping it may void coverage or raise red flags for inspectors and potential buyers.
You should follow manufacturer guidelines to keep warranty valid, document installation, and avoid buyer concerns.
Disclosure of shortcuts can reduce sale value and trust.
Common Problems When Skipping Underlayment
If you skip underlayment, you’ll likely feel hollow or uneven planks where subfloor imperfections show through.
You’ll also raise the risk of moisture-related failures and mold in damp areas.
Plus, your floor will be noisier and less thermally comfortable without the cushioning layer.
Issues with subfloor imperfections and feeling of hollow/uneven planks
When you skip underlayment, minor dips, gaps, and seams in the subfloor translate directly into the surface you walk on, making planks feel hollow, uneven, or springy underfoot.
You’ll notice squeaks, flexing at joints, and accelerated wear where boards can’t fully support traffic.
Proper underlayment evens support, reduces deflection, and keeps planks sitting flat for a firmer, longer-lasting floor.
Moisture-related failures and mold risk
Skipping underlayment lets moisture from below or spills above reach the vinyl and subfloor, so you’ll face cupping, adhesive failure, and trapped damp that invite mold growth.
Without a vapor barrier or breathable cushion, moisture migrates, weakening glue and swelling core layers. You’ll get musty odors, staining, and health risks; repairs mean lifting planks, drying, and possible subfloor replacement.
Increased noise and poor thermal comfort
Beyond moisture and mold, going without underlayment also leaves you with a louder, colder floor.
You’ll notice hollow footsteps, more echo, and sound traveling between rooms. Without the cushioning layer, vinyl feels thin and transmits impact noise.
Thermal comfort drops too — floors stay chilly, forcing higher thermostat settings or rugs.
Underlayment reduces noise and insulates, improving comfort and energy use.
Best Practices and Tips
You should always use underlayment on uneven subfloors, over concrete with moisture risk, and when the manufacturer or installer requires it.
If you skipped underlayment and now see squeaks, hollow spots, or moisture issues, you can often patch problem areas, add a thin overlay, or address moisture before it worsens.
Work closely with your installer and follow manufacturer specs to keep warranties valid and guarantee a lasting installation.
When to always use underlayment
When your subfloor shows any signs of moisture, unevenness, or sound transmission issues, always install underlayment to protect the vinyl and guarantee a long-lasting finish.
Also use underlayment over radiant heat, on concrete slabs, with thin plank vinyl, in multi-story buildings to reduce impact noise, and where manufacturer warranties require it.
Don’t skip it in high-traffic or moisture-prone areas.
Quick fixes if you skipped underlayment and notice problems
If you skipped underlayment and now hear squeaks, feel uneven spots, or spot moisture issues, don’t panic—there are practical fixes you can try before tearing up the floor.
Tighten loose planks, add seam sealer or adhesive where gaps appear, use thin self-leveling compound for minor dips, place moisture barriers in affected rooms, and try area rugs or anti-slip pads to stabilize surfaces temporarily.
Tips for working with installers and following manufacturer specs
Having a pro handle the installation can save time and prevent problems, especially after quick DIY fixes have been applied; make sure you communicate exactly what you’ve done so installers won’t unknowingly cover up issues or void warranties.
- Show installers receipts, product codes, and photos of repairs.
- Ask for written confirmation of manufacturer requirements.
- Verify underlayment type and moisture barrier details.
- Keep a copy of warranties and installation notes.
FAQ
You probably have specific questions like whether you can install vinyl plank directly over plywood, if underlayment’s required over concrete, or whether underlayment will void your flooring warranty.
You might also wonder about using cork with luxury vinyl tile and how thick underlayment should be for floating vinyl floors.
I’ll answer each of these clearly so you can pick the right approach for your project.
Can I install vinyl plank directly over plywood subfloor?
Can you install vinyl plank directly over plywood subfloor? Yes, you can if the plywood is clean, dry, level, and securely fastened.
Fill gaps, sand high spots, and remove debris. Use a vapor barrier or underlayment if manufacturer recommends it for cushioning or sound control.
Follow the vinyl plank maker’s installation guidelines to maintain warranty and guarantee long-term performance.
Is underlayment necessary over concrete?
Wondering whether you need underlayment over concrete? You usually should.
Concrete transmits cold, moisture, and minor imperfections, so a suitable underlayment adds vapor barrier, cushioning, and sound control. Choose products rated for concrete and follow manufacturer moisture guidelines and adhesive/installation methods.
If concrete is perfectly dry, level, and approved by the flooring maker, you might skip underlayment—but that’s rare.
Will underlayment void my vinyl flooring warranty?
How will adding underlayment affect your vinyl flooring warranty?
Check your manufacturer’s warranty before installing—some allow specific underlayments, others require theirs or none.
Using an unapproved product or altering installation methods can void coverage.
Keep receipts, follow approved guidelines, and document installers.
If in doubt, contact the manufacturer for written confirmation to protect your warranty and avoid disputes.
Can I use cork underlayment with luxury vinyl tile?
Curious about cork underlayment for luxury vinyl tile? You can use cork if the manufacturer permits it; check warranty and installation guidelines first.
Cork offers sound reduction and some thermal benefits, but verify it’s compatible with adhesive or floating installation methods.
Avoid overly compressible cork that could affect plank stability. Always follow manufacturer recommendations to keep performance and warranty intact.
How thick should underlayment be for floating vinyl floors?
Which thickness suits your floating vinyl floor depends on the product and subfloor—most manufacturers recommend underlayment between 1mm and 3mm (about 1/32″–1/8″), with some systems calling for up to 6mm for extra cushioning or sound control;
always follow the vinyl flooring maker’s guidelines to protect the locking system and warranty.
Choose a compatible, compressive material that won’t impede clicks, add moisture protection if needed.
Visuals and Resources
You’ll find it helpful to include clear diagrams showing underlayment layers and common installation scenarios so you can visualize how everything fits together.
Add a one-page quick reference checklist to help you decide at a glance whether underlayment is needed for a given job.
These visuals and resources will make your decisions faster and reduce installation errors.
Suggested diagrams: underlayment layers and installation scenarios
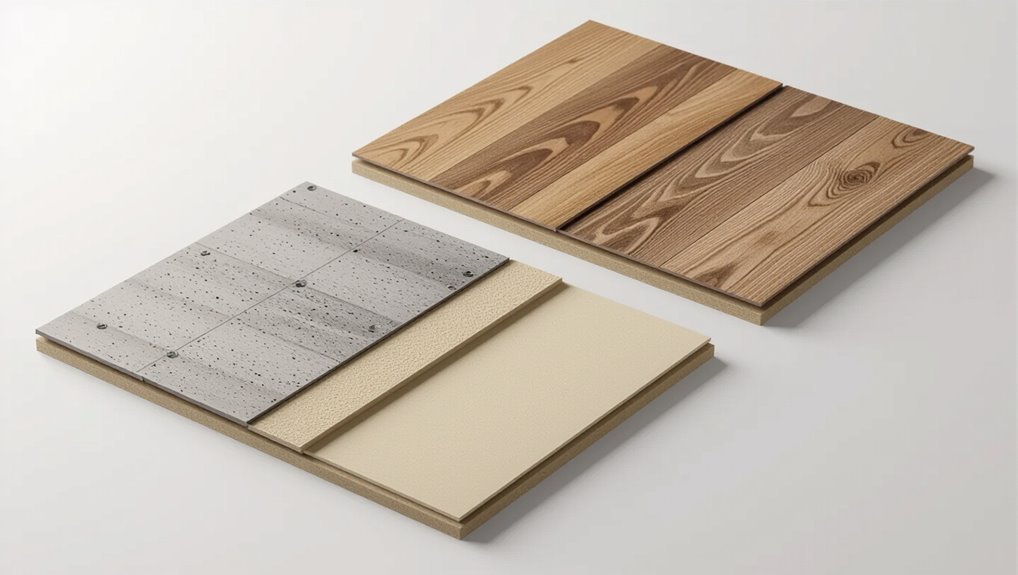
Because visuals clarify how each layer interacts, include clear diagrams showing the underlayment stack (subfloor, moisture barrier, acoustic/foam layer, vinyl plank), edge details, and common installation scenarios like floating, glued, and loose-lay systems.
Label materials, thicknesses, and seam treatments. Add cross-sections for changes, expansion gaps, and fastener locations.
Provide printable versions and captions for quick on-site reference.
Quick reference checklist for whether to use underlayment
Start with a simple checklist you can scan in seconds: assess subfloor type, moisture risk, sound and comfort needs, height constraints, and installation method to decide whether underlayment is necessary.
Use this quick guide to make a firm call on underlayment so you won’t regret skipping it.
- Concrete with moisture? Add vapor barrier.
- Uneven subfloor? Use leveling underlayment.
- Sound/comfort desired? Choose foam or cork.
- Low clearance? Pick ultra-thin or skip.