How to Glue Down Vinyl Flooring for a Flat, Bubble-Free Result
To get a flat, bubble-free glued vinyl floor, you’ll prep the subfloor until it’s clean, dry, and level, pick the manufacturer-recommended adhesive and trowel, and acclimate materials for 48–72 hours. Spread adhesive evenly in manageable sections, lay pieces carefully, align seams, then roll from the center outward with steady pressure. Control room temperature and humidity while the adhesive cures, address any bubbles immediately, and keep going to learn detailed techniques and troubleshooting tips.
How to Glue Down Vinyl Flooring for a Flat, Bubble-Free Result
You’ll get a quick checklist to keep your glue-down vinyl flat and bubble-free, from subfloor prep to adhesive application and rolling.
This guide is for DIYers and pros tackling rooms where permanent, low-profile flooring is needed—like kitchens, bathrooms, and commercial spaces.
Use glue-down vinyl when you want maximum stability, minimal height buildup, and long-lasting adhesion.
Quick Answer Short Checklist for a Successful Glue-Down Vinyl Installation
Start with a clean, flat surface, then follow a tight sequence: measure and acclimate the planks, repair and level the subfloor, choose the right adhesive and trowel, apply adhesive consistently, lay and press the vinyl working outward to expel air, and roll the finished floor thoroughly to lock in contact and prevent bubbles.
You’ll follow this quick how to glue down vinyl flooring checklist:
- Confirm subfloor flatness and moisture.
- Use recommended adhesive and notch size.
- Work in sections, roll and inspect for gaps.
Who this guide is for and when to use glue-down vinyl
Now that you’ve got the quick checklist down, let’s clarify who should use a glue-down vinyl installation and when it makes the most sense.
You’ll want this method if you need durable, smooth floors that resist lifting. Consider it when subfloors are stable and moisture is controlled.
- You’re installing in high-traffic areas
- You need a low-profile, secure finish
- Subfloor is flat and dry
Basic Understanding What Glue-Down Vinyl Is and Why Bubbles Form
Glue-down vinyl means you’re adhering either sheet vinyl or tile/plank LVT/LVP directly to the subfloor with a pressure-sensitive or wet adhesive.
Bubbles and unevenness usually come from moisture in the subfloor, an uneven or dirty substrate, incorrect adhesive choice or application, or extreme temperature changes during installation.
Knowing the benefits—strong stability and thinner profile—and the limitations—less forgiveness for subfloor flaws and harder repairs—helps you prevent and fix these problems.
What “glue-down” vinyl flooring means (types: sheet, LVT/LVP)
When you choose glue-down vinyl, you’re picking flooring that’s permanently bonded to the subfloor with adhesive rather than floating or locking together. It comes mainly as sheet vinyl and as luxury vinyl tiles/planks (LVT/LVP), each with different installation and performance characteristics.
You’ll install sheet as large, seam-sealed rolls; LVT/LVP are individual pieces offering realistic visuals, easier replacements, and varied thicknesses for durability and comfort.
Causes of bubbles and unevenness (moisture, subfloor issues, adhesive errors, temperature)
If your new vinyl develops bubbles or feels uneven, it’s usually because something under the surface went wrong — trapped moisture, an uneven or contaminated subfloor, incorrect adhesive choice or application, or temperature swings that affect bonding.
You should check for vapor, high spots, dirt or paint, wrong or old adhesive, excessive trowel ridges, or installation in too-hot or too-cold conditions.
Advantages and limitations of glue-down installation
Because it’s adhered directly to the subfloor, glued vinyl gives you a stable, low-profile surface that resists shifting and feels more solid underfoot. It’s a great choice for high-traffic areas or rooms where you want minimal height buildup.
You’ll get excellent dimensional stability, sound reduction, and durability, but you’ll need meticulous subfloor prep, moisture control, and professional adhesive application to avoid bubbles and difficult repairs.
Tools, Materials, and Preparation Checklist
Before you start gluing, gather the right tools and safety gear—knee pads, gloves, a notched trowel, roller, and a respirator if the adhesive requires it.
Pick an adhesive suited to your vinyl type and subfloor (check manufacturer recommendations) and inspect the subfloor for flatness, dryness, and cleanliness.
Also plan for proper temperature, humidity, and acclimation time so the adhesive and plank bonds correctly.
Required tools and safety equipment
You’ll need a compact set of tools and the right safety gear to lay vinyl confidently and cleanly:
- Utility knife, straightedge, and seam roller for accurate cuts and joins
- Notched trowel, adhesive spreader, and measuring tape for even coverage and layout
- Knee pads, gloves, safety glasses, and a respirator for protection while cutting and applying adhesives
Recommended adhesives and adhesive selection guide
Choosing the right adhesive is one of the most important steps in a successful vinyl installation, so match the glue to your vinyl type, subfloor, and room conditions. Pick pressure-sensitive for sheets, acrylic for planks, or urethane for heavy traffic. Test compatibility and pot life. Stay mindful of VOCs and moisture ratings.
| Adhesive | Feeling |
|---|---|
| Pressure-sensitive | Confident |
| Acrylic | Secure |
| Urethane | Assured |
| Water-based | Calm |
Subfloor materials and condition checklist
1 key step is ensuring your subfloor is clean, stable, and suitable for the vinyl you’re installing; inspect for levelness, moisture, structural damage, and old adhesive residues so you can gather the right tools and materials before you lay a single plank or sheet.
Check these:
- Plywood/OSB integrity and flatness
- Concrete moisture and pH levels
- Existing adhesive removal and surface cleanliness
Environmental and scheduling considerations (temperature, humidity, acclimation)
Before you lay any vinyl, make sure the room, the flooring material, and the adhesive are all acclimated and within the manufacturer’s recommended temperature and humidity ranges; doing this prevents expansion, contraction, and bond failures once the floor is down.
Monitor conditions for 48–72 hours, using a thermostat and hygrometer. Schedule installation during stable weather, avoid HVAC swings, and don’t rush acclimation.
Step-by-Step Installation Process (Primary How-To Framework)
Before you spread adhesive, you’ll inspect and prepare the subfloor, test for and fix any moisture issues, and level or patch low and high spots.
Then you’ll clean and prime the surface and let your vinyl and glue acclimate to the room.
Follow these steps in order to guarantee a flat, dry, and stable base for a lasting bond.
Step 1 Inspect and prepare the subfloor
Start by thoroughly inspecting the subfloor for flatness, cleanliness, and moisture—any imperfections will telegraph through glued vinyl.
Remove debris, nails, adhesive residue, and loose board sections.
Sand or level low spots and fill cracks or gouges with a suitable patching compound.
Confirm the surface is dry and stable, then vacuum and tack-rag before applying primer or adhesive per manufacturer instructions.
Step 2 Moisture testing and remediation
Step 2 is to test for moisture and fix any problems you find: use a reliable moisture meter and at least one ASTM-approved test (like a calcium chloride or relative humidity probe) to measure concrete slab moisture, then compare results to the vinyl and adhesive manufacturer’s limits.
If readings exceed limits, apply appropriate remediation — vapor barriers, topical sealers, or moisture mitigation systems — and retest until compliant.
Step 3 Leveling and patching low/high spots
Once moisture is under control, you’ll assess the subfloor for low and high spots and correct them so the vinyl lays flat and bonds evenly.
Tap and sight across the floor, mark depressions and humps.
Sand high spots, use a cementitious patch or floor-leveler for lows, feather edges smooth, and let cures reach manufacturer-recommended hardness before proceeding to adhesive application and sheet placement.
Step 4 Cleaning and priming the subfloor
After you’ve smoothed highs and filled lows so the floor sits flat, clean and prime the subfloor to guarantee the adhesive bonds properly.
Remove dust, debris, grease, and laitance with a vacuum and damp mop, then let dry.
Patch any remaining cracks with recommended filler.
Apply a manufacturer-approved primer evenly, allow proper cure time, and inspect for uniform coverage before proceeding.
Step 5 Acclimating the vinyl and adhesive
Because vinyl and adhesive expand and contract with temperature and humidity, you’ll want to acclimate both in the installation space before you start laying the floor.
Unbox and lay sheets or planks flat for 48–72 hours, keeping HVAC at normal operating temperature and 35–65% humidity.
Keep adhesive sealed until use.
Check for curling, warping, or moisture issues before proceeding.
Step 6 Layout planning and dry-fitting sheets or planks
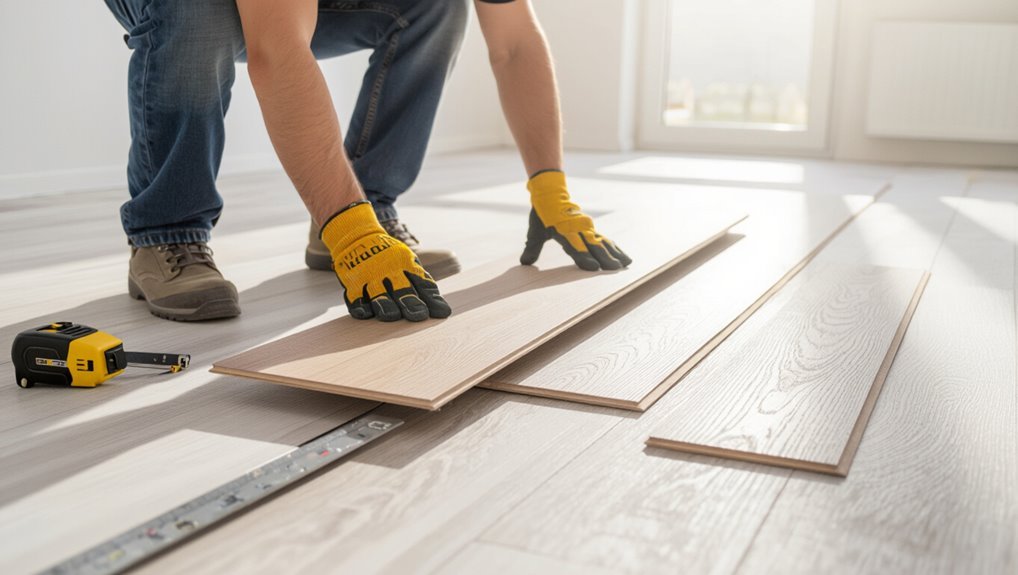
Start by planning a layout that balances aesthetics and waste: measure the room, snap chalk lines for a centered starting line or a focal wall, and determine where you’ll place full and cut sheets or planks so narrow slivers don’t end up at visible edges.
Dry-fit the pieces, stagger seams for stability and appearance, check connections and door clearances, and mark final cuts before gluing.
Step 7 Applying adhesive correctly (trowel type, open time, spread rate)
With your layout set and pieces dry-fitted, it’s time to apply adhesive correctly so the floor bonds and performs as designed.
Choose the manufacturer’s recommended trowel notch for spread rate. Maintain open time—don’t wait too long or trap moisture.
Spread evenly, working in manageable sections. Clean trowel lines and maintain consistent ridges to guarantee full transfer and avoid voids.
Step 8 Laying vinyl, rolling, and seam techniques
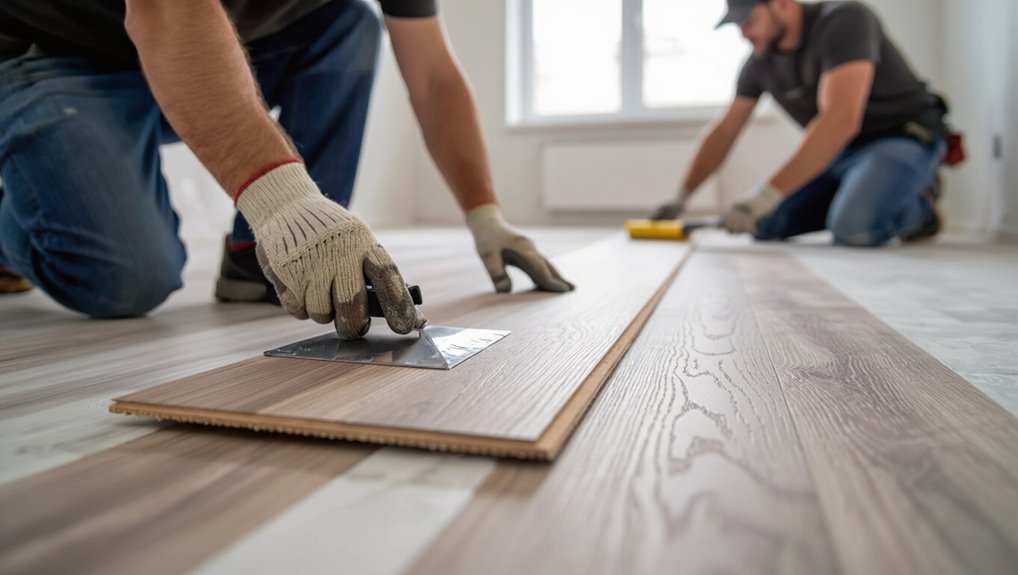
Lay each vinyl sheet into the adhesive gently but confidently, aligning seams and pattern before pressing it down so you don’t trap air or misalign the design.
Smooth from center toward edges with a clean flooring roller, applying even pressure.
Butt seams tightly, use seam tape or roller as recommended, and check for lifted edges or bubbles—puncture and re-roll small blisters immediately.
Step 9 Edge finishing, trims, and transition strips
Trim and finish the edges by cutting the vinyl flush to walls and doorways. Then secure them with the appropriate trims and junction strips so your floor looks professional and stays durable.
Measure and cut threshold strips to match door heights. Fasten trims with screws or adhesive, and seal gaps with matching caulk.
Check alignment and trim excess for a neat, safe edge.
Step 10 Post-installation rolling, weighting, and cure time
After the adhesive’s initial set, you’ll want to roll and weight the floor to guarantee full contact and prevent future lifting.
Use a 75–100 lb floor roller, passing slowly in overlapping rows.
Place weights along seams, thresholds, and edges for 24–48 hours.
Respect the adhesive’s full cure time (usually 72 hours) before heavy traffic or moving furniture to avoid displacement.
Troubleshooting Common Problems and How to Fix Them
After installation you’ll still run into issues like bubbles, wrinkles, adhesive bleed, or seams lifting, and knowing quick fixes versus after-cure repairs will save you time.
Learn how to smooth or puncture and re-roll bubbles, re-tension shifting planks or sheets, treat or remove adhesive discoloration, and repair or glue separated seams.
Follow the right cause-based corrections to prevent recurrence and protect your floor’s appearance.
Bubbles and blisters: immediate fixes vs. after-cure repairs
A small bubble or blister in your vinyl can show up during installation or days later, and how you fix it depends on whether the adhesive has cured.
If wet, press and roll outward, then reapply adhesive and weigh the area.
If cured, cut a small slit, inject adhesive with a syringe, press flat, wipe excess, then tape and weight until set.
Wrinkling or shifting planks/sheets: causes and corrections
Bubbles and blisters often warn you about adhesive issues, but wrinkles or shifting planks/sheets point to different problems: movement, improper adhesive coverage, or temperature and substrate changes.
You should lift affected areas, reapply adhesive evenly, and roll or press to fully bond.
Control room temperature, acclimate materials, secure seams, and address subfloor movement or moisture to prevent recurrence.
Adhesive bleed-through or discoloration: prevention and remediation
If adhesive soaks through vinyl or leaves dark stains, it not only ruins the look but can also weaken seams and finishes.
So you’ll want to catch and fix it quickly. Prevent it by using manufacturer-approved adhesives, testing on scraps, and applying thin, even coats.
If bleeding occurs, blot fresh adhesive, use recommended solvent sparingly, then clean and reseal affected area once dry.
Seams that lift or separate: repair techniques
When seams lift or separate, you’ll want to act quickly to prevent moisture, dirt, and further edge damage from spreading under the vinyl. Small gaps can often be fixed without replacing planks.
Clean the seam, dry thoroughly, apply an appropriate vinyl seam adhesive or caulk, press edges together with a seam roller, wipe excess, and clamp if needed.
Check after 24 hours and reseal if necessary.
Mistakes to Avoid
Don’t skip moisture tests or ignore the results — trapped moisture ruins glue-down vinyl.
Make sure you’re using the correct adhesive and trowel notch, installing only within the recommended temperature and humidity range.
Also clean and prep the subfloor thoroughly so the adhesive can bond properly.
Skipping moisture tests or ignoring results
Because concrete and subfloor moisture can wreck an otherwise perfect vinyl install, skipping moisture tests or dismissing their results is a costly mistake.
You must test with a reliable meter or lab kit, follow manufacturer limits, and address high readings before gluing.
Ignoring moisture leads to adhesive failure, bubbles, mold, and costly repairs — don’t gamble with unseen dampness.
Using wrong adhesive or trowel notch
Choose the correct adhesive and trowel notch carefully, because the wrong combo will ruin the bond and cause gaps, telegraphing, or adhesive squeeze-out.
Check manufacturer recommendations for your vinyl type and subfloor. Use the specified notch size to get full contact without excess.
Test a small area first. Replace trowels when worn and never guess—incorrect adhesive or notch leads to lifting and visible defects.
Installing in improper temperature/humidity
If you install vinyl when temperature or humidity are outside the manufacturer’s recommended range, the adhesive won’t cure properly and the floor can buckle, gap, or delaminate.
You should monitor site conditions, use HVAC or humidifiers/dehumidifiers to stabilize levels, and wait until conditions meet specs.
Don’t force installation in extreme heat, cold, or dampness—doing so risks permanent adhesive failure and costly repairs.
Inadequate subfloor preparation or cleaning
While it might seem faster to skip deep cleaning or smoothing, inadequate subfloor preparation guarantees problems down the line: adhesive won’t bond to dust, grease, loose material, or uneven surfaces, causing tiles or sheets to lift, bubble, or wear prematurely.
You should remove debris, fill cracks, sand high spots, and use a primer or leveling compound where needed so the adhesive creates a full, lasting bond.
Best Practices and Professional Tips for a Bubble-Free Finish
Plan your install with precise sequencing and timing so adhesive open time and traffic-free curing align. Then use a heavy roller with even pressure and cross-pattern passes to eliminate trapped air.
You’ll also maintain the finish by cleaning properly, controlling humidity, and inspecting seams to stop future bubbling.
If bubbles persist, odors, wide gaps, or uneven subfloor issues appear, call a pro—compare repair costs to DIY time and risk before proceeding.
Optimal sequencing and timing tips
Because timing and order make the difference between a smooth, permanent bond and trapped air pockets, you should follow a clear sequence when laying glued vinyl: spread adhesive in manageable sections, roll or embed the sheet promptly, and finish with a weighted roller before the adhesive skins over.
Work one bay at a time, check alignment, smooth seams immediately, and monitor open time for temperature and humidity to avoid delays.
Rolling techniques, pressure, and weight distribution
Begin rolling as soon as the vinyl’s been positioned and the adhesive’s tacky enough to grip; use a heavy, smooth-surfaced roller and work from the center outward in overlapping passes to force out trapped air and guarantee uniform contact.
Apply steady, even pressure, increasing weight slightly for large formats.
Watch seams and edges, re-roll areas with resistance, and avoid lifting or sliding the sheet.
Long-term care to prevent future bubbling (maintenance, cleaning, humidity control)
One simple routine will go a long way: keep the floor clean, control indoor humidity, and inspect seams regularly so small issues never become bubbles.
Wipe spills promptly, use pH-neutral cleaners, and avoid steam mops.
Maintain indoor humidity between 35–55% with a dehumidifier or humidifier.
Address lifted edges immediately, reapply adhesive if needed, and protect high-traffic areas with rugs.
When to call a pro: red flags and cost vs. DIY considerations
Keeping up with cleaning and humidity reduces most bubbling, but some problems need a pro’s eye.
Call a pro if you see large or recurring bubbles, adhesive failure, seams lifting, uneven subfloor, or moisture issues beyond a moisture meter’s safe range.
Weigh DIY labor, tool rental, and repair risks against pro estimates; complex fixes often justify hiring an experienced installer.
Comparison: Glue-Down vs. Floating and Click-Lock Vinyl (Quick Reference)
While glue-down, floating, and click-lock vinyl all give you durable, water-resistant floors, they differ in installation, stability, and repairability—so pick based on your room, skill level, and long-term plans. You’ll choose glue-down for permanence, floating for DIY ease, click-lock for fast swaps.
| Option | Feel | Commitment |
|---|---|---|
| Glue-down | Solid, permanent | High |
| Floating | Slight give, fixable | Medium |
| Click-lock | Uniform, replaceable | Low |
FAQ Fast Answers to Common Questions
You’ll want quick, practical answers to common concerns like curing time before heavy use, whether you can glue over existing vinyl or tile, and how to repair a bubble that shows up weeks later.
Also check moisture-mitigation needs for basements and verify any warranty or product limitations before you start.
I’ll cover each of these so you can make the right prep and installation choices.
How long does adhesive take to cure before heavy use?
Curious how long you should wait before moving heavy furniture onto newly glued vinyl? Most adhesives set in 24–48 hours but need 72 hours for full cure and maximum bond strength.
Cool, humid conditions can lengthen curing; warm, dry conditions shorten it.
Follow the adhesive manufacturer’s cure-time instructions and avoid heavy traffic or furniture until the recommended full cure period has passed.
Can I glue vinyl over existing vinyl or tile?
Can you glue new vinyl over existing vinyl or tile? Yes, often—if the old floor is sound, level, clean, and firmly bonded.
Remove loose pieces, fill grout lines, and sand glossy tiles or vinyl to improve adhesion. Use a compatible adhesive and follow manufacturer guidelines.
If the substrate is damaged, uneven, or peeling, remove it first to avoid future failures.
How do I fix a bubble that appears weeks after installation?
If a bubble shows up weeks after you glued vinyl over existing flooring, it’s usually from trapped air, moisture, or a spot where the adhesive failed—start by inspecting the area and nearby seams.
To fix it, cut a small slit, press out air, lift the vinyl, clean and dry substrate, apply recommended adhesive, roll firmly, and patch the slit with adhesive and a roller to flatten and seal.
Is moisture mitigation always required for basements?
How often do you need moisture mitigation in a basement? You don’t always need it, but you should test concrete for moisture and vapor drive before installing glued vinyl.
If results exceed manufacturer limits or you see efflorescence, dampness, or a musty smell, apply appropriate mitigation (sealers, membranes, or vapor barriers).
Follow product specs and local codes to protect adhesive and flooring.
What warranty or product information should I check before installing?
You’ve checked moisture and taken care of any issues—now look closely at warranties and product specs before you glue.
Verify adhesive compatibility, recommended subfloor types, and temperature or moisture limits.
Note installation steps required to keep warranty valid (trowel size, acclimation, adhesive type).
Check coverage rates, return policy, and labor vs. material warranty durations.
Keep receipts and photos for claims.
Visuals and Resources
You’ll want clear diagrams and photos showing layout, adhesive trowel patterns, and edge details to follow during installation.
Keep links handy to adhesive technical datasheets and manufacturer installation guides so you can confirm open time, coverage, and substrate prep.
Save or print those resources before you start so you can reference them on the job.
Recommended diagrams and photos to reference during installation
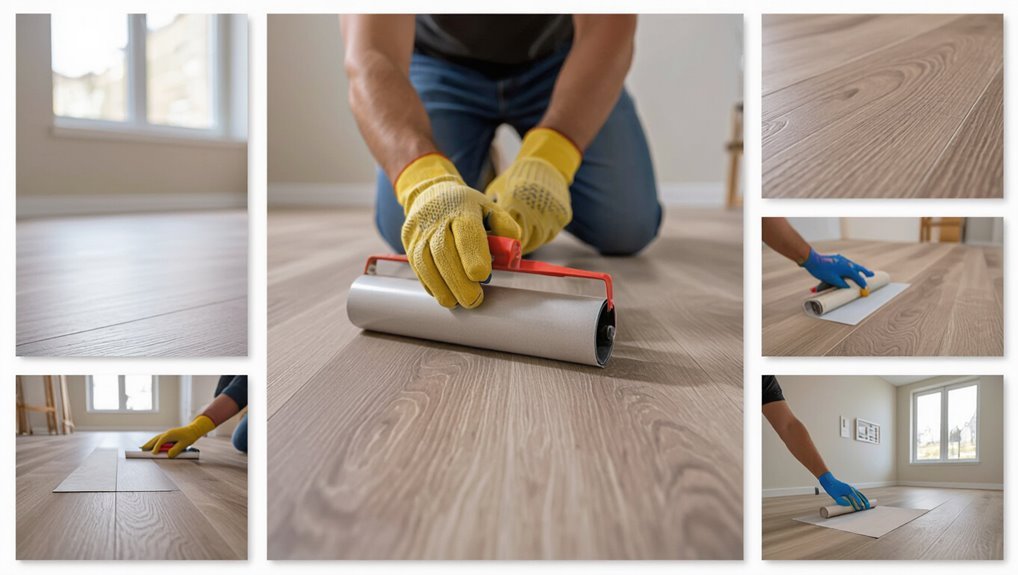
Before you start spreading adhesive, gather clear, labeled visuals that show layout patterns, seam orientation, and adhesive coverage so you can reference them during every step of the installation.
Include overhead layout diagrams with measurements, close-ups of correct seam joins, photos of trowel notch patterns and wet adhesive appearance, and before/after edge and junction shots to confirm alignment and proper bonding as you work.
Links to adhesive technical datasheets and manufacturer installation guides
When you’re ready to choose an adhesive, collect the technical datasheets and manufacturer installation guides for each product so you can compare VOC levels, open time, trowel size, substrate prep, and seam instructions at a glance.
These documents also show recommended coverage rates, curing times, and any required primers or moisture mitigation that affect your layout and schedule.
Use links to:
- Manufacturer installation guide (PDF)
- Adhesive technical datasheet (TDS)
- Moisture/primer product data sheet