How to Fix Creaky Laminate Floors Without Pulling Them Up
You can quiet creaky laminate without pulling planks up by locating the noisy spots, tightening joints and moldings, and stabilizing loose boards with trim-head screws or discreet shims. Inject powdered graphite or talc into seams to reduce friction or use construction adhesive in gaps for long-term fixes. Add felt pads or foam underlays where movement transmits noise. Test under load as you go, and follow simple diagnostic steps and tools to make targeted repairs—keep going to learn the step-by-step methods.
Quick Answer Fixing Creaky Laminate Floors Without Pulling Them Up
You can usually silence creaky laminate by tightening loose boards, adding shims beneath gaps, or using a powdered graphite or talc in seams to reduce friction.
Use this quick fix when the noise comes from small, localized gaps or movement between boards rather than structural issues or widespread buckling.
If the floor is warped, wet, or the sound persists, you’ll need a deeper repair or to lift sections.
One-sentence fix summary
If the squeaks come from loose planks or gaps between the floor and subfloor, try injecting wood glue or a powdered lubricant into the seams and fastening the boards with trim-head screws through the tongue to the subfloor.
This fixes most creaks without pulling up the flooring. Use targeted injections and discreet trim-head screws to stop movement; this quick, minimal approach shows how to fix creaky laminate floors.
When this quick fix is appropriate
When creaks come from loose planks, gaps at the tongues, or slight movement between the laminate and subfloor, this quick glue-and-screw method usually works without pulling up the floor.
You’ll know it’s appropriate if the issue is localized, the underlayment is intact, and panels click back together.
Check for:
- small, movable gaps
- no water damage
- limited area of noise
Basic Understanding What Causes Creaky Laminate Floors
To fix creaky laminate floors, you first need to understand what’s causing the noise so you can target the right repair.
It’s usually mechanical—loose boards, gaps, or subfloor problems—but environmental factors like moisture, temperature swings, and humidity also make planks shift and rub.
The way laminate is constructed—floating joints and thin wear layers—can amplify those movements into creaks you’ll hear.
Common mechanical causes (loose boards, gaps, subfloor issues)
Because laminate floors are a floating system, most creaks come from simple mechanical issues you can see or feel: loose boards that shift underfoot, gaps that let edges rub, and subfloor irregularities that let panels flex.
Check for loose or poorly locked seams, uneven joists or underlayment, and perimeter gaps.
Tightening connections, filling gaps, or shimming subfloor high spots often stops the noise.
Environmental causes (moisture, temperature, humidity)
If your laminate starts creaking at certain times of year, changing moisture and temperature levels are often the cause.
You’ll notice expansion in humid, warm months and contraction in cold, dry seasons. Those dimensional shifts make boards rub, separate slightly, or press against trim.
Control indoor humidity with a dehumidifier or humidifier and keep temperatures steady to reduce seasonal creaks.
How laminate flooring construction contributes to creaks
Seasonal moisture and temperature shifts can trigger movement, but the way laminate is built often makes that movement audible.
Its floating design lets planks shift against each other and against underlayment, and thin wear layers transmit friction noises.
Poorly fitted joints, uneven subfloors, or low-quality click systems increase gaps and rubbing.
You’ll hear creaks where parts compress, rub, or flex under weight.
Tools and Materials You’ll Need
Before you start, gather a few basic tools—screwdriver, rubber mallet, shims, and a tape measure—to handle most quick fixes.
You may also need specialty items like a flooring repair kit, construction adhesive, and trim-removal tools for tougher spots.
For materials, pick up wood or composite shims, felt pads, screws, and a suitable sealant.
Basic tools (screwdriver, rubber mallet, shims, tape measure)
You’ll need a few simple tools to get started: a screwdriver, rubber mallet, shims, and a tape measure. Use them to locate gaps, tighten loose boards, and level sections before more involved fixes.
Keep tools handy and organized.
- Screwdriver: pry minor gaps, tighten fasteners
- Rubber mallet: seat joints without damage
- Shims/tape measure: align and measure gaps precisely
Specialty tools (flooring repair kit, construction adhesive, trim removal tools)
A few specialty tools make stubborn creaks much easier to fix: a flooring repair kit for replacing or stabilizing planks, construction adhesive for bonding loose tongues or subfloor seams, and trim-removal tools to access hidden fasteners without damaging baseboards.
You’ll also want a caulking gun for precise adhesive application and a pry bar-sized trim tool to lift molding cleanly while you stabilize or re-seat affected boards.
Materials (wood or composite shims, felt pads, screws, sealant)
When you tackle creaky laminate, gather a handful of simple materials that make the repairs solid and unobtrusive: wood or composite shims to fill gaps, thin felt pads to quiet joins, short screws for strategic fastening, and a clear sealant to protect seams.
Use compatible sizes, test fit shims, and trim excess. Keep screws shallow to avoid penetrating subfloor systems.
Diagnostic Steps How to Locate the Source of the Creak
Start by walking the floor and listening for patterns so you can map where the creaks happen.
Then apply weight and try different movements to narrow the spot to a single board or seam.
If that’s still fuzzy, use a mechanic’s stethoscope or record with your smartphone to isolate the exact location.
Simple walk-and-listen inspection (pattern recognition)
Want to pinpoint that creak fast? Walk the room slowly, listening for recurring sounds and noting where they repeat.
Move in straight lines, along edges, across centers, and vary your pace to expose pattern-linked noises. Mark suspected spots with tape or a sticky note.
Repeat the route from different directions to confirm consistent sources before trying fixes or further tests.
Pinpointing with weight and movement tests
If you need to isolate a creak more precisely, use controlled weight and movement tests to stress likely trouble spots and confirm whether the sound comes from a joint, a loose plank, or subfloor movement.
Stand on one foot, shift weight slowly, then hop gently along the suspect run. Press down on seams with your heel and toe.
Note where noise intensifies and repeat to verify consistent location.
Using a stethoscope or smartphone recording to isolate the area

When hands-on tests leave you unsure, use a stethoscope or your smartphone to pinpoint the creak more precisely: place the stethoscope on boards while someone walks, or record with your phone close to the floor and replay, listening for the loudest click.
Move systematically, marking spots. Compare recordings from different locations to isolate the noisy seam before repairing.
Primary Repair Methods (Step-by-Step)
You’ll start with simple fixes like tightening loose connections and moldings, then move to stronger options such as screwing the laminate to the subfloor and plugging the holes.
For gaps and rubbing boards you can apply construction adhesive or inject powdered graphite or talc to reduce friction.
If the squeak comes from contact with the underlayment, installing felt pads or foam underlays can isolate and stop the noise.
Method 1 Tightening loose transitions and moldings
Start by inspecting all movement strips and base moldings along the creaky area; loose trim often lets laminate shift against the floor or subfloor, causing noise.
Tighten or refasten trim, add shims where gaps allow movement, and use adhesive for permanent contact.
Suggested actions:
- Remove loose screws or nails and replace with proper fasteners
- Slip thin shims behind molding
- Apply construction adhesive sparingly and clamp until set
Method 2 Securing floor to subfloor from above with screws and plugs
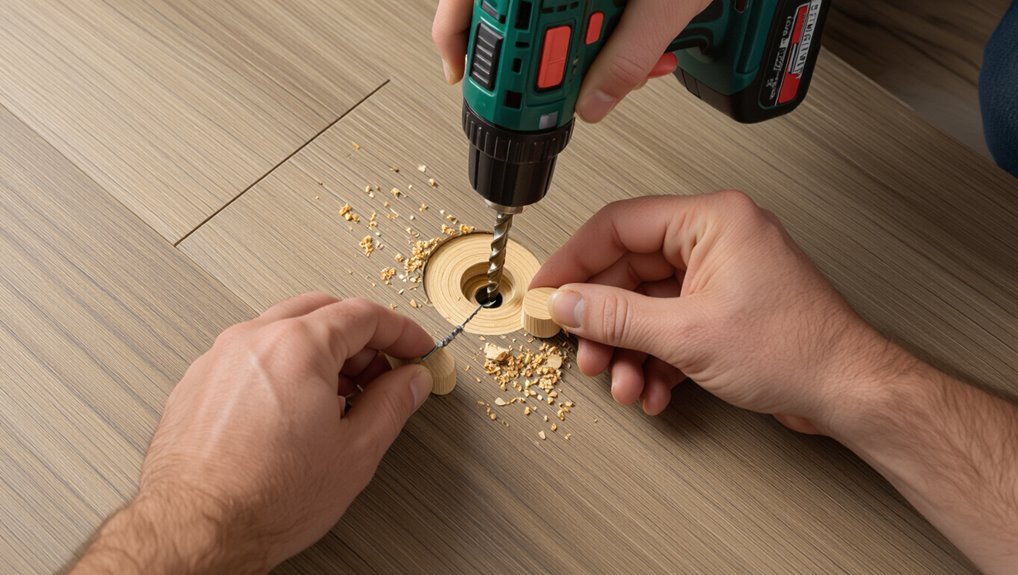
If tightening trim didn’t stop the squeak, it’s time to secure the laminate to the subfloor from above using screws and matching plugs.
Locate squeaky spots, pre-drill through the laminate into the subfloor to avoid splitting, drive short screws into joists or subfloor, then countersink and glue in color-matched wood/plastic plugs.
Sand flush and finish for a seamless look.
Method 3 Applying construction adhesive into gaps between boards
Method 3 uses construction adhesive injected into the gaps between laminate boards to bond them to the subfloor and stop movement that causes squeaks.
You’ll locate gaps, clean debris, and syringe a bead of adhesive into seams. Press boards together, wipe excess, and clamp or weight the area until cured.
Follow adhesive instructions and ventilate; avoid overfilling to prevent board misalignment.
Method 4 Injecting powdered graphite or talc into joints to reduce friction
After you’ve tried bonding loose boards with adhesive, reducing the friction between seams can stop remaining squeaks without filling gaps permanently.
Use powdered graphite or talc: puff a small amount into the joint, work it in by walking or tapping the boards, then wipe away excess.
Repeat where needed. These dry lubricants won’t gum up or stain, and they’re easy to reapply if noise returns.
Method 5 Using felt pads or foam underlays to isolate squeaks
When squeaks persist along seams or where boards rub on underlayment, try isolating the contact with thin felt pads or a foam underlay—these materials cushion movement and stop noise by absorbing friction and vibration.
You’ll lift edges slightly, slide pads into gaps, or cut thin foam strips to place under problem boards. Test walking, adjust pad thickness, and secure loose edges with adhesive as needed.
When to Use Each Method Decision Guide
Match the creak patterns and locations to the fixes that work best so you don’t waste time.
If the noise is isolated and the boards are accessible, you can usually try quick DIY fixes; call a pro when the problem is widespread, structural, or you’re unsure about underlayment issues.
Use the following guide to help decide which method to try first.
Symptoms matched to recommended fixes
If your laminate floor is squeaking, shifting, or rubbing, this guide helps you pick the right fix based on the symptom and location of the noise. Match symptom to action: use talc or screws for isolated squeaks, shims or underlayment for gaps, edge adhesive for rubbing, and floor clips for shifting near thresholds.
| Symptom | Recommended Fix |
|---|---|
| Isolated squeak | Talc or screw |
| Gaps | Shims/underlayment |
| Edge rubbing | Adhesive |
| Shifting | Clips/anchors |
Quick DIY vs. professional help indicators
After you’ve matched symptoms to fixes, decide whether to tackle the repair yourself or call a pro based on scope, skill, and risk.
Choose DIY for isolated squeaks, accessible gaps, and simple tightening if you’re handy and comfortable with tools.
Call a pro for widespread movement, subfloor issues, moisture damage, or if structural repairs, warranty concerns, or complex refinishing are involved.
Common Mistakes to Avoid During Repairs
Don’t over-tighten screws or pierce a floating floor, because you’ll ruin the click-lock and void the floor’s movement.
Don’t use the wrong adhesives or harsh materials that can stain or warp the laminate.
And don’t ignore moisture or subfloor issues — those are often the real cause of creaks and will keep coming back if you skip them.
Over-tightening or screwing through floating floors
When you tighten screws too much or drive fasteners through a floating laminate floor, you stop the planks from moving as they were designed to and create new squeaks, gaps, or buckling.
Don’t anchor the floor to the subfloor. Instead, use approved repair clips, underlayment shims, or weight and tapping methods to settle boards.
Leave expansion gaps and test before finishing.
Using wrong adhesives or materials that damage laminate
If you grab the wrong glue or sealant, you can ruin the wear layer, discolor edges, or prevent the locking profile from closing properly.
Use only adhesives labeled safe for laminate and floating installations. Avoid solvent-based glues, construction adhesives, or bulky fillers that swell joints.
Test a hidden plank first, follow manufacturer guidance, and use small amounts to preserve appearance and locking integrity.
Ignoring moisture or subfloor problems
Because moisture and subfloor issues often cause the creaks, you should check for leaks, high humidity, and uneven subfloors before patching or gluing boards.
Don’t ignore damp spots, musty smells, or soft spots under the laminate. Fix leaks, improve ventilation, and level the subfloor first.
Otherwise repairs will fail and creaks will return, wasting time and money.
Preventive Measures and Best Practices
To stop creaks before they start, make sure you install laminate correctly and leave proper expansion gaps.
You’ll also want to control humidity and temperature to keep the boards stable.
Finally, stick to simple routine maintenance—cleaning, checking seams, and tightening junctions—to prevent future squeaks.
Proper installation and expansion gaps
When you lay laminate correctly and leave the right expansion gaps, you’ll prevent most creaks before they start.
Fit boards tightly without forcing joints, stagger end seams per manufacturer specs, and use proper underlayment to smooth subfloor imperfections.
Leave consistent perimeter gaps (usually 1/4–3/8 inch) and use spacers during installation.
Secure thresholds and connector strips to allow plank movement without rubbing.
Controlling humidity and temperature
If you keep indoor humidity and temperature steady, your laminate will stay snug in its joints and resist the seasonal swelling and shrinking that causes squeaks.
Use a humidifier in dry winter months and a dehumidifier or AC in humid summers. Aim for 35–55% relative humidity and about 60–75°F.
Monitor with a hygrometer and thermostat to prevent movement-related creaks.
Routine maintenance tips to prevent future creaks
Because regular care keeps joints tight and surfaces smooth, a few simple maintenance habits can prevent most future creaks.
You should inspect seams monthly, clean gently, and protect high-traffic areas. Follow these steps:
- Sweep and vacuum with a soft-brush head to remove grit.
- Wipe spills immediately with a damp, not wet, cloth.
- Use felt pads and area rugs to reduce wear and movement.
When to Call a Professional
If your floor has wide gaps, uneven sections, or creaks that change with humidity, you should call a pro because those can signal subfloor or structural problems.
A professional will inspect joists, underlayment, and moisture levels to pinpoint the cause. They can recommend or perform advanced fixes like sistering joists, replacing underlayment, or addressing moisture sources.
Signs that indicate subfloor or structural issues
When creaks keep getting louder, gaps keep widening, or whole sections feel springy underfoot, you’re likely dealing with problems beyond simple surface fixes; these signs point to subfloor or structural issues that need a pro’s assessment.
Also watch for uneven floors, localized sagging, recurring squeaks after repairs, moisture stains, or persistent movement at seams. If you see any, call a professional.
What a pro will check and possible advanced fixes
Those warning signs mean it’s time to bring in a pro who’ll inspect more than just the surface.
They’ll check subfloor flatness, joist spacing, moisture levels, and fastener integrity.
Expect diagnostic tools, targeted repairs like sistering joists, replacing damaged subfloor panels, reinforcing framing, or installing sound-deadening underlayment.
You’ll get a prioritized repair plan, cost estimate, and timeline to restore stability and silence.
Tools, Materials, and Estimated Costs
You’ll get a clear cost comparison between tackling creaks yourself and hiring a pro, so you can pick the most cost-effective option.
I’ll list the basic tools and materials you’ll need—screwdriver, shims, wood glue, laminate repair kit—and typical price ranges for each.
I’ll also recommend reliable product brands and when it’s worth spending more for better results.
Cost breakdown for DIY repairs vs professional service
A quick cost comparison helps you decide whether to tackle creaky laminate floors yourself or hire a pro: You can fix squeaks with simple tools and materials for $20–$100; a pro typically charges $150–$600 depending on access and labor. Consider time, skill, and warranty when choosing.
| DIY | Pro |
|---|---|
| $20–$100 | $150–$600 |
| Low skill/time | Faster, insured |
Recommended products and brands
Now that you’ve compared DIY vs. pro costs, pick tools and materials that match your budget and skill level.
Choose reliable brands and affordable options:
- WD-40 Specialist or silicone spray for squeaks; cost $6–$12.
- Loctite PL or Gorilla wood glue for gaps; $5–$15.
- Shim/soft filler kits like QEP or Roberts; $10–$25.
Buy quality for longer results.
Step-by-Step Quick Fix Checklist (Printable)
Before you start, you’ll want to follow a few quick prep steps: clear the area, gather your tools, and mark noisy boards.
Then work through the repair sequence—tighten or shim joints, add lubricant or filler, and replace damaged planks as needed.
Finish with post-repair testing by walking the floor and rechecking fixes, then tidy up and monitor for recurring creaks.
Prep steps
Since small mistakes will waste time and materials, start by collecting everything you’ll need and clearing the work area so you can move freely.
Inspect the floor to locate creaks, gaps, and loose boards.
Gather tools: pry bar, screws, drill, wood glue, shim, wedge, rag, and flashlight.
Protect nearby furniture and mark problem spots before you begin repairs.
Repair sequence
Start by working through a short, ordered checklist so you can fix creaks efficiently and avoid redoing steps.
1) Identify noisy boards.
2) Clean gaps and remove debris.
3) Apply lubricant or wood glue where needed.
4) Drive screws or use shims to stabilize planks.
5) Wipe excess and let set.
6) Replace trim if removed.
Post-repair testing
After you finish repairs, walk the repaired area and listen for any remaining squeaks so you can confirm the fixes held.
Test under different loads: walk slowly, briskly, and with weight (carry a bag).
Check adjacent boards for new noises.
Re-inspect fasteners or glue lines if anything persists.
Note locations and repeat targeted repairs until the floor is quiet and stable.
FAQ
You probably have a few quick questions before you start, like whether injecting adhesive will harm the laminate or if wood screws are safe on a floating floor.
You’ll also want to know how long DIY quieting repairs last, whether creaks indicate structural problems, and if humidity control alone will stop the noise.
Read on for concise answers and practical guidance.
Will injecting adhesive damage my laminate?
Worried that injecting adhesive will ruin your laminate? You won’t if you choose the right product and technique.
Use a wood-floor or construction adhesive recommended for laminate, inject sparingly into gaps or seams, and wipe excess immediately. Test a hidden spot first.
Avoid soaking joints or using adhesives not labeled for laminate to prevent swelling, staining, or finish damage.
Can I use wood screws on a floating laminate floor?
If you just injected adhesive to stabilize a gap, note that a floating laminate floor isn’t meant to be fastened down with wood screws.
Screwing through planks can split tongues, void warranties, and restrict natural expansion. Instead, use weight, adhesive in seams, or underlayment fixes.
Reserve screws for subfloor repairs beneath the laminate, not the floating surface itself.
How long do DIY quieting repairs last?
Most DIY quieting fixes last anywhere from a few months to several years, depending on the cause and method you used.
Your repair’s longevity depends on traffic, humidity, and how well you addressed the actual movement.
Simple fixes like talc or felt pads wear faster; adhesive or shim adjustments last longer.
Monitor the floor and repeat or upgrade repairs if creaks return.
Are creaks a sign of serious structural damage?
How serious are creaks? You’ll usually find they’re cosmetic: loose boards, subfloor gaps, or fastener issues cause noise rather than structural failure.
Check for sagging, widespread unevenness, visible joist cracks, or doors that stick—those suggest deeper problems.
If you don’t see those signs, simple targeted fixes suffice; if you do, consult a pro to assess load-bearing components promptly.
Can humidity control alone stop creaking?
You can reduce or even stop many laminate-floor creaks by controlling humidity, but it won’t fix every cause.
Maintaining stable humidity (30–50%) prevents boards from shrinking or swelling and reduces movement.
However, fasteners, uneven subfloor, loose underlayment, or installation gaps also cause noise.
Use dehumidifiers/humidifiers consistently, but inspect and tighten or add support where humidity control doesn’t eliminate creaks.