Is It Hard to Install Tile? What to Expect Before You Start
You can install many types of tile yourself if you’re handy and patient, but expect a learning curve and careful prep. Small ceramic projects are the easiest; porcelain, large-format, and natural stone demand precise cuts, proper substrate work, and sealing. Wet areas need waterproofing and skill. DIY takes extra time; pros deliver faster, guaranteed results. If you want a solid plan, tools list, and step-by-step tips to avoid common mistakes, keep going.
Is It Hard to Install Tile? Quick Answer and What to Expect
Quick answer: tile installation ranges from moderately challenging for handy DIYers to straightforward for experienced pros.
You should consider DIY if you’re comfortable with precise measuring, cutting, and patience for prep and grouting.
Hire a pro if the layout is complex, you’re working with wet areas or large-format tile, or you want a guaranteed, fast finish.
Direct Answer short summary of difficulty for DIYers vs pros
If you’ve got basic DIY skills and patience, installing tile isn’t impossibly hard, but it’s more demanding than simple weekend projects; pros make it look easy because they’ve practiced layout, cutting, and substrate prep until those steps are second nature.
For you, is it hard to install tile? Expect a steep learning curve, time-consuming prep, precise cuts, and patience—pros minimize mistakes and speed.
Who should consider DIY and who should hire a pro
Now that you know the basic challenges—layout, cuts, substrate prep, and patience—you can decide whether to tackle the job yourself or call in a pro.
You should DIY if you’re comfortable with tools, precise measuring, and have time for learning and occasional mistakes.
Hire a pro for complex layouts, wet-area waterproofing, large-format tile, uneven substrates, or when you need guaranteed, timely results.
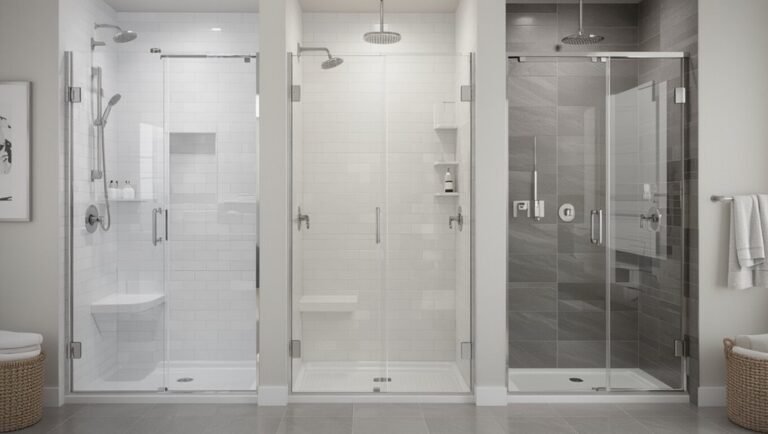
Basic Understanding Types of Tile and Installation Methods
To decide how hard a job will be, you’ll want to know the common tile materials—ceramic, porcelain, natural stone—and how their weight and fragility change difficulty.
You’ll also need to pick an installation method (thinset, mortar, peel-and-stick, or click-lock) since each has different skill and tool needs.
Finally, check your substrate—concrete, plywood, or existing tile—and the prep required, because a solid, level base makes the whole project much easier.
Common tile materials and how they affect difficulty
Different tile materials demand different skills and tools, so picking the right type shapes how hard the job will feel. You’ll find porcelain is dense and needs precise cuts; ceramic is forgiving for beginners; natural stone demands sealing and leveling. Choose based on durability, cost, and your experience.
| Material | Difficulty | Notes |
|---|---|---|
| Porcelain | High | Precise cuts |
| Ceramic | Low | Beginner-friendly |
| Stone | High | Sealing/leveling required |
Installation methods: thinset, mortar, peel-and-stick, click-lock
You’ll encounter four common installation methods—thinset, mortar, peel-and-stick, and click-lock—each with its own skill level, tools, and ideal applications.
You’ll use thinset for ceramic and porcelain, mortar for heavy or exterior work, peel-and-stick for quick, low-cost updates, and click-lock for floating floor systems.
Choose based on tile type, foot traffic, and how permanent you want the installation.
Substrate types (concrete, plywood, existing tile) and prep requirements
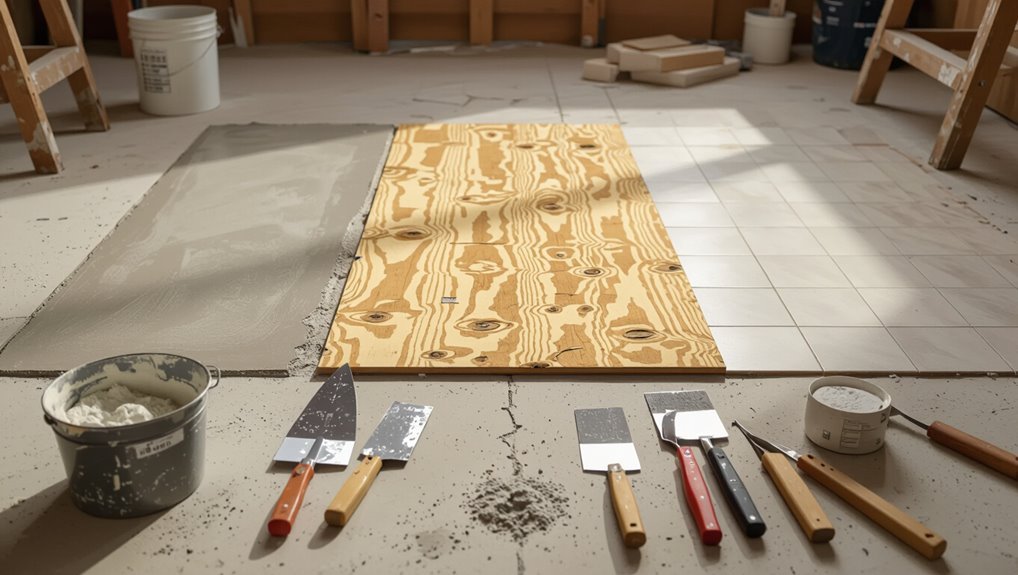
Substrate choice matters because concrete, plywood, and existing tile each demand different prep to verify a stable, flat surface and long-lasting bond.
On concrete, check moisture, clean, and level cracks.
On plywood, use exterior-grade, stiff subfloor and cement backer board or uncoupling membrane.
Over existing tile, confirm tiles are well-bonded, clean, and consider skim-coating or a membrane for adhesion.
What Makes Tile Installation Easy or Hard
Whether a tile job feels manageable or overwhelming comes down to a few clear factors you control: your skill with measuring, cutting, leveling, and finishing grout; the site conditions like room size, layout complexity, moisture, and changes; and the materials and tools you choose, from large-format or rectified tiles to patterned layouts and specialized equipment.
Each of those elements can raise or lower the difficulty quickly, so plan for the trickiest ones first. In the next sections we’ll examine how each factor affects time, cost, and the chance of mistakes.
Skill-related factors: measuring, cutting, leveling, grout finishing
A few core skills make tile installation feel straightforward or frustrating: accurate measuring, clean cutting, precise leveling, and careful grout finishing.
You’ll measure and plan layouts to avoid tiny slivers. You’ll cut tiles cleanly with the right tools, level each piece to prevent lippage, and apply grout smoothly, wiping joints for uniform lines.
Practice reduces mistakes and speeds the job.
Site-related factors: room size, layout complexity, moisture, transitions
Once you’ve got the measuring, cutting, leveling, and grout work down, the physical site shapes how hard the job will feel.
Smaller rooms with simple layouts go faster; irregular shapes, multiple doorways, or stairs demand more cuts and planning.
Moisture-prone areas need waterproofing and mortar choices.
Changes to other floors require profiles and careful leveling to avoid lippage and trip hazards.
Material-related factors: tile size, rectified edges, patterned layouts
While material choices might seem like aesthetic decisions, they directly affect how easy the installation will be.
Larger tiles cover more area faster but demand flatter substrates; small tiles need more grout lines and precise spacing. Rectified edges require tighter joints and exact cuts.
Patterned layouts (herringbone, basketweave) increase planning and cutting time, so expect higher skill and patience.
Tool and equipment needs that change difficulty
Material and layout choices set the stage, but the tools you use determine how smoothly the job goes. You’ll need proper tools to save time and avoid mistakes: the right wet saw, quality trowels sized to your tile, and leveling systems for flat results.
Rent or buy based on scope, and practice with unfamiliar gear before cutting your first tile.
- Wet saw with diamond blade
- Matched trowels and floats
- Tile leveling system
Step-by-Step What to Expect If You Install Tile Yourself
If you’re tackling tile yourself, you’ll start by planning the layout and estimating materials so you don’t run short mid-job.
Next you’ll prep the subfloor or wall—repairing, adding underlayment, and waterproofing as needed—then dry-fit the layout to see how cuts and edges will fall.
Finally you’ll cut tiles for edges and fixtures, spread adhesive, set the tiles with proper spacing, and level each one for a flat finish.
Step 1 Planning and estimating materials
Start by measuring the room and calculating the square footage so you know exactly how much tile, thinset, grout, and underlayment you’ll need.
Then factor in waste (cutting, breakage), changes, and tools. Order slightly extra.
Visualize layout and pattern to estimate cuts and accent tiles.
- Tile boxes and waste allowance
- Bags of thinset and grout
- Tools and spacers needed
Step 2 Preparing the subfloor or wall (repair, underlayment, waterproofing)
Before you lay a single tile, inspect and repair the subfloor or wall so it’s flat, solid, and clean—any dips, loose boards, or crumbling drywall will ruin the installation.
Patch, replace, and sand as needed.
Install appropriate underlayment and a waterproof membrane in wet areas.
Confirm seams are sealed and screw heads countersunk.
Let primers or membranes cure before tiling.
Step 3 Laying out the tile and dry fitting
Now you’ll lay out the tile pattern and dry-fit pieces to confirm alignment, spacing, and cuts before any mortar touches the floor or wall.
Work from your chosen starting point, snapping chalk lines for reference. Place full tiles first, use spacers for grout width, and trial-fit edge pieces.
Walk the layout, adjust for visual balance, and mark tiles that will need trimming later.
Step 4 Cutting tile and dealing with edges/fixtures
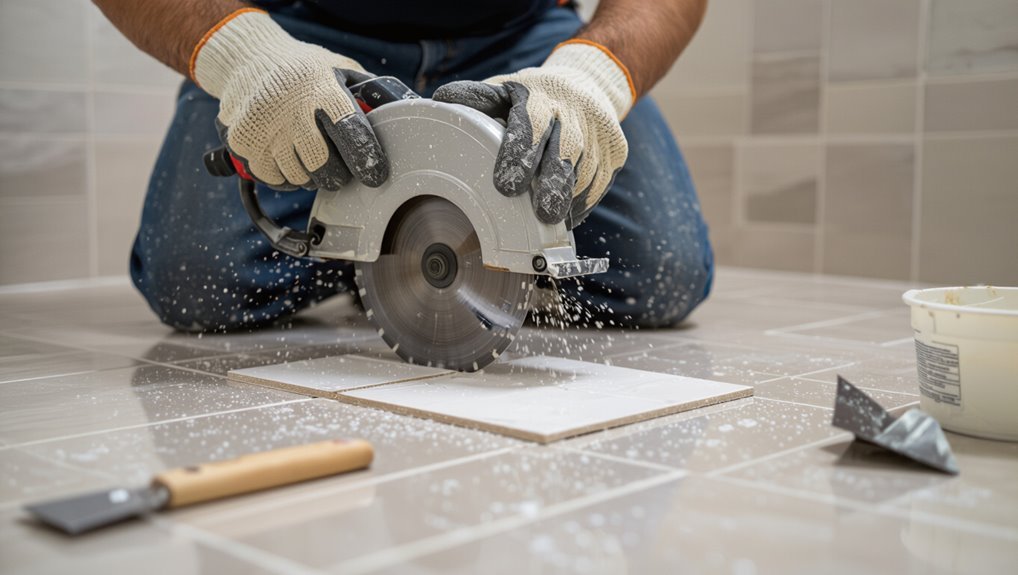
Measure and mark each tile you’ll cut, then make those cuts with the right tool for the job—wet saws for straight and diagonal cuts, tile nippers for small notches, and a grout saw or angle grinder for tricky curves around pipes and fixtures.
Hold tiles steady, wear eye and ear protection, score and snap where appropriate, and test-fit edges and trim pieces before installation to guarantee clean, accurate fits.
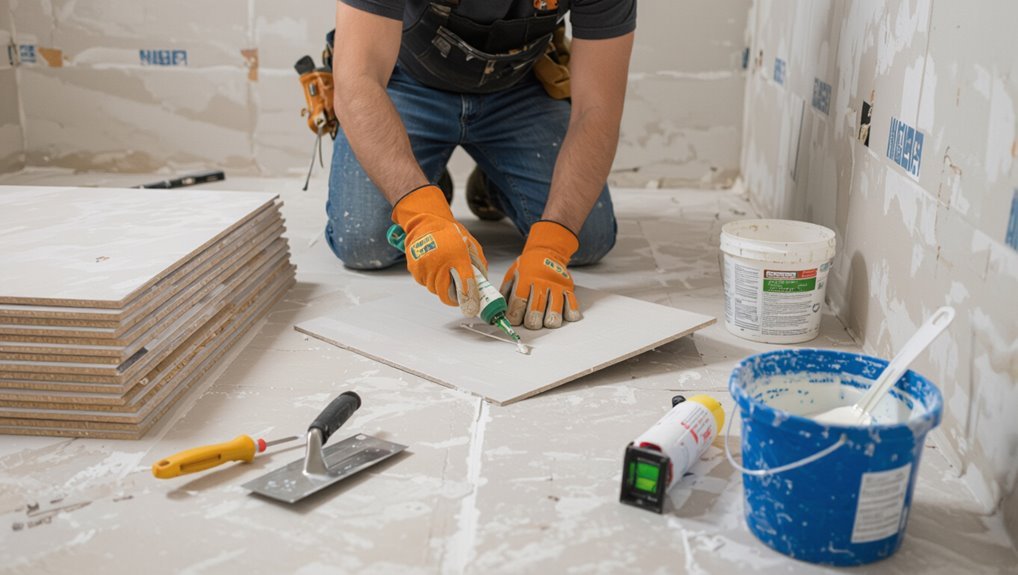
Step 5 Applying adhesive and setting tiles (spacing, leveling)
Spread a consistent bed of thinset and press each tile into place, using spacers and a level to keep joints even and surfaces flat.
Work in small sections so adhesive doesn’t skin over. Tap tiles gently with a rubber mallet to seat them, check alignment frequently, and adjust as needed.
Maintain uniform spacing, monitor for lippage, and clean excess thinset from joints immediately.
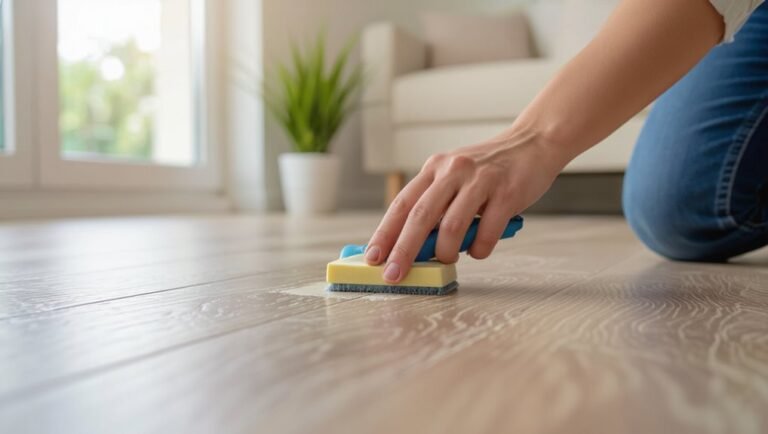
Step 6 Grouting and sealing (cleaning techniques)
Once the tiles have set, you’ll move on to grout and sealing, a step that locks the installation together and protects joints from dirt and moisture.
Mix grout to the right consistency, force it into joints with a rubber float, then wipe excess with a damp sponge before it dries.
After grout cures, apply a penetrating sealer to protect grout lines and ease cleaning.
Step 7 Finishing touches and curing time
After grout and sealer have cured, you’ll focus on the finishing touches that make the installation look professional and guarantee proper curing time for long-term durability.
Install trim, border strips, and caulk joints where tile meets fixtures.
Clean haze with a damp sponge, polish tiles, and allow the full cure period—typically 48–72 hours—before light use, and up to a week for heavy traffic.
Time, Cost, and Effort Expectations
You’ll want to set realistic time expectations: a small room can take a weekend DIY, while pros finish faster but on a tighter schedule.
Budget for materials, necessary tools, and labor separately so you don’t underestimate the total cost.
Also watch for hidden expenses and delays—subfloor repairs, shipping wait times, or wasted tiles can add days and dollars.
Typical timeframes for DIY vs professional installation
Time is the biggest variable when deciding between DIY and hiring a pro for tile work.
If you DIY a small bathroom, expect several weekends—prep, setting, grout, and curing. Larger rooms take days to weeks.
A professional crew often finishes a medium bathroom in 1–3 days and larger areas in a few days, thanks to experience, tools, and coordinated labor.
Cost breakdown: materials, tools, and labor
1 clear way to decide whether to DIY or hire is to break costs into three buckets: materials, tools, and labor. You’ll compare tile, adhesive, grout, and underlayment prices; factor basic tool purchases versus rentals; and estimate professional hourly rates for faster, guaranteed work.
| Category | Typical cost range |
|---|---|
| Materials | $2–$10/ft² |
| Tools | $20–$200 |
| Labor | $40–$100/hr |
Hidden costs and delays to watch for
Because remodeling rarely goes exactly to plan, expect hidden costs and delays that can push your tile project past the original budget and timeline.
You’ll face surprises like cracked subfloor repairs, uneven surfaces needing prep, back-ordered tiles or thinset, permit or inspection hold-ups, and extra labor for intricate patterns.
Build a 10–20% contingency and realistic schedule padding.
Pros vs DIY When Hiring a Professional Is Worth It
If your project involves tricky layouts, showers, or other wet areas, you’ll usually be better off hiring a pro.
A good installer brings speed, troubleshooting skills, and often a warranty you won’t get DIY.
I’ll also cover how to choose and vet a tile installer so you know what qualifications and references to look for.
Scenarios where a pro is recommended (complex layouts, wet areas)
When your project involves irregular shapes, intricate patterns, multiple threshold changes, or any wet-area like a shower or steam room, hiring a pro is usually worth it; they’ll prevent costly mistakes from improper waterproofing, uneven slopes, or miscut tiles that ruin the look and function.
You should also call a pro for large projects, radiant-heat systems, structural floor repairs, or historic restorations requiring precise matching.
What a professional does differently (warranty, speed, troubleshooting)
You’ve seen why complex or wet-area jobs usually call for a pro; now look at how hiring one changes the project outcome.
A pro offers warranties, faster completion, and expert troubleshooting when unexpected issues arise. You’ll get proper substrate prep, correct waterproofing, and rapid problem-solving—reducing callbacks and hidden costs.
That reliability often outweighs DIY savings for high-risk or time-sensitive installs.
How to choose and vet a tile installer
How do you tell a reliable tile installer from the rest? You’ll check credentials, inspect past work, and ask precise questions. Trust clear estimates, timelines, and written guarantees.
Bring references and verify insurance before booking.
- Photos of finished jobs and references you can call
- Written estimate, timeline, and warranty
- Proof of insurance and relevant certifications
Common Mistakes and Problems During Tile Installation
When you install tile, small layout and alignment errors quickly become visible and frustrating.
Skipping proper substrate prep or using the wrong adhesive leads to loose tiles and premature failures, and incorrect adhesive application makes the problem worse.
You’ll also run into grout troubles like staining, cracking, or efflorescence if you don’t choose the right product and finish properly.
Layout and alignment errors
Because a poor layout shows immediately, getting your tile alignment right is one of the most critical steps you can’t skip.
You’ll plan grout lines, center tiles, and snap precise chalk lines. Measure twice, dry-lay tiles, and adjust for focal points and shifts.
Don’t rush spacing or ignore tile variation; small misalignments compound and ruin the finished look.
Improper substrate prep and resulting failures
Once your layout is spot-on, the surface beneath the tile becomes the next make-or-break factor.
If you don’t clean, level, and remove loose material, tiles can crack, lippage will appear, and grout will fail.
You’ll need to address moisture, patch hollows, and guarantee a stable, rigid substrate.
Skipping prep guarantees callbacks and costly repairs down the road.
Incorrect adhesive choice or application
If you pick the wrong adhesive or spread it poorly, tiles won’t bond, grout won’t hold, and problems will show up fast.
You need the right mortar for tile type and substrate, correct trowel notch, full coverage, and proper open time.
Skimping on thickness or curing time leads to loose, hollow-sounding tiles and eventual cracking.
Follow manufacturer’s instructions precisely.
Grout issues: staining, cracking, and efflorescence
Grout problems can ruin a finished tile job fast: staining, cracking, and efflorescence each have distinct causes and fixes you’ll want to understand.
Stains come from dirt, spills, or improper sealing; clean and reseal regularly.
Cracks mean movement or improper joint depth—remove and regrout with flexible grout.
Efflorescence indicates moisture—fix leaks, dry substrate, and neutralize salts before regrouting and sealing.
Prevention, Tips, and Best Practices
Before you start, make a checklist with accurate measurements, required permits, and the exact materials and quantities you’ll need.
Gather the right tools and accessories that speed the job and improve accuracy, and follow waterproofing and durability best practices to avoid future failures.
When working with large-format or natural stone tiles, use the proper setting methods, back-buttering, and handling tips to prevent lippage and cracking.
Checklist before you start (measurements, permits, materials)
Start by taking three critical steps: measure the space accurately, confirm any required permits or building-code considerations, and list all materials and tools you’ll need.
Then calculate tile quantities plus 10–15% waste, note substrate prep supplies, and verify adhesive and grout types suit your tile and environment.
Check delivery timing, storage conditions, and budget for unexpected extras.
Tools and accessories that make the job easier
With measurements, permits, and materials squared away, focus on the tools and accessories that’ll save you time and prevent mistakes.
You’ll want quality tile spacers, a notched trowel sized to your tile, and a wet saw or scoring tool. Proper safety gear and a grout float speed finishing.
Choose durable mixing buckets and a level to keep layouts true.
- Tile spacers and wedges
- Notched trowel and grout float
- Wet saw or score-and-snap tool
Best practices for waterproofing and long-term durability
If you want your tile to last, prioritize waterproofing and proper substrate prep from the outset: seal joints, use a bonded waterproof membrane where moisture is likely, and guarantee your underlayment is flat, rigid, and securely fastened.
Use appropriate thinset and grout rated for your tile, slope wet areas to drains, apply sealers where recommended, and inspect caulking periodically to prevent leaks and failures.
Tips for working with large-format and natural stone tiles
Large-format and natural stone tiles demand extra care—plan how you’ll handle weight, flatness, and finish before you set a single tile.
Use a stiff, level substrate and full-bed mortar to prevent lippage. Score and snap porcelain; wet-cut natural stone with appropriate blades.
Pre-seal porous stones, use wider joints with flexible grout, and enlist help for handling heavy pieces to avoid breakage.
Materials and Tool Comparison Cheat Sheet
You’ll compare common adhesives and grouts—epoxy, cement, and premixed—so you can weigh durability, ease of use, and cost.
Then you’ll match cutters to the job: snap cutters for straight cuts on ceramic, tile cutters or wet saws for porcelain and large format, and wet saws for angled or intricate cuts.
This cheat sheet will help you pick the right product and tool for your skill level and tile type.
Adhesives and grouts: pros and cons
Because the right adhesive and grout determine a tile job’s durability and appearance, you should choose them with care. Pick thinset for strength, mastic for dry walls, epoxy for stains, cement grout for joints. Consider flexibility, curing time, water resistance, and color options.
| Type | Best for |
|---|---|
| Thinset | Floors/wet areas |
| Epoxy | High-traffic/stains |
| Mastic | Walls/dry areas |
| Cement grout | Standard joints |
Tile cutter vs wet saw vs snap cutter when to use each
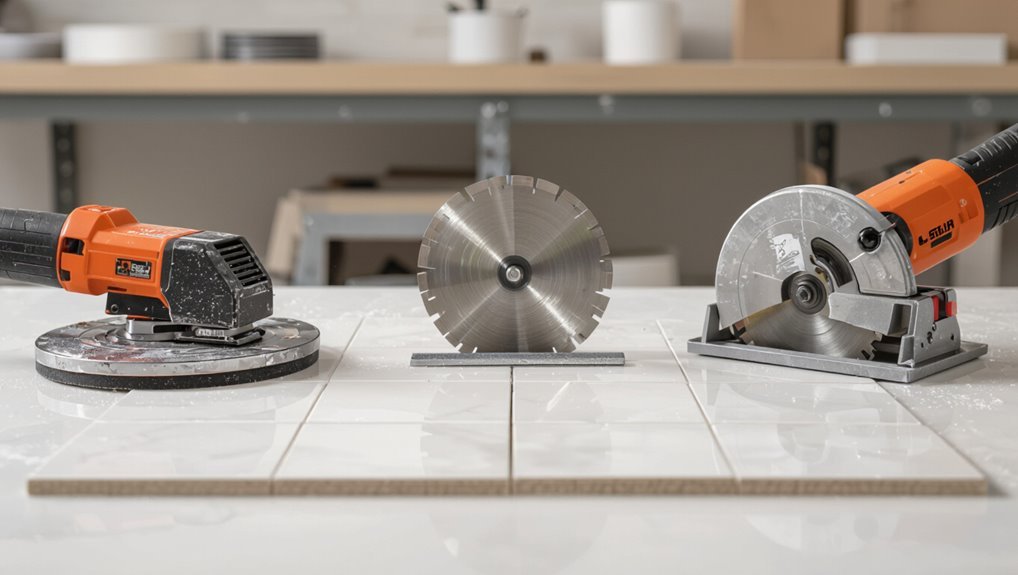
When you need clean, accurate cuts for tile layouts, choosing the right cutter—manual snap cutter, dry tile cutter, or wet saw—makes the job faster and prevents breakage.
Use a snap cutter for straight cuts on ceramic or porcelain; a dry tile cutter for thicker porcelain and quick jobs; and a wet saw for large formats, mosaics, diagonal cuts, or stone to guarantee precision and reduce chipping.
Real-World Scenarios and Case Examples
You’ll get a clear timeline and common pitfalls if you walk through a simple bathroom floor install, from subfloor prep to grout curing.
For a kitchen backsplash you’ll see a quick DIY guide with tips on layout, adhesive, and cutting tiles.
For complex shower pans and full wall systems, you’ll learn why pros usually lead those jobs because of waterproofing and slope precision.
Simple bathroom floor install timeline and pitfalls
A straightforward bathroom floor tile job typically takes a weekend for a competent DIYer or 2–3 days for a professional crew.
However, unexpected delays—like uneven subflooring, old glue, or plumbing snags—can stretch that into a week or more.
You’ll demo existing flooring, prep the subfloor, set tiles, grout, and seal.
Plan extra time for curing, rechecking slopes, and fixing unforeseen plumbing or substrate issues.
Kitchen backsplash DIY quick guide
Tackle a kitchen backsplash project over a long weekend by picking a realistic scope—simple subway tile or peel-and-stick sheets will usually take a day, while intricate mosaics or full-height tiled walls can stretch into two or three—so you can plan for demo, substrate prep, precise layout, tiling, grout, and sealing with time for curing and any unexpected fixes like uneven drywall or outlet repositioning.
Measure carefully, prep the wall, use spacers, mix thinset to package instructions, cut tiles cleanly, grout after proper set time, and seal grout if recommended.
Work around outlets with proper covers and test fit patterns before final adhesion.
Complex shower pan and wall tiling why professionals often lead
Because shower pans must handle constant water, sloped drains, waterproofing layers, and structural loads, complex pan and full-height wall tiling often push homeowners to hire pros.
You’ll face precise slopes, membrane seams, tile cut patterns, and tight grout joints. Mistakes mean leaks, mold, or costly rework.
A pro brings experience, correct materials, tools, and tested sequencing to guarantee a durable, watertight result.
FAQ
You’ll want straight answers to common concerns like how long tile lasts, whether you can lay new tile over old, and if sealing is required.
We’ll also cover the toughest skills beginners face and practical fixes for lippage or uneven tiles.
Read on and you’ll get concise, usable advice for each question.
How long does a tile installation usually last?
How long will a tile installation last?
With proper materials, installation, and maintenance, tile can last 20–50 years or more.
You’ll extend its life by choosing durable tile, a stable substrate, correct thinset/grout, and sealing porous surfaces.
Regular cleaning, prompt grout repair, and avoiding heavy impact will keep tiles looking good and functional for decades.
Can I install tile over existing tile?
Want to save time and labor? You can install tile over sound, well-bonded existing tile if it’s level and securely attached.
Clean thoroughly, roughen the surface, and use a suitable thinset or bonding adhesive. Avoid doing this over damaged, loose, or wet areas.
Check height changes, door clearances, and manufacturer guidelines to guarantee a durable, code-compliant installation.
Do I need to seal tiles and grout?
If you’re installing tile over existing tile or laying fresh flooring, you’ll also need to contemplate sealing—both the tiles and the grout—to protect against stains, moisture, and wear.
You should seal porous tiles (natural stone, unglazed ceramic) and grout after curing. Reseal grout annually and tiles as manufacturer recommends.
Use appropriate penetrating or topical sealers for the material and traffic.
What’s the hardest part of tiling for a beginner?
What’s toughest for a beginner is getting a perfectly flat, well-prepared substrate and keeping tiles consistently level as you work.
You’ll need accurate measurements, proper adhesive coverage, and disciplined spacing.
Cutting tiles to fit edges and around obstacles demands steady tools and patience.
Mistakes compound quickly, so plan layout, double-check lines, and work methodically to avoid wasted materials and uneven results.
How do I fix lippage or uneven tiles?
How do you fix lippage without tearing out the whole job?
You can often correct small high tiles by removing grout around them, applying a bit of thinset under the raised edge, and tapping it down with a rubber mallet and straightedge.
For low tiles, inject compatible thinset or epoxy to raise them.
Regrout and seal the repair to match surrounding joints.