Why Is My Laminate Floor Separating and How Do I Fix It?
Your laminate is separating because boards are shifting from moisture, temperature swings, poor acclimation, subfloor issues, or low-quality materials. Stop foot traffic, dry spills, fix leaks, and push loose planks back together, weighing seams if needed. Check humidity with a hygrometer, inspect the subfloor for flatness and damp spots, and reseat or replace warped boards. Small gaps can use filler; bigger problems may need pro help—keep going to learn how to diagnose and repair it step by step.
Quick Answer Why Your Laminate Floor Is Separating and What to Do Right Now
If your laminate is separating, start with a short checklist: remove moisture, push boards back into place, and weigh seams overnight to see if they hold.
Try simple DIY fixes like tightening floating floor gaps or using a pull bar for stubborn seams, but don’t force warped or buckled planks.
Call a professional if you see widespread buckling, warped subflooring, or persistent gaps after basic repairs.
Immediate short checklist for urgent fixes
1 quick checklist will help you stop further damage and buy time for a proper repair: remove foot traffic from the area, control moisture (turn off leaks, use towels or a wet/dry vacuum), push separated planks back into place if they’re loose, weigh them down with flat boards and heavy objects, and note the extent and location of gaps for a follow-up assessment.
- Assess gap size and pattern — why is my laminate floor separating?
- Dry and stabilize the subfloor.
- Temporarily secure loose planks and block traffic.
When to call a professional vs. DIY
You’ve stabilized the area and noted the gaps, so next decide whether you can handle repairs yourself or need a pro.
If gaps are small, boards pop back, and subfloor is dry, you can DIY with glue, clamps, or replacement planks.
Call a professional for widespread separation, moisture damage, warped boards, or if you suspect structural or moisture-source issues beyond simple fixes.
Basic Understanding What Laminate Floor Separation Means
When your laminate floor is separating, you’ll see gaps between planks, raised edges, or misaligned seams that catch your eye and your foot.
You should know that most laminate is a floating floor made of layered boards joined by click-lock or tongue-and-groove systems, not glued to the subfloor.
Understanding those visible signs and how the joints are built will help you pinpoint whether the issue is installation, moisture, or movement.
Definition and visible signs of separation
Separation in laminate flooring happens when the planks pull apart at their seams or edges, creating visible gaps, raised edges, or uneven joints that you can see and feel.
You’ll notice light showing through seams, boards that shift underfoot, or edges that lift.
Gaps may widen over time, especially along walls or high-traffic zones, signaling movement, moisture issues, or subfloor instability.
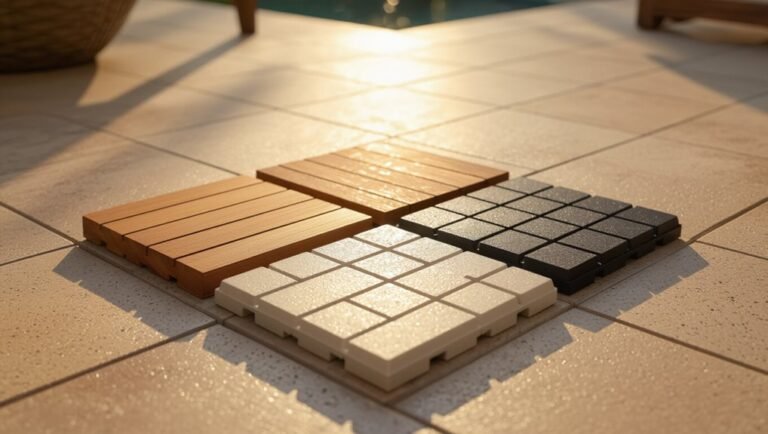
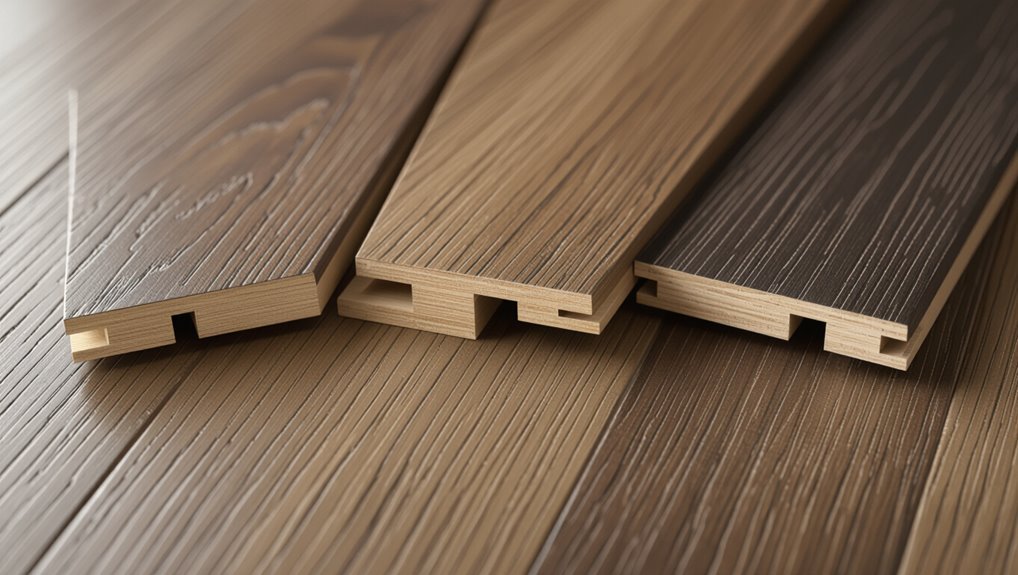
How laminate flooring is constructed (click-lock, tongue-and-groove, floating)
Noticing gaps or lifted edges makes it helpful to understand how laminate is built, since the joint system determines how and why boards can pull apart.
You’ll see click-lock panels that snap together for a floating floor, traditional tongue-and-groove that fits snugly, and fully glued installations.
Each method tolerates movement differently, so installation type influences separation causes and repair approaches.
Common Causes of Laminate Floor Separation
You’ll usually see separation when moisture or wide temperature swings make the boards expand and contract beyond their joints.
Improper acclimation, installation mistakes, or an uneven, damp, or unstable subfloor can make the problem worse.
Sometimes low-quality or already-damaged boards are the culprit, too.
Moisture and humidity problems
1 main culprit behind laminate gaps is moisture—either too much water from spills, leaks, or high humidity, or too little moisture when indoor air gets excessively dry.
You should check for plumbing leaks, high basement humidity, and wet mopping.
Use a dehumidifier or humidifier to stabilize levels, dry wet areas quickly, and guarantee underlayment and seams stay sealed to prevent warping.
Temperature fluctuations and seasonal expansion/contraction
Along with moisture swings, temperature changes make laminate planks move—heat causes them to expand and cold makes them contract—so gaps or buckling often show up as seasons change.
You’ll notice tighter seams in winter and slight crowding in summer.
Keep interior temperatures steady, use humidifiers or dehumidifiers as needed, and allow for proper perimeter expansion space so the floor can move without separating.
Improper acclimation or installation errors
When installers skip proper acclimation or rush the layout, the planks won’t settle to the room’s temperature and humidity. You’ll start seeing gaps, buckling, or misaligned seams soon after installation.
You should guarantee boards acclimate per manufacturer guidelines, maintain correct expansion gaps at edges, stagger end joints properly, and follow locking procedures.
Improper snapping or uneven pressure during installation causes separation and stress.
Subfloor issues (uneven, damp, or unstable subfloor)
If your subfloor is uneven, damp, or unstable, it’ll undermine even the best-installed laminate and cause gaps, buckling, or seam separation.
Check for low spots, soft areas, or moisture from leaks and poor vapor barriers. Level high or low areas, replace rotten or spongy sections, and install proper underlayment and a moisture barrier.
Make sure joists are stiff and fastened securely.
Poor quality materials or damaged boards
Poor-quality or physically damaged laminate boards will let seams separate regardless of how well you install them.
You’ll notice warped, swollen, or delaminated planks that won’t lock tightly. Replace defective boards and inspect unopened cartons before installation.
Choose reputable brands with solid locking systems, check warranties, and avoid salvaging visibly damaged pieces to prevent premature gaps and ongoing maintenance headaches.
Heavy loads and high-traffic wear
Because heavy loads and constant foot traffic put repeated stress on the locking joints, your laminate can start to separate along seams and around doorways.
You’ll notice gaps, lifting, or uneven boards where weight concentrates. Reduce stress by using area rugs, felt pads, and furniture coasters, rearranging heavy items, and limiting rolling loads.
Replace worn planks and reinforce connections to restore stability.
Diagnose the Problem How to Find the Root Cause
Start by mapping where gaps appear and note any repeating pattern so you can link location to cause.
Then measure moisture and humidity with a moisture meter and hygrometer (aim for manufacturer-recommended ranges) while checking subfloor flatness and stability.
Finally, review installation and acclimation records and inspect planks and locking joints for damage or failure.
Step 1: Inspect pattern and location of gaps
Where are the gaps and how do they run across the room?
Walk the floor, note gap locations, lengths, and directions. Are separations along walls, between boards, or radiating from a doorway?
Photograph patterns and mark hot spots. Consistent gaps along one wall suggest installation stress; random gaps point to movement or localized issues.
Record findings before you act.
Step 2: Measure moisture and humidity levels (tools & target ranges)
Before you try repairs, measure both the room humidity and the moisture content of the subfloor and laminate to confirm whether moisture’s causing the gaps.
Use a hygrometer and moisture meter, compare readings to manufacturer specs, and record results.
- Hygrometer: target 30–50% RH indoors.
- Moisture meter: subfloor ≤12% (wood) or per spec.
- Retest after environmental adjustments.
Step 3: Check subfloor flatness and stability
If your humidity and moisture readings look normal, the next thing to check is whether the subfloor is flat and stable, because uneven or springy substrates often cause laminate boards to separate.
Walk the floor, press for bounce, and use a 6‑ or 10‑foot straightedge to spot gaps or high spots.
Repair or level with patch, screws, or plywood underlayment before reinstalling.
Step 4: Review installation history and acclimation time
Once you’ve ruled out moisture and subfloor issues, look back at how the floor was installed and how long the boards acclimated—those details often reveal the root cause of gaps.
Check installer notes, photos, and whether expansion gaps were left. Confirm acclimation time matched manufacturer recommendations.
Short acclimation or rushed locking can cause shrinkage and movement; document findings for repair or warranty claims.
Step 5: Identify plank damage or locking mechanism failure
Step 5: Now inspect individual planks and the locking joints to spot physical damage or failure that’s allowing gaps to form.
Check for cracked, swollen, or delaminated boards and damaged tongue-and-groove edges.
Press adjacent planks to test the lock. Loose or broken locking profiles mean replacement or reseating.
Note water stains or insect damage—these indicate plank replacement rather than simple adjustment.
How to Fix Laminate Floor Separation Step-by-Step Repairs
Once you’ve identified what’s causing the gaps, you can choose the right repair path—from quick cosmetic fixes for minor gaps to re-seating loose boards or replacing damaged planks.
You’ll also need to address moisture or subfloor issues if they’re driving the separation, and in some cases a full floor replacement will be the only reliable solution.
Below I’ll walk you through step-by-step repairs for each of these scenarios.
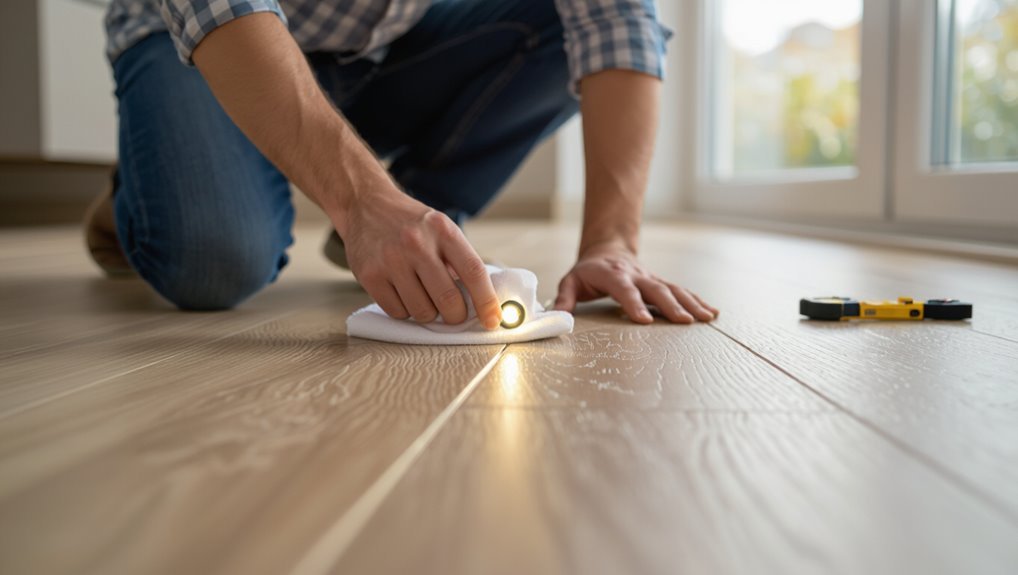
Minor gap repairs (cosmetic fixes)
For small gaps you can use laminate gap filler or color-matched putty to blend seams so they’re barely noticeable.
Apply the filler with a caulk gun or putty knife, wipe away excess, and let it cure before walking on it.
Where gaps meet doorways or room changes, install connector strips or thresholds to hide seams and prevent further separation.
Using laminate gap filler and color-matched putty
When small gaps appear between laminate planks, you can often hide them quickly with a laminate gap filler or color-matched putty to restore a clean, finished look.
You’ll press filler into gaps, smooth it flush, then wipe excess before it sets. Match color, test a hidden spot, and follow drying times.
- Choose matching shade
- Apply with caulking tool
- Sand/lightly buff
Applying transition strips and thresholds
Alteration strips and thresholds give your laminate a neat, finished edge and hide minor gaps where planks meet other flooring or doorways.
You pick a matching profile, measure and cut to fit, then anchor the metal or wood track to the subfloor.
Snap the connector into place, trim any excess, and seal edges if needed so gaps stay concealed and edges stay secure.
Re-seating and locking loose boards
Before you start, gather basic tools—rubber mallet, tapping block, pry bar, pull bar, spacers—and wear knee pads and safety glasses to protect yourself.
You’ll release affected planks by carefully prying the joint, realign the tongues and grooves, then re-click them together using gentle taps and a pull bar to guarantee a tight fit.
Work methodically along the seam so each board locks fully without forcing or damaging the edges.
Tools required and safety tips
You’ll want a compact set of tools and a focus on safety before you start re-seating and locking loose laminate boards.
Gather essentials, protect yourself, and prep the area.
- Rubber mallet, tapping block, pry bar, spacers, and a soft cloth.
- Knee pads, safety glasses, dust mask, and work gloves.
- Clear workspace, good lighting, and unplug nearby appliances.
Step-by-step: unlocking, realigning, and re-clicking planks
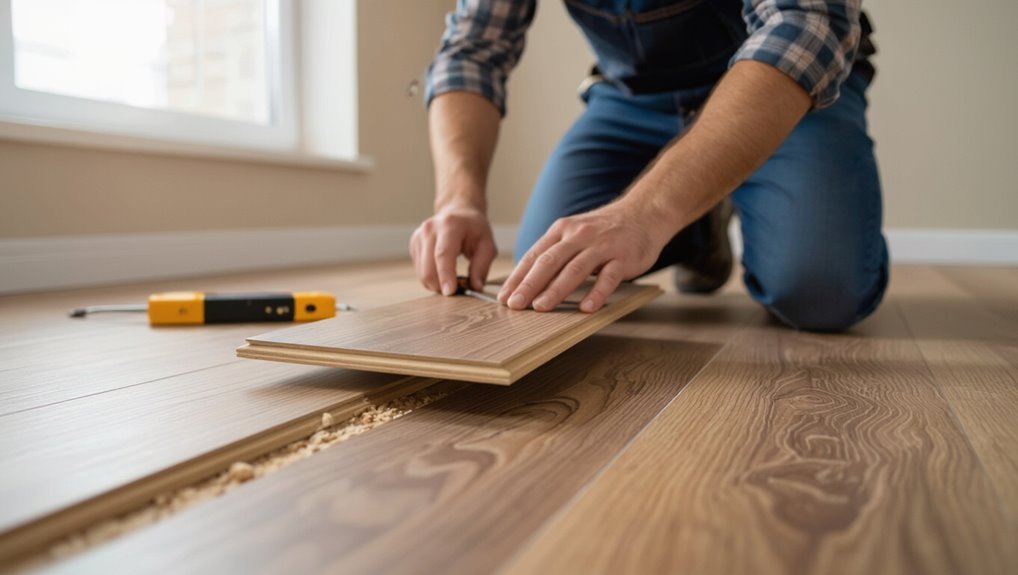
With tools and safety gear ready, you can start re-seating the boards: work methodically along the gaped area, release the affected planks by gently levering the edge with a tapping block and pry bar, realign the tongue-and-groove so they sit flush, and then tap them back together using the rubber mallet and tapping block to re-click the joint.
- Inspect seams and clean debris.
- Release adjacent rows if needed.
- Re-seat, tap, and check alignment.
Replacing damaged boards
If a single plank is cracked or swelling, you can remove and replace it without ripping up the whole floor by cutting out the damaged board and fitting a matching replacement.
You’ll need to match color, thickness, and the wear layer—and ideally the same brand or a very close match—to keep the joints and finish uniform.
I’ll walk you through the precise cutting, fitting, and locking steps so the repair blends in and holds up.
How to remove and replace a single plank without removing whole floor
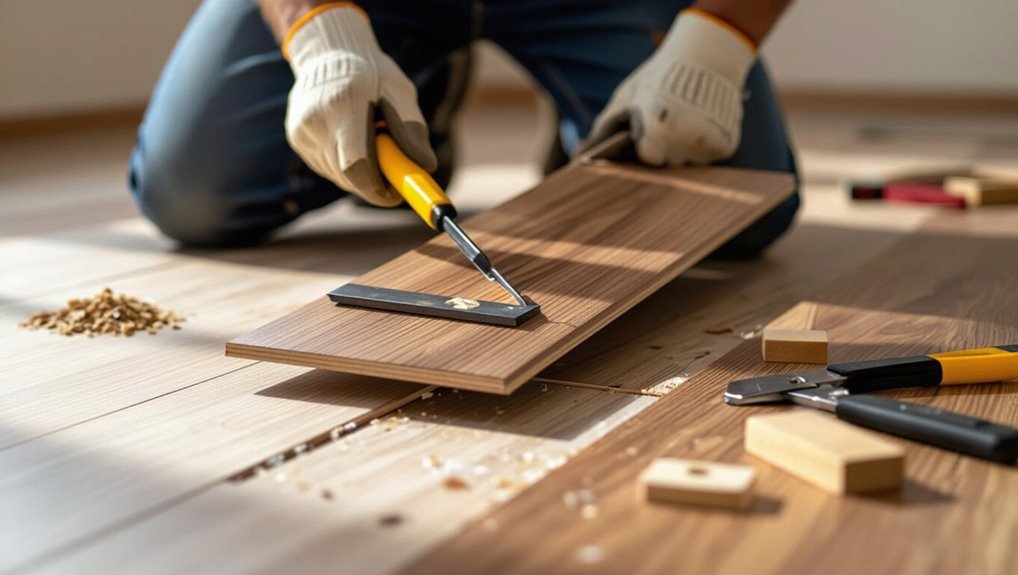
When a single laminate plank’s edge is cracked or cupping, you don’t have to tear up the entire floor to fix it; you can remove and replace that board alone with a few basic tools and careful steps.
Carefully cut out the damaged plank, clean the groove, fit a replacement, and lock it in place.
Steps:
- Score and remove center, then side pieces.
- Clean subfloor and tongue/groove.
- Dry-fit, apply adhesive if needed, and tap into place.
Matching color, wear layer, and brand considerations
After you’ve cut out and fitted the replacement plank, you’ll want the new piece to blend in and perform like the rest of the floor.
Match color and grain first, then verify the wear layer thickness and AC rating equal existing boards.
Prefer the same brand or compatible locking profile to avoid fit issues.
Test a small section for color-fastness before final installation.
Addressing moisture and subfloor problems
First, you’ll check for leaks, plumbing issues, or high indoor humidity and fix those sources so moisture stops attacking the floor.
Next, you should install an appropriate vapor barrier and underlayment to prevent future moisture migration.
If the subfloor is warped or rotten, repair or replace it before reinstalling the laminate.
Identifying and fixing leaks or high humidity sources
If your laminate is buckling or gaps keep appearing, start by checking for leaks and excess humidity that are often the real culprits.
Inspect plumbing, appliances, windows, and exterior grading. Repair leaking pipes, seals, or flashing promptly.
Use dehumidifiers and improve ventilation in basements or bathrooms.
Dry the subfloor thoroughly before repairing or replacing affected planks to prevent recurrence.
Installing proper vapor barriers and underlayment
Once you’ve fixed leaks and dried the subfloor, focus on installing the right vapor barrier and underlayment to stop moisture from returning and causing separation.
Choose a polyethylene vapor barrier for concrete and seam-tape edges.
Add foam or cork underlayment to level minor imperfections and provide cushioning.
Make certain seams and edges overlap correctly and maintain manufacturer-recommended expansion gaps during installation.
When to repair or replace the subfloor
Because a damaged or cupped subfloor will keep pulling your laminate apart, you need to assess its condition before deciding whether to repair or replace it.
Check for rot, soft spots, mold, and significant warping.
Minor issues you can patch, sand, or sister with new joists; widespread decay, extensive moisture damage, or structural instability means replace the subfloor to prevent recurrence.
When a full floor replacement is necessary
If the damage is widespread you’ll likely need a full floor replacement, so weigh the cost and timeline before you start.
Think about whether to stick with laminate or switch to a more water‑resistant alternative, and factor material and labor costs into your decision.
I’ll walk you through selecting suitable products and estimating time and budget for the job.
Cost and timeline considerations
When you’re deciding whether to repair gaps or replace the whole laminate floor, weigh both the costs and the timeline side by side so you know what to expect financially and how long your home will be disrupted. Fast repairs: lower cost, days. Full replacement: higher cost, days–weeks. Use the table to compare.
| Option | Time |
|---|---|
| Repair | 1–3 days |
| Replace | 3–14 days |
Choosing the right laminate or alternative flooring
Cost and timeline will help decide whether to repair gaps or opt for a full replacement, but you’ll also want to pick the right material for long-term performance.
Choose water-resistant or waterproof laminate with quality click-lock edges for stability, or consider vinyl plank or engineered hardwood for moisture-prone areas.
Factor durability rating, warranty, and installation ease to prevent future separation and reduce maintenance.
Common Mistakes to Avoid When Repairing Laminate Floors
When you tackle separated laminate, don’t just fill gaps—track down and fix any moisture sources first.
Don’t force or jam planks back in place, and avoid the wrong fillers or adhesives that can make things worse.
Also, if you’re installing replacement boards, make sure they acclimate properly before fitting.
Ignoring moisture sources and only treating gaps
If you only fill the gaps between boards without finding where the moisture’s coming from, you’ll be back to square one—moisture keeps swelling and warping the core, so the seams reopen.
Check for leaks, high humidity, or wet subfloor before repairs.
Dry and fix the source, replace damaged planks, then reseal or refasten.
Temporary caulking won’t solve it.
Forcing planks and causing further damage
After you’ve tracked down moisture and fixed the source, don’t rush into forcing stubborn planks back together—doing so can crack the laminate tongue, tear the locking mechanism, or split plank edges.
You’ll worsen gaps, misalign rows, and create irreparable damage. Instead, gently release and realign panels, use proper tapping blocks, and remove affected planks to replace or repair them without stressing the joints.
Using the wrong filler or adhesives
Anyone can make the mistake of reaching for the first caulk or wood filler they find, but using the wrong product will leave gaps looking worse and can damage the plank surface or locking seams.
You should choose fillers and adhesives labeled for laminate, non-expanding, and compatible with the finish. Test a small area, follow manufacturer instructions, and avoid permanent glues that prevent future repairs.
Skipping proper acclimation on replacement boards
Because new laminate planks absorb and release moisture, failing to let replacement boards acclimate can cause them to expand or contract once installed, leading to gaps, buckling, or stressed locking seams.
You should store replacements in the room for 48–72 hours, on cartons opened and elevated.
Check humidity and temperature, follow manufacturer guidelines, and avoid fastening or trimming boards before acclimation completes.
Prevention and Best Practices to Keep Laminate From Separating
To prevent separation, you should follow proper installation and acclimation guidelines and use compatible underlayments with higher-quality materials.
Keep indoor humidity and temperature stable and set a regular inspection and maintenance schedule to catch issues early.
Short, consistent care and the right materials will greatly reduce the risk of your laminate pulling apart.
Proper installation and acclimation guidelines
If you want your laminate to stay tight and gap-free, proper installation and acclimation are the two most important steps you can control.
You should let boards acclimate in the room for 48–72 hours, inspect subfloor flatness, and maintain correct expansion gaps.
Follow manufacturer instructions, use recommended underlayment, and lock planks carefully to prevent stress.
- Acclimate 48–72 hours
- Check subfloor flatness
- Maintain expansion gaps
Humidity and temperature control recommendations
When indoor humidity and temperature swing wildly, your laminate will expand and contract and the seams can pull apart; you’ll prevent this by keeping conditions steady.
Aim for 35–55% relative humidity and 60–75°F (15–24°C). Use a humidifier or dehumidifier and reliable thermostat to maintain ranges.
Avoid drastic, rapid changes from heaters, AC, or large open windows that stress boards.
Regular maintenance and inspection schedule
Because small problems usually show up before they become big ones, set a simple, regular inspection and maintenance routine for your laminate floor and stick to it.
Check seams, edges, and junctions monthly, wipe spills immediately, and clean with recommended products weekly.
Note any swelling, gaps, or loose planks, document issues, and address repairs promptly to prevent expansion and permanent damage.
Selecting higher-quality materials and compatible underlayments
Although cheaper laminate can save money up front, choosing higher-quality boards and a compatible underlayment will keep your floor stable and cut down on separation over time.
Pick boards with tight locking systems, good AC ratings, and moisture-resistant cores.
Match underlayment for moisture barrier, sound control, and thickness compatibility.
Install per manufacturer guidelines to maintain expansion gaps and prevent buckling or seam failure.
Cost Estimates and Timeframes for Common Repairs
You can often fix small gaps yourself with a few basic materials and an afternoon’s work.
Hiring a pro usually runs higher — expect a wide range depending on scope, from spot repairs to full board replacement.
If repairs won’t hold, compare full replacement costs for laminate versus alternatives like engineered wood or vinyl to find the best long-term value.
DIY minor repairs materials and time
Tackle most small separations with a few basic tools and under an hour of hands-on time: a tube of wood‑floor adhesive or silicone, a caulk gun, a putty knife, painter’s tape, and a damp cloth will cover the majority of edge lifts and small gaps.
Expect materials under $20; prep, glue, clamp or tape, wipe excess, and cure—total about 30–60 minutes per spot.
Professional repair costs typical ranges
If a quick glue-and-tape fix won’t hold or the separation covers several planks, you’ll likely need a pro — and knowing typical costs helps you decide. Expect hourly rates $50–$100, small repairs $100–$300, plank replacement $150–$500, and larger seam or moisture repairs $300–$1,200. Timeframes vary from 1–8 hours depending on scope.
| Service | Typical cost |
|---|---|
| Hourly labor | $50–$100 |
| Small repair | $100–$300 |
| Plank replace | $150–$500 |
| Major repair | $300–$1,200 |
Full replacement cost comparison (laminate vs. alternative floors)
Cost is usually the deciding factor when you’re weighing a full laminate replacement against alternatives like hardwood, vinyl, or engineered wood.
It’s helpful to compare both material and installation expenses as well as expected lifespans.
Laminate runs $2–6/ft² plus $1–3/ft² installation, vinyl $3–8/ft², engineered wood $5–12/ft², and hardwood $8–15+/ft²; factor durability, resale value, and installation complexity.
Frequently Asked Questions (3“5)
You probably have specific questions like whether you can glue gaps shut permanently or if sanding will help separated boards.
You’ll also want clear limits on humidity, how long laminate should acclimate before installation, and whether underlayments can cause separation.
I’ll answer each of these briefly so you can pick the right fix.
Can I glue laminate gaps shut permanently?
Can gluing laminate gaps shut give you a permanent fix?
You can glue small, stable gaps with a quality wood glue or specialized laminate adhesive, clamping until cured.
It’s not foolproof: recurring movement, poor subfloor or moisture will reopen seams.
For long-term results, address underlying causes first, then glue as a repair rather than a guaranteed permanent solution.
How much humidity is too much for laminate floors?
How humid is too humid for laminate floors? You should keep indoor relative humidity between 35% and 65%.
Consistently above 65% risks swelling, warping, joint separation, and mold. Rapid humidity swings also stress boards.
Use a hygrometer to monitor, run dehumidifiers in damp seasons, and ventilate bathrooms and kitchens to maintain stable levels and protect your floor.
Will sanding or refinishing help separated laminate?
High humidity can cause gaps and lifting, but sanding or refinishing won’t fix separation on laminate because the wear layer is a printed, plastic surface over compressed fiberboard.
You can’t sand through that layer to re-seal joints without destroying the decorative surface.
Instead, remove and replace affected planks or refit floating sections, address moisture sources, and reinstall with proper expansion gaps to prevent recurrence.
How long should laminate acclimate before installation?
Before you install laminate, let the planks acclimate in the room where they’ll be laid for at least 48 hours so they can reach the same temperature and humidity as the space.
For heavy or multi-pack shipments, extend acclimation to 72 hours.
Keep boxes unopened, stack flat, and maintain normal HVAC settings.
Proper acclimation reduces expansion gaps and separation risks after installation.
Can underlayments cause separation problems?
Although underlayments are meant to protect and stabilize your laminate, the wrong type or a poorly installed pad can actually lead to plank separation.
If the pad compresses unevenly, traps moisture, or prevents proper locking, boards can gap or lift.
Use manufacturer-recommended underlayments, guarantee a flat substrate, overlap seams correctly, and avoid thick foam under click-lock systems to prevent problems.