How to Clean a Tile Floor With Vinegar Safely
You can safely clean most glazed tile floors with diluted white vinegar: mix about 1 part vinegar to 10 parts water for routine mopping, or up to 1:4 for tougher grime, spot-testing first. Sweep or vacuum, mop with a microfiber pad, let the solution sit briefly, then rinse well to avoid residue. Don’t use vinegar on natural stone or unglazed tiles, and stop if grout or finishes show damage—keep going to find safer alternatives and tips.
When Vinegar Is a Good Choice for Cleaning Tile
When your tile is glazed and you’re dealing with everyday dirt, vinegar makes a safe, effective cleaner because its mild acidity cuts grease and light grime without harming the finish. You’ll dilute white vinegar with water—usually one part vinegar to four parts water—for routine mopping. Test a hidden spot first and avoid prolonged soaking.
If you’ve already applied proper tile sealing, vinegar won’t penetrate or dull the surface. For sensitive materials or when stronger disinfecting’s needed, consider vinegar alternatives like diluted rubbing alcohol or a pH-neutral commercial cleaner.
Follow manufacturer guidance and rinse well to prevent residue build-up.
Which Tiles Should You Never Clean With Vinegar?
Although vinegar works well on many glazed tiles, you should never use it on natural stone like marble, travertine, limestone, or on unglazed terracotta and some encaustic tiles, because the acid etches and dulls their surfaces.
Avoid vinegar on natural stone, unglazed terracotta, or encaustic tiles—the acid will etch and dull their surfaces.
You’ll also want to avoid vinegar on soft, porous ceramics where ceramic porosity lets acid penetrate and cause staining or surface damage.
Glazed porcelain benefits from porcelain durability, but confirm the glaze is intact before using vinegar; otherwise, microscopic cracks can allow harm.
When in doubt, test a hidden spot or choose a pH-neutral cleaner to protect sensitive tile types and finishes.
How Vinegar Can Harm Grout, Sealants, and Finishes
If you use vinegar regularly on tiled floors, it can eat away at grout, soften sealants, and strip protective finishes over time.
You’ll notice grout deterioration as joints become porous, crumbly, or discolored, which invites moisture and stains. Acidic vinegar also causes sealant damage, breaking down silicone or polymer caulks so edges lift and fail.
Protective coatings and factory finishes can dull or etch, reducing slip resistance and making tiles harder to clean. To protect your floor, spot-test hidden areas, avoid repeated acidic exposure, and choose neutral pH cleaners or consult manufacturers before using vinegar.
Exactly What Dilution to Use : Vinegar-to-Water Ratios
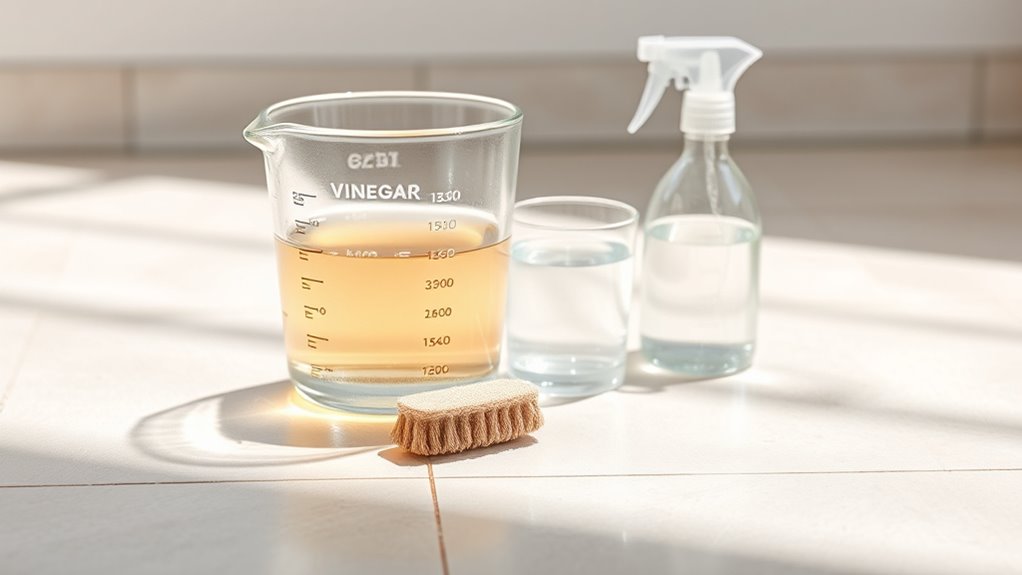
You’ll usually use a mild 1:10 vinegar-to-water ratio (one part vinegar to ten parts water) for routine mopping.
But you can go stronger for stubborn grime.
Hard, glazed ceramic or porcelain can tolerate a bit more acidity, while natural stone, sealed grout, and delicate finishes need a much weaker mix or none at all.
Test a small area first so you know the right strength for your specific tile.
Vinegar-To-Water Ratios
When you’re mixing vinegar and water for tile, the right dilution balances cleaning power with safety—too strong can damage grout or sealants, too weak won’t cut grease. Use a common 1:10 ratio (1 part 5% white vinegar to 10 parts warm water) for routine mopping; it cleans without risking vinegar hazards.
For tougher spots, try 1:4 briefly, rinsing afterward. Always spot-test first and avoid leaving vinegar puddles.
If you’re concerned about acidic effects or sensitive finishes, consider an alternative cleaning solution like a pH-neutral floor cleaner.
Store mixtures in labeled spray bottles and rinse surfaces after cleaning.
Adjusting For Tile Types
Because different tiles and finishes react differently to acid, you should match vinegar strength to the surface. Use these quick guidelines so you don’t harm tile patterns or lighten grout colors.
- Porcelain or glazed ceramic: 1 cup vinegar to 1 gallon water — safe for most patterns.
- Matte ceramic: 1/2 cup vinegar to 1 gallon water — gentler for finish.
- Natural stone (marble, travertine): avoid vinegar; use pH-neutral cleaner to protect veining and grout colors.
- Sealed stone: 1/4 cup vinegar to 1 gallon water, test first.
Always spot-test and rinse with clean water.
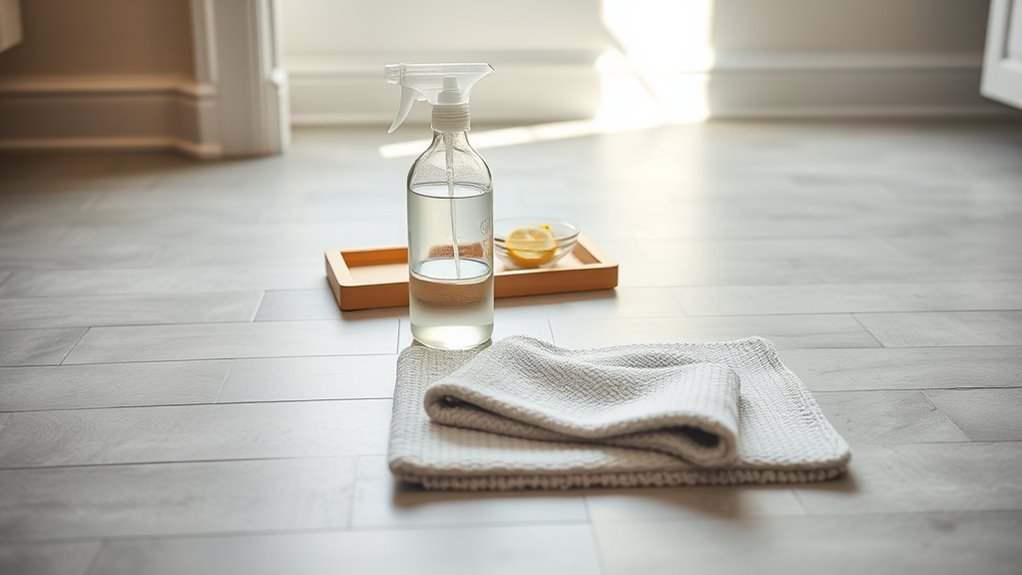
Tools and Supplies for Safe Vinegar Cleaning
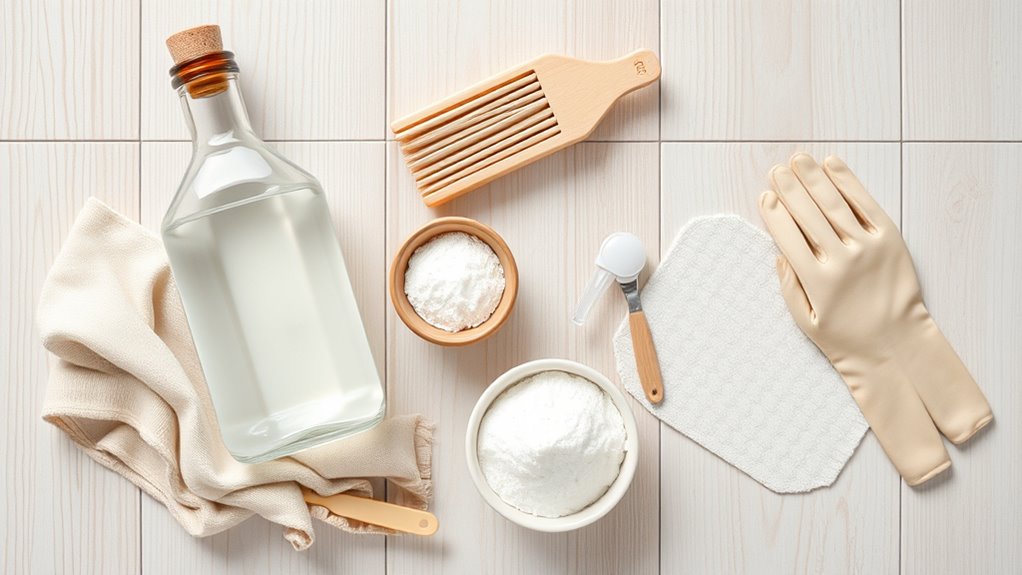
Before you start, gather a few basic tools and the right supplies so you can clean efficiently and avoid damage. You’ll need a soft-bristle broom or vacuum, a microfiber mop, a bucket, and a spray bottle.
Choose white distilled vinegar for predictable acidity and label it for Vinegar safety. Add pH strips if you want to test dilutions.
Keep rubber gloves and eye protection on hand to protect skin and eyes. Avoid abrasive pads or acidic cleaners with vinegar.
Have clean microfiber cloths for spot drying and a small scrub brush for grout.
Store supplies safely away from children and pets.
Quick Daily Clean With Diluted Vinegar (Step-by-Step)
Start by mixing one part white vinegar with about ten parts warm water so the solution’s gentle on grout and sealant.
Dip a clean microfiber mop into the mix, wring it well, and mop the floor in even strokes.
Let the surface air-dry or buff with a dry microfiber pad for a streak-free finish.
Dilute Vinegar Properly
When you dilute vinegar properly, you’ll get a safe, effective daily cleaner that won’t harm grout or finish. Aim for a mild solution of one part white vinegar to four parts warm water for general tile cleaning.
Check vinegar potency on the label and remember that dilution shifts pH balance toward neutral, reducing acidity.
Measure, mix, and store in a clearly labeled spray bottle.
Visualize the process:
- Pour warm water into a clean pitcher.
- Add measured white vinegar slowly.
- Stir to combine, note the faint vinegar scent.
- Label and date the bottle for daily use.
Use within a week for best results.
Mop With Microfiber
For a quick daily clean, dampen a microfiber mop with your diluted vinegar solution (one part white vinegar to four parts warm water).
Wring it so it’s moist but not dripping, and work in overlapping strokes across the tile to lift dirt without leaving streaks.
Move methodically from one side to the exit to avoid stepping on cleaned areas.
Rinse or replace the mop pad when it looks dirty, and change the solution if it becomes cloudy.
Test a hidden spot first on sensitive floors.
Store mop pads separately to prevent cross-contamination with other cleaning solutions.
Deep Clean Tiles With Vinegar (Step-by-Step)
Before you deep clean, gather everything you need so the process goes smoothly: white distilled vinegar, warm water, a bucket, a stiff-bristled brush or scrub mop, a spray bottle, and microfiber towels.
You’ll respect vinegar safety and preserve tile durability by diluting vinegar with warm water (1:4).
Pre-sweep, spot-spray stubborn stains, let the solution sit for 5 minutes, then scrub along grout lines and tile edges.
Rinse with clean water and dry to prevent streaks.
Follow this simple sequence:
- Sweep and vacuum
- Apply diluted vinegar
- Scrub with brush
- Rinse and dry
How to Protect Grout and Sealants While Using Vinegar
Although vinegar is a great degreaser, you’ll need to protect grout and sealants because undiluted acid can erode grout joints and strip sealers over time. Use a diluted solution (one part vinegar to four parts water) and apply with a damp mop rather than soaking.
Wipe up puddles quickly and avoid leaving vinegar on grout longer than a few minutes. For grout protection, consider reapplying a penetrating grout sealer annually and spot-sealing worn areas before cleaning.
For sealant safety, test compatibility with a small hidden spot and avoid vinegar on silicone or rubberized sealants to prevent deterioration.
How to Test Vinegar on a Small Area First
When you want to be sure vinegar won’t damage your tile or grout, try it first on a small, inconspicuous spot—like a corner or behind an appliance—using the same diluted mix you’ll clean with. Wipe, wait five minutes, then inspect for discoloration or dulling. Record results to inform future cleaning schedules and surface preparation.
- Apply diluted vinegar with a soft cloth.
- Wait five minutes; blot residue.
- Check grout, sealant, and tile finish.
- Note findings and photograph for comparison.
If no change appears, proceed confidently; if you see damage, stop and reassess.
When to Avoid Vinegar and Pick a Different Cleaner
Don’t use vinegar on natural stone or grout because its acidity can etch stone and weaken grout.
Skip it on waxed or sealed floors since it can strip finishes, and choose pet- and kid-safe cleaners if anyone in the home has allergies or sensitivities.
When in doubt, pick a pH-neutral, labeled-safe product instead.
Natural Stone And Grout
If your floor includes natural stone—like marble, limestone, travertine, or certain unsealed grout—skip the vinegar; its acidity can etch and dull those surfaces. You’ll want a pH-neutral cleaner designed for stone to avoid damage.
You should treat natural stone and grout differently: use gentle, stone-safe products and avoid acidic or abrasive mixes.
For Grout maintenance, scrub gently and reseal when porous. Picture common issues:
- Faint etching on marble after vinegar use.
- Dull limestone surface from repeated acidic cleaners.
- Stained, crumbly unsealed grout.
- Harsh scrub marks from abrasive scouring.
Waxed Or Sealed Floors
Because vinegar can strip wax and break down some sealants, you’ll want a milder, pH-balanced cleaner for waxed or freshly sealed tile floors to preserve the finish.
If your floor has a sealed surface or a wax coating, avoid acidic cleaners that can cause dulling or require wax removal. Test any cleaner in an inconspicuous spot first.
Use a manufacturer-recommended product or a neutral cleaner labeled safe for sealed surfaces. Rinse thoroughly and buff gently to restore shine.
For heavy build-up, consider professional stripping and re-sealing instead of repeated home acid-based treatments.
Pets, Allergies, Kids
When you’ve got crawling babies, curious pets, or household members with asthma or chemical sensitivities, skip vinegar and choose a gentler, non-irritating cleaner instead. You’ll protect pets’ safety and support allergy prevention by using fragrance-free, enzyme, or plant-based cleaners. Rinse thoroughly and keep kids and pets out until floors dry.
- Soft cloth wiping to remove residue
- Diluted, mild cleaner for regular use
- Open windows for fresh air exchange
- Barrier mats to catch dirt before rooms
Always read labels for low-VOC, non-toxic claims, and test a small area first.
Tile-Safe Natural and Commercial Alternatives to Vinegar
Although vinegar’s acidity can damage some tiles and grout, you don’t have to give up simple, effective cleaning — plenty of natural and commercial alternatives are tile-safe and work well for different finishes.
Use natural disinfectants like hydrogen peroxide diluted with water for grout and sealed tiles; tea tree oil mixed sparingly with water can add antimicrobial action.
Dilute hydrogen peroxide for grout and sealed tiles; add a little tea tree oil for extra antimicrobial boost.
For tougher dirt, choose pH-neutral commercial cleaners labeled safe for ceramic, porcelain, or stone—avoid acidic or bleach-based formulas on porous surfaces.
Always spot-test, follow manufacturer instructions, and rinse thoroughly so residue won’t attract dirt or harm seals.
Common Mistakes That Damage Tile : And How to Avoid Them
If you use the wrong cleaners, tools, or techniques, you’ll shorten your tile’s life and harm grout and sealants. Don’t scrub sealed grout with acid or scourers; avoid oily soaps that leave film. Skip steam on unsealed stone and never mix bleach with ammonia.
For clarity, imagine these risks:
- Scratches from metal brushes on ceramic or stone.
- Etching when acidic cleaners meet natural stone.
- Residue build-up from improper soaps hiding dull spots.
- Lost protection if you skip grout sealing after cleaning.
Use soft mops, pH-neutral cleaners, and gentle Tile polishing to restore shine safely.
Troubleshooting Stains, Build-Up, and Residue After Vinegar Use
Because vinegar’s acidity can react differently with various tile types, you may see stains, cloudy residue, or etched spots after cleaning. First, identify the tile material: glazed ceramic tolerates mild scrubbing, while natural stone can etch.
For surface build-up, mop with warm water and a microfiber cloth, then scrub grout lines with a paste of baking soda and water.
For stubborn stains, try oxygen-based bleach alternatives per label instructions—avoid chlorine on stone.
Test any product in a hidden spot first.
If etching occurred, consult a professional for honed stone refinishing rather than DIY stain removal attempts.
Maintenance Tips to Keep Tile Looking Great Between Cleanings
Keep daily dust and debris under control by sweeping or using a microfiber dust mop so grit doesn’t scratch the tile.
When you spot spills or sticky spots, act quickly with a damp cloth or a vinegar solution wipeup to prevent stains.
These simple habits will stretch the time between full cleanings and keep your floor looking fresh.
Daily Dust And Debris
Want to stop dirt from building up between moppings? You can prevent dust accumulation and simplify debris removal with a short daily habit. Walk the room with purpose and tackle visible grit before it grinds in.
- Sweep high-traffic paths once a day.
- Use a microfiber dust mop to trap fine dust.
- Keep a small handheld broom for corners and grout lines.
- Empty or shake out mats and shoe trays outdoors.
These steps take minutes, protect your grout, and make weekly vinegar mopping more effective—no heavy scrubbing needed.
Quick Spot Cleaning
When spills happen, act quickly so stains don’t set and grime won’t spread. Blot liquids with a microfiber cloth, then wipe with a 1:1 water-vinegar solution for tile-safe cleaning.
For greasy spots, sprinkle baking soda, let it sit briefly, scrub with a soft brush, rinse, and dry.
Tackle sticky messes promptly to avoid buildup along grout lines. Regularly inspect grout for cracks and prioritize grout sealing to keep moisture out and support mold prevention.
Keep a small spot-clean kit—spray bottle, cloths, soft brush—handy so you can restore appearance fast between deep cleans.
Frequently Asked Questions
Can I Mix Vinegar With Bleach for Stronger Cleaning?
No — you shouldn’t mix vinegar with bleach; you’ll create toxic chlorine gas. You should follow cleaning techniques that separate acidic and chlorinated products, and always use safety precautions like ventilating, wearing gloves, and reading labels carefully.
Will Vinegar Remove Mold or Mildew From Tile?
“An ounce of prevention is worth a pound of cure.” You’ll find vinegar can loosen mild mold and mildew on tile, but for effective mold prevention and long-term tile maintenance, use proper cleaners, scrubbing, and fix moisture sources.
How Long Should Vinegar Sit on Stains Before Rinsing?
You should let vinegar sit on stains for about 5–10 minutes for effective stain removal; if grime’s stubborn, keep it 15–20 minutes but don’t exceed that to avoid damage. Rinse thoroughly after the cleaning duration.
Is Distilled White Vinegar Better Than Apple Cider Vinegar?
About 90% of people prefer distilled white vinegar; you’ll find it’s better than apple cider for cleaning. You’ll protect vinegar health concerns and boost cleaning effectiveness, and you’ll avoid staining and residual odors more reliably.
Can I Use Vinegar on Underfloor Heating Systems?
You shouldn’t pour vinegar directly into underfloor heating; vinegar safety concerns and heating system compatibility mean it can corrode pipes or damage seals. Instead, use manufacturer-approved cleaners or consult a pro to protect your system.
Conclusion
You’ve learned when vinegar’s a smart, budget-friendly choice—and when it’s a hidden hazard—so imagine kneeling on sun-warmed tile, mop in hand, breathing the faint tang of diluted vinegar as it lifts yesterday’s grime. Pause: one wrong swipe could dull a finish or eat grout, but the right ratio and a gentle touch will reveal tile’s quiet shine. Keep tools clean, test first, and you’ll walk away with floors that almost seem to glow.