
How to Clean a Porous Tile Floor Without Damage
You can safely clean porous tile by sweeping or vacuuming first, then using a damp microfiber mop with a pH‑neutral cleaner, working in small sections and wringing the mop well to avoid soaking. Spot‑test any product, treat stains with enzyme cleaners or gentle poultices, rinse thoroughly, blot dry, and reseal when needed. Use soft nylon brushes for grout and avoid acidic or abrasive cleaners that etch. Keep going to learn practical testing, stain fixes, and sealing tips.
Quick Cleaning Steps for Porous Tile Floors
Before you start, sweep or vacuum the floor to remove loose dirt and grit so you don’t grind debris into the pores while cleaning.
Next, mix a pH-neutral cleaner with warm water and mop gently, avoiding harsh scrubbing that can worsen porous surfaces.
Combine a pH-neutral cleaner with warm water and mop gently—avoid harsh scrubbing that can damage porous surfaces.
Rinse with clean water and blot puddles to prevent staining.
For spots, dab with a soft brush and repeat rinsing.
Once dry, evaluate for color enhancement needs; consider a suitable sealer or enhancer to revive hues.
For texture restoration, use a mild poultice or professional-grade poultice treatment sparingly and follow manufacturer instructions.
How to Tell If Your Tile Is Porous
To tell if your tile is porous, do a quick water test: place a few drops of water on an inconspicuous spot and watch—if the water soaks in or darkens the tile within a minute or two, the surface is porous.
If the water beads up and stays on the surface, the tile is likely nonporous. Also inspect grout lines and cut edges where manufacturing exposes material.
Porous tiles often show subtle color variations and absorb stains along grout. Examine tile patterns and finish—matte, unglazed, or natural stone surfaces tend to be porous.
If unsure, test multiple areas to confirm consistency.
Why Porous Tile Needs Different Care
Because porous tile soaks up liquids and dirt, it reacts differently to cleaning than glazed or nonporous surfaces. You’ll need gentler, targeted methods to avoid damage and staining.
You should respect its higher water absorption, since excess moisture can penetrate, weaken grout, and promote mold. Harsh scrubbing or strong chemicals can etch the surface, deepen stains, or strip sealers, so choose pH-neutral cleaners and controlled dampness.
When you address spills quickly and use blotting rather than rubbing, you limit penetration. Regular sealing reduces water absorption and makes routine cleaning safer, prolonging the tile’s appearance and integrity.
Prepare the Room Before You Clean
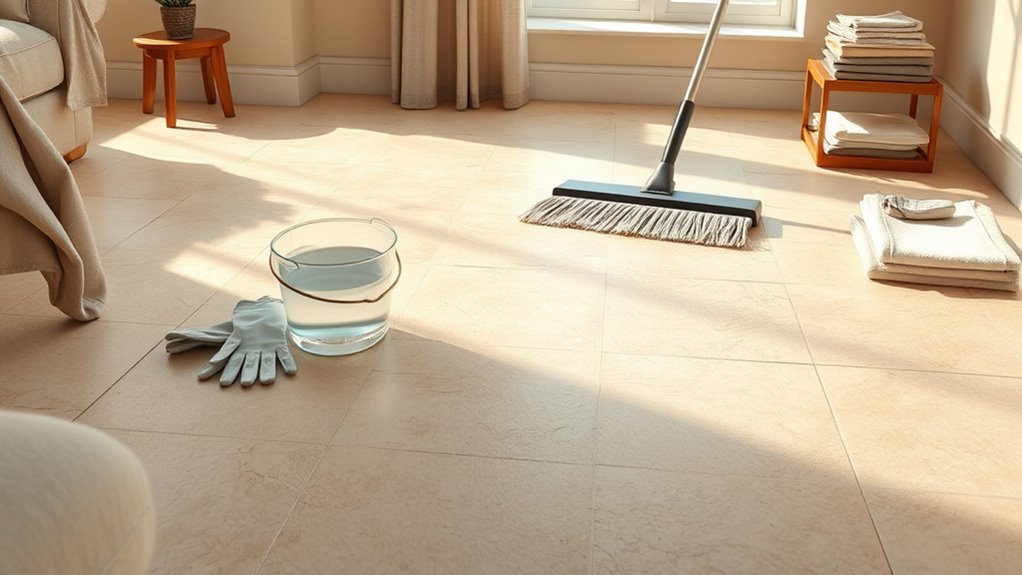
Before you start cleaning, clear the floor area so you have full access to every tile.
Sweep or vacuum to remove loose debris that could scratch or get trapped in the pores.
Tape or cover nearby surfaces and furniture to protect them from cleaners and splashes.
Clear The Floor Area
Start by removing furniture, rugs, and any loose items from the floor so you can see every tile and grout line clearly. You’ll want unobstructed access to assess flooring patterns and color variations, noting any stains, chips, or sealed versus unsealed areas.
Move lightweight pieces yourself and get help with heavy items to avoid strain or scratches. Cover immovable fixtures with protective pads or tape to prevent accidental contact during cleaning.
Keep doors and windows accessible for ventilation. Place removed items on clean, elevated surfaces or protective sheets so you won’t reintroduce dirt when you return them later.
Remove Loose Debris
Ready to make the floor truly clean? Start by removing loose debris so your cleaning won’t trap grit or stir up dust that can cause scratches. You’ll also reduce the need for heavy chemicals that create cleaning fumes and risk color fading.
Use these steps:
- Sweep from the far corner toward the exit, gathering particles.
- Vacuum with a soft-brush attachment to lift grit from pores.
- Use a microfiber dust mop for residual dust and hair.
- Pick up larger pieces by hand, disposing of them before wet cleaning.
Doing this minimizes abrasion and keeps your porous tile safer during deeper cleaning.
Protect Adjacent Surfaces
While you prep the floor, cover baseboards, nearby furniture, and walls to prevent splashes, stains, or abrasive contact from tools and solutions. Use low-tack painter’s tape and plastic sheeting or drop cloths, securing edges so cleaners won’t seep underneath.
Protect vents and electrical outlets with plastic covers. Move small items out or elevate them on blocks.
If you’ll test or apply tile surface sealing afterward, mask off grout lines or adjacent materials to avoid sealant overlap. Adjacent surface protection prevents costly fixes and keeps your work area tidy, letting you focus on cleaning the porous tile without risking surrounding finishes.
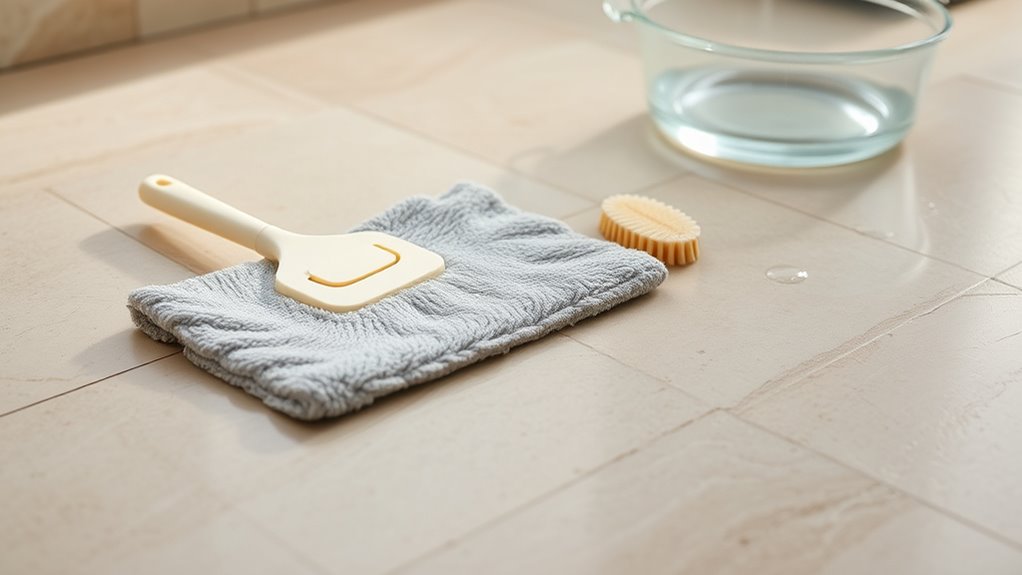
Tools You’ll Need for Gentle Cleaning
You’ll want a soft-bristled brush to loosen dirt without scratching the porous surface.
Use a pH-neutral cleaner so you don’t damage the tile or sealant.
Finish with a microfiber mop to lift residue and dry the floor gently.
Soft-Bristled Brush
Because porous tile can trap grit and grime, a soft-bristled brush is one of the gentlest tools you can use to loosen debris without scratching the surface.
You’ll hold it at a shallow angle, working along grout lines and following tile patterns so you don’t force particles deeper. Forget cleaning myths about stiff scrubbing; light, consistent strokes work best.
Look for natural or nylon bristles with a sturdy handle. Use it dry for loose dirt or slightly damp for stuck-on spots.
- Narrow head for grout
- Gentle nylon bristles
- Comfortable handle
- Lightweight and durable
pH-Neutral Cleaner
If you want to protect porous tile and grout, choose a pH-neutral cleaner—it’s formulated to remove dirt without etching or breaking down sealers. You’ll use a gentle, balanced product labeled pH-neutral or “for natural stone/porcelain.” Test on an inconspicuous spot first.
Dilute according to directions; concentrated cleaners can harm grout. Apply sparingly, let dwell briefly, then agitate with a soft brush and rinse thoroughly.
Avoid acidic or alkaline cleaning solutions like vinegar, bleach, or ammonia that penetrate pores and degrade finishes. Store cleaners safely and replace cloudy or contaminated mixtures to keep porous tile looking its best.
Microfiber Mop
When caring for porous tile, use a microfiber mop to lift dirt and trap debris without abrading grout or finish. You’ll protect tile porosity by choosing a high-quality Microfiber mop with a soft, dense pad that captures particles instead of pushing them into pores.
Rinse and wring frequently in clean water to avoid redepositing grit. Replace pads when stained or worn.
- Velcro-backed washable pad for easy removal
- Low-twist fibers to prevent scratching
- Flat head for even pressure on grout lines
- Lightweight handle to reduce fatigue
Use gentle, repeated passes rather than heavy scrubbing.
Best Mop and Bucket Techniques for Porous Tile
Although porous tile soaks up cleaners and water faster than glazed surfaces, you can still get a deep, even clean by using the right mop-and-bucket techniques. For porous tile care, choose a damp—not soaking—microfiber or sponge mop and wring thoroughly. Change water often, use pH-neutral cleaners, and carry cleaning tools like a grout brush for targeted spots. Work in small sections, rinse the mop frequently, and avoid harsh scrubbing that forces moisture into pores.
| Technique | Tip |
|---|---|
| Wring tight | Prevent over-wetting |
| Small sections | Control moisture |
| Fresh water | Reduce residue |
| pH-neutral | Protect tile |
| Rinse mop | Remove soil buildup |
Dry Cleaning: Removing Loose Dirt and Dust
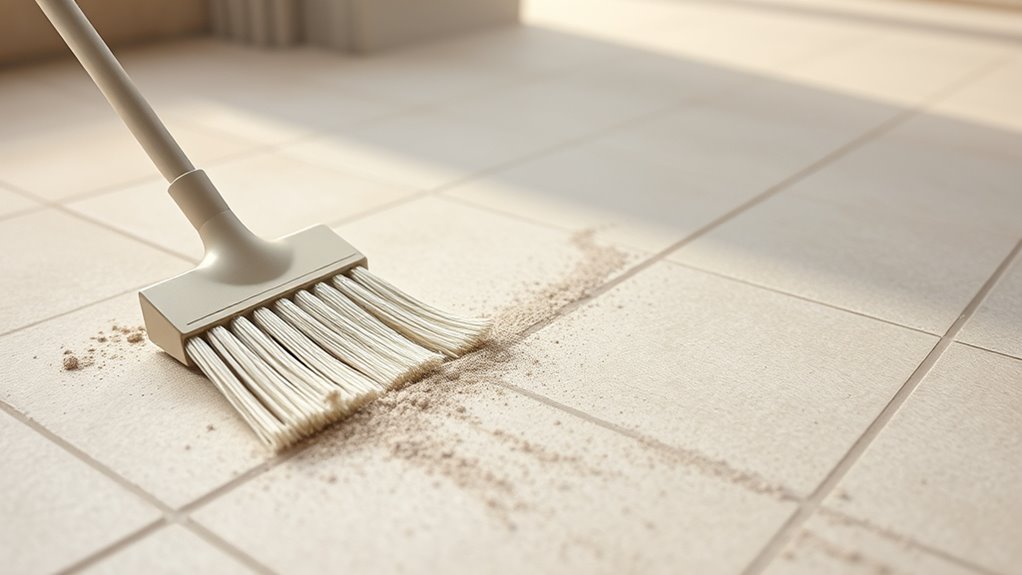
Start by sweeping with a soft-bristle broom to lift grit without scratching the tile.
Follow up with a vacuum set to the hard-floor setting to pick up what the broom missed.
Finish with a microfiber dry mop to capture fine dust and leave the surface ready for mopping.
Sweep With Soft-Bristle Broom
Before you wet the floor, grab a soft-bristle broom and sweep the entire surface to lift loose dirt, dust, and grit from grout lines and pores. You’ll work systematically, following tile patterns and watching how color patterns hide debris. Sweep toward a single collection point, using short, confident strokes so you don’t push grit into pores. Check edges and corners where dirt gathers. Lightly flick the broom to dislodge trapped particles.
- Start at the far corner and move outward.
- Angle bristles to reach grout joints.
- Use overlapping passes for consistency.
- Inspect swept pile for gritty residue.
Vacuum With Hard-Floor Setting
After sweeping, run a vacuum on its hard-floor setting to pull remaining dust and grit from tile pores and grout lines without scratching the surface. Move methodically, overlapping passes and using a soft-brush attachment to protect edges.
Empty the canister or replace the bag often so suction stays strong and abrasive particles don’t grind back into tiles. Focus on seams and textured areas where dirt hides; this dry step boosts color enhancement by removing dulling residues and aids pattern restoration by revealing crisp lines.
Don’t press too hard—let the vacuum do the work—and check brushes for trapped grit between rooms.
Use Microfiber Dry Mop
Once you’ve vacuumed, grab a microfiber dry mop and glide it over the floor to pick up the fine dust and grit that vacuums can miss. You’ll find this gentle dry-clean step keeps porous tile clear without wetting pores.
Use microfiber cloths on corners and edges. Empty the mop head often and launder per instructions.
Prefer flat dust mops for wide areas and pad-style for textured tile. Follow this quick routine:
- Start at the farthest corner and work toward the door
- Overlap strokes to avoid missed strips
- Check and shake out the mop head regularly
- Replace pads when they stay gray
Perform a Small Spot Test First
Because porous tile and grout can react differently to cleaners, always try your chosen solution on a hidden or inconspicuous spot first. Apply a small amount, wait the recommended dwell time, then blot and inspect.
Test cleaners on an inconspicuous spot first — apply, wait, blot, and inspect for fading before treating the whole floor.
Look for color fading on the tile surface and grout discoloration nearby. Test both tile and grout edges, since sealants or pigments can react differently.
If change appears, stop and choose a milder cleaner or different method. If no change after drying, proceed cautiously across the floor, retesting occasionally.
Document the product and ratio that worked so you can replicate safe cleaning later.
Interpreting Your Spot Test Results
If your test patch shows no visible change after it dries, you can cautiously proceed—but if you notice fading, staining, or a tacky residue, stop immediately and reassess. Use what you observed to decide whether the cleaner is safe for that tile and grout.
Look for early warning signs like color fading or grout cracking. Note results and try a gentler option if needed. Compare test areas under normal light before wide use.
- No change: proceed slowly, monitor.
- Slight dulling: avoid further use.
- Stain or residue: neutralize and rinse.
- Grout cracking: consult a professional.
Safe Cleaners for Porous Tile Surfaces
When choosing cleaners for porous tile, pick products that won’t penetrate or weaken the surface—mild, pH-neutral cleaners, specially formulated stone or grout cleaners, and gentle enzymatic solutions are usually your safest bets.
You should avoid acidic or highly alkaline agents that can etch or discolor older tiles; porous tile history shows many traditional tiles were more sensitive due to early tile manufacturing methods.
Test any cleaner in an inconspicuous spot, follow dilution instructions, and rinse thoroughly.
Use soft brushes or microfiber mops to lift soils without abrasion.
Store cleaners safely and replace aggressive products with gentler alternatives when possible.
When to Use Enzyme Cleaners (And How)
Since enzyme cleaners break down organic matter rather than just lifting it, you’ll reach tougher stains and lingering odors on porous tile with less scrubbing and less risk of damage than with harsh chemicals.
Use enzyme application when odors persist, pet accidents penetrate grout, mildew recurs, or food stains soak in.
Apply per label: pre-clean loose debris, mist or pour, let dwell 10–30 minutes, then blot or rinse. Repeat if needed.
Test a hidden spot first.
Proper enzyme application supports deep stain removal without scrubbing, so you preserve the tile’s surface and grout while restoring cleanliness.
What to Avoid: Harsh Chemicals and Abrasives
Although you want stains gone fast, don’t reach for bleach, ammonia, or gritty powders for porous tile—those chemicals and abrasives can etch, discolor, or strip sealers and grout.
You should avoid harsh chemicals because they penetrate pores, weaken the surface, and cause lasting blotches. Skip acidic cleaners and undiluted solvents that react with natural stone or unsealed ceramic.
Don’t use abrasive tools such as steel wool, wire brushes, or scouring pads that scratch and expose raw tile. Instead, choose pH-neutral cleaners, soft microfiber mops, and test any product in an inconspicuous spot before treating the whole floor.
Hand-Scrubbing Grout Without Damage
If you want grout lines to look fresh without damaging surrounding tile, work gently with the right tools and cleaners. You’ll avoid scrapes and discoloration by choosing soft brushes, pH-neutral cleaners, and patience.
After cleaning, consider grout sealing to protect lines and keep maintenance light, and follow tile polishing only if your tiles require it and the product is compatible.
- Use a soft nylon brush, not metal
- Test cleaner in an inconspicuous spot first
- Rinse thoroughly to remove residue
- Dry grout with a microfiber cloth
Scrub lightly along the joint, repeat only as needed.
Removing Oil & Grease Stains From Porous Tile
First, identify what kind of oil you’re dealing with—cooking oil, motor oil, or something else—since that affects the treatment.
Then pick a poultice made for that oil type (absorbent base plus appropriate solvent) to draw the stain out.
Finally, use gentle, safe scrubbing with a soft brush and test a small area so you don’t damage the porous tile.
Identify Oil Type
Want to know what you’re dealing with before you start scrubbing? You need quick oil identification to choose the right approach and improve stain prevention. Assess by look, feel, and context: automotive oil, cooking oil, lubricant, or sealant each behave differently. Check these clues:
- Color and sheen: dark, glossy, or translucent
- Texture: sticky, greasy, or thin
- Source nearby: garage, kitchen, or tools
- Smell: burnt, vegetal, or chemical
Record your observations and photograph the spot. With clear oil identification, you’ll avoid ineffective treatments and reduce the risk of driving the stain deeper into porous tile.
Choose Suitable Poultice
How will you pull oil out of porous tile instead of just spreading it around? Choose a poultice tailored to the oil type: absorbent base like powdered cellulose or diatomaceous earth for light oils; kaolin or fuller’s earth for heavier grease.
Mix with a solvent compatible with your tile—test in an inconspicuous spot to avoid color bleeding or grout discoloration.
Apply a paste thicker than the stain, cover with plastic to slow drying, and label the area. Let it draw oil slowly; aggressive solvents can push contaminants deeper.
Remove gently once dry and repeat with a fresh poultice if extraction’s incomplete.
Safe Scrubbing Techniques
When you’re ready to scrub, pick soft, nonmetallic brushes and gentle circular motions to lift oil without grinding it deeper into the pores. Work in small sections, test a hidden spot to avoid color bleeding or tile cracking, and blot—don’t rub—excess residue.
Use a mild degreaser diluted per instructions, rinse frequently, and dry thoroughly.
- Use a nylon scrub brush, not wire
- Apply poultice sparingly, wait as directed
- Blot with microfiber towels to absorb loosened oil
- Rinse with clean water, dry to prevent staining
Stop if grout softens or color shifts; consult a pro.
Lifting Mineral Deposits and Hard-Water Rings
If your porous tile shows chalky white rings or cloudy patches from hard water, you can remove them without damaging the surface by using the right mild acid and a gentle scrubbing technique. Test vinegar or diluted citric acid on an inconspicuous spot, then apply briefly to mineral buildup and water stains. Gently scrub with a soft brush, rinse thoroughly, and neutralize with baking soda solution to stop etching. Repeat spot-treatments rather than soaking. Protect grout by working in small areas and drying quickly. Monitor results and stop if the tile’s finish dulls, then consult a pro.
| Product | Dilution |
|---|---|
| Vinegar | 1:1 water |
| Citric acid | 1 tsp/1 cup water |
Treating Organic Stains (Coffee, Wine, Food)
Once you’ve cleared mineral rings, shift attention to organic stains like coffee, wine, and food, which penetrate pores differently and often require enzymes or mild oxidizers rather than acids. You’ll blot fresh spills, avoid rubbing, and test cleaners on an inconspicuous spot.
For persistent organic stains, use enzyme cleaners or a hydrogen peroxide paste briefly, then rinse.
- Blot immediately with a clean cloth
- Apply enzyme cleaner per label instructions
- Use a 3% hydrogen peroxide paste for stubborn spots
- Rinse and dry thoroughly to prevent residue
These steps aid stain removal while protecting porous tile.
Dealing With Mold and Mildew on Porous Tile
Look for mold-prone areas like grout lines, shower corners, and spots with poor ventilation.
Pick cleaners that’re labeled safe for porous tile and effective against mold, or use a diluted bleach or hydrogen peroxide solution where appropriate.
Then reduce moisture and improve airflow to prevent future growth.
Identify Mold-Prone Areas
Where do mold and mildew usually hide on porous tile? You’ll find them where moisture and organic matter meet. Identify these spots quickly to start mold prevention and plan tile sealing or targeted cleaning.
- Grout lines and joints that stay damp after showers or spills
- Corners and edges near baseboards where air circulation is poor
- Under loose or lifted tiles where water can pool unseen
- Around sinks, toilets, and drains with recurring splashes and condensation
Check regularly, dry spotted areas, and note recurring locations so you can address causes before mold takes hold.
Choose Safe Cleaners
Start with cleaners that kill mold without damaging porous tile or your health: you’ll want products labeled for mold and mildew on porous surfaces, or simple household solutions like diluted hydrogen peroxide (3%) or a bleach solution for unsealed grout—never mix chemicals—and always test a small area first.
Choose low-odor, no-residue formulas to avoid staining or degrading sealer and tile pores. Apply gently with a soft brush, rinse thoroughly, and dry.
For tiles with faded grout or surface discoloration, pick cleaners that support color enhancement and aesthetic restoration so you remove mold while preserving appearance.
Prevent Future Growth
After cleaning, you’ll want to stop mold and mildew from coming back by controlling moisture and improving airflow around porous tile. You’ll focus on ongoing maintenance and simple changes that reduce spores and dampness.
For future prevention, follow routines and use breathable materials so water doesn’t sit.
- Open windows or run exhaust fans after showers and mopping.
- Fix leaks and grout cracks promptly to keep water out of pores.
- Use area rugs sparingly; choose quick-dry, breathable mats.
- Reseal porous tile and grout yearly with a penetrating sealer.
These steps keep surfaces drier and mold growth minimal.
How to Neutralize and Rinse Cleaning Residues Safely
Because residues from cleaners can damage grout, attract dirt, or leave a slippery film, you’ll want to neutralize and rinse thoroughly right after cleaning. Use a mild neutralizer or diluted vinegar solution appropriate to your Cleaning agents, then mop with clear water for Residue removal. Work in sections, change rinse water often, and avoid overwetting grout joints.
| Step | Tool | Result |
|---|---|---|
| Neutralize | Neutralizer or diluted vinegar | pH balanced surface |
| Rinse | Clean water, mop | removes residues |
| Repeat | Fresh water | prevents redeposit |
| Inspect | Towel | no film remains |
How to Dry Porous Tile to Prevent Moisture Damage
Once you’ve neutralized and rinsed away cleaning residues, dry the porous tile promptly to prevent moisture from seeping into grout and substrate. Use a consistent method to minimize moisture absorption and prepare surfaces for future sealing techniques.
After rinsing, dry porous tile promptly and consistently to prevent moisture from seeping into grout and substrate.
- Wipe excess water with microfiber mops or towels, working along grout lines.
- Use a wet/dry vacuum to extract trapped water from uneven areas.
- Run fans or dehumidifiers to speed evaporation, aiming for balanced airflow.
- Keep doors and windows open when humidity allows to prevent condensation buildup.
Drying thoroughly helps avoid stains, mold growth, and long-term substrate damage; act quickly and consistently.
How Often to Clean Porous Tile Floors
How often should you clean porous tile floors? Aim for a regular cleaning frequency: sweep or vacuum daily to remove grit, mop with a pH-neutral cleaner weekly in moderate-traffic areas, and spot-clean spills immediately for stain prevention.
Increase routine wiping to every few days where pets, kids, or heavy foot traffic occur. Avoid over-wetting; use damp mops and dry thoroughly to prevent moisture damage.
Keep a small stain kit handy for prompt action on spills. Consistent, light maintenance reduces buildup and the need for aggressive interventions, preserving the tile and lowering long-term cleaning effort.
When to Deep-Clean vs. Routine Maintenance (Signs & Timing)
If you see visible grime, stubborn stains, or a persistent odor or mold, it’s time to stop routine wiping and deep-clean the porous tile.
You should also deep-clean when the sealant has lost its shine or water no longer beads on the surface.
Otherwise, stick to regular maintenance to prevent buildup and extend the sealant’s life.
Visible Grime Or Staining
When you spot concentrated grime, dark stains, or a sticky residue that won’t lift with your usual mop, it’s a sign the floor needs a deep clean rather than routine maintenance. You’ll decide between regular upkeep and targeted stain removal when grime buildup resists quick fixes.
Look for patterns and recent causes before treating.
- Dark patches near entryways or sinks
- Sticky spots from spills that smear
- Discolored grout lines that don’t brighten
- Localized dullness where dirt packs in
Act quickly: pretreat spots, use appropriate cleaners, and test a small area to avoid damage.
Loss Of Sealant Shine
Those visible grime and staining signs often go hand-in-hand with a fading sealant sheen, which tells you the surface protection is wearing thin and needs more than routine mopping.
When sealant shine dulls across high-traffic areas, you should escalate from regular sweeping and gentle cleaning to a targeted deep-clean and reseal.
Check edges and grout lines monthly; reduced gloss plus quicker re-soiling means seal failure.
Adjust cleaning frequency: busy zones may need monthly inspections and quarterly deep maintenance, while low-use rooms can stay on a biannual schedule.
After deep-cleaning, apply the proper sealer and monitor shine retention.
Persistent Odor Or Mold
Because porous tiles trap moisture and organic material, persistent odors or visible mold mean you need more than routine maintenance—you need a targeted deep clean.
You’ll act quickly when odor control fails or staining returns after regular Porous tile maintenance.
Deep-clean signs: musty smell that returns within days, black or green growth in grout or pores, health symptoms like allergies, or cleaning that only temporarily brightens the surface.
When you see any sign, use enzymatic cleaners, heated steam cautiously, or professional extraction.
Follow with proper drying and resealing schedule to prevent recurrence and restore safe, long-term results.
How to Choose a Sealer for Porous Tile
Which sealer is right for your porous tile depends on the material, location, and the look you want to keep; you’ll want a product that penetrates the pores, resists stains, and matches the tile’s finish. For sealer selection, prioritize penetrating sealers for natural stone or unglazed tile to boost porous tile durability and avoid topical films that alter appearance. Consider water- or solvent-based formulas for traffic and climate. Test a small area to confirm finish and adhesion before full application.
| Type | Best for | Longevity |
|---|---|---|
| Penetrating | Natural stone | High |
| Topical | Glazed tile | Medium |
| Impregnating | High-traffic | High |
How to Test Tile Porosity for Sealing
Before sealing, you’ll want to test how porous your tile is so the right product and application get used.
Put a few drops of water on several tiles (water drop test) and time how long the moisture takes to absorb.
If the water soaks in within a minute or two, note the quick absorption.
If it beads for longer, the tile is less porous and may need a different sealer or prep.
Water Drop Test
To check whether your porous tile needs sealing, do a simple water drop test: place a few drops of water on several tiles in different areas and watch how they behave for 1–5 minutes. You’ll notice color contrast and texture variation as indicators.
If drops bead, the surface’s repellent; if they sink, it’s absorbent. Record results from varied spots — grout lines, high-traffic, near sinks, and shaded corners — to get a full picture.
- Bead stays on surface: likely sealed
- Drop flattens but stays visible: partial repellency
- Dark spot forms: absorbent tile
- No change: immediate absorption
Absorption Time Check
If you want a more precise measure than the simple water-drop check, use an absorption time test to see how quickly your tile soaks up a measured amount of water. This rate determines whether you should seal and how aggressive the sealer needs to be.
Place a 1-inch ring of petroleum jelly, pour 10 ml of water inside, and time absorption. Record the absorption rate in seconds or minutes; faster absorption means higher porosity and urgent sealing.
Repeat across tiles and grout for reliable porosity testing. Choose a sealer rated for the measured absorption rate and follow manufacturer cure instructions.
Step-by-Step Porous Tile Sealing Process
Now that your porous tile is clean and dry, you’ll walk through a clear, step-by-step sealing process that protects the surface and makes future cleaning easier.
Choose sealing materials suited to your tile patterns and porosity. Test the sealer on an inconspicuous area.
Apply evenly with a brush or low-lint pad, following manufacturer timing. Wipe excess before it skins over.
- Work in small sections for uniform coverage.
- Follow recommended dwell time exactly.
- Buff lightly between coats if advised.
- Allow full cure before foot traffic.
Inspect for missed spots and recoat thinly where absorption varies.
How Often to Reseal Porous Tile Floors
Because wear patterns and foot traffic vary, you’ll need to reseal porous tile based on use and exposure rather than a fixed calendar date.
Check sealing frequency by performing a water drop test: place drops across the floor; if water soaks in within a few minutes, it’s time to reseal.
High-traffic or wet areas may need resealing every 1–2 years; low-traffic rooms can last 3–5 years.
Keep a maintenance log and note conditions like sunlight, cleaners used, and spills.
Regular porous tile maintenance extends sealant life and protects grout, saving time and money over reactive fixes.
Repairing Stained or Etched Tiles
Start by identifying whether the mark is a surface stain or actual etching so you know what you’re dealing with.
For surface stains, you’ll try gentle cleaners and poultices.
For etching, you’ll need careful restoration like honing or professional repair.
Always test methods in an inconspicuous spot and avoid abrasive techniques that can make damage worse.
Assess Damage Type
How bad is the damage—stain or etch—and where’s it located? You’ll inspect closely, noting depth, spread, and proximity to grout or edges.
Consider original color variations and any marks from installation techniques that mimic damage.
- Shallow surface haze: often etching or finish wear
- Localized dark spot: likely a stain penetrating pores
- Multiple mottled areas: could be dye transfer or uneven curing
- Edge or grout-adjacent damage: may stem from grout cleaners or sealing gaps
Document each area with photos and notes so you can choose targeted, minimally invasive repairs next.
Safe Restoration Methods
When you’ve identified stains or etches, choose the least aggressive repair that will do the job—gentle cleaning and poultices for superficial stains, mild abrasive polishing for light etching, and targeted fillers or colorants only when damage penetrates the glaze or body.
Start with spot tests: use pH-neutral cleaner, enzyme poultice, or hydrogen peroxide for organic stains.
For etching, buff lightly with fine pads and assess color fading risk.
Match fillers to tile porosity and tint to avoid noticeable repairs.
Address grout discoloration separately with sealed grout brighteners.
Always rinse, dry, and seal repaired areas to protect finish.
Troubleshooting Stubborn Problems Without Damage
If a stain, grout haze, or stubborn residue won’t budge with regular cleaning, don’t resort to harsh scrubbing or strong chemicals that can etch or discolor porous tile.
You can remove most problems safely by identifying the cause, testing a gentle method in an inconspicuous spot, and working gradually from least to more aggressive treatments.
Start with pH-neutral cleaners and soft brushes, then try targeted approaches for specific issues.
Consider how decorative accents and sealants affect results.
Use this sequence, stopping if damage appears:
- Blot and rinse, avoiding spread of stain
- Mild detergent and soft brush
- Poultice for deep stain removal
- pH-adjusted cleaner for grout haze
When to Call a Professional Cleaner
Because porous tile can hide damage or persistent stains that resist home treatments, call a professional when your efforts aren’t getting results or you suspect structural issues. You’ll want an expert if stains penetrate deep, grout crumbles, or moisture causes warping or mold.
Pros use tests and specialized cleaners, and they can respect historical context and cultural significance when working on antique or heritage tiles. Tell them the tile’s age, previous treatments, and any patterns of damage.
A pro helps preserve value and prevents costly mistakes you might make trying stronger chemicals or aggressive scrubbing yourself.
Cost and Time Estimates for DIY Cleaning and Sealing
While exact figures vary with tile type and room size, you can expect a DIY cleaning and sealing job to take a weekend for a small room and cost roughly $50–$300 in materials, with larger or heavily soiled areas pushing time and expense higher.
Expect a weekend DIY cleaning and sealing project for a small room, costing about $50–$300 in materials.
You’ll plan labor, buy cleaners, sealant, and protective gear, and factor drying time. Historical trends and cultural influences shape product availability and common practices, so research local recommendations.
Typical estimates:
- Small bathroom: 4–8 hours, $50–$100
- Kitchen or medium room: 8–16 hours, $100–$200
- Large areas: 1–2 weekends, $200–$300
Eco-Friendly Cleaning Options for Porous Tile
When you choose eco-friendly cleaners for porous tile, you’re protecting the floor and indoor air while avoiding harsh chemicals that can damage pores or seals.
Use diluted white vinegar or castile soap for routine cleaning, rinsing thoroughly to prevent residue.
For tougher stains, make a paste of baking soda and water, apply gently, then rinse.
Choose certified eco-friendly products labeled non-toxic and biodegradable to maintain porous tile durability and avoid seal deterioration.
Always test cleaners in an inconspicuous spot, follow manufacturer guidance for sealed tiles, and dry surfaces promptly to prevent water penetration and mildew.
Seasonal Tips to Protect Porous Tile Floors
As seasons change, adjust your care routine to protect porous tile from temperature shifts, moisture, and debris. You’ll plan seasonal maintenance to prevent stains, freeze-thaw damage, and grout weakening. Focus on weather protection and timely actions so small issues don’t become repairs.
Consider these tasks each season:
Consider these seasonal tasks to protect porous tile: spring deep-clean, summer care, fall checks, and winter snow removal
- Spring: deep clean, reseal grout, inspect for winter damage.
- Summer: trim landscaping, limit irrigation overspray, use mats at entries.
- Fall: clear leaves, top-up sealant if needed, check for cracks.
- Winter: remove snow promptly, avoid rock salt, use safe deicers and rugs.
Quick Daily Habits to Keep Porous Tile Clean Longer
Because small daily actions add up, adopting a few quick habits will keep your porous tile looking fresh and reduce the need for deep cleaning.
Wipe spills immediately with a microfiber cloth to prevent staining and protect grout color.
Sweep or use a soft broom daily to remove grit that scratches tile patterns.
Place doormats at entries and remove shoes to limit tracked-in dirt.
Use a damp mop with a pH-neutral cleaner twice weekly in high-traffic areas.
Inspect grout edges for buildup and spot-clean with a soft brush.
Rotate area rugs to distribute wear and maintain even appearance.
Frequently Asked Questions
Can Porous Tile Be Used Outdoors Without Extra Protection?
Yes — you can use porous tile outdoors, but you’ll need porous tile maintenance and Outdoor protection like sealers, proper slope, and frost-resistant grout; you’ll want regular inspections and re-sealing to prevent stains, moisture damage, and freeze issues.
Can Pets’ Nails or Litter Scratch Porous Tiles?
About 70% of homeowners report minor floor scuffs annually; yes, you’ll find pet nails and litter scratches can mar porous tile surfaces, so you’ll need protective mats, regular trimming, and prompt cleanups to minimize damage.
Will Steam Cleaners Damage Porous Tile Surfaces?
Steam cleaner effects can harm porous tile cleaning if you use high heat or pressure; you’ll loosen grout, cause staining, or warp softer tiles. Test a small area, use low settings, and avoid prolonged steaming.
Can Grout Colorants Alter Porosity or Sealing Effectiveness?
Can grout dye change porosity or sealing impact? You’ll usually find dyes sit on the surface and won’t alter porosity, but some penetrate—so test first, and re-seal afterward to guarantee ideal sealing impact and longevity.
How to Handle Efflorescence on Newly Installed Tiles?
Address efflorescence removal promptly: dry-brush crystals, apply a mild acidic cleaner, rinse thoroughly, let tiles fully dry, then apply porous tile sealing to block salts; don’t seal until efflorescence is completely gone and substrate cured.
Conclusion
You’ve learned to lovingly look after porous tile: lift loose litter, limit liquid, and lightly launder with gentle, green cleaners. Seal seriously and schedule simple scrubs to slow stains and seal seams. Tidy up spills swiftly, stay savvy about surface-safety, and snip stubborn scuffs with soft scrubbers. With steady, sensible steps and seasonal sealing, your textured tile will stay tidy, tough, and timelessly tasteful—preserved with practical, periodic protection.