How to Clean a Porcelain Tile Floor Easily at Home
You can keep porcelain tile floors looking great with a simple routine: sweep or vacuum to remove grit, then damp‑mop with warm water and a pH‑neutral cleaner (or diluted vinegar for unsealed grout). Spot‑treat stains with a baking soda paste or mild detergent, rinse well, and dry with a microfiber cloth to avoid streaks. Use mats, felt pads on furniture, and reseal grout every 1–3 years. Keep going to learn practical tools, DIY mixes, and stain fixes.
Quick 3‑Step Clean for Porcelain Tile
Before you start, sweep or vacuum the floor to remove loose dirt and grit so you don’t grind debris into the tile while mopping.
First, mix a gentle cleaner with warm water and mop in small sections, rinsing the mop often so you don’t redistribute grime.
Second, spot-treat persistent marks with a soft brush and a diluted cleaner, avoiding abrasive pads that can dull glaze; think of carpet stains treatment but matched to tile.
Third, dry the floor with a microfiber cloth or mop to prevent streaks and water spots, similar to techniques used in window cleaning for a streak-free finish.
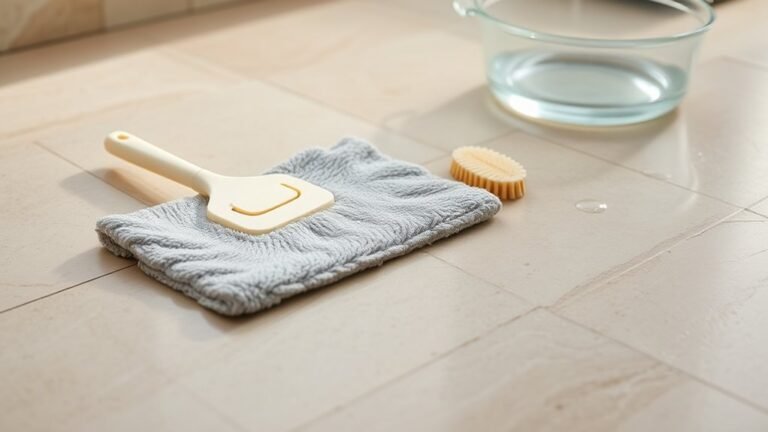
Tools & Supplies You’ll Need First
Before you start, gather the essential tools—broom, vacuum, mop, bucket, scrub brush, and microfiber cloths—to make cleaning efficient.
Pick recommended supplies like a pH-neutral tile cleaner, gentle degreaser for grout, and warm water; avoid harsh acids or bleach.
Having these on hand will save time and protect your porcelain floor.
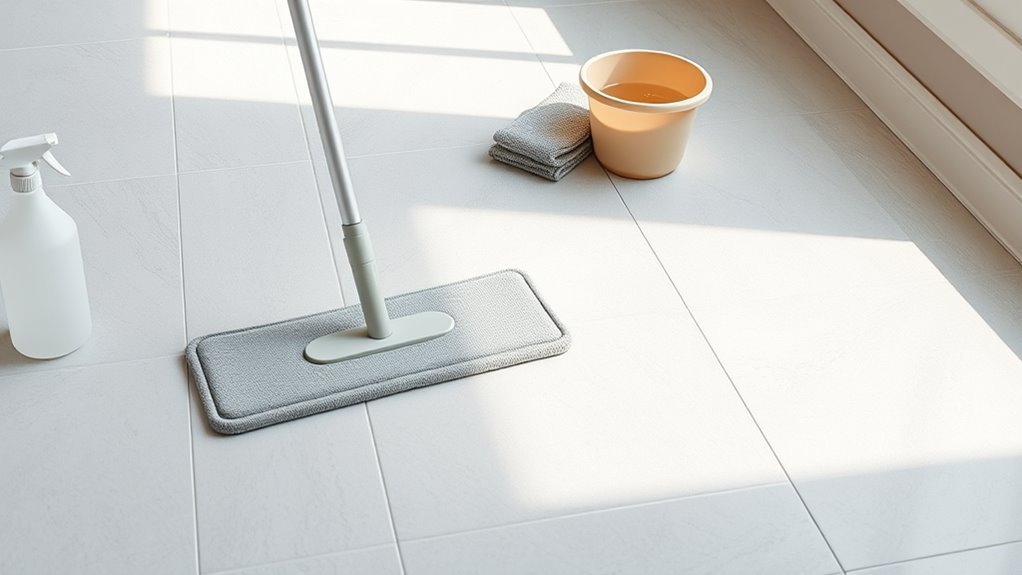
Essential Cleaning Tools
When you’re ready to clean your porcelain tile floor, gather a few reliable tools and supplies so the job goes quickly and won’t damage the tile or grout. You’ll rely on basic tools to protect porcelain durability and respect the original tile installation. Choose items that avoid scratching or stressing grout lines.
- Soft-bristle broom or vacuum with hard-floor setting
- Microfiber mop and bucket (gentle wringing)
- Soft scrub brush or grout brush for edges
Having these on hand keeps routine cleaning efficient and prevents damage. You’ll move faster and avoid common mistakes that compromise appearance and longevity.
Recommended Cleaning Supplies
Now that you’ve gathered the basic tools, pick cleaning supplies that protect porcelain and grout without leaving residue. Choose pH-neutral cleaner, microfiber mop, grout brush, and a spray bottle for spot treatments. Use vinegar sparingly; it’s harsh on grout. Follow cleaning tips: dilute cleaners, test a corner, and rinse thoroughly to avoid film. For stain removal, make a paste of baking soda and water for grout or use a commercial grout cleaner per instructions. Store supplies in a caddy for easy access and safety.
| Item | Use |
|---|---|
| pH-neutral cleaner | Daily cleaning |
| Grout brush | Stain removal |
Safe Cleaners: pH‑Neutral, Vinegar & Commercial Options
Use a pH‑neutral cleaner to protect the glaze and grout without stripping sealers.
You can use diluted vinegar for routine cleaning on unsealed grout if you rinse well and avoid long contact.
When picking commercial products, choose ones labeled safe for porcelain and follow the manufacturer’s instructions.
pH‑Neutral Cleaner Benefits
Although acidic or alkaline cleaners can strip grout and dull glaze, pH-neutral cleaners give you a safe middle ground for everyday porcelain care. You’ll protect finish and grout while still cutting grease and dirt.
Look for pH balanced solutions and eco friendly options to reduce fumes and surface wear.
- Gentle on glaze: won’t etch or dull tiles.
- Safe for grout: reduces discoloration and breakdown.
- Kid- and pet-friendly: less irritation and safer fumes.
You’re using a cleaner that preserves appearance, extends tile life, and fits routine maintenance without harsh chemistry or extra risk.
Using Vinegar Safely
When you need a budget-friendly, natural cleaner, diluted white vinegar can work on porcelain—if you keep the solution mild and avoid prolonged contact with grout or unsealed edges.
Use one cup of vinegar per gallon of warm water for general cleaning; stronger mixes risk dulling grout seals. Test a small area first to confirm vinegar safety, and rinse thoroughly with clean water after mopping.
Avoid soaking grout or letting vinegar sit. For routine maintenance, stick to a gentle pH-neutral cleaner more often; limit vinegar use to occasional spot-cleaning based on observed soil and cleaning frequency.
Choosing Commercial Products
Picking the right cleaner matters because porcelain is tough but its grout and sealants can be sensitive. Look for pH-neutral formulas labeled safe for porcelain or ceramic, and save harsher acids, alkalis, or abrasive powders for very rare, targeted use.
You’ll balance cleaning power with environmental impact and respect any surface sealing. Test new products in a corner, follow dilution instructions, and rinse well.
- Choose pH-neutral or manufacturer-recommended cleaners.
- Avoid bleach, acidic descalers, or abrasive pads on sealed surfaces.
- Prefer biodegradable formulas or concentrates to reduce waste.
Read labels, spot-test, and store products safely.
DIY Cleaning Solutions That Actually Work
If you want effective, budget-friendly cleaners for porcelain tile, simple DIY mixes often outperform fancy store-bought products and avoid harsh chemicals. Here are reliable recipes and tips so you can clean safely and efficiently without leaving residue or damaging grout.
Use a cup of white vinegar in a gallon of warm water for regular mopping—vinegar cuts grease but won’t etch porcelain.
For stubborn spots, paste baking soda with water, let sit, then scrub gently.
Add a few drops of dish soap to mop water for extra cutting power.
These natural remedies and DIY hacks keep floors bright without harsh fumes.
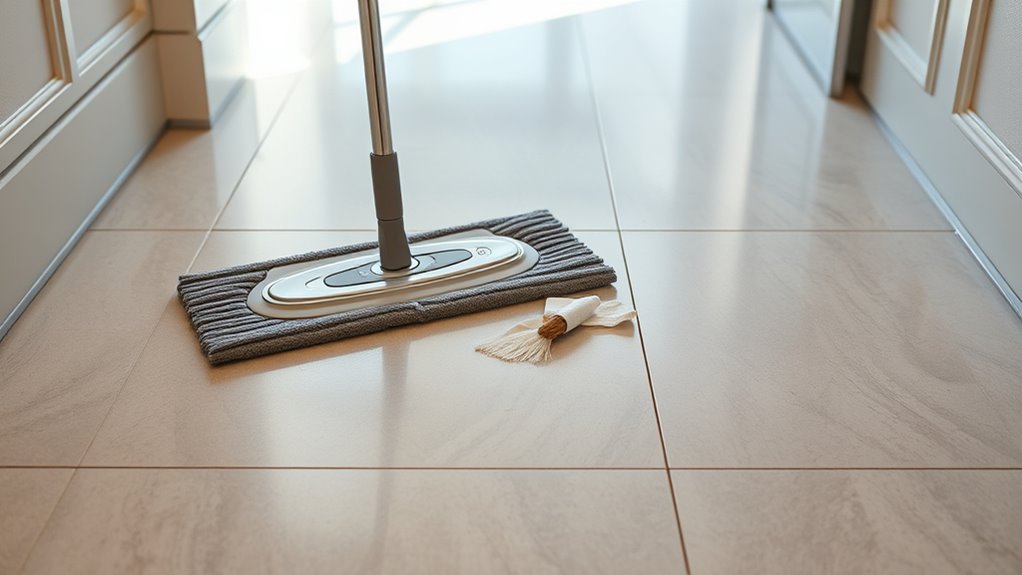
How to Sweep & Dust Porcelain Tile Properly
Start by choosing the right broom or microfiber dust mop so you don’t scratch the glaze or scatter dust.
Use a consistent dust-mopping technique—push debris into overlapping strokes and empty the head frequently.
Finish by sweeping edges and corners with a small brush or crevice tool to catch trapped grit.
Choose The Right Broom
Which broom should you reach for when sweeping porcelain tile? You want a soft- to medium-bristle broom that lifts dust without scratching glaze. Consider broom head width for room size and handle comfort—think ergonomics and simple installation tips for replacement heads. Also match color options if appearance matters in open storage.
- Soft synthetic bristles: gentle, durable, great for grout lines.
- Angled heads: reach corners and baseboards with less effort.
- Compact corn brooms: good for textured tile; use gently.
Pick one you’ll actually use regularly; proper choice saves time and preserves the floor.
Proper Dust Mopping Technique
Because dust and grit abrade glaze over time, you’ll want to dust mop porcelain tile regularly using the right technique. You’ll start with surface preparation: remove large debris, then use a microfiber dust mop for gentle dust removal. Work in straight lines, overlap strokes, and avoid pushing grit into grout. Shake or vacuum the mop head frequently. Finish by inspecting for missed specks before damp cleaning.
| Tool | Motion | Frequency |
|---|---|---|
| Microfiber mop | Straight, overlapping | Daily/weekly |
| Dustpan | Sweep-up small piles | As needed |
| Vacuum | Edges and corners | Weekly |
Edge And Corner Cleaning
After you’ve dust-mopped the main floor, focus on edges and corners where grit hides and mops can’t reach. You’ll need precise edge detailing and check corner sealing to prevent dirt buildup and moisture damage. Use tools that get into tight spaces and work methodically.
- Run a soft-bristle brush along baseboards, loosening trapped dust.
- Use a crevice tool on your vacuum or a micro brush for grout lines.
- Wipe edges with a damp microfiber cloth, drying immediately to preserve corner sealing.
Finish by inspecting seams; proper edge detailing keeps porcelain tiles looking clean and lasting longer.
How to Mop Porcelain Tile Without Streaks
When you want a streak-free finish, start by choosing the right mop and cleaning solution—microfiber mops and diluted, pH-neutral cleaners work best.
Then wring the mop so it’s damp, not dripping, and clean in small sections using overlapping strokes. Work methodically from one corner toward an exit, rinsing the mop frequently to avoid redepositing soil that causes grout discoloration.
Buff any remaining moisture with a dry microfiber pad to enhance color enhancement and shine. Avoid excessive cleaner, hot water, or waxy products that leave residue.
Let tiles air-dry fully before replacing rugs or foot traffic.
Best Daily Routine for Porcelain Tile Upkeep
Keep your porcelain looking its best with a quick daily sweep to remove grit before it scratches the surface.
Spot-mop spills as they happen so stains don’t set and you don’t have to scrub later.
Place preventive entry mats at doors to trap dirt and moisture before it reaches the tile.
Quick Daily Sweep
A quick daily sweep keeps dirt and grit from scratching your porcelain tiles and makes deeper cleans faster and easier. You’ll prevent dirt accumulation by sweeping once a day; adjust cleaning frequency if you have pets or heavy foot traffic. Use a soft-bristle broom or microfiber dust mop, and sweep toward a central spot for quick pickup. Empty the dustpan or shake out the mop outside to avoid redistributing debris.
- Sweep high-traffic zones first
- Keep a small dustpan and brush handy
- Store the mop near the entry for fast access
This simple habit saves time and protects your floor.
Spot Mop Stains
Because spills and spots can set quickly on porcelain, you should tackle stains as soon as you see them with a spot mop. Grab a microfiber pad, warm water, and a mild cleaner; spray lightly, then blot rather than scrub to avoid streaks.
For greasy marks, add a drop of dish soap to water. Rinse the pad frequently and change solution if it gets cloudy.
Work from edges toward the center to contain residue. Finish with a clean, damp pass to remove cleaner traces so grout won’t discolor.
Regular spot cleaning guarantees effective stain removal and keeps tiles looking fresh.
Preventive Entry Mats
When you place a high-quality entry mat just outside and inside doorways, you cut dirt, grit, and moisture before they reach your porcelain tile, reducing wear and the need for frequent deep cleans. You’ll keep outdoor furniture debris, tracked soil, and water from migrating in, preserving finishes and minimizing grout sealing needs.
Choose absorbent, durable mats and clean them regularly. Simple habits save time.
- Shake or vacuum mats weekly to remove grit.
- Replace worn mats seasonally to avoid damage.
- Position mats to cover high-traffic paths and wipe feet when entering.
These steps keep floors cleaner daily.
Quick Fixes for High‑Traffic Porcelain Tile
If your porcelain tile sees constant foot traffic, quick fixes can keep it looking sharp between deep cleans; you’ll want simple, targeted steps that restore appearance and prevent wear without a full overhaul.
Spot-clean scuffs with a damp microfiber and a mild detergent, rub gently along porcelain tile patterns to avoid uneven shine.
Tighten or replace loose grout with a grout pen for fast cosmetic repair.
Use felt pads on furniture legs and rotate rugs to distribute wear.
Follow tile installation tips when replacing tiles to match height and pattern.
Repeat weekly to maintain finish and prevent long-term damage.
Removing Dried Mud & Ground‑In Dirt
Start by softening dried mud with a warm water soak so it loosens without scratching the glaze.
Then use a soft-bristled brush or nonabrasive pad and gentle circular strokes to lift ground-in dirt.
Rinse frequently and blot dry to prevent residue from settling back into grout.
Pre-Soak Tough Areas
Because dried mud and ground-in dirt can bond tightly to grout and tile pores, you’ll want to pre-soak those spots before scrubbing. Use warm water with a mild cleaner to loosen debris, paying attention to seams affected by porcelain tile patterns and areas where tile installation techniques left textured grout.
Soak for 10–15 minutes, cover stubborn patches with damp microfiber towels, and avoid harsh acids.
- Blot excess residue with a sponge after soaking.
- Reapply solution to heavily soiled grout lines and corners.
- Rinse soaked areas thoroughly to prevent cleaner residue.
Let tiles dry before proceeding to the next step.
Gentle Scrub Techniques
Now that soaked spots have loosened, you can gently scrub away the remaining dried mud and ground-in dirt without damaging the porcelain or grout. Use a soft-bristled brush or microfiber pad and mild detergent mixed with warm water.
Work in small sections, applying gentle scrubbing in circular motions to lift stubborn particles. Rinse the brush frequently and blot excess moisture with a clean towel to prevent seepage into grout.
For tight grout lines, use a toothbrush and avoid harsh chemicals.
Finish with a final rinse and dry; this soft cleaning preserves the tile’s finish while removing embedded dirt efficiently.
Getting Grease & Oil Off Porcelain Tile
Grease and oil can leave stubborn films on porcelain tile, but you can remove them without damaging the surface by using the right cleaners and techniques. Start by blotting excess oil, then apply a mild degreaser or a mix of dish soap and warm water.
Test in a corner—especially if your porcelain tile installation involved specific grout color selection—to guarantee no discoloration. Scrub gently with a soft brush, rinse thoroughly, and dry to prevent residue.
- Use dish soap for fresh spots.
- Try a commercial degreaser for older buildup.
- Avoid harsh acids or abrasive pads.
Treating Coffee, Wine & Food Stains
After handling oil and grease, tackle coffee, wine, and food stains promptly to keep them from setting into grout or tile pores. Blot spills immediately; don’t rub. For coffee stains, use warm water and a mild detergent, then rinse. For wine removal, sprinkle baking soda, let it absorb, then mop. For dried food, soften with warm water, scrape gently, then clean.
| Spill type | Quick fix |
|---|---|
| Coffee stains | Blot, detergent, rinse |
| Wine removal | Baking soda, mop |
| Food stains | Soak, scrape, clean |
Finish by drying the area to prevent streaks and residue.
Removing Scuff Marks & Shoe Marks
When scuff and shoe marks appear, you can usually lift them without harsh chemicals by using simple household items and a gentle touch. You’ll protect porcelain tile durability by avoiding abrasive scrubs and testing any method in an inconspicuous spot first.
Try these quick fixes:
- Use a melamine sponge dampened with water to gently rub marks away.
- Apply a little baking soda paste for stubborn spots, then wipe clean.
- Roll a clean tennis ball or eraser over scuffs for light abrasion.
After cleaning, dry tiles and check grout color options to ensure the grout’s appearance stays consistent.
Fixing Persistent Grout Stains (What Works)
If grout stains won’t budge with regular mopping, you’ll want to deep-clean using a baking soda paste and a stiff brush to lift embedded grime.
For grout that’s permanently discolored, you can recolor lines quickly and precisely with a grout marker to restore a uniform look.
Both methods are inexpensive and easy to do yourself.
Deep-Clean With Baking Soda
Though grout seems stubborn, baking soda is a simple, effective deep-cleaner you can use to lift persistent stains without harsh chemicals. You’ll appreciate porcelain tile durability while keeping grout color options intact by avoiding bleach.
Make a paste of baking soda and water, apply to grout, let sit 10–15 minutes, then scrub with a stiff brush. Rinse well and dry.
- Use a toothbrush for narrow lines.
- Try a spray of vinegar after scrubbing for extra lift (test first).
- Repeat weekly for high-traffic areas.
This method brightens grout gently and preserves tile finish.
Recolor With Grout Marker
A grout marker is a quick, cost-effective way to restore uniform color to stained grout lines without regrouting. You’ll find it especially useful on narrow or heavily trafficked seams where scrubbing hasn’t worked.
Choose a marker that matches your grout for color restoration; test it on a hidden spot first. Clean and dry grout thoroughly, then apply steady, even strokes.
Wipe excess from tile immediately to avoid staining. Let the marker cure per instructions, then apply grout sealing to protect the finish and extend results.
Touch up annually or as needed to keep lines looking consistent.
How to Deep‑Clean Porcelain Tile (60‑Minute Plan)
Before you start, gather your supplies—vacuum or broom, mop, bucket, pH-neutral cleaner, soft scrub brush, microfiber cloths, and a grout brush—so the 60-minute deep-clean stays efficient and controlled.
Begin by sweeping, then damp-mop with cleaner diluted per instructions. Scrub grout lines where dirt hides; think about porcelain tile aesthetics and grout color coordination when deciding how much whitening you want. Rinse with clean water and dry to prevent streaks.
Finish by spot-cleaning stubborn marks with the soft brush and buffing tiles with a microfiber cloth.
- Work methodically, one small area at a time.
- Keep cleaner pH-neutral.
- Rotate tools.
When to Use a Steam Mop on Porcelain Tile
If your deep-clean routine still leaves grout dingy or you need a chemical-free lift, a steam mop can be a smart next step for porcelain tile. Use steam cleaning when tiles are sealed, grout is stained but intact, and you want quick drying. Avoid steam on cracked grout or unglazed tiles. Move slowly, keep mop pads clean, and test a small area first. Steam offers tile sterilization without harsh chemicals, cutting allergens and surface bacteria. Check manufacturer guidance before use; improper application can harm seals.
| Benefit | When to Use | Caution |
|---|---|---|
| Deep lift | Sealed tile | Cracked grout |
| Sterilization | Allergy concerns | Unsealed tile |
How to Protect Grout After Cleaning
When grout’s clean, protect it to keep stains and moisture from returning; sealing and simple maintenance will extend your work and save headaches. After cleaning, dry grout fully, then apply grout sealing per product instructions—this blocks moisture and grime.
When grout’s clean, seal it—dry fully, follow product instructions, and stop stains and moisture from returning.
For faded or stained grout, consider color sealing to refresh appearance and add protection.
Finish with routine care: avoid harsh acids and mop spills quickly.
- Apply grout sealing evenly; work in small sections.
- Use color sealing if you want a uniform grout tone.
- Reapply sealant every 1–3 years based on traffic.
You’ll preserve grout and reduce future deep cleans.
Preventive Tips to Keep Porcelain Tile Looking New
Now that your grout is sealed and protected, keep the whole porcelain floor looking new with a few simple habits. Wipe spills immediately, use soft microfiber mops, and sweep daily to prevent grit from scratching glaze.
Place doormats and use felt pads under furniture; rotate rugs to avoid uneven fading and consider color matching for replacement mats so shifts stay subtle. Reapply grout sealing per manufacturer guidelines and avoid harsh acids or abrasive cleaners that dull finish.
Clean high-traffic zones more often, dry floors after mopping to prevent residue, and address stains early to maintain showroom appearance.
Handling Cracked or Chipped Porcelain Tiles
If you spot a crack or chip, first assess how deep and widespread the damage is so you can decide whether repair is feasible.
You’ll want to block off the area and cover sharp edges to prevent cuts or further breakage until you can fix it.
For minor damage you can use a porcelain repair kit, but for large cracks or loose tiles you’ll need to replace the tile.
Assess Damage Severity
Because small chips can quickly worsen under foot traffic, you should assess each cracked or chipped porcelain tile promptly to decide whether to repair, replace, or temporarily stabilize it.
Check size, depth, and location: hairline cracks often stay cosmetic; large fractures or holes need replacement.
Consider age and pattern—matching older porcelain tile history and original tile installation techniques can affect your repair options.
Note substrate damage or loose edges that suggest broader issues.
Use this quick checklist to prioritize actions:
- Size and depth: cosmetic vs. structural
- Location: high-traffic vs. hidden areas
- Matchability: pattern, glaze, and installation style
Temporary Safety Measures
While you decide whether to repair or replace a cracked or chipped porcelain tile, take immediate steps to protect people and prevent further damage. You’ll want to cordon off the area, warn household members, and minimize foot traffic. Cover sharp edges with strong tape or cardboard, and use temporary barriers to keep pets and kids away. Note visible debris and sweep carefully to remove shards that create safety hazards.
| Emotion | Action | Result |
|---|---|---|
| Concern | Tape edges | Calm |
| Urgency | Block area | Safety |
| Frustration | Note debris | Order |
| Relief | Clean shards | Secure |
| Resolve | Monitor | Peace |
Repair Or Replace Tile
When you spot a cracked or chipped porcelain tile, decide quickly whether to repair or replace it based on the damage, tile availability, and your comfort with DIY work. Small surface chips and hairline cracks often respond well to repair, but larger breaks, shattered tiles, or discontinued patterns usually call for replacement.
Assess matching Tile patterns and the condition of surrounding grout. For repairs, use epoxy or color-matched filler. For replacement, remove grout, lift the tile, and bed a new one.
Finish with grout sealing to protect joints and blend repairs.
- Repair small chips with epoxy
- Replace badly broken tiles
- Match Tile patterns before buying
Products to Avoid on Porcelain Tile
Although porcelain is tough, some common cleaners and chemicals can still damage the glaze, grout, or finish, so you should steer clear of them.
Although durable, porcelain’s glaze, grout, and finish can still be harmed by common cleaners—avoid harsh chemicals.
Avoid abrasive powders, steel wool, and scouring pads that undermine porcelain durability and scratch surfaces.
Stay away from bleach and high-acid cleaners like straight vinegar or lemon on colored grout because they can fade grout color and weaken joints.
Ammonia-based products may dull finishes and leave residues.
Harsh degreasers and oil-based soaps can build film and attract dirt.
Use pH-neutral, tile-specific cleaners instead, and always test a small area first.
Restore Shine to Dull Porcelain Tile
If you’ve avoided harsh cleaners that harm glaze and grout, you can focus on safe methods to bring back your porcelain’s shine. You’ll restore Porcelain tile aesthetics by cleaning gently, using a microfiber mop and a neutral pH cleaner, then buffing dry.
Check grout sealing techniques to prevent future dulling and protect edges. For stubborn haze, try a diluted vinegar rinse on matte tiles, followed by thorough rinsing.
Maintain shine with regular dusting and quick spills cleanup. Keep tools clean and test any product in an inconspicuous spot first.
- Microfiber mop and neutral cleaner
- Buff dry after rinsing
- Reapply grout sealant as needed
Kitchen vs Bathroom: Cleaning Differences & Tips
Because kitchens see food spills and bathrooms collect soap scum and moisture, you’ll use different cleaners and routines for each space.
Because kitchens handle spills and bathrooms collect moisture, use tailored cleaners and routines for each space.
In the kitchen, tackle cooking spills quickly with a mild detergent solution to prevent staining and greasy buildup. Mop regularly and wipe sticky areas after cooking.
In the bathroom, focus on grout and tile joints where shower mold and mildew thrive. Use a bathroom cleaner that targets mold and scrub grout with a brush.
Ventilate bathrooms to reduce moisture and run exhaust fans.
Spot-clean high-traffic kitchen areas and deep-clean bathroom grout weekly to keep porcelain tile sanitary and lasting.
Eco‑Friendly Cleaner Options That Work
When you want effective cleaning without harsh chemicals, eco-friendly options let you protect your porcelain and the planet at the same time.
You’ll keep tile looking fresh and maintain grout’s stain resistant qualities by choosing mild, natural solutions and using them properly.
- Vinegar diluted with water for routine mopping (avoid on polished surfaces)
- Baking soda paste to target scuffs and stubborn marks
- Castile soap mixed with warm water for gentle, effective cleaning
You’ll rinse well, dry promptly, and test any new cleaner in a discreet spot to guarantee finish compatibility and lasting results.
How Often to Deep‑Clean Porcelain Tile Floors
Although your daily sweeping and weekly mopping handle most dirt, you should deep‑clean porcelain tile floors every 6–12 months depending on traffic, pets, and spills. If you have heavy footfall, active pets, or frequent spills, aim for the shorter end; low‑traffic rooms can wait toward twelve months.
Deep cleaning preserves porcelain durability by removing embedded grime and grout buildup that regular mopping misses. Check grout lines and tile color variation to spot fading or stains needing targeted treatment.
Between deep cleans, stick to gentle weekly routines and address spills immediately to extend time between intensive interventions.
Cost‑Effective Tools for Rental Homes
Renters can keep porcelain tile floors looking great without spending much by choosing a few multipurpose, budget-friendly tools. For rental homes you’ll want items that work on grout and tile, store easily, and won’t break the landlord’s rules.
Keep porcelain tile spotless on a budget with a few compact, multipurpose tools that respect rental rules.
Choose stuff that’s cost effective and versatile so you can clean often without replacing gear.
- Microfiber mop with removable pads — gentle, reusable, and fits small storage.
- Grout brush and a small scrub pad — tackles spots without heavy machinery.
- Spray bottle with mild cleaner — mixes diluted solutions for regular maintenance.
How to Spot‑Test Cleaners Safely
After you’ve picked affordable tools, always spot-test any cleaner before using it across the whole floor. Choose an inconspicuous area, like behind a cabinet or inside a closet, and apply the diluted product per label instructions. Wait the recommended time, then blot—don’t rub—to check finish, colorfastness, and grout reaction. Note results and rinse fully.
For stubborn marks, test a small stain removal method separately to confirm effectiveness without damaging glaze. Wear gloves and guarantee good ventilation; follow basic chemistry safety—avoid mixing cleaners.
If damage appears, stop and try a gentler product or consult manufacturer guidance.
Seasonal Checklist for Porcelain Tile Care
Because your porcelain floor faces different stresses through the year, a seasonal checklist keeps maintenance efficient and prevents damage. You’ll protect porcelain tile aesthetics and extend life by scheduling simple tasks: sweep, deep-clean grout, and check seals. Follow this concise seasonal maintenance routine to avoid surprises and costly repairs.
A simple seasonal checklist—sweep, deep-clean grout, and check seals—to protect porcelain floors and prevent costly surprises.
- Spring: deep clean grout, reseal grout lines, inspect for weather-related wear.
- Summer: reduce abrasive dirt with mats, mop regularly with pH-neutral cleaner, check for fading.
- Fall/Winter: trap moisture with entry mats, dry spills promptly, verify sealant integrity before cold months.
Maintaining Porcelain Tile in Homes With Pets
How do you keep porcelain tile looking great when pets are part of the family? Sweep or vacuum daily to remove pet hair before it abrades grout or finish. Use a microfiber mop for quick pickups and a HEPA filter vacuum for deeper cleaning.
Place washable mats at doors and litter areas to reduce litter tracking; clean them often. Trim pet nails regularly to prevent scratches, and clean spills promptly with a pH-neutral cleaner safe for porcelain.
For high-traffic pet zones, consider area rugs with non-slip backing that you can machine wash to protect tile and simplify upkeep.
Troubleshooting Common Porcelain Tile Problems
Keeping up with pet messes and traffic helps prevent many issues, but you’ll still run into common porcelain tile problems like grout stains, surface scratches, loose tiles, and efflorescence.
Tackle them quickly: clean grout with a pH-neutral cleaner, buff light scratches with a polishing pad, and reattach loose tiles with appropriate adhesive. For tougher situations, consider professional porcelain tile repairs to avoid bigger costs.
Match grout color carefully—grout color matching keeps repairs invisible.
Quick tips:
- Blot spills and treat stains promptly.
- Use felt pads to prevent scratches.
- Test cleaners in an unseen spot first.
Frequently Asked Questions
Can I Use Bleach on Porcelain Tile Grout Occasionally?
You can use diluted bleach occasionally for grout stain removal, but don’t overuse it; it can degrade grout. You’ll want grout sealing afterward to protect pores, and you should test a small area first.
Will Steam Mops Void the Tile Manufacturer’s Warranty?
Often they won’t void warranty, but you should check manufacturer terms first to be sure. You’ll investigate warranty fine print, use steam cleaning cautiously, and include steam cleaning in regular tile maintenance to avoid potential exclusions.
How Do I Remove Mineral Deposits From Hard Water on Porcelain?
You can dissolve mineral buildup by applying a vinegar-and-water solution or a commercial descaler, letting it sit, scrubbing with a soft brush, then rinsing thoroughly; test cleaning agents on a hidden spot first to avoid damage.
Can Porcelain Tiles Be Refinished or Resurfaced Instead of Replaced?
About 70% of homeowners restore surfaces instead of replacing them: you can refinish porcelain via tile polishing and surface sealing to revive gloss, repair light damage, and extend life, though deep cracks usually need tile replacement.
Is It Safe to Use Wax or Polish on Porcelain Tile Floors?
You shouldn’t use wax or polish on porcelain tile floors; they’re unnecessary and can build residue. Use proper cleaning tools instead, and rely on surface protection like mats and sealers for shiny, long-lasting finishes.
Conclusion
You’ll feel like a cleaning superhero when your porcelain tile sparkles so brightly it practically blinds guests — and yes, you can do it without breaking a sweat. Stick to the simple steps, test cleaners, and keep up with quick maintenance, and your floors will stay flawless even with pets and chaos. You’ll wonder how you ever lived with dull tiles before; just follow the plan and enjoy that dazzling, effortless shine every day.