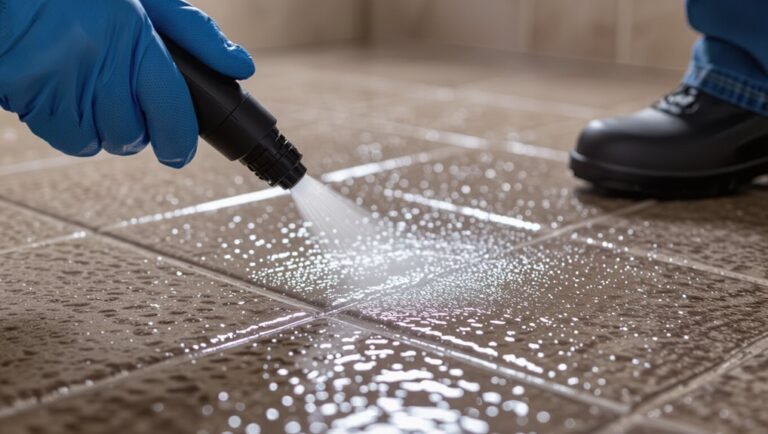
How to Clean White Floor Tiles at Home Fast
You can restore white floor tiles fast with a damp microfiber mop, a mild pH-neutral cleaner or diluted dish soap, and quick spot treatments for stains. Sweep or vacuum first, spray small sections, mop in straight strokes, rinse with clean water, then dry with a microfiber cloth to avoid streaks. Use baking soda paste or hydrogen peroxide for grout spots and rubbing alcohol for ink. Keep tools handy and you’ll find easy tricks and deeper fixes ahead.
What You’ll Achieve With White Floor Tiles
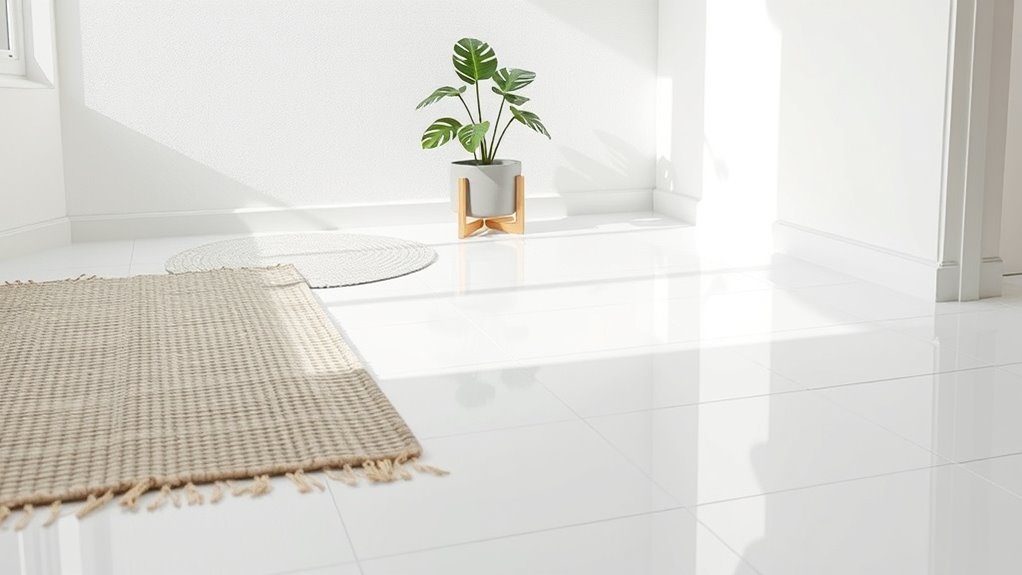
When you install and maintain white floor tiles, you’ll create a bright, open look that makes rooms feel larger and cleaner. You’ll highlight architectural lines and reflect natural light, boosting perceived space.
White tiles let you experiment with color variations through grout, rugs, or furnishings, so you can shift moods without replacing flooring. They also showcase tile patterns—herringbone, grid, or staggered—making design intentional and visible.
With careful upkeep you’ll keep that crisp appearance longer, and minor scuffs become easier to spot and address. Ultimately, white tiles give flexible, enduring style that adapts as your decor evolves.
Fast Cleaning Vs. Deep Cleaning: Which to Pick
Although quick touch-ups can keep white tiles looking fresh day to day, you’ll need a scheduled deep clean to remove embedded grime, grout discoloration, and dullness that shortcuts miss. You’ll choose based on traffic, time, and results desired.
Quick touch-ups keep white tiles bright, but schedule deep cleans to banish grime, grout stains, and dullness.
Fast cleaning is great for spills and maintaining color contrast; deep cleaning restores brightness and addresses grout and tile patterns.
- Quick: 10–15 minutes, mop or wipe.
- Regular: weekly for moderate traffic.
- Deep: monthly or quarterly, scrub grout and edges.
- Intensive: stain removal, steam or strong cleaner.
Pick fast for upkeep, deep for renewal.
Essential Tools for Quick White Tile Cleaning
If you’re keeping up with quick touch-ups between deep cleans, having the right basic kit makes those 10–15 minute sessions effective. You’ll want tools that handle grime without harming grout or disrupting color contrast and tile patterns. Keep a lightweight mop, a soft-bristle brush, microfiber cloths, and a spray bottle handy for spot work. Store them in a caddy so you can grab everything fast.
| Tool | Use | Tip |
|---|---|---|
| Microfiber cloth | Buff spots | Fold for more layers |
| Soft brush | Grout & edges | Angle for seams |
| Spray bottle | Quick misting | Label contents |
Everyday Household Cleaners That Work on White Tile
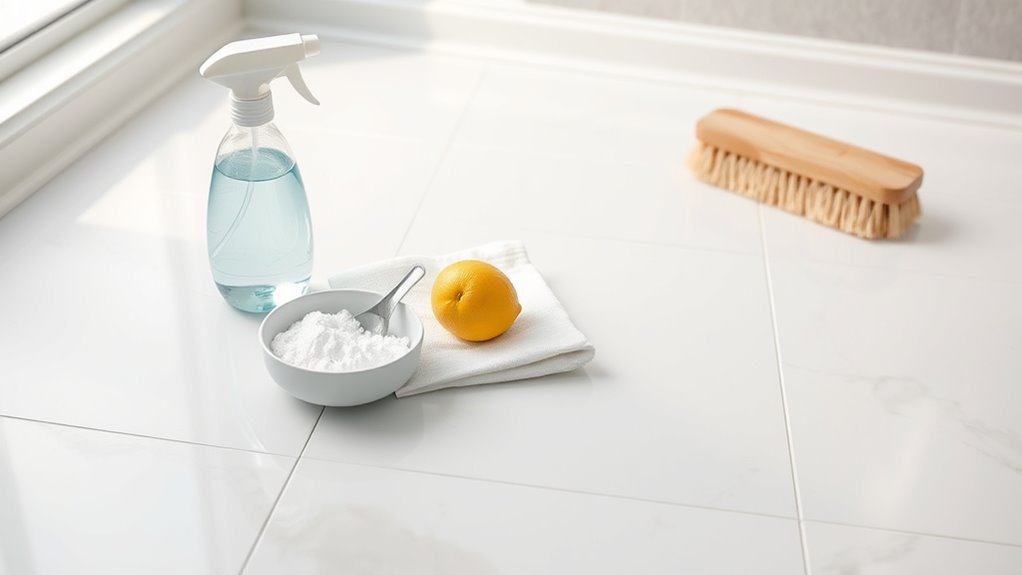
Because everyday stains don’t need specialty products, you can tackle most dirt with simple household cleaners you probably already have: dish soap, white vinegar, baking soda, and a mild bleach solution. Use them wisely to keep white tile bright without harsh chemicals. Combine solutions for specific jobs and rinse thoroughly.
Because everyday stains don’t need specialty products—use dish soap, vinegar, baking soda, and mild bleach; rinse well.
- Dish soap + warm water: quick degreasing after spills.
- White vinegar: dilute for dull residues, avoid on stone.
- Baking soda paste: gentle scrubbing for grout edges.
- Mild bleach solution: occasional disinfecting for stubborn stains.
You’ll treat floors like you treat kitchen gadgets or follow gardening tips—practical, routine care.
How to Spot-Test Cleaners Safely
Before using any cleaner, pick a hidden spot—like inside a closet threshold or under a cabinet—so you won’t notice minor changes right away.
Apply a small amount of the cleaner, wait the manufacturer’s recommended time, then blot and inspect for discoloration or finish damage.
If the tile and grout look unchanged, it’s safe to use the cleaner on visible areas.
Choose A Hidden Spot
When you’re testing a cleaner, pick a discreet area—like under a cabinet, inside a closet threshold, or behind a baseboard—so you can check results without risking visible damage. Choose hidden spots that mirror your main tile: same grout, finish, and traffic level. Avoid unrelated topics like fixture finishes or painted trim when deciding where to test.
Follow a quick checklist:
- Clean the spot gently first.
- Apply the cleaner sparingly.
- Wait the manufacturer’s recommended time.
- Rinse and dry, then inspect for discoloration or etching.
Record results so you’ll know what’s safe for the full floor.
Test Cleaner Inconspicuously
If you’re about to use a new cleaner, spot-test it first in an inconspicuous area that matches your main tile’s finish and grout so you won’t risk visible damage. Apply a small amount, wait the product’s recommended time, then blot with a white cloth to check for discoloration or residue.
Test near edges, closets, or behind appliances where spills won’t show. Note reactions—matte tiles may dull, grout can lighten.
Keep records like you’d for garden maintenance or pet grooming products, so you remember safe options.
If the tile passes, proceed; if not, try a milder solution or manufacturer advice.
10-Minute Daily Wipedown Routine for White Tile
Because a quick daily wipedown keeps dirt from embedding, spend just a minute or two each day running a damp microfiber cloth or mop over your white tile to lift surface dust, splatters, and tracked-in grit. You’ll keep finishes bright and make deeper cleaning less frequent.
Consider Color coordination and Decor integration when choosing cloths and mop heads so tools blend with rooms and won’t be misplaced.
Follow this simple rhythm:
- Shake or rinse cloth to remove grit.
- Work in straight strokes across tiles.
- Flip or rinse when dirty.
- Air-dry to prevent streaks.
Do it daily for consistently clean white tile.
Two-Minute Corner and Baseboard Touch-Up
Spend two minutes wiping corners with a microfiber cloth and a dab of all-purpose cleaner to lift scuffs and crumbs.
Use a cotton swab or an old toothbrush for stubborn grout edges and tight spots.
For baseboards, run a damp cloth with a little white vinegar to remove marks and restore a light shine.
Quick Spot-Clean Method
Want a fast way to keep corners and baseboards looking sharp between deep cleans? Use this Quick Spot-Clean Method to zap scuffs and crumbs in two minutes. Match your cleaning cloth to color coordination or tile patterns so dirt isn’t obvious while you work.
Follow these steps:
- Grab a microfiber cloth and a spray bottle with diluted cleaner.
- Spray a small area, avoid soaking grout.
- Wipe edges and corners with firm strokes toward the baseboard.
- Flip to a clean cloth side, buff until dry.
Repeat high-traffic spots quickly; you’ll extend time between thorough scrubs.
Baseboard Shine Trick
If you’re short on time, this two-minute Baseboard Shine Trick restores crisp corners and glossy baseboards with minimal effort. Grab a microfiber cloth, cotton swab, and a mild all-purpose cleaner or vinegar mix.
Run the damp cloth along baseboards, wiping where dust and scuff marks meet tile. Use the cotton swab for tight corners and grout lines; it lifts buildup without scrubbing.
For homes with strong color contrast or busy tile patterns, work in small sections so you’ll notice missed spots immediately.
Finish with a dry buff to boost shine and prevent streaks. Repeat weekly for lasting curb appeal.
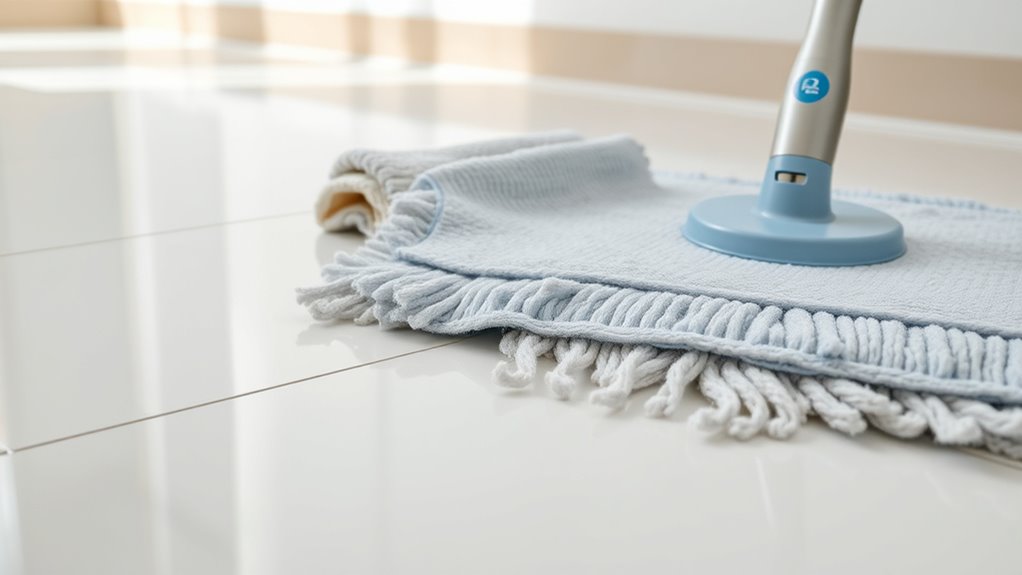
Fast Mop Techniques for White Tile
When you’re short on time but still need bright white tiles, fast mopping techniques let you clean thoroughly without scrubbing for hours; you’ll move quickly while keeping grout and shine intact. Start by sweeping debris, choose a mild cleaner, and work in straight lines that follow tile patterns so you don’t miss spots. Consider how color options for grout or accent tiles affect visible streaks and adjust rinsing.
When time’s tight, fast mopping keeps white tiles bright—sweep, spray, mop in straight strokes, then rinse and air-dry.
- Sweep or vacuum first for loose grit.
- Use diluted cleaner in a spray bottle.
- Mop in overlapping straight strokes.
- Rinse with clean water and air-dry.
Best Microfibre Cloths and Mop Heads for White Tile
Because white tiles show every streak and speck, you’ll want microfiber cloths and mop heads that trap dirt, lift oils, and rinse out clean without leaving lint behind. Choose high-density flat cloths for polishing and looped mop heads for deep grime—both pick up grit without smearing.
Opt for split-fibre or ultra-fine blends to remove residue from grout lines and accent tile patterns. Pick neutral-colored cloths to avoid dye transfer and keep spares for greasy zones.
Rotate cloths by task: one for dusting, one for washing, one for buffing. Regularly launder without fabric softener to preserve performance.
Speed-Friendly Tools to Buy Under $30
You can outfit your cleaning kit without spending much by choosing a microfiber mop head or handheld mop that fits your routine.
Pick up a quick-spray cleaner for spot jobs and a few grout brush picks to tackle stubborn lines.
Together those three items speed up touch-ups and keep white tiles looking sharp.
Microfiber Mop Options
If you want a fast, effective clean without splurging, microfiber mops under $30 give you the best bang for your buck — they pick up dust, hair, and spills quickly. Most pads are machine-washable for repeated use. You’ll notice how microfiber highlights color contrast and follows tile patterns without scratching grout. Choose lightweight, swivel heads and removable pads for speed.
- Flat mop with washable pads — glides into grout lines.
- Spray mop compatible — refillable and compact.
- Spin mop head — good for textured tiles.
- Telescoping handle — adjusts for reach and storage.
Pick one that fits your routine.
Quick-Spray Cleaners
When you’re after speed without sacrificing shine, quick-spray cleaners are your best bet—lightweight bottles, concentrated formulas, and trigger heads that mist evenly make spot-cleaning tiles fast and effective.
You’ll spray, wipe, and buff high-traffic zones in minutes, removing spills and dull film without dragging out a mop. Choose citrus or non-abrasive ammonia blends labeled safe for glazed surfaces; test a hidden corner first.
For tile patterns, aim sprays along grout lines and edges to preserve overall contrast. Affordable, portable, and under $30, these cleaners keep white floors bright between deep cleans without specialized tools.
Grout Brush Picks
Although small, grout brush picks pack serious cleaning power for white tiles, letting you target dingy grout and tight corners faster than a full mop job. You’ll grab a pick to loosen stains, scrub along grout lines, and reach edges around fixtures.
Use them with a paste or spray, rinse, then consider tile sealing to lock results and reduce future scrubbing. Pick models with stiff bristles and comfortable grips; salt or baking soda paste plus a bit of vinegar works well.
- Compact size for precision
- Stiff angled bristles
- Comfortable handle
- Under $30, replaceable heads
Quick Steam-Cleaning: Pros and Best Practices
Because steam loosens dirt and sanitizes without harsh chemicals, quick steam-cleaning is one of the fastest ways to refresh white floor tiles between deep cleans. You’ll get rapid results: run a handheld or mop steamer along grout lines and tile surfaces to lift grime and kill bacteria.
Use distilled water, low-to-medium heat, and a microfiber pad to avoid streaks or damage. Work in small sections, ventilate the room, and wipe excess moisture to prevent water spots.
Steam cleaning is chemical free and ideal for routine touch-ups, but don’t rely on it for stubborn stains or damaged grout.
How to Remove Scuff Marks in Under Five Minutes
If scuff marks are ruining the look of your white tiles, you can usually erase them in under five minutes with items you already have on hand. Grab a clean cloth, a pencil eraser, and some furniture polish or rubbing alcohol. Try this quick method:
- Wipe loose dirt away with a damp cloth.
- Rub scuffs gently with a pencil eraser or a soft-bristled brush.
- Apply a small amount of furniture polish or alcohol to the cloth, buff the mark.
- Finish by wiping with a damp cloth and drying.
Avoid harsh scrubbing that can dull grout; treat carpet stain separately.
Fast Fixes for Tracked-In Mud and Pet Pawprints
Scuffs come and go, but tracked-in mud and pet pawprints need a different quick approach because moisture and grit can smear and set fast. You’ll blot fresh mud with paper towels, then mist a solution of water and mild detergent, agitating gently with a soft brush so color contrast and tile textures don’t hide residue. For stubborn marks, use a damp microfiber with a touch of baking soda paste, rinse, then dry.
| Before | After |
|---|---|
| Smeared pawprints | Clear, bright tile |
| Dull mud marks | Restored grout lines |
Act fast to prevent staining.
Speed-Cleaning Greasy Spots in the Kitchen
When grease splatters in the kitchen, tackle it quickly to stop it from baking onto tile and grout; you’ll save scrubbing time and protect grout. Use eco friendly solutions like diluted dish soap or vinegar mix to lift oil without harsh fumes. Blot excess, then follow a quick routine:
- Sprinkle baking soda over spot to absorb oil.
- Spray diluted dish soap solution, let sit 2 minutes.
- Gently scrub with a soft brush along grout lines.
- Rinse with warm water and dry to prevent re-soiling.
This keeps white tiles bright and emphasizes stain prevention through prompt action.
Removing Sticky Residue Without Harsh Chemicals
When sticky residue shows up on your white tiles, try a quick vinegar solution to break it down without harsh chemicals.
For stubborn spots, rub a small amount of gentle oil (like olive or coconut) to loosen the gunk, then wipe away with soapy water.
You’ll get a clean tile finish without damaging grout or finishes.
Quick Vinegar Solution
If you’re dealing with sticky residue on white floor tiles, a quick vinegar solution cuts through gunk without harsh chemicals. Mix equal parts white vinegar and warm water in a spray bottle, test a small inconspicuous area, and note color contrast and tile patterns for any change.
Spray, wait 2–3 minutes, then scrub with a soft sponge. Rinse with clean water and dry to prevent streaks.
- Gather vinegar, water, spray bottle, sponge.
- Test hidden corner first.
- Spray, wait, gently scrub.
- Rinse and buff dry for even shine.
Gentle Oil-Based Removal
1 simple trick uses common oils to loosen sticky residue without harsh chemicals. You’ll dab a small amount of olive, coconut, or vegetable oil onto the spot, let it sit a few minutes, then rub gently with a soft cloth or plastic scraper.
Oil based solvents break down adhesive bonds without scratching porcelain or ceramic. Wipe away residue with warm soapy water, then rinse thoroughly.
For scent and freshness, add a few drops of lemon or orange essential oil—natural deodorizers that cut grease. Repeat if needed, then dry the tile to prevent slipping and restore your bright white finish.
Removing Coffee, Wine, and Juice Stains Quickly
Because spills like coffee, wine, and juice can sink into grout and tile pores fast, act quickly and blot—don’t rub—to lift most of the liquid before it sets. Remove objects like indoor plants and pull up window blinds to access the area. Mix mild dish soap with warm water, apply, then blot.
For stubborn stains, use a 1:1 white vinegar-water spray, let sit one minute, then blot dry.
- Blot excess immediately.
- Apply soap solution gently.
- Treat persistent spots with vinegar mix.
- Rinse and dry thoroughly to prevent rings.
How to Handle Paint, Nail Polish, or Ink Spills Fast
If you spill paint, nail polish, or ink, act fast and cordon off the area to keep the stain from spreading.
Blot—don’t rub—to lift excess before it sets.
Then try safe solvent options like rubbing alcohol for ink, acetone for nail polish (test in a hidden spot), or a mild paint remover suitable for your tile.
Act Quickly And Contain
When a spill happens, act fast and stop it from spreading — blot up excess paint, nail polish, or ink with a clean cloth or paper towel and place a barrier (like tape or a folded towel) around the stain to contain any run-off.
Next, protect surrounding tile patterns and note color contrast to avoid transferring pigment. Use gentle blotting, not rubbing, to lift material.
Follow these steps:
- Remove excess with a disposable cloth.
- Isolate area with towels or cardboard.
- Blot outward from edges to center.
- Dry and inspect for residual staining before treating further.
Use Safe Solvent Options
Since time matters with paint, nail polish, or ink, pick a safe solvent that matches the stain and your tile finish: rubbing alcohol or hydrogen peroxide works well for fresh ink.
Non-acetone nail polish remover loosens polish without attacking most glazes.
And mild dish soap mixed with warm water can lift uncured water-based paint.
Test the solvent in an inconspicuous spot to check color contrast and tile durability.
Blot—don’t rub—to avoid spreading.
Use a soft cloth or cotton swab, working outward.
Rinse the area with clean water and dry.
Repeat cautiously; stop if finish dulls.
Rapid Grout Surface Cleaning Tricks
Because grout soaks up dirt fast, you’ll want quick tricks that restore its look without a full scrub session. You can target surface grime to revive color contrast and emphasize tile patterns with minimal effort. Try these fast steps:
- Sweep, then vacuum grout lines to remove loose debris.
- Spray a 50/50 water-vinegar mist, let sit 2–3 minutes, then blot.
- Use a stiff nylon brush in short, controlled strokes along grout.
- Rinse with clean water and dry with a microfiber to prevent streaks.
Work small areas, repeat only where needed, and avoid harsh abrasives that damage grout.
Grout-Whitening Hacks With Household Items
You can make a thick baking soda paste, spread it on stained grout, and scrub with a brush to lift surface grime.
Follow with a gentle hydrogen peroxide rinse to brighten and disinfect the lines without harsh chemicals.
Let the peroxide sit a few minutes, then rinse and dry for best results.
Baking Soda Paste
If your grout’s looking dingy, try a simple baking soda paste to lift stains and brighten lines without harsh chemicals. You’ll mix baking soda with water to a toothpaste consistency, apply into grout, and let it sit before scrubbing.
This method works across tile patterns and helps maintain color coordination with surrounding flooring.
- Make paste (3:1 baking soda to water).
- Apply with a toothbrush into grout lines.
- Let sit 10–15 minutes; scrub firmly.
- Wipe away residue and dry.
Repeat on stubborn spots. Always test a hidden area first to guarantee no discoloration.
Hydrogen Peroxide Rinse
When grout’s looking dingy after a baking soda scrub, follow with a hydrogen peroxide rinse to brighten lines without bleach. You’ll mix 3% hydrogen peroxide with equal water in a spray bottle, mist grout, and let it sit five to ten minutes.
Agitate with a stiff brush and rinse with warm water. This method uses common household ingredients and fits eco-friendly techniques, avoiding harsh chemicals while giving effective stain lift.
For stubborn spots, apply undiluted peroxide briefly, then scrub. These stain removal tips are safe for most tiles, but test a hidden area first to ensure compatibility.
When to Use Baking Soda, Vinegar, or Hydrogen Peroxide
Although all three are common household cleaners, baking soda, vinegar, and hydrogen peroxide work best in different situations, so you’ll choose based on the soil type and tile finish. Consider tile patterns and flooring durability when deciding.
- Baking soda: gentle abrasion for scuffs and stains on matte or textured tiles.
- Vinegar: acidic degreaser for soap buildup on glazed tiles, but avoid on natural stone or weakened grout.
- Hydrogen peroxide: oxidizer for organic stains and light disinfecting without harsh fumes.
- Combine cautiously: paste or diluted mixes let you target spots without harming finish or long-term flooring durability.
How to Tackle Grout Mold and Mildew Fast
Start by spotting mold-prone areas like grout lines near sinks, showers, and exterior doors so you know where to focus.
Use natural cleaners—baking soda paste, diluted vinegar, or hydrogen peroxide—to scrub and lift mildew without harsh fumes.
Finish by sealing grout, improving ventilation, and wiping spills promptly to prevent it from coming back.
Identify Mold-Prone Areas
Where do grout and tile collect mold most often, and how can you spot trouble early? You’ll check damp, low-light spots and watch for discoloration, musty smells, or slimy texture. Prioritize mold prevention with regular inspections and simple Ventilation tips to reduce humidity.
- Shower corners and grout lines — dark streaks, soft grout.
- Around tubs and sinks — constant splashes, peeling caulk.
- Under mats and rugs — trapped moisture, faint odor.
- Near exterior doors and basements — condensation, patchy growth.
Spot issues early, dry surfaces after use, and address leaks promptly to stop mold spreading.
Use Natural Cleaning Solutions
A few simple, natural ingredients can remove grout mold and mildew quickly without harsh chemicals, and you can mix them from pantry staples. You’ll make a paste of baking soda and water, apply it to grout, then spray with vinegar to fizz away grime. Let it sit, scrub with a stiff brush, and rinse.
For stubborn spots, use hydrogen peroxide mixed with a little dish soap. These natural remedies work fast, smell mild, and won’t damage tile.
Choose eco-friendly solutions like diluted vinegar or tea tree oil for antimicrobial action, keeping cleaning effective and safer for your home.
Prevent Future Mold Growth
1 simple habit can cut grout mold recurrence: keep grout dry and ventilated. You’ll prevent mildew by removing moisture fast, which also helps with color enhancement and stain prevention of white tiles. Do these steps regularly:
- Wipe spills and damp areas immediately after use.
- Run exhaust fans or open windows during and after wet tasks.
- Reapply a breathable grout sealer every 6–12 months.
- Scrub borders weekly with a mild detergent and soft brush.
If mold appears, treat promptly with a vinegar or diluted bleach solution, then dry thoroughly.
Consistency keeps grout bright and mold-free.
Fast Remedies for Discoloration and Yellowing Spots
When your white tiles start showing yellow or discolored patches, act quickly to prevent stains from setting — you can often lift them with simple household solutions before calling in heavy-duty cleaners.
Mix equal parts white vinegar and warm water, spray spots, let sit five minutes, then scrub gently with a soft brush to preserve grout and tile patterns.
For stubborn yellowing, make a paste of baking soda and water, apply, wait ten minutes, then rinse.
Test first in an inconspicuous area to check color contrast.
Dry thoroughly to prevent reoccurrence and repeat weekly until discoloration fades.
How to Remove Hard-Water Rings From White Tile Floors
Because hard-water rings leave mineral deposits that dull white tile, you’ll want to tackle them with cleaners that dissolve lime and calcium rather than just scrubbing.
You’ll remove water stains and restore shine by using mild acid solutions, applying them briefly, then rinsing thoroughly to avoid etching.
After treatment, consider light tile polishing to even the finish.
- Test cleaner on a hidden spot.
- Apply vinegar or commercial descaler; let sit 1–3 minutes.
- Gently wipe with a microfiber cloth; rinse well.
- Dry and buff; repeat if traces remain.
Always ventilate and wear gloves.
Speed-Safe Scrubbing That Won’t Scratch Tiles
Use soft, quick tools like microfiber mops or non-abrasive scrub pads to lift dirt without scratching your tiles.
Pair them with safe cleaners—mild dish soap, diluted vinegar, or a pH-neutral tile cleaner—to avoid damaging grout or finish.
For stubborn spots, work quickly with a targeted scrub and rinse immediately to prevent residue.
Quick Gentle Tools
Although you want fast results, pick tools that clean without scratching: soft microfiber mops, non-abrasive sponges, and nylon-bristle brushes remove grime quickly while protecting glaze and grout. You’ll work smarter, not harder, and preserve Color options and tile patterns by avoiding harsh abrasion. Choose tools that match surface texture and reach grout lines.
- Microfiber mop — traps dust, gentle on gloss.
- Non-abrasive sponge — for spot cleaning without streaks.
- Nylon brush — scrubs grout without etching.
- Soft paddle scraper — lifts stuck debris, won’t gouge.
Rinse tools often and replace pads when worn.
Safe Cleaning Solutions
When you need quick, effective cleaning that won’t scratch white tiles, pick mild, pH-neutral solutions and dilute them correctly so they cut grease without harming glaze or grout.
You’ll use soft microfiber mops or non-abrasive sponges with warm water and a splash of neutral cleaner. Test in a hidden corner to confirm no dulling.
Avoid acids, bleach concentrates, or rough pads that erode grout lines or alter tile patterns.
For visual appeal, coordinate cleaning frequency with color coordination of surrounding rugs and mats to keep edges and grout uniformly bright without over-scrubbing.
Speedy Stain Techniques
Because quick action beats heavy scrubbing, tackle fresh stains within minutes using gentle, non-abrasive tools and targeted cleaners so you lift spots without scratching the tile or wearing down grout. You’ll want to act fast, blot spills, and choose cleaners suited to your tile installation and finish. Test any product on an inconspicuous patch to protect color options and grout tone.
Use soft microfiber, a nylon brush, and diluted vinegar or pH-neutral cleaner for stubborn marks. Follow with plain water and dry. Repeat only as needed.
- Blot immediately.
- Test cleaner.
- Scrub gently.
- Rinse thoroughly.
How to Clean Textured and Matte White Tiles Quickly
If your white tiles have a textured or matte finish, you’ll need a gentler, more targeted approach to remove dirt without dulling the surface. Start by sweeping or vacuuming to lift grit from textured surfaces.
Mix warm water with a mild pH-neutral cleaner; avoid harsh acids or bleach that can etch a matte finish.
Mix warm water with a pH-neutral cleaner—steer clear of acids or bleach that can etch matte finishes.
Use a soft-bristle brush or microfiber mop, working in small sections and rinsing frequently to prevent residue buildup.
For stubborn grime, apply a paste of baking soda and water, scrub gently, then wipe clean.
Dry with a soft cloth to restore uniform appearance.
Quick Methods for Polished or Glossy White Tiles
Textured and matte tiles need gentle care, but polished or glossy white tiles let you use quicker, more straightforward methods that bring out their shine. You’ll wipe spills immediately, mop with a mild neutral cleaner, and buff with a microfiber cloth to avoid streaks. Keep grit off to prevent scratches, and consider protective pads under furniture to preserve the finish and color coordination with your room.
After tile installation, sealant isn’t usually needed for glazed surfaces, but test cleaners first.
Quick routine:
- Sweep/dust daily.
- Damp-mop weekly.
- Spot-clean spills immediately.
- Buff to dry and shine.
Quick Care for Porous or Painted White Stone Tiles
When caring for porous or painted white stone tiles, you’ll need gentler, more deliberate steps than with glazed tile. You’ll blot spills immediately, avoid acidic cleaners, and test any product in a hidden spot. Use pH-neutral cleaner, soft mop, and occasional resealing for porous stone; for painted tiles, gentle soap and wipe-only routines prevent finish loss.
| Task | Tip |
|---|---|
| Spill response | Blot, don’t rub |
| Cleaner choice | pH-neutral only |
| Painted tiles | Test first, wipe gently |
| Maintenance | Reseal porous stone periodically |
These habits protect surface integrity and extend appearance.
How to Remove Permanent Marker or Vinegar Damage Fast
First check the mark to see if it’s ink from a permanent marker or etching from vinegar so you know what treatment will work.
Try safe removal methods first—rubbing alcohol or a baking soda paste for markers, and a mild poultice or neutralizer for vinegar—working gently to avoid more damage.
Once the stain’s gone, restore the tile finish with a suitable polish or sealer to blend the repair and protect the surface.
Assess The Stain
Before you reach for a scrubber, take a close look at the mark to identify what you’re dealing with — permanent marker and vinegar damage need different approaches. You’ll assess size, depth, and context before treating.
- Note color contrast: dark marker on pale grout is obvious; faded dye might be harder to spot.
- Check tile patterns: printed or textured tiles can hide marks differently than smooth ones.
- Test whether the stain sits on the surface or has penetrated grout lines.
- Smell briefly: acidic vinegar damage sometimes leaves a faint sour odor.
Record findings so you choose the safest removal method next.
Use Safe Removal Methods
Now that you’ve identified the stain type and extent, choose removal methods that won’t damage your tile or grout. For permanent marker, try rubbing alcohol or an acetone-free nail polish remover on a microfiber cloth, testing a hidden spot first.
For vinegar damage, neutralize with a baking soda paste to avoid etching, then rinse thoroughly.
Favor eco-friendly alternatives like hydrogen peroxide or diluted lemon juice for light marks, and always blot rather than scrub hard.
Use gentle brushes for grout.
Document results and stop if the finish dulls—switch to a milder DIY stain removal approach or consult a pro.
Restore Tile Finish
If a permanent marker or vinegar has dulled your white tiles, you can often restore the finish quickly with the right products and gentle technique. Start by testing in an inconspicuous spot to preserve sheen and tile pattern.
Lightly rub permanent marker with isopropyl alcohol or a melamine eraser; rinse.
For vinegar-etched haze, buff with a non-abrasive polish or a paste of baking soda and water, then wipe clean.
If color contrast remains, consider a tile-safe restorative sealer.
Repeat only as needed to avoid abrasion.
- Test area
- Clean marker
- Buff haze
- Seal lightly
Quick Drying Techniques to Avoid Streaks and Water Spots
When you dry white floor tiles quickly and evenly, you’ll prevent streaks and water spots that make them look dull; use microfiber mops, squeegees, and fans to speed drying while respecting color contrast and tile textures so patterns stay sharp. Work in sections, pull moisture toward exits, and change cloths when damp. Finish with a dry, lint-free microfiber buffing in overlapping strokes.
| Tool | Motion | Timing |
|---|---|---|
| Microfiber mop | Push/pull | 30–60s/section |
| Squeegee | Diagonal pulls | Immediate |
| Fan | Cross-vent | 5–10min/area |
How to Keep White Tiles Looking Clean Between Deep Cleans
Because daily upkeep prevents stubborn buildup, you can keep white tiles bright between deep cleans with a few quick habits. Wipe spills immediately, spot-clean grout with a toothbrush and mild paste, and use a microfiber dust mop daily to lift grit that scratches surfaces.
Daily upkeep keeps white tiles bright—wipe spills, spot-clean grout, and dust-mop to prevent stubborn buildup.
Rotate rugs to avoid permanent shading and consider simple color coordination for mats to hide dirt without clashing with tile patterns.
Ventilate after cooking to reduce grease. Store shoes by the door and use felt pads under furniture legs to prevent scuffs.
These small steps preserve shine and reduce the need for intensive scrubbing.
Weekly 20-Minute Maintenance Routine for White Floors
Spend 5–7 minutes quickly dusting and sweeping to lift grit that scratches tiles and dulls grout.
Then spot-mop any spills or high-traffic marks with a mild cleaner and a microfiber mop.
Finish by buffing wet areas with a dry cloth to restore shine and prevent streaks.
Quick Dust And Sweep
Want to keep your white floors bright all week with minimal effort? You’ll spend 20 minutes on quick dusting and sweeping to prevent grit buildup and preserve tile patterns and any color options you’ve chosen. Follow this focused routine:
- Open windows briefly to air the room while you work.
- Use a microfiber dust mop, moving with the grain of the tiles.
- Sweep edges and corners with a soft-bristled broom, collecting debris into a dustpan.
- Shake or wash the mop head, then store it dry.
Do this weekly to reduce scratches and keep your floors uniformly bright.
Spot Mop And Shine
If you follow a quick, targeted routine each week, your white tiles will keep their shine without a full mop session.
Start by spotting stains and scuffs, working in short 20-minute increments. Use a microfiber mop or damp cloth with a gentle cleaner for high-traffic zones and grout lines.
Pay attention to color contrast areas and patterned sections where dirt hides along tile patterns. Rinse the mop often and buff dry to prevent streaks.
Rotate your focus weekly—kitchen one week, hallways the next—so you maintain uniform brightness without spending hours on continual deep cleans.
How to Protect High-Traffic Zones for Easier Cleaning
Because high-traffic areas collect the most dirt and wear, protecting them makes daily cleaning faster and keeps white tiles looking fresh longer. You’ll reduce scuffs and hide dirt with smart choices: use washable rugs and runners, place boot trays, and add a doormat.
Protect high-traffic zones with washable rugs, boot trays, and doormats to keep white tile cleaner, longer.
Balance function with style—use decorative accents and color coordination so protection complements your space.
- Washable runner at entry for debris
- Low-profile rug near sink and stove
- Clear boot tray by doors
- Felt pads on furniture legs
Rotate and clean these regularly so maintenance stays quick and effective.
Quick Hacks to Prevent Grout From Getting Dirty Again
Although grout soaks up dirt easily, you can keep it looking new with a few simple habits and targeted products. Wipe spills immediately, sweep daily, and use a microfiber mop to remove grit before it abrades grout.
Apply grout sealing after a deep clean and let it cure—this repels stains and water. Consider tile sealing on porous stone tiles to protect adjacent grout lines.
Use entry mats and remove shoes to limit soil. Spot-treat high-traffic areas weekly with a gentle cleaner.
Reapply sealers yearly or as recommended to maintain protection and cut down on frequent scrubbing.
How to Make a Fast, Effective DIY Tile Cleaner
Keeping grout sealed and traffic low goes a long way, but you’ll still need a reliable cleaner on hand for regular touch-ups.
Mix 1 cup warm water, 1/4 cup white vinegar, 1 tsp dish soap, and 1 tbsp baking soda in a spray bottle. Shake gently and test a hidden tile first.
You’ll notice how color contrast and lighting effects reveal streaks, so buff dry with a microfiber cloth.
Follow this quick routine:
- Spray lightly.
- Let sit 1–2 minutes.
- Agitate with a soft brush.
- Wipe and buff until tiles gleam.
Fast Eco-Friendly Cleaning Swaps That Still Work
If you want quick, eco-friendly swaps that actually work, reach for simple ingredients you probably already have—vinegar, baking soda, castile soap, and lemon—then use them strategically for different tasks.
Use diluted vinegar for routine mopping, castile soap for greasy spots, and a baking soda paste to lift stains without harsh fumes. Lemon brightens tile naturally and helps with mild discoloration.
For grout, apply paste briefly and rinse. If you plan color customization with grout paint or additives, clean thoroughly first.
Finish by ensuring tiles are dry and consider tile sealing where appropriate to protect your work.
How to Spot-Test Grout and Tile Before Using Treatments
Before you apply any cleaner or colorant to your whole floor, test a small, hidden area to make sure the product won’t damage the tile or grout. You’ll learn whether cleaners alter finish, stain grout, or affect color coordination with nearby surfaces. Pick a corner or behind a cabinet near the original tile installation seam.
- Clean test spot, dry fully.
- Apply product per instructions.
- Wait recommended dwell time.
- Inspect for fading, etching, or grout reaction.
If the sample stays unchanged, proceed. If not, choose a gentler formula or consult the tile installation guide before treating larger areas.
Troubleshooting Common Quick-Clean Problems and Fixes
When a quick clean doesn’t give the bright, even look you expected, troubleshoot the most likely causes—residue buildup, streaking from wrong cleaners, or grout that needs deeper attention—so you can target fixes fast.
If residue remains, rinse with clear water and microfiber, then dry to avoid streaks.
Rinse tiles with clear water, wipe with a microfiber, and dry thoroughly to prevent streaks.
For streaking, switch to a pH-neutral cleaner and test in a small area, considering how Tile patterns catch light differently.
If grout looks dull, use a soft brush and a paste cleaner, rinse thoroughly, and seal when dry.
Keep Color coordination in mind to mask minor discoloration until you deep-clean.
Cost-Effective Schedule: Quick Cleans Vs. Professional Service
Although quick cleans keep your white tiles looking sharp day-to-day, you’ll save money and time by scheduling periodic professional deep cleans to tackle grout, stubborn stains, and restorative sealing.
Balance quick DIY upkeep with occasional pros using cost comparison and scheduling flexibility to match your budget and lifestyle. You’ll extend tile life and avoid costly repairs.
- Weekly quick cleans: low cost, high frequency.
- Monthly deeper DIY: moderate time, better results.
- Biannual professional service: higher cost, restorative benefits.
- Emergency/professional spot-clean: as needed, targeted fixes.
Plan around usage, budget, and visible wear.
When to Call a Pro for Stubborn Stains or Damaged Grout
If regular scrubbing and household cleaners aren’t lifting stains or your grout looks cracked, warped, or permanently discolored, call a professional—these issues often need specialized tools, stronger (but safe) chemicals, or regrouting to restore appearance and prevent moisture damage.
You should also hire help when stains smell, spread, or follow water leaks; pros diagnose underlying issues and advise on sealants.
Before they arrive, remove Holiday decorations and clear pathways by adjusting Furniture arrangement to give technicians room.
Get quotes, check reviews, and ask about warranties so you won’t repeat fixes.
Timely action prevents bigger repairs and mold risks.
Speed-Cleaning After a Party: A Room-by-Room Plan
After the last guest leaves, move quickly with a room-by-room plan so you’ll get floors, surfaces, and trash under control without feeling overwhelmed.
Start in the kitchen: gather trash, stack dishes, wipe spills, and sweep crumbs.
In living areas, corral recyclables, fluff cushions, and spot-mop sticky patches.
Bedrooms need quick trash runs and airing out.
Bathrooms deserve a fast surface disinfect and floor wipe.
- Kitchen: sweep, spot-mop tiles, rinse mats.
- Living: vacuum, tackle visible stains.
- Bedroom: tidy, check under beds.
- Bathroom: disinfect, mop grout.
Note tile installation or color matching concerns only if repairs are needed.
Quick Checklist to Finish a Fast Tile-Cleaning Session
Want to wrap up your quick tile-cleaning session without missing anything? Start by scanning for streaks, grout residue, and spots you might’ve skipped.
Rinse mop or cloth and buff high-traffic areas until tiles shine. Check grout lines; touch up with a mild cleaner if needed.
Replace mats and move furniture back carefully to avoid smudges. Note any discoloration that could be related to color coordination with rugs or décor, and mark grout for deeper cleaning later.
Inspect edges to confirm no damage from tile installation. Empty trash, wash tools, and air the room for 10–15 minutes.
Frequently Asked Questions
Can White Floor Tiles Be Safely Cleaned With a Steam Mop on Radiant Heat Flooring?
Yes — you can steam clean white floor tiles on radiant heat, but you’ll use a low-moisture steam setting, avoid prolonged heat exposure, and check manufacturer guidelines to prevent grout or system damage.
How Do I Prevent Grout Sealer From Yellowing White Tiles?
Don’t let grout sealing cause tile discoloration: you’ll test sealers on scrap tile, use a high-quality water-based grout sealer, apply sparingly, wipe excess immediately, cure fully, and avoid oil-based products to prevent yellowing.
Are There Quick Tests to Detect Porous Versus Glazed White Tiles?
Think of a stone vs a mirror: you’ll perform porous identification with a water drop test and a fingernail scrape; for glazed comparison, flash a light and watch bead behavior—porous soaks, glazed repels and reflects instantly.
Will Frequent Use of Bleach Damage White Tile Glaze or Finish?
Yes — if you use bleach frequently and undiluted, you’ll cause bleach damage to grout and can dull the tile finish over time; dilute properly, rinse well, and spot-test to avoid long-term harm.
How Soon Can Furniture Be Moved Back Onto Freshly Cleaned Tiles?
About 90% of sealants cure within 24 hours, so you can usually move furniture back after 24 hours; you should stagger furniture placement and maintain regular cleaning frequency to avoid scuffs and allow proper sealant recovery.
Conclusion
You’ve got this — your white tiles can sparkle like a showroom in minutes, not days. Stick to quick cleans for daily upkeep and save deep scrubbing for stubborn grime. Use the right tools, test cleaners, and follow the room-by-room plan after parties to stay ahead. If grout won’t budge or tiles are damaged, call a pro. Keep a simple schedule and you’ll spend less time cleaning and more time enjoying your bright floors.