How to Clean White Grout in Floor Tiles at Home
You can restore white grout using items you likely have: sweep, mix baking soda into a paste with water, apply it to grout lines, spray hydrogen peroxide, let it sit 5–10 minutes, then scrub with a stiff nylon brush and rinse. For mold use diluted bleach or oxygen bleach following label directions; for stone use pH-neutral cleaners. After drying, apply grout sealer and spot-treat as needed — keep going and you’ll find deeper cleaning, repair, and sealing tips next.
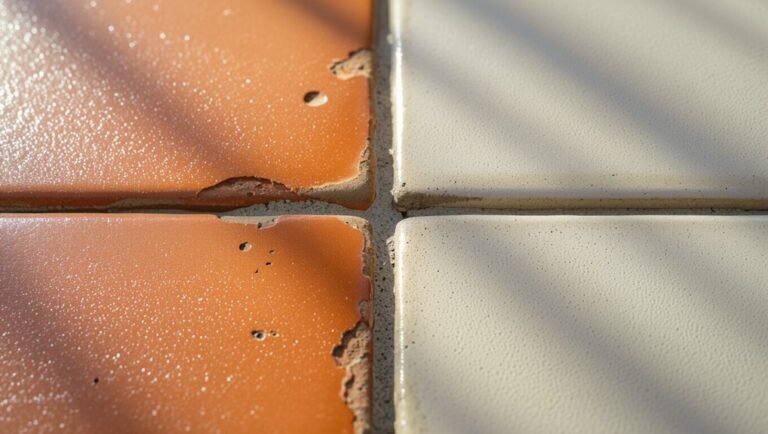
When to Clean White Grout (Signs It Needs Attention)
When grout starts to darken, crumble, or show mold spots, it’s time to act—don’t wait until dirt becomes permanent. You’ll notice discoloration between tiles, uneven texture, or a musty smell that signals bacteria.
Foot traffic and spills speed wear; pets and damp rooms worsen it. If water beads instead of soaking, sealing likely still protects grout, but faded lines mean color restoration or deeper cleaning’s needed.
Crumbling joints let moisture reach subflooring, so address failures early. Monitor grout regularly and prioritize repair, color restoration, or grout sealing to prevent costly replacements and keep floors hygienic.
Quick How-To: Clean White Grout in 5 Steps
Noticing those warning signs means it’s time to clean—here’s a simple, five-step routine you can follow to restore white grout without harsh chemicals or professional help.
Step 1: Sweep and dampen the area to remove loose dirt.
Step 2: Apply a gentle cleaner and scrub grout lines with a brush in short strokes.
Step 3: Rinse thoroughly and check progress; repeat stubborn spots.
Step 4: Allow grout to dry completely for true color restoration.
Step 5: Once dry, apply grout sealing to protect results and slow future staining.
You’ll see immediate improvement.
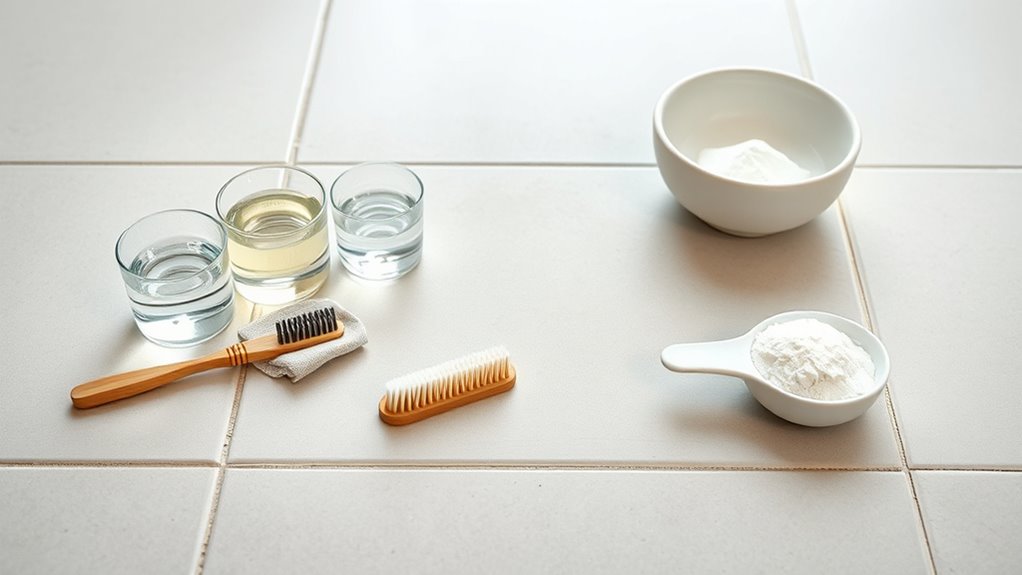
Tools and Household Supplies You’ll Need
Before you start, gather the essential cleaning tools like brushes and a spray bottle, plus common household supplies such as baking soda, vinegar, or a mild bleach alternative.
Make sure you’ve got gloves, eye protection, and good ventilation for safety and preparation.
Having everything ready will make the job faster and protect your surfaces and skin.
Essential Cleaning Tools
What do you need to tackle stained white grout effectively? Gather a stiff nylon brush, a narrow grout brush or old toothbrush, microfiber cloths, and a small bucket.
Use a grout saw or rotary grout tool only if you’re prepared for grout replacement; those create color contrast until repaired.
Add a spray bottle for applying cleaner, rubber gloves, and safety goggles.
A plastic scraper and putty knife help lift stubborn residue without damaging tiles.
Keep a pumice stone and grout float handy for tougher spots and repairs.
Organize tools on a tray so you work efficiently and avoid spills.
Common Household Supplies
Once you’ve gathered your brushes and safety gear, collect a few household staples that’ll make grout cleaning simpler: baking soda, white vinegar, hydrogen peroxide, dish soap, and a small container of bleach for really stubborn stains (use sparingly and never mixed with vinegar).
Use these to tackle dirt, lighten grout color, and test small areas before wider application. Pick supplies that match your tile and grout color results you want, and plan sealing techniques after cleaning to protect your work.
Essentials:
- Baking soda paste
- White vinegar spray
- Hydrogen peroxide
- Dish soap
- Bleach (spot use)
Safety And Preparation
While you gather your tools and supplies, put safety first: wear rubber gloves, eye protection, and a mask if you’ll be scrubbing dusty grout or using bleach. Make sure the room is well ventilated by opening windows or running a fan.
You’ll need a stiff brush, microfiber cloths, bucket, mild detergent, baking soda, hydrogen peroxide, and optional oxygen bleach. Keep a spray bottle and grout sealer handy.
If staining or recoloring, pick grout colorants that match existing lines—test small areas for color matching.
Have rags and water for quick rinses, and store chemicals away from children and pets.
Safe DIY Cleaners and When to Use Them
Because grout reacts differently to stains and sealants, you’ll want to match the cleaner to the job: mild soap and baking soda for light surface dirt, hydrogen peroxide or diluted bleach for stubborn discoloration on unsealed grout, and oxygen-based cleaners for general brightening without harsh fumes.
You’ll also consider grout coloring and sealing techniques after cleaning to protect results. Choose based on grout type, ventilation, and nearby surfaces. Test a small area first.
Common safe DIY options:
- Mild dish soap and warm water
- Baking soda paste for gentle scrubbing
- Hydrogen peroxide for whitening
- Diluted bleach for mold on unsealed grout
- Oxygen bleach for routine brightening
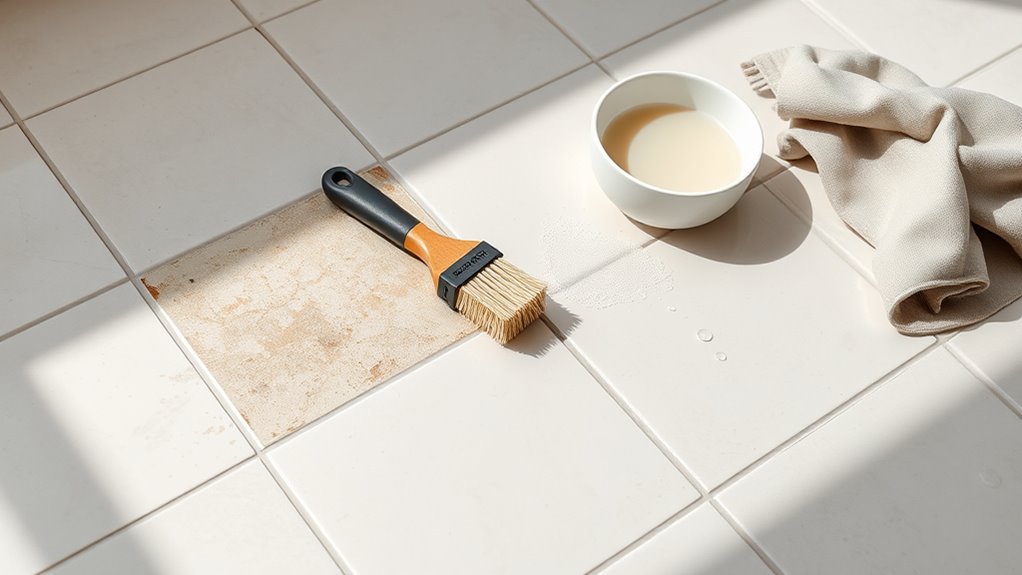
How to Deep Clean White Grout on Porcelain & Ceramic
If your porcelain or ceramic tile grout has deep stains or grime that routine cleaning won’t touch, you’ll need a targeted deep-cleaning approach that restores whiteness without damaging the tile. Start by vacuuming or sweeping to remove surface debris.
If grout has deep stains that routine cleaning won’t touch, start by vacuuming or sweeping the surface debris.
Apply a paste of baking soda and hydrogen peroxide, let it sit 10–15 minutes, then scrub with a stiff nylon brush. Rinse thoroughly and dry.
For persistent discoloration, try an oxygen bleach soak (follow label directions).
After cleaning, consider color enhancement via grout dyeing to uniformly restore appearance and protect against future stains; test small areas first.
How to Clean Grout on Natural Stone and Other Sensitive Tiles
Porcelain and ceramic can take stronger cleaners, but natural stone and other sensitive tiles need gentler care to avoid etching or discoloration. You’ll protect stone while improving grout appearance by using pH-neutral cleaners and soft tools. Focus on safe color restoration and mild stain removal methods.
- Test any product on a hidden spot first.
- Use pH-neutral cleaner or stone soap only.
- Apply with a soft brush or cloth, not wire.
- Rinse thoroughly and dry to prevent residue.
- Seal grout with a stone-safe sealer after drying.
Work patiently; aggressive scrubbing risks permanent surface damage.
Remove Stubborn White Grout Stains and Mildew
When grout’s surface won’t budge with routine cleaning, tackle stains and mildew with targeted treatments that break down mold and lift deeply set grime without harming tile.
You’ll begin by testing a small area with a diluted bleach or hydrogen peroxide solution to confirm color restoration won’t be harmed.
Apply a paste of baking soda and peroxide for stubborn spots, scrub with a nylon brush, then rinse.
For mildew, use a mildew-specific cleaner or vinegar for non-sensitive tile, letting it sit before agitation.
Rinse thoroughly, dry to prevent recurrence, and consider a grout sealer after successful stain removal.
Daily and Weekly Maintenance to Keep Grout Bright
Keep your white grout bright by wiping up spills and soap scum daily so stains don’t set.
Once a week, give the grout a focused scrub with a brush and cleaner to remove buildup.
Every few months, apply a grout sealer to prevent stains and cut down on cleaning time.
Daily Spot Wiping
Although daily grout care sounds small, wiping spots as they appear prevents stains from setting and saves you time later. You’ll act fast with a microfiber cloth and mild cleaner, avoiding abrasive scrubs that can ruin color matching or break down grout sealing.
Make a quick habit after meals and spills so dirt never bonds.
- Keep a spray bottle with pH-neutral cleaner handy.
- Use microfiber for gentle, effective pickup.
- Blot rather than rub to protect grout lines.
- Check for discoloration to note needed repairs.
- Dry thoroughly to prevent mildew and staining.
Weekly Deep Scrub
Ready for a weekly reset? You’ll deep scrub grout to restore grout color and remove embedded dirt. Mix a baking soda paste with water, apply, and let sit 10 minutes. Scrub with a stiff brush, rinse, and inspect. Use a hydrogen peroxide spot treatment for stubborn stains. After drying, evaluate sealing techniques you plan to use later to protect results (don’t start preventive sealing now). Repeat in high-traffic zones.
| Task | Product | Time |
|---|---|---|
| Paste clean | Baking soda + water | 10 min sit |
| Scrub | Stiff brush | 5–10 min |
| Spot treat | H2O2 | 5 min |
Preventive Sealing Routine
Want grout that stays bright between deep scrubs? Seal daily trouble spots and schedule weekly care to prevent dirt buildup. Use sealers that offer slight color matching if needed, and keep stain removal tools ready.
- Wipe spills immediately with a damp cloth.
- Vacuum or sweep daily to stop grit abrasion.
- Mop weekly with pH-neutral cleaner; avoid harsh chemicals.
- Reapply grout sealer every 6–12 months, focusing on high-traffic areas.
- Keep a stain removal paste (baking soda + water) for quick spot treatment.
Stick to this preventive sealing routine and you’ll cut down on intensive restorations.
Recolor, Seal, or Repair Damaged Grout
If your grout is stained, cracked, or losing color, you can bring it back to life by recoloring, sealing, or repairing the damaged areas—each fix addresses a different problem and lasts for different lengths of time.
For color enhancement, use a grout pen or dye to match tiles and hide surface stains quickly; that’s great for grout restoration when structure is sound.
Sealants repel future dirt and moisture—apply after cleaning and allow cure time.
For cracks or missing grout, remove loose material, refill with matching grout, then seal when dry.
Work in small sections and follow product instructions carefully.
When to Call a Pro (Costs vs. DIY Trade-Offs)
After you’ve tried recoloring, sealing, or patching grout, you’ll need to weigh whether to keep going DIY or hire a pro. Decide based on time, skill, and results you want.
Grout color matching can be tricky; pros nail consistency. Compare professional cleaning vs DIY costs: estimate labor, materials, and potential rework.
- Extensive staining or mold that returns quickly
- Uneven grout lines after repair or poor adhesion
- Large areas needing complete replacement
- Tight timelines or lack of tools and confidence
- Desire for guaranteed color match and warranty
If costs approach pro quotes, hire someone.
Frequently Asked Questions
Can Steam Cleaners Damage Grout or Tile Finishes?
Yes — steam cleaners can damage grout or tile finishes if you use excessive heat or pressure; you should test a small area, avoid unsealed grout, and follow grout sealing and tile polishing guidelines to protect surfaces.
Will Bleach Harm Colored Grout or Cause Discoloration?
Yes — bleach can strip colored grout and cause discoloration, so you’ll hesitate as it foams and fades. Protect color preservation by testing first, and try bleach alternatives like oxygen bleach or vinegar-baking-soda mixes instead.
How Long Should Grout Sealer Cure Before Foot Traffic?
You should wait 24–48 hours after grout sealing before allowing regular foot traffic; curing time varies by product and humidity, so check the manufacturer’s instructions and avoid heavy traffic for 72 hours if you’re unsure.
Can Pets or Children Safely Be in Rooms During Cleaning?
You shouldn’t have pets or children present during strong grout cleaning; you’ll guarantee pet safety and child safety by ventilating, using mild cleaners, wiping thoroughly, and keeping them out until fumes clear and the sealer fully cures to avoid exposure.
Are There Eco-Friendly Commercial Grout Cleaners Available?
Absolutely — you can: Eco friendly options exist, like plant-based commercial cleaners and concentrated enzyme sprays; natural cleaning methods inspire them, so you’ll choose safer brands, read labels, follow instructions, and limit exposure for pets and kids.
Conclusion
You’ve got the tools and know-how to make your grout sing again—think of it as giving your floor a little Renaissance. With regular care, quick touch-ups, and the right cleaners, those dull lines can return to bright, clean seams that frame your room like fresh paint on a gallery wall. If a stubborn stain resists, call a pro before it’s a fresco lost to time; otherwise, enjoy the renewed glow underfoot.