How to Install Laminate Flooring on Stairs: A Step-by-Step Walkthrough
You can install laminate on standard stairs if you measure carefully, use stair nosing, risers, and proper underlayment, and secure treads with adhesive and fasteners. Take 1–2 days for a typical staircase, work with a partner, and acclimate materials 48 hours first. Prep by removing old coverings, repairing the substructure, and dry‑fitting pieces. Finish edges with trim, caulk seams, and add non‑slip options for safety; continue for a full, step‑by‑step walkthrough.
Can You Install Laminate Flooring on Stairs and How Long It Takes
Yes — you can install laminate on stairs, but it needs the right tools (saws, adhesive/trim, stair nosing) and careful measuring.
A typical DIY job for a standard staircase takes a weekend. Hire a pro if your stairs are irregular, have open risers, or you’re uncomfortable with precise cuts and secure nosing installation.
If you’ve done flooring before and have patience, it’s an achievable DIY; otherwise hiring a pro saves time and guarantees safety.
Short verdict (suitability, required tools, time estimate)
If you’re handy and willing to follow precise steps, you can install laminate on stairs safely—provided you choose stair-specific nosing and adhesive or mechanical fasteners designed for laminate.
For “how do i install laminate flooring on stairs,” expect basic carpentry tools: mitre saw, jigsaw, drill, adhesive, spacers, and tape measure.
Plan 1–2 days for an average staircase; two people help.
When to hire a pro vs DIY
When you’re confident with cutting, fitting, and finishing trim but lack experience with stair nosing, tight miters, or structural repairs, consider hiring a pro—those tasks demand precision and mistakes are costly.
Weigh your skills, available time, and tools. DIY if stairs are simple, you have correct tools, and can follow templates.
Hire a pro for complex profiles, uneven structure, tight deadlines, or safety concerns.
Basic Understanding What Is Laminate Stair Installation and Why Choose It
When you install laminate on stairs, you’ll be fitting stair nosing, risers, and treads with tongue-and-groove or adhesive methods to create a finished, uniform look.
You’ll weigh pros like affordability, easy maintenance, and wide style choices against cons such as potential slipperiness and limited lifespan compared with wood.
Keep safety and durability front of mind by choosing textured or anti-slip options, proper underlayment, and secure fastening.
What laminate stair installation involves
Installing laminate on stairs transforms plain treads and risers into a durable, attractive surface that mimics wood without the cost or maintenance.
You’ll measure, cut, and fit planks, secure nosing, and finish edges for safety and style.
Visualize the process:
- Clean, level stair structure
- Precise plank measuring and cutting
- Secure adhesive or screws with nosing
- Trim and seal edges for a clean look
Pros and cons of laminate on stairs
After preparing and fitting planks, you’ll want to weigh whether laminate is the right choice for your stairs. Laminate is affordable, easy to install, and looks realistic, but it can be slippery, less repairable, and sensitive to moisture. Consider traffic and maintenance before choosing.
| Benefit | Drawback | When to Choose |
|---|---|---|
| Low cost | Slippery | Low-moisture areas |
| Fast install | Hard to refinish | Moderate traffic |
| Wide styles | Water-sensitive | Budget projects |
Key safety and durability considerations
Because stairs carry more impact than a flat floor, you’ll need to prioritize both safety and durability when choosing and installing laminate.
Choose high-density, wear-resistant laminate with proper edge sealing. Install anti-slip nosing and secure each tread and riser to prevent movement.
Use moisture barriers on exposed stairways and reinforce fastenings at high-traffic zones to prevent squeaks and premature wear.
Materials, Tools, and Preparation
Before you start, gather the right materials—treads, risers, nosing, adhesives, and underlayment—and the proper tools like saws, routers, adhesive guns, sanders, and measuring devices.
Measure each stair carefully (tread depth, riser height, stringer width, and nosing length) so cuts and fittings are precise.
Finally, choose a laminate grade suited for stairs and pick a nosing style that matches both safety and aesthetics.
Materials checklist (treads, risers, nosing, adhesives, underlayment)
Getting your materials right will save time and prevent mistakes once you start installing laminate on the stairs.
You’ll gather stair treads, risers, and matching nosing, plus adhesive and underlayment suited for stairs. Confirm measurements and finish match before cutting.
Visualize the pieces:
- Prefinished laminate treads
- Vertical risers
- Stair nosing profiles
- High-strength adhesive and thin underlayment
Tools checklist (saws, routers, adhesive guns, sanding tools, measuring tools)
You’ll need a compact but complete toolkit to install laminate on stairs: a circular saw or miter saw for straight and angled cuts, a jigsaw for notches and irregular shapes, a router with a clean-up bit for precise nosing and edge profiles, a caulk/adhesive gun rated for construction adhesives, sanding tools (orbital sander or sanding block) for smoothing cut edges, and accurate measuring tools—tape measure, combination square, carpenter’s pencil, and a level—so every piece fits tight and runs true.
- sharp blades and extra bits
- dust mask and eye protection
- clamps and straightedge
- rubber mallet and pull bar
How to measure stairs accurately (tread, riser, stringer, nosing)
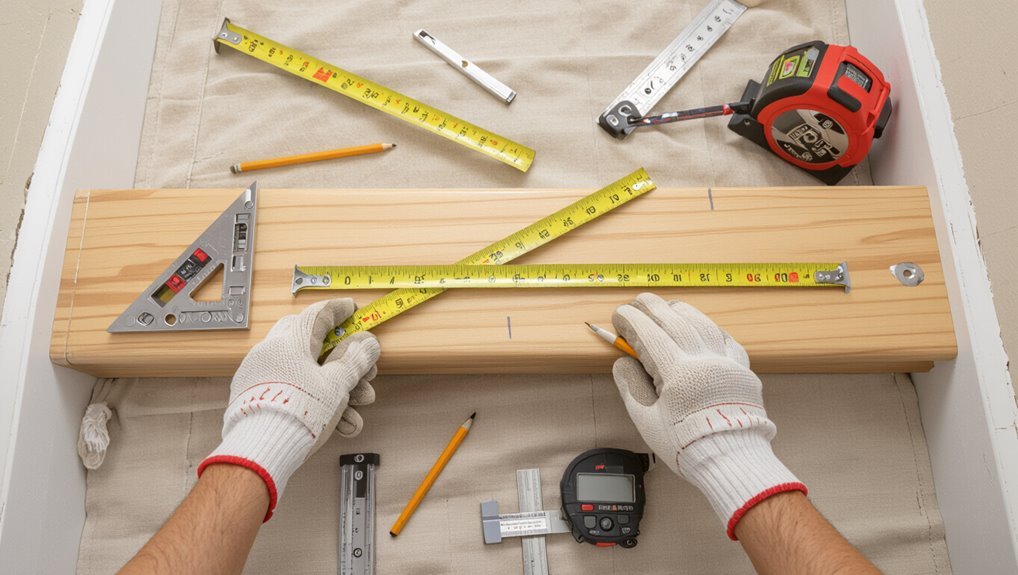
Measure each component carefully so your laminate fits cleanly and safely: record the tread depth (front to back), riser height, stringer width and angle, and nosing projection, noting any variations between steps.
Use a tape measure and angle protractor; measure at multiple points on each step. Log dimensions, mark high or low spots, and double-check totals before cutting to guarantee consistent, snug fits.
Selecting the right laminate grade and stair nosing styles
Now that you’ve confirmed accurate stair dimensions, pick a laminate grade and nosing style that match the traffic and look you want. Choose AC3 for moderate, AC4/AC5 for heavy commercial use. Match nosing: rounded for safety, square for modern, bullnose for comfort.
| Grade | Use case |
|---|---|
| AC3 | Homes |
| AC4 | Busy homes |
| AC5 | Commercial |
Step-by-Step Installation Full Walkthrough
Now you’ll walk through the installation step by step, starting with a careful inspection of the stairs to fix squeaks and clean the surface.
Remove old coverings and repair or level the substructure, then let the laminate and underlayment acclimate to the room.
Measure, cut, and dry-fit treads, risers, and nosing, and finally install risers using either adhesive or mechanical fasteners.
Step 1 Inspect and prepare the staircase (structure, squeaks, clean)
Start by giving the staircase a careful once-over: check that the stringers and treads are solid with no rot, pull on each step to detect loose boards or squeaks, and clear away dust, nails, and debris so you’ve got a clean, stable surface to work on.
- Run your hand along edges for gaps
- Listen for hidden squeaks
- Sweep and vacuum thoroughly
- Remove nails and staples
Step 2 Remove old covering and repair substructure (fix squeaks, level, replace boards)
Pull up any old carpet, vinyl, or treads and inspect the exposed substructure for damage.
Remove nails, glue, and debris.
Tighten or replace loose or rotten stringers and risers, sister joists where needed, and shim or plane uneven treads.
Secure squeaky areas with screws or adhesive, replace damaged boards, and guarantee each step is level and solid before proceeding.
Step 3 Acclimate laminate and underlayment to room conditions
Because laminate and underlayment expand and contract with humidity and temperature, you should let them acclimate in the stairwell area for at least 48 hours before installing.
Lay unopened boxes flat, stack them no more than two high, and keep underlayment rolls standing upright.
Keep room temperature and humidity stable, avoid drafts, and check boards for defects before you begin cutting or fitting.
Step 4 Cut and dry-fit treads, risers, and nosing pieces
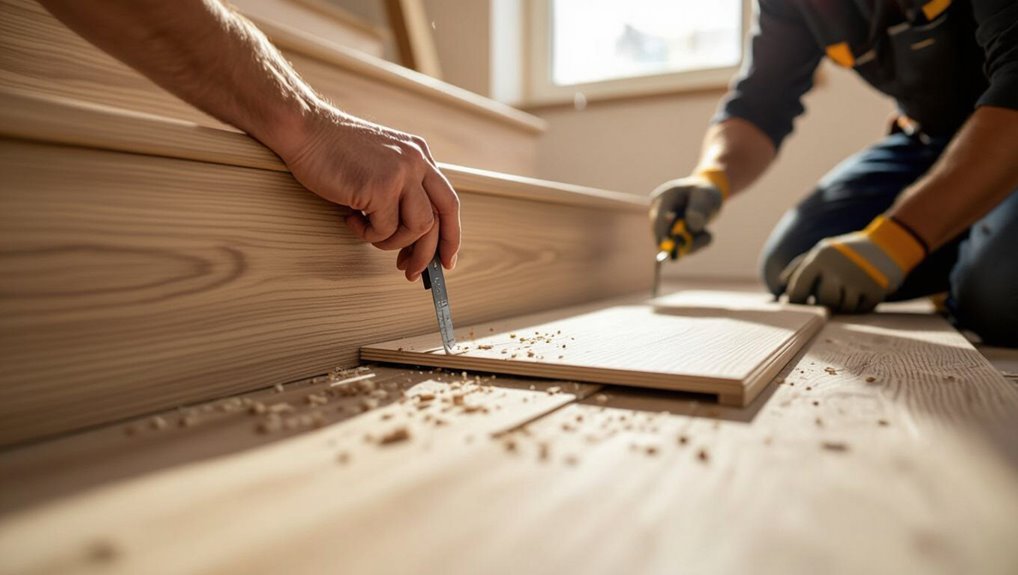
Measure and mark each stair carefully, then cut your laminate treads, risers, and nosing pieces to fit before fastening anything.
Test-fit every piece, ensuring tight joints and consistent overhangs. Trim edges for clearance at stringers and landings.
Label pieces for their stair position, check alignment front-to-back, and make minor adjustments now so installation proceeds smoothly when you permanently attach components.
Step 5 Install risers (adhesive vs mechanical fastening)
Now you’ll attach the risers, which are what give each stair its finished vertical face and help hide the substructure. You can secure them with construction adhesive, mechanical fasteners, or a combination of both depending on your substrate, riser material, and local code.
Choose method, then:
- Spread adhesive bead or brace with clamps
- Countersink screws into framing
- Use trim head nails for thin laminates
- Seal joints and gaps for a clean look
Step 6 Install treads and attach stair nosing (adhesive, screws, clamps)
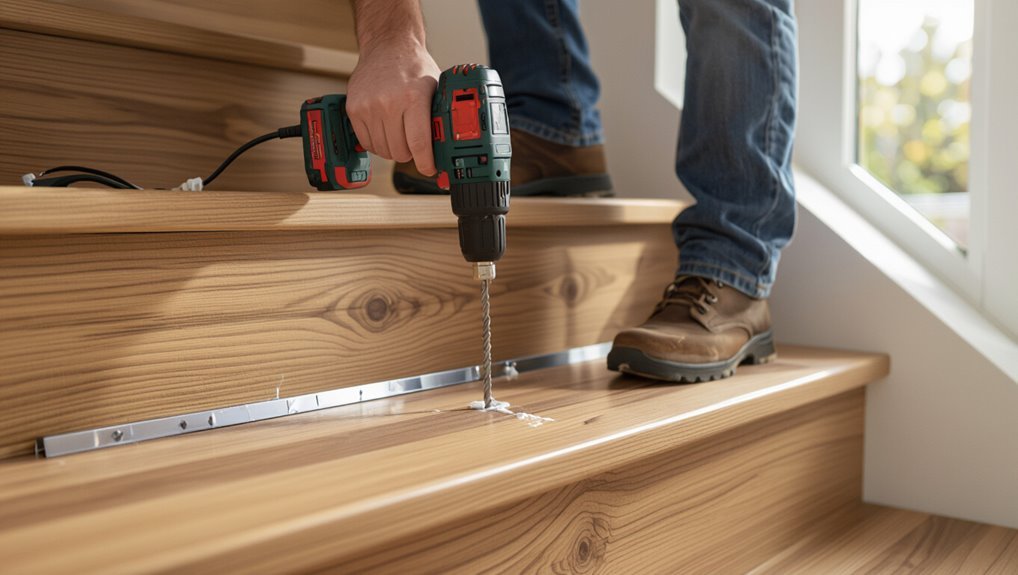
Lay each tread in place and secure it before moving on to the next step so the staircase stays true and safe; you’ll use construction adhesive plus screws or clamps depending on your tread material and whether you’re installing a separate stair nosing or an integrated nosing profile.
Press treads firmly, clamp until adhesive sets, then predrill and fasten screws where specified.
Check alignment and remove excess adhesive promptly.
Step 7 Finish edges, transitions, and end caps
With your treads set and nosing secured, finish the exposed edges and junctions to give the stairs a professional look and protect them from wear.
Install matching edge trim and connector strips at landings, caulk seams with color-matched flexible sealant, and fasten end caps where laminate meets risers or carpet.
Sand minor burrs, check alignment, and tighten any loose fasteners.
Step 8 Clean up, cure time, and first-use recommendations
1. Clean up debris, vacuum seams, and wipe surfaces with a damp cloth.
Let adhesives and sealants cure per manufacturer instructions—usually 24–48 hours. Avoid heavy traffic, moisture, and rolling loads until fully set.
Replace trim, reinstall hardware, and inspect for loose pieces.
For first use, walk gently, test tread grip, and address any squeaks or gaps immediately to prevent damage.
Variations and Alternatives
You can choose between floating laminate treads, glued-down installations, or clip systems depending on how permanent and stable you want the stairs to be.
Decide whether you’re laying over existing carpet or bare wood, since each base needs different prep and fastenings.
You can also combine laminate with a runner or add anti-slip strips for extra traction and style.
Floating laminate treads vs glued-down vs clip systems
Three common methods—floating laminate treads, glued-down installations, and clip systems—each offer distinct pros and trade-offs for stair projects. You’ll choose based on noise, permanence, and ease. Floating is quick and removable; glued-down is solid and permanent; clip systems balance stability and replaceability.
| Method | Pros | Cons |
|---|---|---|
| Floating | Removable | Slight movement |
| Glued | Very stable | Permanent |
| Clip | Replaceable | Requires parts |
Installing over carpeted stairs vs bare wood
When deciding whether to install laminate on carpeted stairs or bare wood, consider prep time, stability, and long-term wear.
Removing carpet gives you a solid substrate and cleaner results, while laying over carpet can save demolition time but often leads to movement and a shorter lifespan.
You should remove padding, inspect and repair treads, and fasten laminate to a rigid, level surface for durability.
Combining laminate with stair runners or anti-slip strips
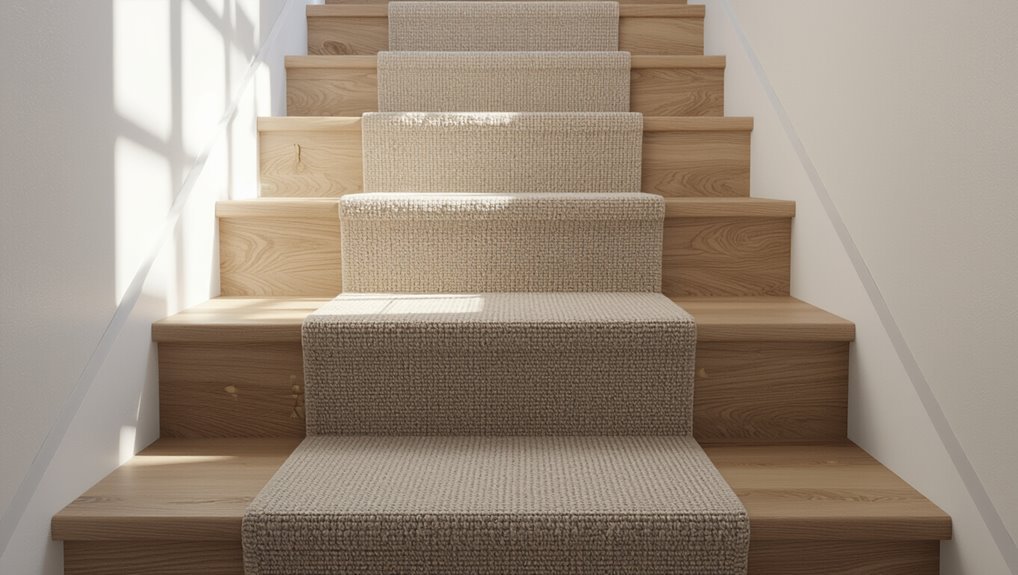
Although laminate alone can look sleek, pairing it with a runner or anti-slip strips gives you both style and safety—runners add cushioning and visual warmth while adhesive or screw-mounted strips boost traction on high-traffic steps.
You’ll measure carefully, secure runners with stair rods or adhesive, and place strips on tread noses.
Balance aesthetics, maintenance, and code requirements for a durable, safe finish.
Common Problems and How to Fix Them
When you spot gaps, buckling, or loose treads, check for improper underlayment, moisture, or fastener issues and tighten, replace, or resecure the affected pieces.
If you hear squeaks after installation, locate the source with a walk test and fix it by adding screws, shims, or adhesive where the tread or riser moves.
For visible seams or uneven nosing, trim or plane the edges, adjust the nosing alignment, and use filler or a replacement nosing for a smooth finish.
Problem: Gaps, buckling, or loose treads causes and fixes
If you see gaps between stair treads, buckling, or loose pieces, the problem usually traces back to moisture, improper acclimation, or incorrect fastening during installation. Identifying the exact cause lets you choose the correct fix—tighten or replace fasteners for loose treads, confirm proper subfloor fastening and add adhesive or screws where laminate is separating, and address moisture sources or re-acclimate and reinstall planks that’ve expanded or warped.
- warped plank lifting at edges
- visible seam gaps along risers
- loose nosing or tread movement
- cupping where moisture pooled
Problem: Squeaks after installation diagnosis and remedies
Because squeaks can come from several sources—loose fasteners, gaps under laminate, or movement between the riser and tread, you’ll want to pinpoint where the sound originates before making repairs.
Walk stairs to locate squeaky spots, then tighten or add screws through the tread into stringers, inject construction adhesive into gaps, shim voids, or secure loose risers.
Recheck and repeat until quiet.
Problem: Visible seams or uneven nosing correction techniques
Visible seams or an uneven nosing stand out on stairs and undermine the clean, finished look you worked for, but you can correct them without ripping everything out.
Tighten loose boards, trim or sand high edges, and use a rubber mallet to realign plank joints.
Fill small gaps with color-matched wood filler or flexible sealant, then clamp until set and finish with matching trim.
Best Practices, Tips, and Safety
To keep your laminate stair installation safe and long-lasting, follow proven best practices like proper subfloor prep, secure nosing, and correct adhesive or fastening.
Use anti-slip nosing, tread strips, or textured finishes and check local code for rise/run and handrail requirements.
Finally, maintain your stairs with regular cleaning, prompt repairs, and humidity control to extend their life.
Installation best practices for longevity and safety
Good installation decisions start with planning: gather quality materials, measure stair dimensions precisely, and choose the right underlayment and nosing for your traffic levels.
You’ll work methodically, verify fits, and secure pieces firmly. Keep fasteners flush and seams tight.
- Smooth, even risers
- Snug tread-nosing joints
- Consistent expansion gaps
- Clean adhesive lines
Anti-slip and code compliance recommendations
While you’ll want a finished look, prioritize proven anti-slip measures and local stair codes from the start: pick textured or slip-resistant nosings, use non-skid adhesive strips or coatings on treads, and verify tread depth, riser height, and handrail requirements against your jurisdiction’s standards so your installation stays both safe and compliant.
Also guarantee edge visibility with contrasting nosing, secure nosings firmly, and document compliance.
Maintenance tips to extend life of laminate stairs
Protect your investment with simple, regular care: sweep or vacuum stairs weekly to remove grit that scratches laminate, wipe spills immediately with a damp (not wet) cloth, and place felt pads on furniture or heavy objects you move up and down.
- Soft-bristled broom clearing sand
- Quick spot-clean with microfiber
- Non-abrasive cleaner for stubborn marks
- Inspect edges and risers monthly for gaps
Cost, Time, and When to Hire a Pro
You’ll want a clear cost breakdown—materials, labor, and extras like stair nosing or adhesives—so you can budget accurately.
Expect roughly 10–30 minutes per stair for a DIY install or faster with a pro, and a full staircase can take a day to a weekend depending on prep and drying times.
Hire a professional if you’re unsure about structural issues, complex stair shapes, or want guaranteed, code-compliant results.
Typical cost breakdown (materials, labor, extras)
Expect to spend most on materials and labor, with extras like stair nosing, underlayment, and finishing supplies adding a modest amount. You’ll budget for laminate planks, riser/tread pieces, adhesives, and tools; labor varies by complexity. Compare DIY vs pro quotes and factor in waste and unexpected repairs.
| Item | Typical cost range |
|---|---|
| Materials | $200–$800 |
| Labor/extras | $150–$1,200 |
Time estimates per stair and per staircase
Now that you’ve seen how costs break down, it’s helpful to look at how long the work will take so you can schedule the job and compare DIY versus pro timelines.
Plan about 20–45 minutes per stair for a DIYer (removal, fitting, trim). A pro typically does 8–15 minutes per stair.
Expect a small staircase (12 steps) to take 4–9 hours DIY, 1.5–3 hours pro.
Signs the job needs a professional installer
If your staircase has uneven treads, tight or curved turns, or a mix of materials—especially with open risers or delicate trim—you should hire a pro; they’ve got the tools and experience to handle tricky cuts, guarantee consistent nosing alignment, and avoid costly mistakes that slow DIYers down.
Expect higher labor costs but faster completion, cleaner finishes, and warranty protection when complications arise.
Tools and Material Suppliers Where to Buy and What to Look For
When shopping for stair materials, you’ll want specs that match stair traffic—look for higher AC ratings, thicker wear layers, and a clear warranty that covers stair use.
Compare ready-made DIY stair kits for uniform nosing and faster install against custom-cut boards if you need exact fits or unique profiles.
Check supplier return policies, warranty terms, and whether they offer cutting or installation services before you buy.
Recommended material specs and warranty considerations
Start by choosing stair-specific laminate that’s rated for high-traffic areas and has a durable AC3 or AC4 abrasion class, a minimum 7–9 mm thickness for rigidity, and an attached or compatible stair nose profile; these specs help guarantee the treads resist wear, reduce flex, and align with most manufacturers’ installation guidelines and warranties.
- Wear-resistant textured surface
- Solid core for reduced flex
- Matching stair nose availability
- Clear manufacturer warranty terms
Comparing DIY kits vs custom-cut materials
Having chosen a stair-specific laminate with the right abrasion class and thickness, you’ll next decide whether a DIY kit or custom-cut materials suit your project and budget. DIY kits save time and include nosing; custom cuts fit odd stairs and look seamless. Choose suppliers offering returns and warranties.
| Option | Pros | Cons |
|---|---|---|
| DIY kit | Fast, complete | Less precise |
| Custom | Tailored fit | Higher cost |
| Hybrid | Mix of both | Coordination needed |
FAQs
You’ve got practical questions about stairs—like using laminate on curved or spiral steps, whether underlayment is needed, and how to make treads slip-resistant.
You might also wonder if stair nosing can be painted or refinished and how long laminate typically lasts on stairs.
We’ll answer each clearly so you can decide what works best for your setup.
Can laminate be used on curved or spiral stairs?
Wondering whether laminate works on curved or spiral stairs? You can, but it’s challenging.
Laminate’s rigid planks don’t bend, so you’ll need narrow strips, custom cutting, and careful adhesive or molding to follow curves.
Consider flexible vinyl planks or engineered wood for tight radii.
If you proceed with laminate, plan templates, patience, and professional help for neat, safe results that resist gaps and trip hazards.
Is underlayment required on stairs?
Do you need underlayment on stairs? Generally, yes—underlayment cushions, evens minor subfloor imperfections, and reduces noise when installing laminate on stairs.
Some installations omit it when using prefinished stair nosing or glued-down stair treads; follow manufacturer guidelines.
Use a thin, dense underlayment rated for stairs to avoid height or fit issues, and guarantee secure adhesive or fasteners for safety and durability.
How do you make laminate stairs slip-resistant?
How can you make laminate stairs safer without changing their look?
Add clear non-slip adhesive strips or transparent anti-slip film to treads; they preserve appearance while improving traction.
Apply a low-profile textured nosing or discreet rubber inserts on edges.
Keep surfaces clean, dry, and free of polish.
Regularly check and replace worn strips to maintain grip and safety.
Can you paint or refinish laminate stair nosing?
Curious whether you can paint or refinish laminate stair nosing? You can’t sand or refinish laminate like solid wood because its wear layer is a printed resin.
Painting is possible if you clean, scuff lightly, prime with a bonding primer, then use durable paint and sealant.
Expect shorter lifespan and possible peeling; replacement remains the most reliable long-term option.
How long does laminate on stairs typically last?
Wondering how long laminate on stairs will hold up? Expect 10–20 years with moderate traffic and proper installation.
Durability depends on quality (AC rating), maintenance, and moisture exposure. High-traffic stairs may wear faster; using stair nosing, rugs, and regular cleaning extends life.
Replace damaged treads promptly to prevent structural issues and keep stairs safe and attractive.