How to Clean Floors Like a Professional Using the Methods Pros Swear By
You’ll start like a pro by removing grit with a broom or vacuum, spot-treating stains, and choosing a cleaner made for your floor type. Work from the farthest corner toward the exit, use microfiber mops or wet/dry vacs for moisture control, and rinse or buff as needed to avoid residue. For deep grime, pre-soak and scrub grout, use pH-neutral products on stone and wood, and follow manufacturer care. Keep going and you’ll pick up pro tips for tools, scheduling, and fixes.
How to Clean Floors Like a Professional Quick Answer
You’ll start by sweeping or vacuuming, spot-treating stains, then mopping with the right cleaner for your floor type.
Use professional techniques—microfiber mops, proper dilution, and systematic sections—when floors are heavily soiled or need a lasting finish; stick to regular quick cleanups for routine maintenance.
Knowing when to escalate saves time and preserves your floors.
One-paragraph direct method summary
When you want professional results fast, start by sweeping or vacuuming to remove grit.
Then spot-treat stains, choose a cleaning solution suited to your floor type, and mop from the farthest corner toward the exit so you don’t re-soil cleaned areas.
Finish by rinsing if needed and drying with a microfiber cloth or fan to prevent streaks and water damage.
You’ll learn how to clean the floor like a professional efficiently.
When to use pro methods vs. regular cleaning
If you clean daily and only deal with light dirt, stick to regular routines—sweeping, quick vacuuming, and a basic mop—because they’re fast and gentle; reserve professional methods for deep grime, heavy traffic areas, stubborn stains, or before events and seasonal maintenance when you need lasting results.
Use pros’ techniques when stains persist, odors linger, or warranties require specific care; otherwise, keep it simple.
Basic Understanding Types of Flooring and Why Methods Differ
You’ll treat each floor type differently because materials react to water, cleaners, and abrasion in unique ways.
Hardwoods need gentle, low-moisture care while laminate and vinyl look-alikes can handle different cleaners but warn against excess water.
Tile and grout require attention to porosity and sealing.
Natural stone is pH-sensitive and needs specific products, and concrete or sealed surfaces have their own sealing and maintenance needs.
Hardwoods: characteristics and cleaning considerations
Because hardwoods combine natural beauty with sensitivity, they demand cleaning methods that protect finish and grain while removing dirt.
You’ll dry-dust or vacuum with a soft-brush attachment, avoid excessive water, and use pH-neutral cleaners made for wood.
Wipe spills promptly, work with the grain, and rotate rugs and furniture to prevent uneven wear and sun fading that damages finish and boards.
Laminate and vinyl: similarities and cautions
Although they can look strikingly similar at a glance, laminate and vinyl floors differ in construction and moisture tolerance, so you should treat them with slightly different care.
Clean both with a soft broom or vacuum and a damp microfiber mop, but avoid saturating laminate.
Use pH-neutral cleaners for vinyl, skip abrasive tools, and address spills quickly to prevent edge swelling or adhesive failure.
Tile and grout: porosity and sealing issues
If laminate and vinyl demand different moisture and cleaner choices, tile and grout bring another set of concerns rooted in porosity and sealing.
You’ll check tile type and grout porosity before choosing cleaners. Unsealed or worn grout soaks stains and moisture; sealing reduces absorption and simplifies maintenance.
Use pH-neutral cleaners for glazed tile and re-seal grout periodically to protect and prolong results.
Natural stone (marble, slate, travertine): pH sensitivity
When you’re dealing with natural stone like marble, slate, or travertine, remember they’re chemically sensitive and react differently to cleaners than tile or vinyl.
Use pH-neutral cleaners and soft cloths, avoid acidic or alkaline products that etch or dull surfaces, and test any product in an inconspicuous spot.
Rinse thoroughly, dry promptly, and reseal as recommended to protect finish and longevity.
Concrete and sealed surfaces: special needs
Shifting from delicate natural stone to concrete, you’ll find a very different set of needs: concrete is porous and can absorb stains, but sealed concrete behaves more like a hard, nonporous surface that resists moisture and grime.
For unsealed concrete, scrub with pH-neutral cleaner and a stiff brush; for sealed surfaces, use mild detergent, microfiber mop, and avoid abrasive tools that can damage the sealant.
Carpets and area rugs: when to deep-clean vs. spot-treat
Because carpets and area rugs trap dirt, allergens, and spills differently than hard floors, you’ll want to know when a full deep-clean is worth the effort versus a quick spot-treat.
Deep-clean if traffic patterns, persistent odors, embedded dust, or seasonal maintenance demand it.
Spot-treat fresh spills, isolated stains, or pet accidents immediately with appropriate cleaners.
Test cleaners first and dry thoroughly to prevent mold.
Professional Tools and Products You Need
You’ll start by stocking the essential tools pros use—brooms, microfiber mops, scrub brushes, and reliable vacuums—then match cleaning solutions to each floor type so you don’t damage finishes.
I’ll also explain which specialized machines (steam cleaners, extractors) are worth buying and when it’s smarter to rent them for big jobs.
That way you’ll have the right gear and products for every situation.
Essential tools pros use
Think of pro-level cleaning as having the right toolkit: with a few high-quality, purpose-built tools you’ll work faster and get better results.
You should invest in durable gear and learn proper use.
- Microfiber mop with removable heads for quick, streak-free cleaning.
- Adjustable vacuum with hard-floor and carpet settings.
- Flat mop system and washable pads for efficient drying and edge reach.
Recommended cleaning solutions by floor type
When you match cleaners to your floor’s material, you’ll get cleaner results without damage; use pH-neutral solutions for sealed hardwood, enzyme or mild alkaline cleaners for vinyl and LVT, and a low-pH tile cleaner for grout-prone ceramic or porcelain. Choose diluted concentrates, spot-test, and rinse well.
| Floor type | Cleaner | Frequency |
|---|---|---|
| Hardwood | pH-neutral | Weekly |
| Vinyl/LVT | Enzyme/mild alk. | Weekly |
| Tile/Grout | Low-pH | Biweekly |
When to rent vs. buy equipment (steam cleaners, extractors)
If you’re weighing steam cleaners or extractors for a job, compare frequency, budget, and the task’s scope before deciding to rent or buy.
Rent for one-off deep cleans, specialty stains, or infrequent jobs to save money and avoid storage.
Buy if you clean often, need quick access, or will amortize cost across projects.
Factor maintenance, warranties, and resale value.
Step-by-Step Professional Cleaning Process (General Workflow)
Start by prepping the area: clear obstacles, remove dust, and pre-treat stains so you’re ready to clean efficiently.
Pick the correct cleaner and dilution, then use the right technique—mop, scrub, or machine—to get even coverage.
Finish by drying and buffing for a streak-free shine, then inspect and touch up any missed spots.
Step 1 Prep: clear, dust, and pre-treat
- You’ll prep like a pro: clear traffic, dust thoroughly, and pre-treat trouble spots so cleaning works faster and cleaner.
- Remove furniture and loose debris first to expose surfaces.
- Dust edges and corners with a microfiber broom or vacuum attachment.
- Pre-treat stains and high-traffic soil with an appropriate spot cleaner, letting it dwell briefly before you proceed.
Step 2 Choose the right cleaner and dilution
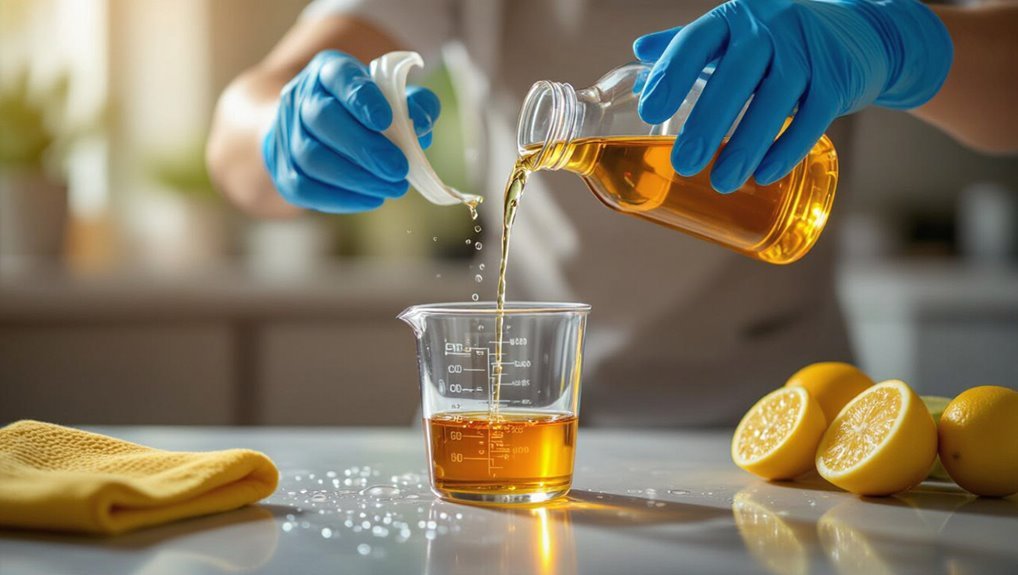
Now that surfaces are clear and trouble spots are pre-treated, pick a cleaner that matches your floor type and the soil you’re tackling.
Read labels for recommended dilutions, pH, and compatible surfaces. Use concentrated solutions sparingly; measure carefully.
For sealed wood, choose pH-neutral cleaners; for tile/grout, use alkaline or specific degreasers.
Test a small area before full application.
Step 3 Cleaning technique for even coverage (mopping, scrubbing, machine use)
Choose a method that matches your floor type and the soil level, and work systematically so you don’t miss spots: mop in overlapping S-patterns for hard, smooth surfaces; scrub grout and textured areas with a stiff brush or pad; and use a floor machine for large, heavily soiled expanses, keeping movement steady and avoiding excess solution.
Rinse or change water often, apply even pressure, and overlap passes to guarantee full coverage.
Step 4 Drying and buffing for streak-free finish
Dry and buff promptly after cleaning to prevent streaks and water spots; lingering moisture traps dirt and dulls the sheen.
Use absorbent microfiber mops or a wet/dry vacuum to remove remaining moisture, then follow with a dry microfiber or buffing pad.
Work in small sections, overlap passes, and keep pads clean.
Finish with light, circular buffs for even, streak-free shine.
Step 5 Post-clean inspection and touch-ups
After the floor looks dry and polished, inspect the area closely for missed spots, residue, or uneven sheen and address them immediately.
Walk the space under varied light, check edges and corners, and test high-traffic zones.
Reapply cleaner sparingly where needed, buff problem areas, and remove streaks with a microfiber pad.
Finish by replacing mats and verifying uniform finish.
Floor-Specific Professional Methods
Now you’ll match techniques to each floor type so you get professional results every time.
For hardwood, start with a dust-mop, use targeted cleaners and light buffing, and know when refinishing is needed;
for laminate and vinyl, dry-clean first, damp-mop, and never use wax or sealants.
For tile/grout, pre-soak and agitate before sealing;
for natural stone, use pH-neutral cleaners, poultices for stains, and a resealing routine;
for carpets and rugs, follow a strict vacuum protocol, spot-treatment sequence, and finish with hot-water extraction.
Hardwood: dust-mop, targeted cleaner, light buffing, refinishing triggers
When you care for hardwood the way professionals do, you start with a dust‑mop to remove grit, use a targeted cleaner for spots and grime, and finish with light buffing to revive sheen;
reserve refinishing for areas with wear, deep scratches, or recurring finish failure.
Clean spills quickly, test any cleaner in an inconspicuous spot, buff sparingly to avoid abrasion, and refinish only when touchups won’t help.
Laminate & vinyl: dry-clean first, damp-mop technique, avoid wax/sealants
Start by dry‑cleaning laminate and vinyl to lift grit and dust that can scratch the surface; use a microfiber dust mop or vacuum with a soft‑bristle attachment.
Then damp‑mop with a well‑wrung microfiber cloth and a pH‑neutral cleaner, working small sections and rinsing the mop.
Never use wax, polish, or sealants—those can cloud or damage the wear layer and void warranties.
Tile & grout: pre-soak, agitation tools, grout sealing process
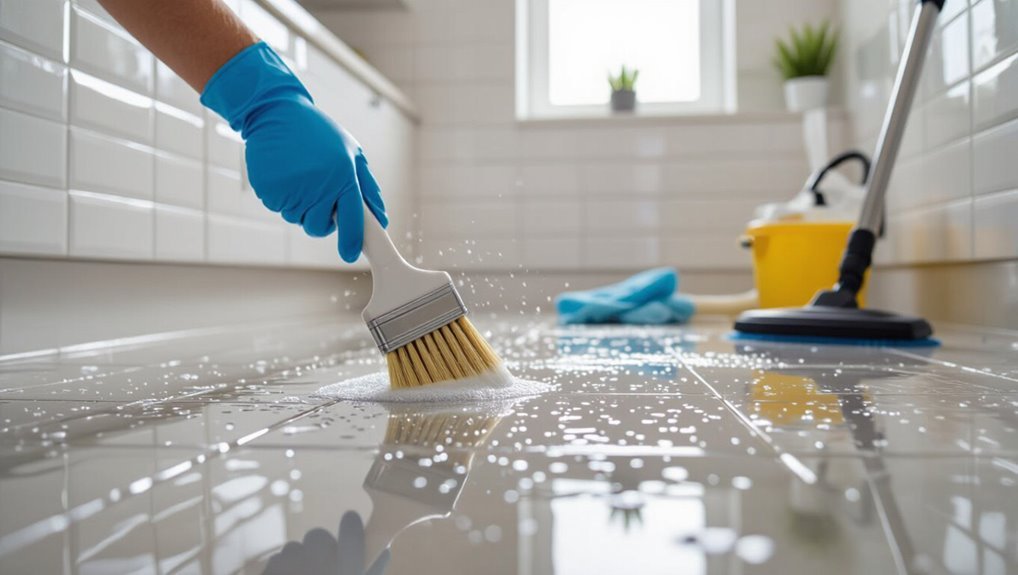
Tile and grout cleaning pays off when you pre‑soak stubborn soils, then use the right agitation tools and sealing steps to protect results.
Pre‑soak with a diluted alkaline cleaner, let dwell, then scrub grout lines with a stiff nylon brush or rotary brush attachment.
Rinse thoroughly, let dry, and apply a penetrating grout sealer per manufacturer instructions to repel stains and simplify maintenance.
Natural stone: pH-neutral cleaners, poultices for stains, resealing routine
Natural stone demands gentle, floor-specific care, so you’ll use pH-neutral cleaners that won’t etch or dull surfaces and reserve stronger treatments—like poultices—for localized stains.
Spot-test first, follow manufacturer dilution, and blot stains before applying a matched poultice.
After cleaning, let stone fully dry, inspect for haze, then apply a breathable sealer on its recommended schedule to protect without trapping moisture.
Carpets & rugs: vacuum protocol, spot treatment sequence, hot-water extraction steps
After caring for stone, you’ll shift attention to soft surfaces where suction, spot care, and deep extraction matter most.
Vacuum systematically—slow passes, multiple directions, high-traffic booster.
Tackle spills: blot, apply appropriate enzyme or solvent, agitate gently, blot again.
For deep cleaning, pre-spray, dwell, then hot-water extract with overlapping passes and controlled moisture.
Dry thoroughly to prevent odors and mold.
Common Problems Pros Solve and How to Fix Them
You’ll learn targeted fixes for stubborn stains based on material, step-by-step wood remediation for water damage and cupping, and how to kill, clean, and prevent grout discoloration and mold.
You’ll also get clear options for repairing scratches or concealing scuffs so your floor looks professional again.
Follow these methods and you’ll handle the most common problems pros tackle.
Stubborn stains and spots targeted solutions by material
Got stubborn stains driving you nuts? You can tackle spots fast by matching cleaners to material: gentle soap for sealed wood, baking soda paste for tile grout, vinegar solution for vinyl, hydrogen peroxide for light carpets, and rubbing alcohol for hard plastics. Pick test area first, apply, blot, then rinse.
| Material | Fix |
|---|---|
| Sealed wood | Gentle soap |
| Tile grout | Baking soda |
| Vinyl | Vinegar |
| Carpet | Hydrogen peroxide |
| Plastic | Rubbing alcohol |
Water damage and cupping on wood remediation steps
Surface stains are often cosmetic, but water damage and cupping in wood demand a different approach because moisture actually changes the board’s shape and integrity.
You’ll first locate affected boards, dry the area thoroughly, and control humidity.
Replace severely cupped planks, sand minor cupping once dry, and refinish.
Fix leaks and improve ventilation to prevent recurrence.
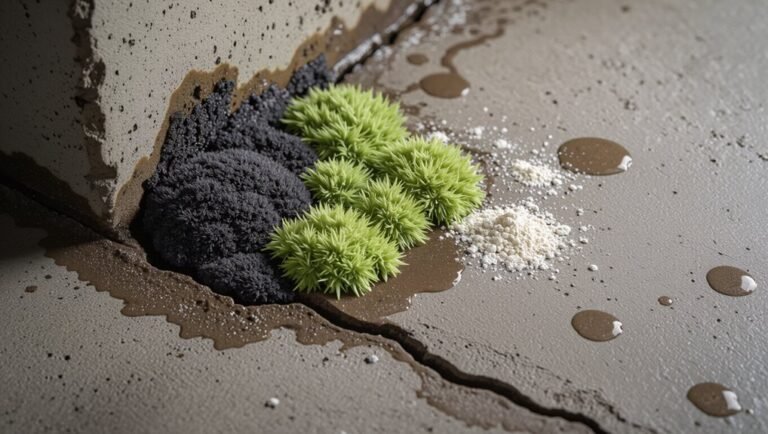
Grout discoloration and mold kill, clean, and prevent
When grout darkens or shows mold, it not only looks bad but can harbor allergens and damage tile edges if left untreated.
You can tackle it by killing the mold, deep-cleaning the grout lines, and sealing to prevent return. Start with a diluted bleach or hydrogen peroxide spot treatment, scrub with a stiff brush, rinse thoroughly, let dry, then apply a grout sealer to block moisture and stains.
Scratches and scuffs repair vs. conceal techniques
Although small scratches and scuffs can make your floor look worn, you don’t always need a full repair to restore its appearance; pros choose between fixing damage and cleverly concealing it based on depth, material, and cost.
You’ll assess severity, use touch-up markers, wax sticks, or filler for deeper gouges, then sand and reseal.
Concealments: rugs, furniture pads, or selective staining.
Mistakes to Avoid (Professional Warnings)
Don’t use the wrong pH cleaner on sensitive floors—you’ll strip finishes or cause staining.
Avoid over-wetting and poor drying, which lead to warping and mold.
Never use abrasive tools or mix chemicals from DIY recipes, since scratches and toxic reactions are real risks.
Using wrong pH cleaners for sensitive floors
If you use a cleaner with the wrong pH on sensitive floors, you can strip finishes, etch surfaces, or cause long-term discoloration.
Always check manufacturer recommendations and test in an inconspicuous spot.
Use pH-neutral products for hardwood, stone, and sealed laminate; acidic or alkaline solutions can weaken sealants.
Rinse thoroughly and neutralize residues to preserve finish and color.
Over-wetting and improper drying
When you saturate floors or let moisture sit, you invite warping, mold, and finish breakdown that can be costly to repair.
Don’t flood wood, laminate, or porous stone; use damp—not dripping—mops and wring cloths thoroughly.
Dry promptly with fans or microfiber towels, ventilate the room, and check seams and grout.
Quick action prevents lasting damage and expensive refinishing.
Abrasive tools that cause micro-scratches
After you’ve stopped excess moisture from damaging floors, pay attention to the tools you use—abrasive pads, steel wool, and harsh scrubbing brushes can leave countless micro-scratches that dull finishes and trap dirt.
Use non-abrasive microfiber, soft-bristled brushes, or recommended pads instead. Test any tool in an inconspicuous spot, work gently with the grain, and replace worn implements before they harm your flooring.
Mixing chemicals and unsafe DIY recipes
Although a glossy finish might tempt you to mix cleaners for a stronger solution, don’t do it—combining products can release toxic fumes, ruin finishes, and create residues that attract more dirt.
Stick to manufacturer recommendations, test any new product in an inconspicuous spot, and avoid DIY “recipes” blending bleach, ammonia, or acids.
When in doubt, consult pros or use products labeled safe for your floor type.
Maintenance Plan Pros Recommend (Prevention & Best Practices)
Keep a simple daily/weekly checklist for sweeping, spot-mopping, and inspecting high-traffic areas so small issues don’t become big ones.
Schedule monthly and seasonal deep-cleans, use mats and furniture pads, and control humidity to protect finish and prevent damage.
Call a professional when stains, warping, or persistent buildup won’t come out with your routine.
Daily/weekly maintenance checklist
A simple, consistent daily and weekly checklist will prevent dirt buildup, extend your floors’ life, and cut down on deep-cleaning time.
Stick to quick, targeted tasks so grime never settles and finishes stay intact.
- Sweep or vacuum high-traffic zones daily.
- Spot-clean spills immediately with appropriate cleaner.
- Mop or damp-clean weekly using recommended solution and minimal water.
Monthly and seasonal deep-clean routines
Once a month and at each seasonal change, plan deeper cleaning tasks that tackle hidden grime, protect finishes, and prevent long-term damage.
Move furniture, vacuum crevices, and clean baseboards and vents. Strip and recoat or deep-clean seals where appropriate.
Treat stubborn stains with recommended products, inspect for wear, and schedule repairs.
Finish with a protective polish suited to your floor type.
Protective measures: mats, furniture pads, humidity control
After you’ve handled deep cleaning and spot repairs, focus on preventive steps that cut down future work and protect your floors’ finish.
Place quality mats at entries, use washable runners in high-traffic zones, and fit furniture with felt pads to avoid scratches.
Keep indoor humidity between 35–55% for wood or laminate to prevent warping.
Inspect and replace pads and mats regularly.
When to call a professional service
Wondering when to call a pro? You should hire a service for deep stains, persistent odors, warped or lifting boards, large-area grout restoration, or finishes that need recoating.
If DIY methods fail after one thorough attempt or damage risks increasing, schedule professionals. They’ll assess, recommend targeted repairs, and use specialized equipment to prevent costly mistakes and extend your floor’s lifespan.
Cost, Time, and Frequency Practical Scheduling Guide
Plan your cleaning by room and floor type so you know the estimated minutes each space will take.
Compare cost factors—DIY supplies, pro services, or equipment rental—to pick the most efficient option for your budget.
Then set frequency based on foot traffic: daily or weekly for high-traffic areas, and monthly for low-use rooms.
Estimated time per room and per floor type
Estimating how long it takes to clean a room depends on three things: room size, floor type, and how dirty it is.
Small bathrooms take 10–15 minutes; bedrooms 15–25; kitchens 20–40.
Hardwood and tile mop faster; grout or textured stone adds 10–20 minutes.
Deep-cleaning high-traffic areas needs extra 20–30 minutes.
Adjust times if furniture moves or stains require treatment.
Cost factors: DIY vs. pro service vs. equipment rental
Now that you’ve got a feel for how long each room and floor type takes, factor cost into whether you’ll do the work yourself, hire a pro, or rent specialized gear. Balance upfront cost, time savings, and outcome quality to choose smartly.
| Option | Typical cost/time |
|---|---|
| DIY | Low cost, more time |
| Pro service | Higher cost, less time |
| Rental | Moderate cost, skilled time |
| Hybrid | Split cost, flexible time |
Frequency recommendations based on foot traffic
High-traffic areas like entryways and kitchens should get your attention weekly, while low-traffic rooms such as guest bedrooms can be cleaned monthly.
Use foot-traffic patterns to set a realistic schedule that balances cost, time, and results. Tackle medium-traffic zones biweekly, adjust for pets or allergies, and combine quick daily spot-cleaning with scheduled deep cleans to extend floor lifespan and save money.
Product and Tool Comparisons
Now you’ll compare the most common mop types—string, microfiber, steam, and flat—to see which fits your floors and routine.
You’ll also weigh cleaning solutions (natural, commercial, or DIY) for effectiveness and safety.
Finally, you’ll consider machine versus manual cleaning and the pros and cons of each approach.
Mop types compared: string, microfiber, steam, flat
Choosing the right mop makes a big difference in how quickly and effectively you clean, so let’s compare the four main types—string, microfiber, steam, and flat—against tasks, floor types, and maintenance needs. You’ll pick based on mess size, surface, drying time, and upkeep.
| Type | Best For | Care |
|---|---|---|
| String | Heavy spills | Rinse/dry |
| Microfiber | Dusting/polish | Washable |
| Steam | Sanitizing | Descale |
| Flat | Quick touch-ups | Replace pad |
Cleaning solutions compared: natural vs. commercial vs. DIY
Whether you prefer store-bought cleaners, simple DIY mixes, or natural options, each type has trade-offs in effectiveness, safety, cost, and maintenance. You’ll choose based on floor type, sensitivity, and time. Commercials are potent but pricier; DIY is cheap but needs care; naturals are gentle yet sometimes less effective.
| Type | Cost | Safety |
|---|---|---|
| Commercial | High | Moderate |
| DIY | Low | Variable |
Machine vs. manual cleaning: pros and cons
While machines cut labor and often deliver more consistent results, manual methods give you greater control for edges, delicate finishes, and quick touch-ups.
You’ll choose machines for large areas, speed, and deep scrubbing; they save time but cost more and risk over-wetting.
You’ll pick manual tools for precision, low cost, and delicate surfaces, though they demand more effort and time.
FAQ Professional Floor Cleaning Questions
You probably have a few quick questions about care, like how often to deep-clean hardwood or whether steam cleaning is safe for your floors.
You’ll also want to know the best ways to remove pet stains and odors, if vinegar is okay to use, and how pros restore shine without refinishing.
I’ll answer each so you can pick the right method for your floor type.
How often should I deep-clean hardwood floors?
Generally, deep-clean hardwood floors about once or twice a year, though high-traffic areas, homes with pets, or visible buildup may need it every three to four months.
Spot-clean weekly and sweep or vacuum regularly to prevent grit scratching.
Use a manufacturer-approved cleaner and a damp mop for deep cleaning, and address spills promptly.
Consider professional refinishing when finish wears thin.
Is steam cleaning safe for all floor types?
Curious whether steam cleaners are a safe choice for your floors? You can use steam on sealed tile, vinyl, and many finished hardwoods, but avoid unsealed wood, laminate, and some resilient floors that warp or delaminate.
Always check manufacturer guidelines, test a hidden spot, use low-steam settings, and avoid excessive dwell time. When in doubt, choose gentler methods.
What is the best way to remove pet stains and odors?
1 simple routine removes most pet stains and odors when you act quickly: blot up solids and urine with paper towels, rinse the spot with cool water, then treat it with an enzymatic cleaner designed for pet messes to break down proteins that cause smells.
After treatment, blot again, let air-dry, then vacuum to lift residue.
Repeat if odor persists; follow product instructions.
Can I use vinegar on my floors?
Can you use vinegar on your floors? Yes, but cautiously.
Vinegar’s acidity cleans tile, vinyl, and sealed laminate, cutting grease and mineral buildup.
Don’t use it on hardwood, stone, or waxed surfaces—it can dull, etch, or strip finishes.
Always dilute (about 1/2 cup per gallon), test an inconspicuous spot, and rinse or dry promptly to avoid residue or damage.
How do professionals restore shine without refinishing?
While you don’t have to refinish to bring back luster, pros rely on a sequence of targeted steps—deep cleaning, residue removal, buffing, and protective topcoats—to restore shine without sanding.
You’ll start with a gentle, pH-balanced cleaner, strip wax or buildup, spot-treat dull areas, then buff with a high-speed or orbital polisher.
Finish with a compatible sealer or maintenance coat to protect and prolong gloss.
Quick Reference Cheat Sheet (Printable)
Keep a one-page, floor-by-floor checklist handy so you can follow the same professional routine every time.
You’ll see tasks, tools, and timing at a glance for kitchens, bathrooms, living areas, and bedrooms.
Print it and tape it near your cleaning supplies for quick reference.
One-page floor-by-floor cleaning checklist
Use this one-page, floor-by-floor checklist as your go-to cheat sheet so you can move quickly from room to room and never miss a key task.
Keep it visible, laminated, and simple. Follow each step per room, tick off as you go, and adjust for special surfaces.
- Sweep/vacuum then spot-treat
- Mop or dry-clean by surface
- Inspect, edge, and replace mats