How to Concrete a Floor From Scratch: Everything Beginners Need to Know
You can pour a durable concrete floor from scratch with planning, the right tools, and basic skills. First assess site conditions, permits, drainage, and load needs, then clear, grade, and compact the ground. Set forms, vapor barrier, and reinforcement, mix or order concrete, pour and consolidate, screed and finish, then cure and seal. Watch for joints and common problems like cracking. Follow step-by-step guidance below and you’ll pick up the techniques and timing you need.
How to Concrete a Floor from Scratch and Project Overview
Yes—you can concrete a basic floor from scratch with careful prep, the right tools, and patience, though complex jobs can overwhelm a beginner.
Expect a small garage or shed slab to take a weekend to a few days, cost anywhere from a few hundred to a few thousand dollars depending on size and materials, and range from easy to challenging based on site prep and finishes.
Hire a pro if the site needs major grading, reinforcement, precise leveling, or when local code and long-term durability are critical.
Direct answer: Can a beginner concrete a floor from scratch?
Curious if you can pour a concrete floor from scratch? Yes—you can.
With basic tools, careful prep, and willingness to learn, you’ll handle tasks like grading, forming, mixing, pouring, leveling, and curing.
Follow clear guides on how to concrete floor, safety, and practice small pours first.
Complex jobs may need pros, but a straightforward slab is achievable for a determined beginner.
Project summary: scope, time, cost range, and difficulty
Now that you know a beginner can pour a simple slab, here’s a concise project overview to help you plan:
Scope: prep, formwork, pour, finish, cure.
Time: weekend for small slab, several days including cure.
Cost: $200–$1,500 depending on size and materials.
Difficulty: moderate—requires basic tools, physical labor, attention to level and curing for durable results.
When to hire a pro vs DIY
Wondering whether to tackle the pour yourself or call a pro?
You can DIY smaller, simple slabs, but hire pros for complexity, drainage, or structural work.
Consider safety, tools, and time.
- Small patch or simple slab
- Tight budget and DIY experience
- Complex slab layout or reinforcement
- Drainage, grading, or permit issues
- Need fast, guaranteed finish
Basic Understanding What Is a Concrete Floor and Why Choose It
A concrete floor can mean different things—slab-on-grade, suspended slab, or slab-over-substrate—so you’ll want to pick the type that fits your site and load requirements.
You’ll also weigh pros and cons like durability, cost, cracking risk, and maintenance before committing.
Finally, get familiar with key terms such as mix, reinforcement, slump, cure time, and vapor barrier so you can make informed choices and communicate with contractors.
Types of concrete floors (slab-on-grade, suspended slab, slab-over-substrate)
Concrete floors come in three main forms—slab-on-grade, suspended slab, and slab-over-substrate—each suited to different site conditions, loads, and moisture concerns.
You’ll choose based on ground access, structural support, and finished use.
- Slab-on-grade: poured directly on compacted soil
- Suspended slab: supported by beams or columns
- Slab-over-substrate: sits atop insulation or decking
Consider site drainage and access.
Advantages and disadvantages of concrete floors
Because it combines durability, versatility, and low maintenance, a concrete floor often makes sense for many projects—you’ll get a surface that resists heavy loads, tolerates moisture (when detailed properly), and accepts a wide range of finishes from polished to tiled.
Advantages: long life, low upkeep, thermal mass, customizable finishes.
Disadvantages: hard underfoot, cold, can crack, requires proper installation and sealing to prevent moisture and staining.
Essential terminology beginners must know
Think of a concrete floor as a layered system where each term describes a different job you’ll need to understand—slab, subgrade, reinforcement, finish, curing, and vapor barrier all matter.
You should know these basics so you can plan, communicate with pros, and avoid mistakes:
- Slab: the poured concrete surface
- Subgrade: compacted soil base
- Reinforcement: rebar or mesh
- Finish: surface texture
- Curing: moisture control
Planning and Preparation
Before you pour, assess site conditions and load requirements to pick the right concrete mix and reinforcement.
Check permits, local codes, and inspection schedules so you don’t get shut down mid-job.
Make a tools and materials checklist—forms, rebar or wire mesh, curing compounds—and gather safety gear and precautions before starting.
Assessing site conditions and load requirements
If you want your concrete floor to perform well and last, start by checking the site’s soil stability, drainage, and existing slab conditions, and by determining the loads the floor must carry.
Measure live and dead loads, note heavy equipment or storage locations, and identify frost or water table risks.
Use findings to choose thickness, reinforcement, subbase type, and drainage solutions.
Permits, codes, and inspections checklist
When you’re planning a concrete floor, get familiar with local permits, building codes, and inspection timelines so you can avoid delays and costly rework.
Contact your local building department, confirm required permits (foundation, slab, or trade-specific), and ask about applicable codes, allowable loads, vapor barriers, reinforcement standards, and setback or drainage requirements.
- Note required permits and fees
- Schedule inspections early
- Verify code references and editions
- Document approved plans on site
- Keep inspector contact info handy
Tools and materials checklist (concrete types, rebar, wire mesh, forms, curing compounds)
A clear tools and materials list will keep your concrete floor project on schedule and on budget, so gather the right concrete mix (bagged or ready-mix), reinforcement (rebar or welded wire mesh), form materials, finishing tools, and curing products before you pour. Check quantities, delivery, and compatibility; plan mixes, spacers, stakes, floats, trowels, and curing compound types.
| Item | Purpose |
|---|---|
| Concrete mix | Structural slab |
| Rebar/wire mesh | Reinforcement |
| Forms/stakes | Shape and contain |
| Curing compound | Strength and finish |
Safety equipment and precautions
Before you pour, prioritize safety gear and site precautions so every step stays controlled and injury-free.
You’ll need protective equipment, clear access, and emergency plans. Check weather and ventilation, secure forms, and keep bystanders away.
- Hard hat and steel-toe boots
- Safety glasses and face shield
- Gloves and knee pads
- Respirator for dust and fumes
- First-aid kit and fire extinguisher
Step 1: Preparing the Site
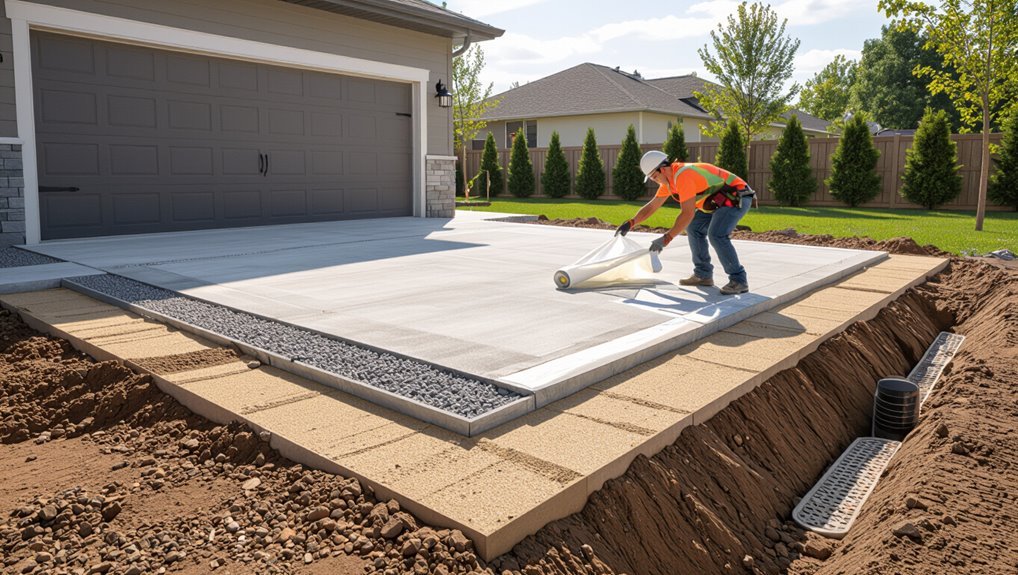
Before you pour, clear, grade, and compact the subgrade so the slab sits on a stable surface.
Install the proper subbase, drainage layers, and any vapor barrier, using gravel or sand to promote runoff and prevent moisture.
Then set elevations and a slight slope for drainage—typically 1/8″ to 1/4″ per foot—and calculate run length to confirm total fall.
Clearing, grading, and compacting the subgrade
Start by clearing the area of vegetation, debris, and any existing pavement so you can see and work the true ground level.
Next, grade the site to the required slope and elevations using stakes and a level. Remove soft spots, cut high areas, and fill low ones.
Compact the subgrade in layers with a plate compactor until firm and uniformly stable.
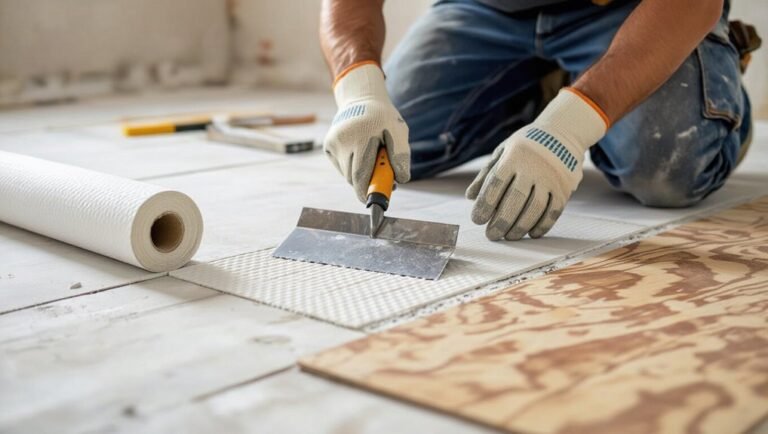
Installing subbase and drainage (gravel, sand, vapor barriers)
A stable subbase and proper drainage keep your concrete slab durable and dry, so lay them out carefully after the subgrade is compacted.
Spread 4–6 inches of crushed gravel, tamping firmly for uniform support.
Add a thin sand layer to level if needed.
Install a continuous vapor barrier (6-mil or thicker) overlapping seams and sealing edges to prevent moisture migration into the slab.
Setting elevations and slope for drainage (how to calculate)
Because water won’t tolerate low spots, you need to set elevations and a consistent slope so runoff clears the slab toward drains or grade.
Measure high and low points with a laser level or string line. Aim for 1/8″ to 1/4″ per foot (1%–2%) toward drains.
Mark batter boards, stake elevations, and verify slope across the entire formwork before pouring.
Step 2: Formwork and Reinforcement
Now you’ll set up sturdy forms—choose materials, brace corners, and seal seams so the slab keeps its shape.
Place reinforcement to suit the load: pick rebar, wire mesh, or fiber, set spacing, use chairs for cover, and overlap correctly.
Finally, lay out control, expansion, and isolation joints at the proper spacing to prevent cracking and allow movement.
Designing and building forms (materials, bracing, seam sealing)
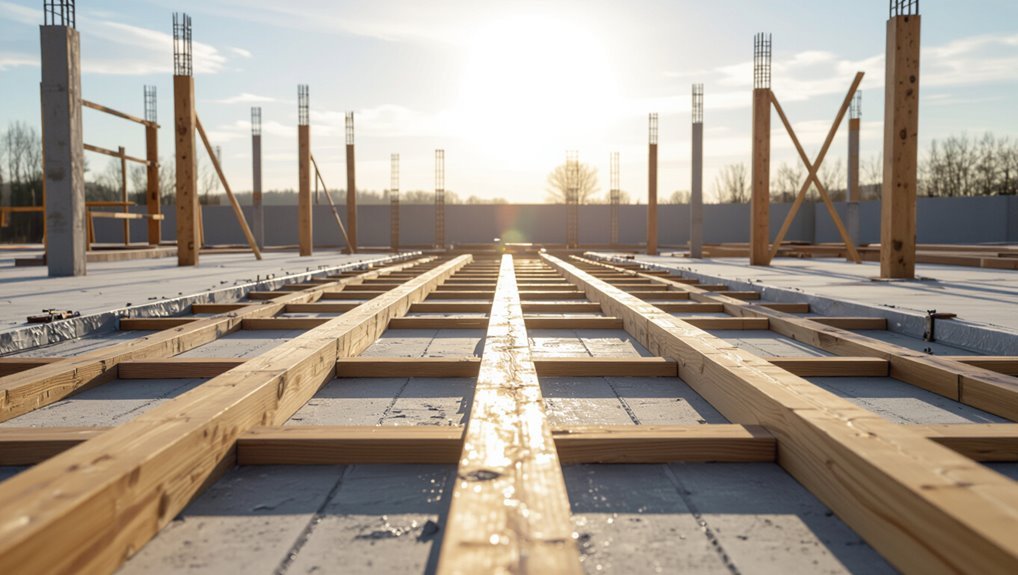
Step 1 in this stage is to lay out sturdy, accurately sized forms that will hold the wet concrete until it cures.
Use straight, treated lumber or metal form boards, brace them with stakes and cross braces, and check alignment and level.
Seal seams with caulk or tape to prevent leakage.
Leave access for screeding and vibration, and plan removal timing to avoid damage.
Placement of reinforcement: rebar vs wire mesh vs fiber (spacing, chairs, overlap)
While your forms are set, place reinforcement that matches the slab’s loads and crack-control needs—rebar for heavy structural loads, welded wire mesh for moderate support, and synthetic fibers for shrinkage and secondary crack control. Use chairs to hold steel mid-depth, overlap rebar by 40x diameter, space mesh per spec, and add fibers to mix.
| Type | Use |
|---|---|
| Rebar | Structural |
| Wire mesh | Moderate |
| Fibers | Shrinkage |
| Chairs/Overlap | Positioning |
Joints: control, expansion, and isolation placement and spacing
Because concrete shrinks and moves, you should lay out control, expansion, and isolation joints during formwork so cracks occur where you want them; place control joints at 24–36 times slab thickness (in inches), spacing them to form roughly square panels.
Use expansion joints at fixed boundaries, and isolation joints around columns, walls, and slabs on grade.
Cut or form joints early and seal where needed.
Step 3: Mixing, Pouring, and Finishing Concrete
Now you’ll select the right concrete—bagged mix or ready‑mix—and calculate the volume so you can order the right amount.
When the truck or wheelbarrows arrive, you’ll pour in staged sections, consolidate with vibration, screed, bullfloat, and edge as you go.
Finish with the method that suits the use—broom, hand trowel, power trowel, or a decorative treatment.
Choosing concrete mix and delivery options (bagged mix vs ready-mix)
If you’re pouring a slab, decide whether bagged mixes or ready‑mix concrete best fit the job, since each option affects cost, labor, and timing.
Use bagged mix for small jobs, tight budgets, or when you want control; expect more mixing labor.
Choose ready‑mix for larger slabs, faster placement, consistent quality, and fewer trips.
Check slump, strength class, and admixtures before ordering.
Calculating volume and ordering concrete
Before you mix or order a truck, calculate the slab’s volume so you know how much concrete to buy and avoid costly shortfalls or excess.
Measure length, width and average depth in feet, multiply to get cubic feet, then divide by 27 for cubic yards.
Add 5–10% for waste and uneven subgrade. Order rounded up to nearest 0.5 cubic yard.
Pouring techniques: staging, consolidation, vibration
Set up a clear pour plan and stick to it: stage the concrete so you maintain a steady flow, consolidate each section as you go, and use vibration to remove trapped air and guarantee full contact with forms and reinforcement.
Work in manageable bays, keep teams coordinated, monitor slump and placement rate, insert internal or external vibrators properly, and stop when sections are fully compacted and no voids remain.
Screeding, bullfloating, and edging methods
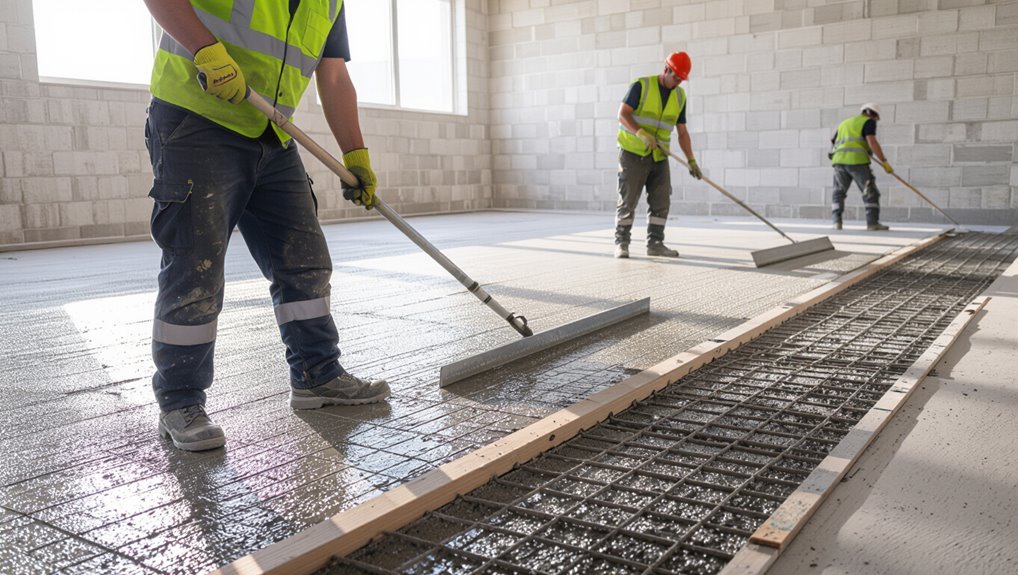
When the concrete’s in place and you’ve consolidated each bay, screeding, bullfloating, and edging shape the slab’s surface and lock in the proper profile; you’ll pull the screed to strike off excess, follow with a bullfloat to level and embed aggregate, then edge to form clean joints and prevent chipping.
Work steadily, keep tools flat, remove high spots, check slope, and avoid overworking edges.
Finishes: broom, trowel, power trowel, decorative options
After screeding, bullfloating, and edging have given the slab its profile, you’ll finish the surface to match its use and appearance.
Choose a broom finish for traction, a hand trowel for smooth indoor floors, or a power trowel for large areas.
Add decorative options—stains, dyes, stamps, or exposed aggregate—while controlling timing and curing to guarantee durability and desired look.
Step 4: Curing, Sealing, and Post-Pour Care
Once the concrete’s placed and finished, you’ll need to control moisture with proper curing—wet curing, curing compounds, or plastic covers—to reach design strength.
Know when to remove forms and follow a timely joint-cutting schedule to prevent random cracking.
After curing, choose the right surface protection—sealants or densifiers—based on traffic and desired appearance.
Curing methods and timing (wet curing, curing compounds, plastic covers)
Although proper placement and finishing get most of the attention, curing is what actually lets your concrete reach strength and durability.
You’ll choose between wet curing, curing compounds, or simple plastic covers based on project size, climate, and schedule.
Wet curing keeps surfaces moist for 7 days for normal mixes. Curing compounds seal moisture when watering’s impractical. Plastic covers are cheap for short-term protection.
When to remove forms and joints cutting schedule
Keeping the concrete moist during curing protects strength, but you’ll also need to know when to take off forms and schedule joint cutting to avoid damage and random cracking.
Remove forms after concrete reaches about 50% design strength—typically 24–72 hours for vertical forms; slabs may need longer support.
Saw control joints within 6–18 hours for fast-setting mixes, up to 24–72 hours otherwise.
Sealing and surface protection options (sealants, densifiers)
If you want your slab to resist stains, wear, and water intrusion, apply a surface treatment after the concrete has cured sufficiently—typically 7–28 days depending on the product and conditions.
Choose penetrating densifiers for hardness and dustproofing, topical sealers for gloss and stain resistance, or acrylics for temporary protection.
Follow manufacturer instructions, guarantee a clean dry surface, and reapply as recommended for maintenance.
Common Problems, Troubleshooting, and Repair Aftercare
After curing and sealing, you’ll still run into issues like cracking, spalling, scaling, and discoloration.
I’ll explain common causes and quick fixes for each problem so you can stop minor damage from getting worse.
Then we’ll cover long-term repairs — patching, overlays, and epoxy coatings — and when to use each.
Common issues: cracking, spalling, scaling, discoloration
Concrete floors commonly show a handful of recurring problems—cracks, spalling, scaling, and discoloration—that you’ll want to identify early so you can troubleshoot and repair them effectively.
- Inspect surfaces regularly for changes.
- Photograph issues to track progression.
- Prioritize safety around loose or uneven areas.
- Clean gently to assess true conditions.
- Plan repairs and aftercare based on severity and use.
Causes and immediate fixes for each problem
When you spot cracking, spalling, scaling, or discoloration, knowing the likely causes lets you choose the quickest, safest fixes; common culprits include freeze-thaw cycles, poor mix or curing, heavy loads, deicing chemicals, and moisture or contamination during finishing. Act fast: clean, remove loose material, dry, and apply temporary seal or filler.
| Problem | Cause | Immediate Fix |
|---|---|---|
| Crack | Shrinkage/settling | Clean, tape, use flexible filler |
| Spall | Freeze/thaw | Remove debris, patch surface |
| Discolor | Contaminants | Clean, neutralize, rinse |
Long-term repair strategies (patching, overlay, epoxy coating)
Those quick fixes will stop immediate damage, but for lasting results you’ll need planned repairs: patching for localized defects, thin overlays to restore worn surfaces, or epoxy coatings for heavy-duty protection.
Assess substrate, remove loose concrete, and use compatible materials.
Patch small spalls; apply polymer-modified overlay for leveling; choose epoxy for chemical resistance and durability.
Follow manufacturer prep, curing, and maintenance instructions.
Best Practices, Tips, and Time-Saving Strategies
When planning your pour, consider weather and seasonal limits so curing and strength aren’t compromised.
Check the flatness and level tolerances required for the room’s use and pick tools and techniques that hit those specs efficiently.
Use task-focused strategies for one-day pours and small crews, and prioritize cost-saving measures that don’t cut corners on mix, reinforcement, or finishing.
Weather and seasonal considerations
Although weather can feel unpredictable, planning around temperature, humidity, and precipitation is the single most important step to guarantee a strong, crack-free concrete floor.
Schedule pours for mild, stable days, avoid rain, and protect curing concrete from rapid temperature swings.
Use admixtures, blankets, or wind barriers when needed, and monitor forecasts so you adjust mix, curing time, and protection methods accordingly.
Ensuring flatness and level tolerances for different uses
Because different applications demand different tolerances, you should plan flatness and level goals before placing any concrete. Industrial floors, warehouses, and polished slabs need much tighter tolerances than garages or patios.
Determine specified F-number or FE-SEM grades, set control joints and screeding methods accordingly, and verify with straightedges, laser levels, or profilometers.
Adjust mix, placement, and finishing to meet targets.
Efficiency tips for one-day pours and small crews
If you’re aiming to finish a slab in a single day with a small crew, plan every step down to crew roles, equipment staging, and curing materials so there’s no downtime between tasks.
You’ll streamline work by pre-mixing, assigning shifts, and prepping tools.
Follow these quick tips:
- Pre-pour checklist completed
- Equipment staged by task
- Clear role assignments
- Rapid communication method
- Curing setup ready
Cost-saving tips without compromising quality
You’ve planned the one-day pour and assigned every role—now focus on trimming costs without cutting quality.
Buy materials in bulk, compare suppliers, and schedule deliveries to avoid downtime.
Rent specialized tools instead of buying, reuse formwork where safe, and mix only what you need.
Prioritize proper prep and curing to prevent costly repairs; skilled labor saves money long-term.
Tools and Material Comparison Guide
You’ll decide whether manual or power tools make sense based on project size, frequency of use, and budget.
You’ll learn when renting beats buying.
We’ll compare reinforcement options—wire mesh, rebar, and fiber—so you can weigh strength, labor, and material costs.
Manual vs power tools: when to rent vs buy
When weighing manual versus power tools, think about the scope of the job, your budget, and how often you’ll use the tool—these factors will tell you whether to rent, buy, or skip it altogether.
| Tool | Rent if | Buy if |
|---|---|---|
| Concrete mixer | occasional big pour | frequent pours |
| Power trowel | one-day finish | many slabs |
| Jackhammer | demo task | regular work |
| Screed | small jobs | constant use |
Comparison of reinforcement options and costs
Because reinforcement affects both strength and long-term cost, pick the option that matches your slab’s load, soil, and budget. You’ll choose wire mesh for light residential slabs, rebar for heavy loads, fiber for crack control, or post-tension for large spans. Compare upfront cost, labor, and longevity to decide.
| Option | Best use |
|---|---|
| Wire mesh | Light slabs |
| Rebar | Heavy loads |
| Fiber | Crack control |
| Post-tension | Large spans |
Typical Project Timeline and Labor Estimates
You’ll want to see example timelines for a small garage, a finished basement, and a large slab so you can plan start-to-finish tasks and curing times.
I’ll outline typical manpower and equipment needs for each size so you know when to hire help or rent gear.
That way you can match crew size and tools to project scope and avoid schedule surprises.
Example timelines for small garage, basement, and large slab projects
Below are three concise example timelines—small garage, basement, and large slab—that show typical steps, crew sizes, and realistic labor hours so you can compare scope and schedule before committing.
| Project | Days | Crew & Hours |
|---|---|---|
| Small garage | 2–3 | 2 workers, ~16–24 hrs |
| Basement | 4–6 | 3 workers, ~36–54 hrs |
| Large slab | 7–10 | 4–6 workers, ~80–160 hrs |
Manpower and equipment needs by project size
Match crew size and equipment to project scale so you can plan cost, schedule, and logistics accurately.
You’ll need different crews and tools for each size; estimate hours, machine time, and support tasks.
Consider subcontractors for specialty work and factor in breaks, setup, and cleanup.
- Small (1–2 people, hand tools)
- Garage (2–4, mixer)
- Basement (3–5, pump)
- Large slab (6+, boom/placement)
- Finishing crew (2–4)
Frequently Asked Questions (FAQ)
You probably have a few practical questions before you start, like how thick the slab should be for a home, whether you can pour in extreme temperatures, and when it’s safe to walk, drive, or put heavy loads on it.
You’ll also want to know the difference between normal cracking and true structural failure, and if you can finish the slab later for a polished look.
Below are clear answers to each of these common concerns.
How thick should a concrete floor be for residential use?
Thickness matters: for most residential concrete floors you’ll want 3.5 to 4 inches for living spaces and garages, increasing to 4 to 6 inches where heavier loads or vehicle traffic are expected.
Use thicker slabs for workshops, heavy appliances, or lift-equipped garages.
Also add proper reinforcement (rebar or mesh), control joints, and a well-compacted base to prevent cracking and settlement.
Can you pour concrete in cold or hot weather?
Wondering whether you can pour concrete in extreme temperatures? You can, but you must adjust mixes and procedures.
In cold, use warm water, accelerators, insulated forms, and curing blankets to prevent freezing.
In heat, cool aggregates, use retarders, work early or late, and keep surfaces moist to avoid rapid drying and cracking.
Plan for weather and monitor curing closely.
How long before you can walk, drive, or place heavy loads on the slab?
Typically, after about 24 to 48 hours you can safely walk on a newly poured slab, but driving or placing heavy loads takes longer and depends on mix strength, temperature, and curing.
Light vehicles usually wait seven days; full vehicle loads and heavy equipment need 28 days for design strength.
Always follow your mix supplier’s recommendations and avoid premature loading to prevent damage.
What is the difference between cracking and structural failure?
Although you’ll see both called “problems,” cracking and structural failure aren’t the same: cracking is usually a surface or hairline issue that affects appearance and may let moisture in, while structural failure means the slab can’t carry its expected loads and risks collapse or major settlement.
You’ll inspect crack size, pattern, and load-bearing performance; small cracks often need sealing, failures need engineering repair.
Can I finish a concrete floor later for a polished look?
Yes — you can finish a concrete floor later to get a polished look, but timing and preparation matter: the slab should be fully cured (usually 28 days), free of major cracks or contamination, and ground or diamond-polished to remove laitance and expose aggregate before sealing or densifying.
You’ll need proper equipment or a pro, and repairs, moisture testing, and surface prep are essential for a lasting polish.
Quick Checklist Before You Start (Printable Prep List)
Ready to start pouring? You’ll want a printable prep list to avoid mistakes. Gather tools, confirm measurements, and guarantee site safety before mixing. Print and check off each item as you go:
Ready to pour? Print this checklist: gather tools, verify measurements, ensure site safety, then mix with confidence.
- Clear area and set forms
- Level subbase and compact
- Install reinforcement and vapor barrier
- Mix concrete and test consistency
- Schedule helpers and curing plan