How to Install Hard Floor: Everything You Need to Know Before You Start
You can install hard flooring yourself if you’ve got basic carpentry skills, the right tools, and patience; choose between hardwood, engineered, laminate, vinyl or tile based on moisture tolerance and room use, then prep a solid, dry subfloor, acclimate materials, and follow manufacturer methods like nail-down, glue-down, or click-lock. Use spacers, stagger joints, and test cuts before fastening; avoid moisture and leveling mistakes. Keep going and you’ll get detailed steps, tips, and when to call a pro.
Can You Install Hard Flooring Yourself and What It Entails
You can often install hard flooring yourself in a weekend or two depending on room size and skill level, but expect a moderate learning curve and some specialized tools.
If the job involves simple floating vinyl or laminate in a straight room, you’ll likely save money by DIYing; hire a pro for complex layouts, subfloor repairs, or moisture issues.
We’ll walk through what each option entails so you can decide.
One-sentence summary of scope, time, and difficulty
Although it takes a weekend for a small room and a few days for larger spaces, installing hard flooring yourself is a moderately challenging DIY project that requires basic carpentry skills, the right tools, and careful surface prep.
You’ll learn how to install hard floor, measure accurately, acclimate materials, cut and fit boards, and finish seams—expect focused work, some trial-and-error, and steady attention to detail.
When to hire a professional vs. DIY
If you’re comfortable with basic carpentry and patient measuring, you can tackle hard-floor installation yourself on small rooms or straightforward layouts; hire a pro when the job involves complex patterns, tricky subfloors, significant leveling, or plumbing and structural changes.
You’ll save money DIYing simple installs, but call a contractor for warranty-backed work, faster completion, specialized tools, or when mistakes would be costly.
What Is Hard Flooring and Why Choose It
Hard flooring refers to durable surface materials like hardwood, engineered wood, laminate, vinyl plank, and tile, each with different looks and construction.
You’ll weigh pros and cons—appearance, cost, maintenance, and durability—when choosing among them.
Think about where you’ll install it and how you live, since some options suit kitchens and bathrooms better while others fit high-traffic hallways or formal living spaces.
Definition and common materials (hardwood, engineered wood, laminate, vinyl plank, tile)
Think of hard flooring as any rigid, durable surface you can walk on for years without it sagging or warping—materials like solid hardwood, engineered wood, laminate, vinyl plank, and tile all fall into this category and each offers different looks, performance, and upkeep requirements.
You’ll choose based on appearance, moisture tolerance, installation method, and budget, since each material has distinct construction and maintenance needs.
Pros and cons of hard flooring types
Because each hard flooring type balances looks, durability, moisture resistance, and cost differently, you’ll want to weigh those trade-offs before choosing—solid hardwood brings timeless beauty and long life but needs careful moisture control, engineered wood offers similar appearance with better stability, laminate is budget-friendly and scratch-resistant yet can swell with water, vinyl plank resists moisture and is low-maintenance but varies in realism, and tile is extremely durable and waterproof but colder and harder underfoot.
| Type | Pro | Con |
|---|---|---|
| Hardwood | Classic | Moisture-sensitive |
| Laminate | Affordable | Water damage risk |
| Tile | Durable | Cold, hard surface |
Best use cases by room and lifestyle
Now that you’ve weighed the trade-offs between materials, consider where each flooring type will perform best in your home and lifestyle.
Use waterproof vinyl or tile in kitchens, baths, and entryways for spills and traffic.
Choose hardwood or engineered wood for living areas and bedrooms for warmth and resale.
Pick durable, low-maintenance options if you have pets or kids, and prioritize comfort in bedrooms.
Tools, Materials, and Preparation Checklist
Before you start installing, make a clear checklist of essential and optional specialty tools so you’re not interrupted mid-job.
Gather materials and accessories—underlayment, adhesive, trim, and fasteners—then inspect and measure the site, acclimate flooring, and test the subfloor for moisture.
Don’t forget safety gear and workspace protection to keep the project safe and clean.
Essential tools and optional specialty tools
You’ll need a concise set of essential tools to get your hard floor installed correctly, plus a few optional specialty items that speed the job or improve finish quality.
Gather basics and consider upgrades:
- Tape measure and chalk line
- Utility knife and carpenter’s square
- Pry bar and mallet
- Flooring saw (optional)
- Flooring jack or pull bar (optional)
Materials and accessories needed (underlayment, adhesive, trim, fasteners)
Materials decide how well your floor performs, so pick them with care: choose quality underlayment for sound and cushioning, the right adhesive or click system, matching trim, and corrosion-resistant fasteners.
Gather these essentials:
- Foam or cork underlayment
- Pressure-sensitive or moisture-cure adhesive
- Junction and quarter-round trim
- Ring-shank or flooring screws
- Finishing nails and trim pins
Site preparation: measuring, acclimation, subfloor inspection, moisture testing
Now that you’ve gathered your underlayment, adhesives, trim, and fasteners, take time to prepare the site so those materials perform as planned.
Measure the room, plan layout and plank direction, and snap chalk lines. Acclimate flooring per manufacturer instructions.
Inspect the subfloor for level, damage, and squeaks; repair as needed. Conduct moisture tests (meter or calcium chloride) and address any issues before installing.
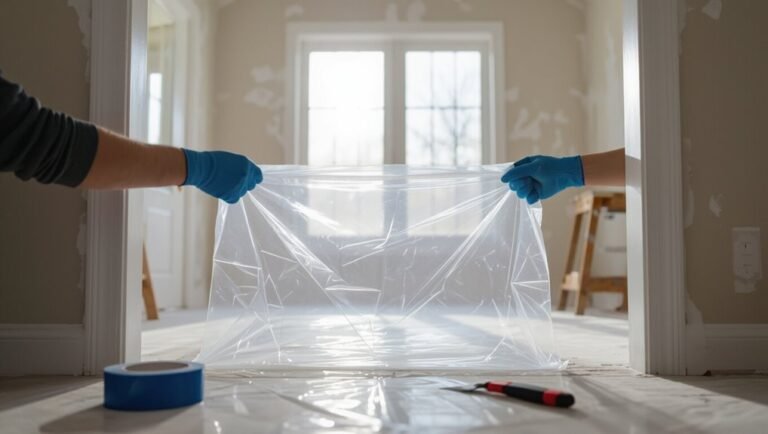
Safety gear and workspace protection
One set of good safety gear and a few protective coverings will keep you safe and your new floor pristine while you work.
Wear safety glasses, ear protection, gloves, kneepads, and a dust mask.
Use drop cloths, rosin paper, and floor protection panels.
Seal vents, remove trip hazards, and keep a fire extinguisher handy.
Keep tools organized and area well-ventilated.
How to Choose the Right Hard Flooring for Your Project
You’ll want to weigh durability, cost, and maintenance to match the floor to your room’s traffic and budget.
Check thickness, wear layer, and finish to guarantee the surface will hold up, and pick colors and styles that complement your space.
Also consider VOC emissions and sustainable options if indoor air quality and eco-impact matter to you.
Compare durability, cost, and maintenance
Because your choice of hard flooring affects long-term performance and expenses, compare durability, cost, and maintenance before you buy. You’ll weigh lifespan, upfront price, and cleaning needs. Pick flooring that matches traffic, budget, and care routine to avoid surprises.
| Type | Durability | Maintenance |
|---|---|---|
| Hardwood | High | Moderate |
| Vinyl | Moderate | Low |
| Tile | Very high | Low |
Thickness, wear layer, and finish considerations
When you’re choosing hard flooring, pay close attention to thickness, wear layer, and finish since they determine comfort, longevity, and how the floor handles traffic and damage.
Thicker cores add stability and sound control; robust wear layers resist scratches and refinishing cycles; durable finishes (polyurethane, aluminum oxide) protect against stains and scuffs.
Match these to room use and expected foot traffic.
Aesthetic and color selection tips
How do you pick a floor color that ties the whole room together?
Consider lighting, room size, and existing finishes: lighter floors open small spaces, darker add warmth and contrast.
Match undertones to cabinetry and trim, test samples in different light, and think about long-term style—timeless neutrals or bold patterns.
Pick a hue that complements furniture and the mood you want to create.
Environmental and health factors (VOC, sustainability)
Beyond color and style, you’ll want to contemplate how a floor affects indoor air and the planet. Choose low-VOC or no-VOC finishes and adhesives to cut harmful emissions.
Prefer sustainably sourced materials—FSC-certified hardwood, reclaimed wood, bamboo, or recycled-content tiles. Check product ecolabels and life-cycle impacts.
Proper ventilation during installation and maintenance also protects occupants and reduces long-term environmental harm.
Step-by-Step Installation Guide (General Workflow)
Start by measuring the room and planning your layout, accounting for pattern orientation and expansion gaps.
Then prepare and level the subfloor, address repairs and moisture, and roll out the underlayment or moisture barrier.
Begin the first row with starter strips and spacers to keep lines straight, then continue cutting, staggering, and joining boards until the floor is complete.
Step 1 Measure the room and plan layout (layout patterns, expansion gaps)
Before you cut or click anything together, measure the room precisely and sketch a simple layout so you know plank orientation, pattern placement, and where expansion gaps will go.
Measure length and width, note doorways, alcoves, and focal lines. Choose a starting wall and pattern (straight, diagonal, herringbone).
Plan 1/4–3/8″ expansion gaps at perimeter and junctions.
Step 2 Prepare and level the subfloor (repair, clean, moisture mitigation)
Step 2 is getting the subfloor sound, flat, and dry so your new flooring performs well; inspect for loose boards, squeaks, nails, gouges, and high or low spots.
Then repair or replace damaged sections, secure loose areas, and sand or grind bumps while filling depressions with a leveling compound.
Clean thoroughly, remove dust and debris, test moisture with a meter, and address elevated readings per manufacturer guidelines.
Step 3 Install underlayment or moisture barrier
With the subfloor repaired, cleaned, and verified dry, you’re ready to install the underlayment or moisture barrier that protects the flooring and evens out minor imperfections.
Choose product per flooring type and moisture level, roll or lay it flat, overlap seams as manufacturer recommends, tape or seal edges, and trim around obstacles.
Guarantee smooth, continuous coverage before proceeding to the next installation step.
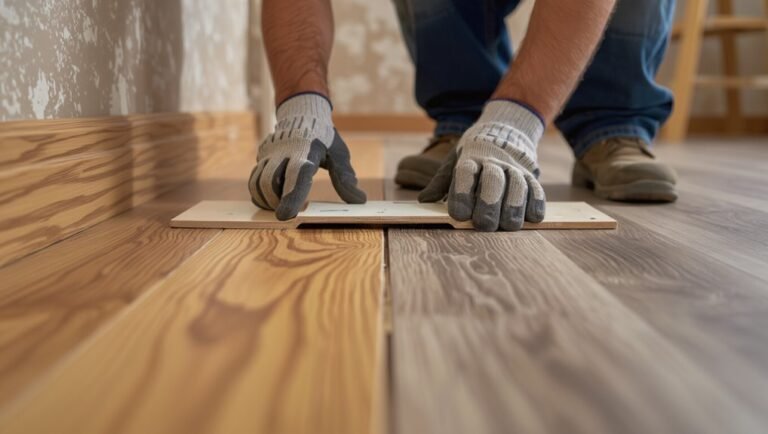
Step 4 Install first row and maintain straight lines (starter strips, spacers)
1. Lay a straight starter row along the longest wall, tongue facing the wall. Use a chalk line to align starter strips so the floor runs true.
Place consistent spacers between boards and the wall for expansion. Tap boards together with a mallet and pull bar, checking alignment frequently.
Trim the first row as needed for a tight, even start.
Step 5 Continue installation: cutting, stagger, and joining techniques
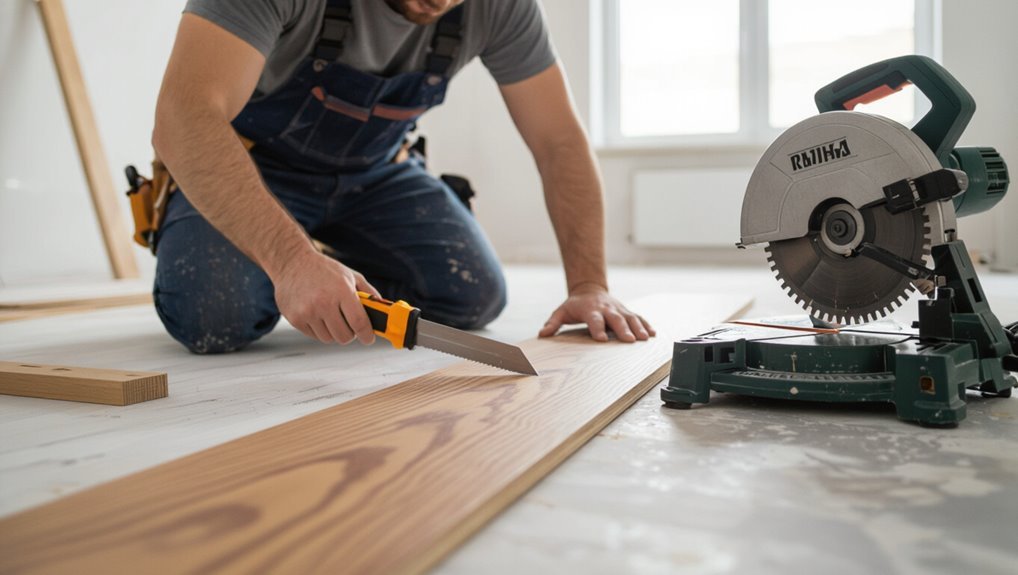
Continue laying boards row by row, cutting pieces as needed so end joints are staggered at least 6–8 inches (or per manufacturer specs) and never line up on adjacent rows; use a saw to trim boards for doorways and fixtures, dry-fit cuts before fastening, and join panels with consistent tapping and a pull bar to keep seams tight while maintaining your chalk-line alignment.
Work methodically, remove debris, check gaps, and adjust.
Step 6 Install trim, transitions, and thresholds
After you’ve finished laying and locking the last rows, it’s time to finish the job by installing base trim, reducers, and thresholds that cover expansion gaps and create smooth edges where the floor meets other surfaces.
Measure each run, cut trim to fit, secure with finishing nails or adhesive, and install connector pieces between differing floor heights.
Check alignment and allow movement space as manufacturer recommends.
Step 7 Clean up, initial maintenance, and curing times
Finish by cleaning the work area, performing initial maintenance, and observing required curing times so your new hard floor looks and performs its best; sweep and vacuum debris, wipe spills, and remove protective coverings after the manufacturer’s recommended wait.
Check adhesives, tighten junctions, and buff surfaces if needed. Avoid heavy traffic and rugs until full cure.
Note specific drying times and follow care instructions to extend lifespan.
Installation Variations by Material
Different materials need different installation methods, so you’ll choose techniques that match your floor type and site conditions.
For example, solid hardwood often uses a nail-down method and can be finished on-site or at the factory, while engineered hardwood can be floated, glued, or nailed.
Laminate typically clicks together as a floating floor.
LVP/LVT offers click-lock, glue-down, or loose-lay options, and tile requires backerboard, thinset, and careful grouting.
Solid hardwood: nail-down method and site-finished vs factory-finished
Solid hardwood floors are typically installed with a nail-down method that secures planks to a wooden subfloor.
You’ll choose between site-finished—installed raw, sanded, stained, and finished in place for a seamless look—or factory-finished, prefinished for faster installation and less mess.
Site finishing lets you customize color and repair minor gaps; factory finishes offer durability and immediate use.
Engineered hardwood: floating vs glue-down vs nail-down
When you pick engineered hardwood, you’ll choose among three main installation methods—floating, glue-down, or nail-down—each suited to different subfloors, room conditions, and performance needs.
Floating installs click or tongue-and-groove planks over underlayment for quick, moisture-tolerant installs.
Glue-down bonds to concrete for stability and sound control.
Nail-down secures to plywood for traditional strength and refinishing potential.
Laminate: click-lock floating installation
Although it clicks together over underlayment like engineered floating floors, laminate’s click-lock system is designed for straightforward, DIY-friendly installation: you lay the underlayment, stagger the planks, and lock each board into place without glue or nails, creating a stable floating surface that’s quick to install and easy to replace.
You cut end pieces, maintain expansion gaps, and use spacers, connections, and trim to finish.
Luxury vinyl plank (LVP/LVT): click-lock, glue-down, loose-lay options
Luxury vinyl plank (LVP/LVT) comes in three common installation styles—click-lock, glue-down, and loose-lay—so you can choose the method that best fits your subfloor, traffic, and DIY comfort level.
Click-lock floats over underlayment for quick installs; glue-down bonds to concrete or plywood for stability; loose-lay relies on weight and friction for easy replacement.
Prep, moisture testing, and acclimation remain essential.
Tile hard flooring: thinset, backerboard, and grout steps
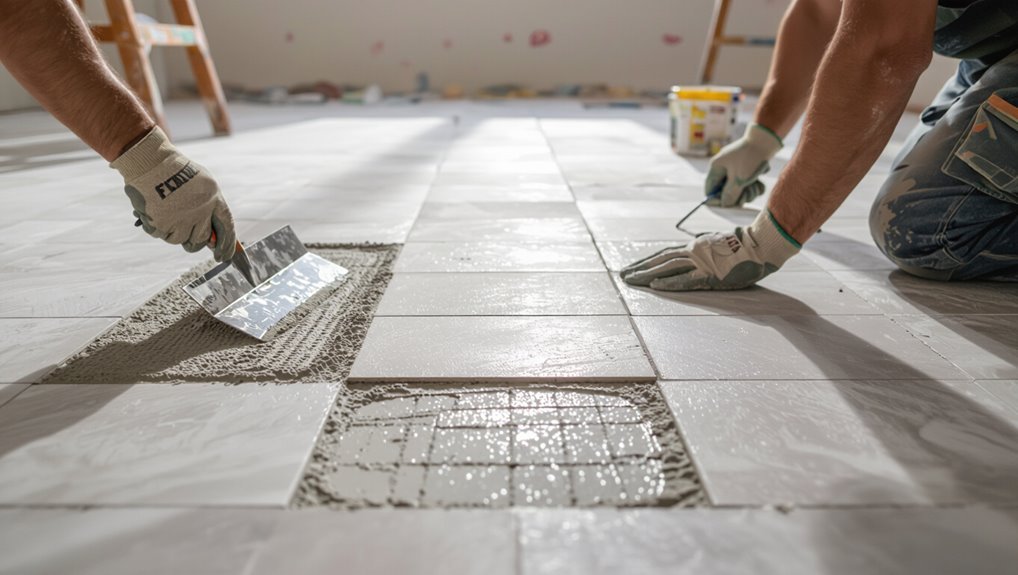
Tile installation typically follows three core steps—installing a cement backerboard or similar underlayment, setting tiles with thinset mortar, and finishing joints with grout—each choice varying by tile type and subfloor.
You’ll fasten backerboard, mix mortar to manufacturer specs, notch thinset with the correct trowel, bed tiles level, spacers for consistent joints, let cure, then grout, seal, and clean for a durable, watertight surface.
Common Problems and How to Fix Them
You’ll run into issues like gapping or cupping, uneven subfloors that cause squeaks, moisture-related failures, and visible seams or color mismatches.
For each problem I’ll explain what causes it, how to diagnose it, and the corrective steps you can take.
Follow those fixes to restore performance and appearance without unnecessary repairs.
Gapping and cupping: causes and corrective steps
When gaps or cupping show up in your hard floor, they usually signal a moisture or acclimation problem that you shouldn’t ignore.
Check humidity, compare plank moisture to the room, and guarantee proper acclimation before installation.
For minor cupping, increase indoor humidity gradually and allow boards to flatten.
For severe cases, remove affected planks, dry subfloor, correct moisture sources, then reinstall or replace flooring.
Uneven subfloor and squeaks: diagnosis and repair
Moisture issues aren’t the only things that’ll ruin a smooth floor — uneven subfloors and squeaks can make a newly installed surface feel unstable and noisy.
Check for high/low spots with a straightedge, shim or sand ridges, and sister joists where needed.
Secure loose subfloor panels with screws, add blocking to joists, and test repeatedly until movement and noise stop.
Moisture-related failures: detection and remediation
If water has anywhere to hide, it will — and that’s why you need to spot and stop moisture problems before installing hard flooring.
Test concrete with a moisture meter and vapor tests; check crawlspaces and plumbing for leaks. Fix sources, install vapor barriers or waterproof membranes, and allow proper drying.
Use moisture-tolerant underlayment and follow manufacturer limits to prevent warping and mold.
Visible seams, mismatched planks, and color variation fixes
Although some color variation adds character, visible seams, mismatched planks, and uneven tones are usually installation or material issues you can fix before they become permanent eyesores.
Check acclimation, stagger boards by length, and sort planks for consistent grain and color.
Fill gaps with matching wood filler or colored caulk, adjust underlayment for flatness, and replace defective boards to guarantee a cohesive finish.
Best Practices, Tips, and Time-Saving Strategies
You’ll save time and get better results by planning cuts and layout before you start, keeping tools sharp, and grouping similar cuts.
Make sure you maintain consistent expansion gaps and proper changes, and account for seasonal humidity so the floor can move without buckling.
Follow simple maintenance routines to protect your investment and extend the floor’s life.
Efficient cutting and layout tips
Because precise cuts and a smart layout speed the whole job, take time up front to plan your board runs and cutting sequence.
You’ll work faster and waste less material by measuring twice, staging pieces, and batching cuts. Visualize each row and mark reference lines.
- Straight runs aligned with light
- Staggered seams for strength
- Group identical cuts
- Use a stop block
- Label pieces clearly
Maintaining consistent expansion gaps and transitions
When installing hard floors, leave consistent expansion gaps and plan changes so the floor can move without buckling or leaving visible gaps; measure and mark gap lines at walls, doorways, and around fixed objects before laying the first row.
Use spacers, maintain uniform gap width, and install connecting strips at room joins and thresholds.
Check alignment frequently and trim undercuts for neat, secure connections.
Seasonal and climate considerations
If your region swings between dry winters and humid summers, plan installation around the most stable season and acclimate materials accordingly so planks don’t cup, gap, or buckle later.
Monitor indoor humidity, use humidifiers or dehumidifiers during acclimation, and avoid installing during rapid temperature swings.
Seal exterior entryways, guarantee subfloor moisture is within spec, and schedule work when weather forecasts are steady.
Long-term maintenance to extend floor life
1 smart maintenance routine will keep your hard floor looking and performing its best for years: clean regularly with the right products, protect high-traffic areas, and address spills or damage immediately.
Sweep or vacuum daily, mop with manufacturer-approved cleaners, use felt pads under furniture, replace worn mats, control humidity, refinish or reseal as recommended, and inspect periodically to catch issues early.
Cost Breakdown and Project Planning
You’ll want to compare typical cost ranges for different materials and installation methods so you know where your budget will go.
Estimate time and decide whether hiring labor or doing it yourself makes financial sense based on those timeframes.
Finally, I’ll explain how to source materials and negotiate contractor quotes to get the best value.
Typical cost ranges by material and installation method
Because materials and installation methods vary so much, costs for hard flooring can swing widely—expect to pay anywhere from budget-friendly per-square-foot options to premium, professional-fit systems. You’ll see vinyl and laminate at low cost, mid-range engineered wood, and high-end solid hardwood or stone with specialized installation. Plan materials, underlayment, and finish choices accordingly.
| Material | Low | High |
|---|---|---|
| Vinyl/Laminate | $1–$4 | $6–$10 |
| Engineered Wood | $3–$7 | $8–$15 |
Time estimates and labor vs DIY cost comparison
After looking at material and installation price ranges, it’s useful to turn to how long projects take and whether you’ll hire pros or do it yourself.
Small rooms often take a day or two for pros; full homes several days to a week.
DIY saves labor costs but adds time, learning curve, tool rental and potential mistakes.
Budget time, skill, and contingency.
How to source materials and negotiate contractor quotes
1 practical step in controlling project costs is knowing exactly where to buy materials and how to read contractor quotes, so you can spot markups, hidden fees, and scope gaps.
Compare local suppliers, big-box stores, and online prices. Ask contractors for itemized bids, references, permits, warranties, and timelines.
Negotiate unit prices, remove unnecessary line items, and get everything in writing.
Mistakes to Avoid When Installing Hard Flooring
Don’t skip moisture testing or leave flooring to acclimate improperly, because that’s how boards cup, warp, or fail.
Make sure your subfloor is flat and secure, use the right tools and fasteners, and follow the manufacturer’s instructions and warranty requirements.
Small shortcuts now can mean costly repairs later.
Skipping moisture testing or improper acclimation
If you skip moisture testing or don’t acclimate your flooring properly, you’re setting yourself up for cupping, gapping, and costly repairs down the line.
Always measure subfloor and product moisture with reliable meters, follow manufacturer acclimation times, and control room humidity and temperature before installation.
Neglecting these steps voids warranties and leads to movement, warping, and fast replacement costs you’ll want to avoid.
Poor subfloor preparation and leveling
Start by inspecting and fixing the subfloor—skipping this step invites squeaks, uneven wear, and even plank failure.
Remove debris, repair rot or loose boards, and level dips or humps with compound or shims. Use a straightedge and proper fasteners; guarantee a solid, dry, and flat base within manufacturer tolerances.
A prepared subfloor prevents gaps, premature damage, and costly callbacks.
Ignoring manufacturer instructions and warranties
When you bypass the manufacturer’s installation guidelines and warranty terms, you risk voiding coverage and creating preventable failures—wrong adhesives, improper acclimation, or incorrect fasteners can all lead to cupping, delamination, or permanent damage.
Follow specified prep, spacing, and environmental limits. Keep receipts, document conditions, and register warranties.
If issues arise, manufacturers won’t honor claims if you ignored their protocols.
Using wrong tools or fasteners
After you follow the manufacturer’s instructions, the next big risk is using the wrong tools or fasteners—mistakes that can undo careful prep and void warranties.
Use recommended adhesive, nails, and screws; the wrong gauge, length, or type can split boards, cause squeaks, or fail under traffic.
Rent or buy proper cutters, spacers, and tapping blocks so your installation performs and stays covered.
When to Hire a Professional and How to Vet Installers
If your subfloor is uneven, the layout is complex, or the project needs plumbing or structural changes, you should hire a pro.
Ask contractors about experience, get a written checklist and multiple bids, and compare scope and warranties.
Watch for vague answers, no references, or missing licenses/insurance before you sign.
Signs a job is beyond DIY
Because hard-floor installation can hide costly mistakes, you should know which jobs aren’t worth DIY risk.
If subfloors need leveling, joists are damaged, moisture issues exist, or layout requires complex cuts and shifts, hire a pro.
Also consider large rooms, radiant-heat systems, or unfamiliar materials.
Professionals save time, guarantee warranty compliance, and prevent expensive callbacks.
Questions to ask contractors and checklist for bids
Wondering how to tell a good installer from a risky gamble? Ask clear, specific questions: experience with your material, timeline, warranty, payment schedule, and cleanup.
Compare written bids that list scope, materials, labor, start/end dates, and change-order terms.
Visualize results:
- Finished seams tight and even
- Subfloor flat and dry
- Neat baseboard connections
- Minimal debris after work
- Crew in uniform and ID
Red flags and verifying licenses/insurance
Those bid details and on-site observations will help you spot good installers, but you also need to watch for warning signs and confirm credentials before you sign.
Look for vague contracts, unpaid-lien history, pressure to pay cash, or no local references.
Verify license numbers with your state, confirm current insurance (liability and worker’s comp), and get everything written to protect yourself.
FAQ
You probably have a few practical questions after planning your install, like how long an average room takes and whether you can fit new flooring over the old.
You’ll also want to know the required expansion gap and why it matters, what maintenance to do right after installation, and if underfloor heating is compatible with your chosen material.
Read on for clear, concise answers to each point.
How long does hard flooring installation take for an average room?
How long will installing hard flooring take in an average room?
You can usually expect one to three days for a typical 150–300 sq ft room: prep and acclimation might take a half to full day, installation one day, and finishing touches or trims another half day.
Complex patterns, subfloor repairs, or room shape can extend the timeline.
Can hard flooring be installed over existing flooring?
Although it’s often possible to install hard flooring over existing flooring, whether you should depends on the type and condition of the current floor, the new flooring material, and local building codes.
You’ll inspect for level, moisture, and adhesion; remove loose, cushioned, or water-damaged layers; and confirm height clearance for doors and joints.
When in doubt, consult a pro.
How much expansion gap is needed and why?
Why does an expansion gap matter? You need a gap so the floor can expand and contract with temperature and humidity without buckling.
Typical gaps are 1/4″ to 3/8″ for floating laminate or engineered, and up to 3/4″ at large perimeters or long runs.
Follow manufacturer specs and leave gaps at thresholds, doorways, and around fixed objects.
What maintenance is required immediately after installation?
Once the floor’s in place, you should remove spacers, clean up debris, and avoid heavy traffic for at least 24 hours so joints can settle and adhesives (if used) can cure.
Then vacuum or sweep gently, wipe with a manufacturer-recommended cleaner, and protect edges with felt pads.
Don’t wet-mop aggressively for a week, and avoid dragging furniture to prevent scratches while surfaces finish settling.
Will underfloor heating work with my chosen hard floor?
If you plan to run underfloor heating, you’ll want to check compatibility with your chosen hard floor before finishing installation — some materials handle heat better than others.
Generally, porcelain, tile and engineered wood work well; solid hardwood may warp unless acclimated and kept at low temperatures.
Verify the floor’s thermal conductivity, adhesive tolerance and manufacturer’s warranty allow underfloor heating, and follow installation temperature limits.
Resources and Further Reading
You’ll want to consult manufacturer guides, how‑to videos, and downloadable checklists to make sure you follow recommended products and steps.
Check local building codes and any permit requirements before you start so you don’t run into violations or delays.
Use these resources together to plan the job and confirm you’ve met safety and legal standards.
Manufacturer guides, videos, and downloadable checklists
Manufacturers provide the clearest, most reliable installation instructions, and you should make their guides your starting point—many include step-by-step manuals, how-to videos, and printable checklists tailored to specific products.
Use these to plan, measure, and prep. Visual aids reduce mistakes.
Examples you’ll find:
- exploded-diagram of plank layout
- video of click-lock technique
- checklist for acclimation
- tool list and measurements
- waste and trim calculator
Local building codes and permit considerations
Those manufacturer resources will tell you how to install the product, but local building codes and permit rules tell you whether and how you can do it in your area.
Check codes before you start, pull permits if required, and schedule inspections.
Consider:
- City permit office counter
- Zoning restrictions notice
- Inspection appointment slip
- Permit card posted by door
- Contractor license verification