How Much Vinyl Flooring Do You Need? A Simple Guide to Calculating Coverage
Measure each room’s length and width in feet, multiply for square footage, and add 5–10% waste for straight runs or 10–15% for irregular layouts and pattern matching. For sheet vinyl, account for roll width and seams; for LVP and LVT, convert area to plank or tile coverage and round up to whole boxes. Keep extra for repairs and matching batch numbers. Follow these steps and you’ll get an accurate order — learn how to apply them by room.
How Much Vinyl Flooring Do You Need? Quick Answer
You’ll need to calculate the room’s square footage first, then convert that into the number of planks or rolls based on the product coverage.
Add a waste allowance—usually 5–10% for straight rooms and 10–15% for irregular layouts or pattern matching—to cover cuts and mistakes.
That extra buffer prevents costly shortages and keeps your install on schedule.
Direct Calculation Summary (Square Feet and Planks/Rolls)
Here’s the quick, no-frills way to figure how much vinyl you need: measure the room’s length and width in feet, multiply to get square footage, then add 5–10% for waste and seams; finally, divide that total by the coverage listed per plank or roll to know how many pieces to buy. Use this table for a simple checklist:
| Step | Value | Result |
|---|---|---|
| Room sqft | length × width | = |
| Waste add | +5–10% | = |
| Coverage/unit | listed on package | ÷ |
| Units to buy | round up | = how much vinyl flooring |
When to Add Waste Allowance and Why
Add waste allowance whenever your layout includes cuts, seams, or pattern matching, and especially when the room isn’t a perfect rectangle; these factors increase scrap and make the extra 5–10% (or more) necessary to guarantee you have enough material to finish the job without delays.
Add 5% for simple layouts, 10–15% for complex patterns or lots of cuts, and buy a bit extra for mistakes.
Understanding Vinyl Flooring Basics
Before you measure, you should know the main vinyl types—sheet, luxury vinyl planks (LVP), and tiles—because each comes in different sizes and packaging.
Check standard roll widths, plank dimensions, and the square footage per box so you can convert room area into the right units.
Also account for room shape, changes, and pattern layout, since those factors increase the amount of material you’ll need.
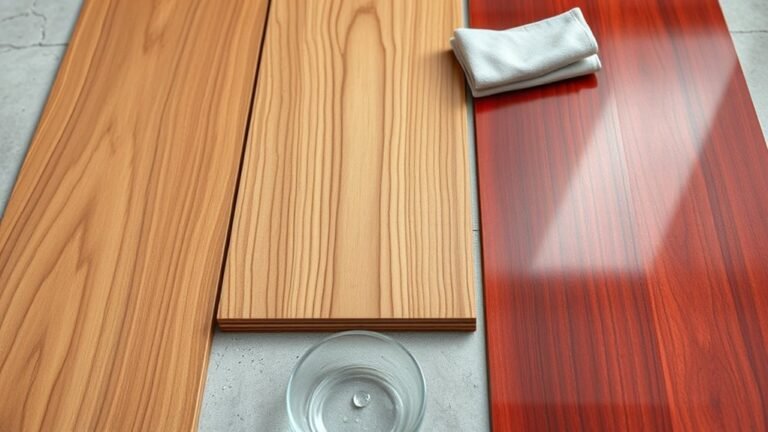
Types of Vinyl Flooring (Sheets, Luxury Vinyl Planks, Tiles)
Vinyl comes in three main forms—sheet, luxury vinyl plank (LVP), and vinyl tile (LVT)—and each has strengths that fit different rooms and budgets, so you’ll want to match the type to your needs.
- Sheet: seamless, water-resistant, great for bathrooms and laundry.
- LVP: realistic wood look, durable, ideal for living areas.
- LVT: tile aesthetics, versatile patterns, good for kitchens and entries.
Standard Sizes and Coverage Units (roll width, plank size, box coverage)
Most vinyl flooring comes in predictable sizes, so you can plan material needs without guesswork: sheets are sold by roll width (typically 6′ or 12′), luxury vinyl planks arrive in common lengths and widths that mimic real wood (for example, 48″ x 6″ or 72″ x 7″), and tiles usually match standard tile dimensions (12″ x 24″, 18″ x 18″, etc.).
| Type | Size | Coverage |
|---|---|---|
| Sheet | 6′ / 12′ rolls | Linear feet |
| Plank | 48″x6″ | Box sq ft |
| Tile | 12″x24″ | Box sq ft |
Factors That Affect Coverage (room shape, transitions, patterns)
When your room isn’t a simple rectangle, coverage needs change—so account for odd angles, alcoves, and doorways when estimating how much vinyl you’ll buy.
Measure each segment, include connections and thresholds, and add waste for pattern matching or directional planks.
Complex layouts and visible seams increase scrap. Round up to the nearest box or roll, typically adding 5–15% contingency for cuts and mistakes.
Step-by-Step Measurement Guide
Ready to measure your space? Start by measuring simple rectangular rooms, then break L-shaped or irregular areas into rectangles and add them together, remembering to include doorways, closets, and built-ins.
Convert your totals to square feet or meters and use the product’s coverage per box or roll to calculate how many you’ll need.
Step 1 Measure Simple Rectangular Rooms
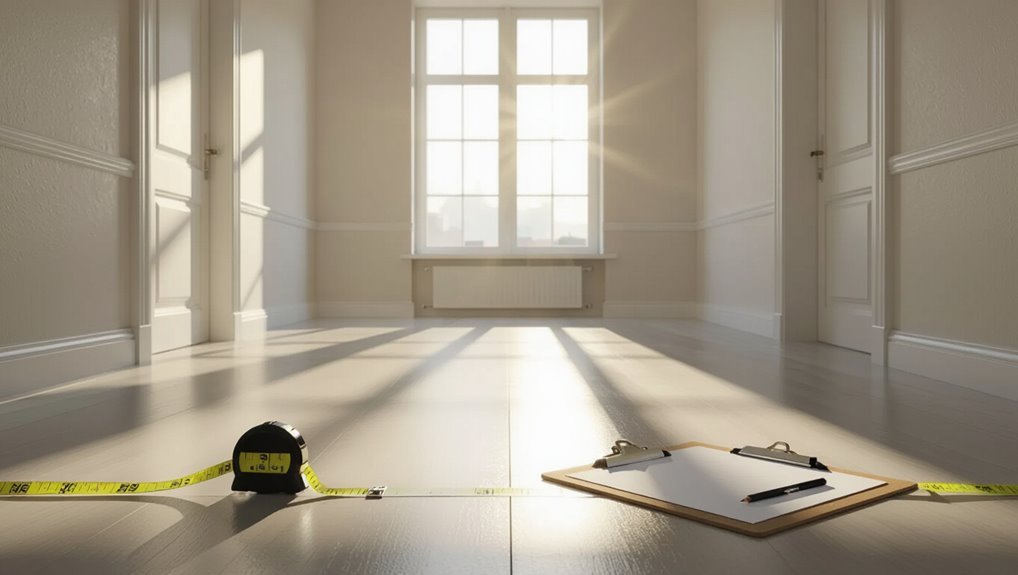
Start by measuring the length and width of your rectangular room with a tape measure, recording each dimension in feet (or meters) to two decimal places if possible.
Multiply length by width to get square footage (or square meters). Note any fixed obstructions like built-in cabinets and subtract their area.
Add a standard 5–10% waste allowance before ordering vinyl to guarantee full coverage.
Step 2 Measure Irregular or L-Shaped Rooms and Combine Areas

For L-shaped or irregular rooms, break the space into two or more simple rectangles you can measure easily. Then add their areas together to get the total square footage.
Measure each rectangle by multiplying length by width, note each area, and sum them.
Sketch the room, label dimensions, and double-check measurements to avoid errors before buying vinyl.
Step 3 Account for Doorways, Closets, and Built-ins
Next, measure doorways, closets, and built-ins so your vinyl fits around openings and fixed features.
Measure each doorway width and swing clearance, note threshold strips, and record closet floor areas separately.
Measure built-in units (cabinets, islands) around their perimeters so you can cut accurately.
Write down all dimensions clearly, labeling each area to avoid confusion when ordering and cutting pieces.
Step 4 Convert Measurements to Square Feet or Square Meters
Once you’ve recorded each area’s length and width, convert those measurements into square feet or square meters so you know how much vinyl to buy.
Multiply length by width for each area to get square units. Add all area totals together for the room.
If you measured in meters, report square meters; if in feet, report square feet. Round up slightly for practicality.
Step 5 Calculate Number of Boxes/Rolls Needed Based on Product Coverage
Now that you’ve totaled the room’s square footage or square meters, you’ll use that figure to determine how many boxes or rolls to buy. Divide your total area by the coverage per box/roll, round up, and add 5–10% for waste. Check product specs and seams.
| Item | Coverage | Quantity |
|---|---|---|
| Room | 250 ft² | — |
| Box | 20 ft² | 13 |
| Waste | 10% | 2 |
Waste Allowance: How Much Extra to Buy
Plan on buying a little extra vinyl to cover cuts and mistakes: straight lays usually need about 5% extra, staggered planks 7–10%, and patterned installs 10–15%.
If your room has odd shapes, alcoves, or many doorways, increase that percentage to account for irregular cuts and matching.
Use a simple sketch of the layout to decide how much more you’ll need before ordering.
Recommended Waste Percentages by Job Type (straight lay, staggered planks, patterned installs)
When you’re figuring how much extra vinyl to buy, different installation styles demand different waste allowances; straight lay installs need the least, staggered plank layouts require more, and patterned or herringbone designs call for the most. Aim for roughly: straight lay 5%, staggered 7–10%, patterned 10–15%. Adjust upward for room complexity.
| Job Type | Recommended Waste |
|---|---|
| Straight lay | 5% |
| Staggered planks | 7–10% |
| Patterned/herringbone | 10–15% |
How to Adjust Waste for Odd Shapes and Cuts
Because odd-shaped rooms and tricky cutouts increase scrap, you should add more waste allowance than for a simple rectangular space.
Measure irregular areas, note angled walls, alcoves and built-ins, then increase waste by 10–20% depending on complexity. For narrow strips or many seams, lean toward 20%.
Buy whole cartons to match dye lots and keep extra for future repairs.
Special Calculations for Different Vinyl Types
Different vinyl products need different math, so you’ll adjust your measurements for sheet vinyl seams, LVP pattern matching, and individual vinyl tiles.
For sheet vinyl you’ll account for roll widths and seam placement; for LVP you’ll plan extra for matching grain or pattern and staggered layouts.
For vinyl tile, factor in breakage and corner cuts to set a practical waste percentage.
Calculating Coverage for Sheet Vinyl (seams and roll handling)
Sheet vinyl comes on wide rolls, but you’ll still need to plan for seams, pattern matching, and roll handling so your coverage estimate is accurate.
Measure room dimensions, note roll width, and orient seams to minimize waste. Add 5–10% for seams, pattern repeat, and trimming.
Account for doorways, alcoves, and seams location to guarantee enough material for clean, continuous installation.
Calculating Coverage for Luxury Vinyl Planks (LVP) and Matching Patterns
How will you calculate coverage for luxury vinyl plank (LVP) while accounting for plank sizes, layout, and pattern matching?
Measure room area, convert to planks using each plank’s square footage, and add waste for staggered layouts (usually 5–10%).
Increase waste to 10–15% for complex patterns or random-width planks.
Account for junction cuts, matching grain direction, and replacement stock for future repairs.
Calculating Coverage for Vinyl Tiles
When calculating coverage for vinyl tiles, start by measuring the room’s net floor area and then convert that area into the number of tiles using each tile’s individual square footage.
This lets you account precisely for tile size variations like 12×12, 18×18, or modular formats.
Add 5–10% for cuts, waste, and pattern matching.
Round up to whole boxes and track leftover tiles for repairs.
Tools and Formulas to Simplify the Math
You’ll find a few quick formulas that make calculating area, converting units, and estimating plank or sheet counts much faster.
I’ll walk you through sample calculations for a small rectangular room, an L-shaped space, and a multi-room layout so you can see the formulas in action.
I’ll also recommend reliable mobile apps and online calculators to speed up your measurements and reduce waste.
Quick Formulas for Area, Conversion, and Quantity
Start by measuring each room’s length and width in feet, then multiply those numbers to get square feet per room; that simple area formula (length × width) is the foundation for all the conversions and quantity estimates that follow.
Use these quick formulas to convert and add up totals:
- Square feet = length × width
- Convert sq ft to boxes = total sq ft ÷ coverage per box
- Add 10% for waste and cuts
Sample Calculations (Small Room, L-Shaped Room, Multiple Rooms)
Take three common scenarios— a small rectangular room, an L-shaped space, and several rooms to cover— and walk through quick, practical calculations so you can see how the formulas apply in real situations. Measure dimensions, convert to square feet, add 10% waste. Use the table for examples:
| Scenario | Area (sq ft) | Total with waste |
|---|---|---|
| Small | 120 | 132 |
| L-shaped | 200 | 220 |
| Multiple | 450 | 495 |
Recommended Mobile Apps and Calculators
While measuring by hand works, using a mobile app or online calculator can speed things up and reduce mistakes, especially when you’re juggling multiple rooms or irregular shapes.
Try RoomScan Pro or MagicPlan for quick layouts, and use manufacturer coverage calculators for exact product yields.
Enter dimensions, add waste percentage (usually 5–10%), and let the tool total required planks or rolls for you.
Common Mistakes to Avoid
Don’t underestimate waste and cut-offs—you’ll need extra material for mistakes, odd cuts, and pattern repeats.
Pay attention to plank or tile direction and pattern matching so seams line up and the design looks intentional.
Remember thresholds, junction strips, and trim when you calculate total footage so you don’t run short at the end.
Underestimating Waste and Cut-offs
Because every cut and misalignment eats into your materials, you should plan for waste from the start when ordering vinyl flooring.
Estimate extra for trim, doorways, and mistakes—typically 5–10% for simple rooms, 10–15% for irregular layouts.
Track usable offcuts for future repairs.
Order an extra roll if patterns or narrow planks limit layout options to avoid mid-project shortages and delays.
Ignoring Directionality and Pattern Matching
If you ignore the direction of planks and the need to match patterns, you’ll end up with seams that jump and a floor that looks disjointed.
Plan plank orientation for light flow and room shape, and sequence boxes to align grain and repeats.
Measure for pattern repeats, note lot numbers, and mark pieces before cutting so you maintain a consistent, professional appearance throughout.
Forgetting Thresholds, Transition Strips, and Trim
When you overlook thresholds, changeover strips, and trim, you’ll often discover gaps, uneven edges, or awkward height changes the moment you finish the main floor.
Plan for thresholds at doorways, connector strips between different floor types, and base shoe or quarter round trim.
Measure and order materials, allow for cuts and waste, and coordinate heights to guarantee smooth, professional-looking changeovers.
Best Practices and Tips for Buying Vinyl Flooring
When you buy vinyl, plan to get extra for repairs and future color matching so patches blend seamlessly.
Check batch and lot numbers and coordinate orders—and time deliveries—to avoid mismatched runs.
Decide whether you’ll buy through a retailer or have a pro handle ordering and installation, since pros can manage quantities and timing for you.
Buying Extra for Repairs and Future Matching
Because lighting, wear patterns, and production batches can change how vinyl looks over time, you should buy extra planks or rolls now to guarantee a close match later.
Keep 5–10% extra for minor repairs and 10–15% for high-traffic areas or complex layouts.
Label and store unused material in a dry, temperature-stable place so you can access matching pieces when needed.
Coordinating Orders (batch/lot numbers) and Timing Delivery
If you’re ordering vinyl for a whole project, coordinate batch or lot numbers across all shipments and schedule deliveries so planks from the same production run arrive together; this prevents visible color or pattern shifts and makes installation smoother.
Also confirm lead times, ask suppliers to reserve your lot, stagger delivery for phased installs, and inspect cartons on arrival to catch mismatches before installers begin.
Working with Retailers vs. Professional Installers
Decide whether you want the convenience of a retailer or the expertise of a professional installer before you buy—each choice affects product selection, warranties, and scheduling.
Retailers often offer lower prices and returns, but installers provide precise measurements, subfloor prep, and warranty-backed labor.
Get written estimates, confirm who handles defects, ask about lead times, and compare total cost rather than unit price.
Cost Considerations Linked to Quantity
When calculating how much vinyl you need, you’ll want to estimate material cost based on the square footage to avoid surprises.
Buying more boxes at once can lower the per-unit price but may leave you with excess you can’t return.
Consider bulk discounts, return policies, and how leftover planks affect your final budget.
Estimating Material Cost Based on Coverage
Estimating material cost starts with matching the square footage you need to the price per square foot, so you can quickly see how quantity drives total expense.
Multiply your measured area (including waste allowance) by the unit price to get the material subtotal.
Add delivery fees and taxes to that subtotal. That gives you a clear, practical estimate for budgeting your vinyl flooring purchase.
How Purchase Quantity Affects Pricing and Returns
Although buying more vinyl at once can lower the per‑square‑foot price through volume discounts, you should weigh that savings against storage, potential returns, and style continuity.
You’ll save on unit cost but risk unused inventory if plans change or stock varies between batches. Buy enough for cuts and mistakes, check return policies, and consider buying a small extra batch later to match dye lots.
FAQ
Got questions? You’ll find answers on measuring rooms accurately, how much extra to buy for pattern matching, and whether unopened boxes can be returned.
We’ll also cover accounting for underlayment or subfloor prep and calculating coverage for multiple adjacent rooms with different layouts.
How do I measure a room for vinyl flooring accurately?
Wondering how to get precise measurements for vinyl flooring? Measure length and width of the room in feet, record to the nearest quarter foot, then multiply to get square footage.
For L-shaped or irregular spaces, split into rectangles, measure each, and sum areas. Subtract fixed fixtures you won’t cover.
Double-check measurements and note doorways, thresholds, and vents for accurate planning.
How much extra vinyl should I buy for pattern matching?
How closely do you want the pattern to line up across seams?
If you need tight matching, add 10–15% extra to account for directional repeats and waste from cuts.
For random or less visible seams, 5–8% extra usually suffices.
Always calculate based on the product’s pattern repeat length and your room layout, then round up to the nearest full box.
Can I return unopened boxes if I overbuy?
Can you return unopened boxes if you overbuy? Check the retailer’s return policy before purchase—most allow returns of unopened, unused boxes within a set timeframe with receipt.
Keep original packaging and tags. Some stores charge restocking or return shipping fees, and clearance items may be final sale.
Call customer service or check your order confirmation for specific return instructions and deadlines.
Do I need to account for underlayment or subfloor prep in coverage?
If you plan to return unopened boxes after overbuying, remember that coverage needs are separate from return policies — and underlayment or subfloor prep can change how much material you actually need.
You typically don’t include underlayment in vinyl square footage, but factor its thickness for changes and thresholds.
Also allow extra for areas needing subfloor repair or leveling; these can affect usable plank length.
How do I calculate for multiple adjacent rooms with different layouts?
When you’re covering multiple adjacent rooms with different layouts, treat each space as its own measurement zone but plan for changes and waste across the whole area.
Measure each room separately, include alcoves, closets, and connections.
Add 5–10% waste per room or 7–10% overall for consistent planks.
Round up to full boxes and coordinate patterns or direction for seams.