How to Clean Laminate Floors the Right Way Without Warping or Dulling
Keep grit off your laminate by sweeping or vacuuming in hard-floor mode and wipe spills up right away. Use a barely damp microfiber mop with a pH-neutral cleaner or a heavily diluted vinegar mix; never steam, scrub with abrasives, or over-wet the floor. Protect furniture with felt pads, control humidity around 35–55%, and test cleaners first. For stubborn stains or warping, take targeted steps or replace planks—keep going to learn precise techniques and fixes.
How to Clean Laminate Floors the Right Way Quick Answer
Keep water light and use a gentle cleaner—wipe spills quickly and mop with a barely damp microfiber.
Before you start, grab a broom or vacuum, a microfiber mop, a mild laminate cleaner or vinegar solution, and dry towels.
Follow the checklist to protect seams, avoid soaking, and dry any wet spots right away.
One-sentence summary of best practice
Start by sweeping or vacuuming to remove grit. Then wipe with a barely damp microfiber mop and a pH-neutral laminate cleaner to lift spills without warping or dulling the finish.
For best results, ask yourself “how can I clean laminate floors” by tackling sticky spots with a soft cloth, drying immediately, avoiding excess water, and using gentle cleaners to preserve the finish and seams.
Fast checklist for a safe cleaning session
1 quick checklist helps you clean laminate floors safely and efficiently:
- Sweep or vacuum loose dirt first.
- Spot-treat stains with a damp microfiber cloth.
- Use a well-wrung mop and gentle cleaner.
- Dry floors immediately to avoid moisture damage.
- Place felt pads on furniture and use mats at entrances.
Follow these steps and you’ll prevent warping, streaks, and dulling.
Understanding Laminate Flooring Basics
You’re working with a layered product—usually a fiberboard core, decorative print, and a protective surface—so excess moisture or harsh cleaners can make boards swell or the finish go dull.
Different surface finishes (gloss, matte, textured) react differently to water and chemicals, so you’ll want to match your cleaning method to the finish.
Learn to tell normal wear—light scratches or loss of sheen—from actual damage like buckling, deep gouges, or edge separation.
What laminate floors are made of and why they warp or dull
Laminate floors combine a tough, clear wear layer over a printed decorative image and a fiberboard core, so what you see is really a protective skin atop compressed wood fibers — and that makeup explains a lot about warping and dulling.
If moisture soaks the core, it swells and warps; abrasive cleaners or scratching wear through the protective layer, exposing fibers that look dull and degrade faster.
Common surface finishes and how they react to water and cleaners
Because manufacturers add different protective coatings, your floor’s finish has a big say in how it handles water and cleaners.
Glossy coatings resist spills and wipe clean easily but can show streaks; matte or textured finishes hide scratches yet trap dirt and need gentler detergents.
Avoid abrasive cleaners and excess water; use pH-neutral solutions and a damp microfiber mop to protect the surface.
Signs of damage vs. normal wear
Glossy and matte finishes handle spills and cleaners differently, but knowing how they wear over time helps you tell normal aging from actual damage.
You’ll expect light surface scratches, minor sheen loss in high-traffic areas, and faint scuffs that buff out.
Deep gouges, swelling at seams, bubbling, or persistent discoloration signal damage needing repair or replacement—act promptly to prevent spreading.
Tools and Cleaning Supplies You Should Use
You’ll want a few basic tools—like a soft-bristled broom, a microfiber mop, and a vacuum set to hard‑floor or bare‑floor mode—to remove grit without scratching.
Use safe commercial cleaners labeled for laminate or a simple DIY mix (for example, a few drops of dish soap in a bucket of warm water or a 1:1 white vinegar-to-water spray) and wring mops well so floors don’t get soggy.
Steer clear of steam cleaners, abrasive pads, and oil‑based or waxy products because they can warp, dull, or leave residue on the planks.
Recommended tools (broom, microfiber mop, vacuum settings)
Start with a few essential tools: a soft-bristled broom, a high-quality microfiber mop, and a vacuum you can set to hard-floor mode or turn off the beater bar.
You’ll use gentle tools to prevent scratches and avoid excess water. Keep replacements ready and adjust vac settings for wheels and suction.
- Soft-bristled broom
- Microfiber flat mop
- Vacuum with hard-floor mode
- Extra microfiber pads
- Dustpan with rubber edge
Safe commercial cleaners and DIY solutions (ingredients & ratios)
When choosing cleaners, pick products and DIY mixes that remove grime without leaving a residue or damaging the wear layer. Use pH-neutral commercial cleaners or mix 1 cup white vinegar per gallon water for light cleaning; add a few drops of dish soap for grease. Test first.
| Cleaner | Ratio | Use |
|---|---|---|
| pH-neutral | as directed | daily |
| Vinegar mix | 1:64 | light |
| Dish soap | 2–3 drops | spot-clean |
Products and tools to avoid (and why)
Although some common cleaning tools seem harmless, many can scratch, dull, or strip laminate’s wear layer, so you should avoid abrasive scrubbers, steam mops, and oil-based polishes.
Also skip wax, ammonia, bleach, and harsh alkaline cleaners. Don’t use soaking wet mops, metal-edged tools, or abrasive pads.
Stick to microfiber, pH-neutral cleaners, and minimal water to protect finish and prevent warping.
Step-by-Step Cleaning Process
Before you start, clear the room of furniture, rugs, and loose debris so you can work efficiently.
Next you’ll tackle dry cleaning with a broom or vacuum, handle spots and stains with the right cleaners, and damp-mop using only a lightly moist mop.
Finish by buffing and adding small finishing touches to restore shine without wax.
Step 1 Preparation: remove furniture, rugs, and loose debris
Start by clearing the room: move furniture, roll up rugs, and pick up any loose items so you can access the whole floor.
Check for pet bowls, toys, and cords, then store them.
Use felt pads on chair legs and stack lightweight pieces nearby.
This prevents damage during cleaning and gives you unobstructed access for efficient, consistent care without accidental scratches or spills.
Step 2 Dry cleaning: sweeping and vacuuming tips for laminate
With the room cleared, dry cleaning is your next move: sweep or vacuum the entire floor to remove dust, grit, and pet hair that can scratch the surface.
Use a soft-bristle broom or a vacuum with a hard-floor setting and felt brush to avoid scuffs. Work toward a doorway, overlap strokes, and empty the vacuum frequently to prevent redistribution of debris.
Step 3 Spot cleaning spills and stains (procedure for different stain types)
Once spills happen, act quickly to prevent stains from setting: blot liquids with a soft, absorbent cloth without rubbing, and scrape solids gently with a plastic spatula before you wipe.
For sticky residues, dampen a cloth with warm water and mild detergent; for grease, use a small amount of dish soap; for ink or dye, try isopropyl alcohol sparingly, then rinse and dry.
Step 4 Damp mopping correctly (how much water, motion, drying)
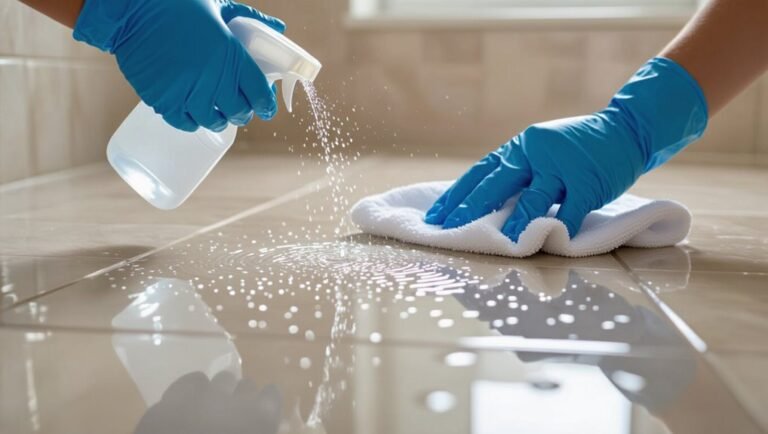
Dampen a microfiber mop or cloth so it’s just moist—not dripping—to avoid water seeping into seams; wring it out thoroughly or use a spray mop set to a fine mist.
Mop in the direction of the planks with gentle, overlapping strokes, changing pads when soiled.
Immediately dry any damp areas with a clean microfiber towel to prevent swelling or streaks.
Step 5 Buffing and finishing touches for shine without wax
Finish by buffing the floor to revive its shine without wax—use a clean, dry microfiber cloth or a soft buffing pad and work in small sections so you can see results as you go.
Move with light, overlapping strokes following the grain, check for streaks, and re-buff any dull spots.
Finish vents closed briefly to keep dust off and admire the even, streak-free sheen.
Deep Cleaning and Restoration Methods
When routine cleaning isn’t enough, you’ll want to schedule a deep clean to lift embedded dirt and revive finish.
I’ll show simple techniques for removing scuffs, adhesive residue, and pet stains without damaging the laminate.
You’ll also learn how to tackle grout lines or textured surfaces safely and effectively.
When and how to perform a deep clean
Although regular maintenance keeps laminate looking good, you’ll need a deep clean whenever grime, stains, or wear build up beyond what mopping removes.
Start by sweeping and vacuuming thoroughly, then spot-test a manufacturer-approved cleaner.
Use a damp (not wet) microfiber mop with gentle solution, work small sections, rinse residue, and dry immediately.
Repeat only as needed to restore appearance without soaking seams.
Removing scuffs, adhesive residue, and pet stains
Tackle scuffs, adhesive residue, and pet stains with targeted treatments so you don’t damage the laminate while restoring its appearance.
For scuffs, rub gently with a melamine sponge or a soft cloth and a bit of laminate cleaner.
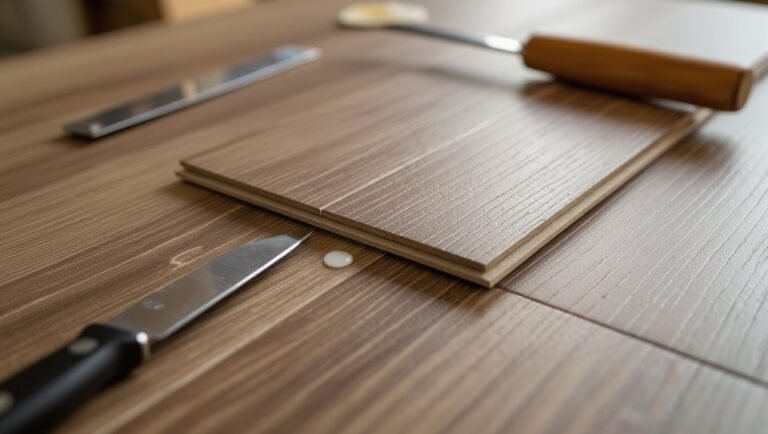
Remove adhesive with a plastic scraper and rubbing alcohol.
Blot pet stains immediately, use enzyme cleaner, then dry thoroughly to prevent lingering odor or damage.
Dealing with grout lines or textured surfaces
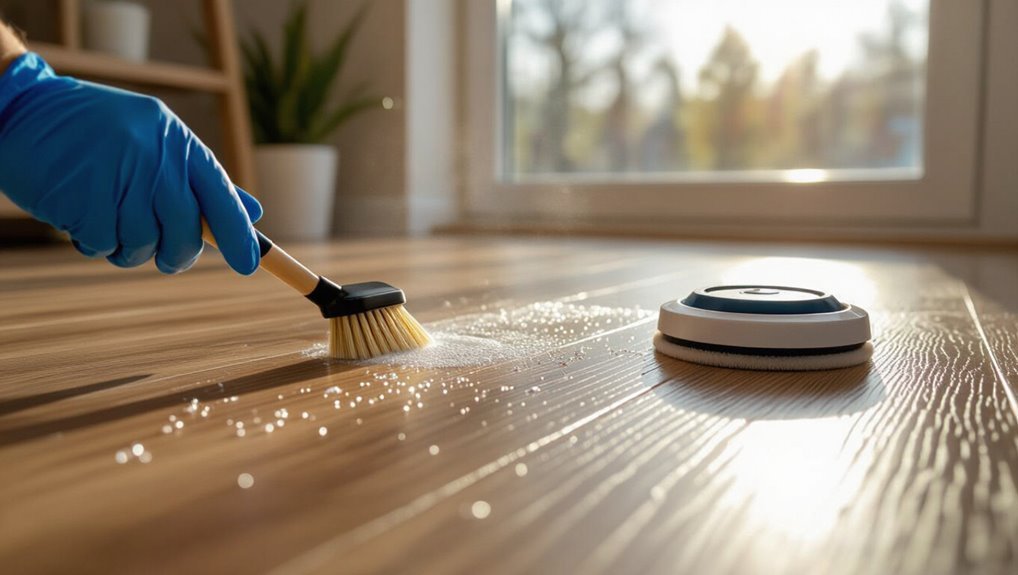
After handling surface scuffs and stains, you’ll want to address grout lines and textured laminate, which trap dirt and show wear differently than smooth planks.
Use a soft-bristle brush with a mild pH-neutral cleaner, working along texture or grout grooves. Rinse with a damp microfiber and dry promptly.
For stubborn buildup, repeat gently; avoid abrasive tools or excess water that can lift edges.
Common Mistakes That Cause Warping or Dulling
Don’t over-wet your floors or use steam cleaners, because excess moisture can warp the core layers.
Avoid abrasive pads and harsh chemicals that strip the wear layer and leave dull spots.
Also be careful with mopping technique and mixing products—wrong combos or soaking the floor will damage the finish.
Over-wetting and steam cleaning risks
Although laminate looks sealed, it’s vulnerable to excess moisture and high heat; over-wetting or using a steam cleaner can force water into seams and under the wear layer, causing swelling, warping, or a cloudy, dulled finish.
You should mop with a barely damp cloth, dry spills immediately, and never use steam.
Excess moisture ruins joints and adhesives, shortening your floor’s life.
Using abrasive tools or harsh chemicals
If you’re tempted to scrub away stains with steel wool, scouring pads, or harsh chemical cleaners, think twice—those abrasive tools and strong solvents can quickly wear down the protective wear layer and leave the surface dull or scratched.
Use soft microfiber, gentle pH-neutral cleaners, and spot-treat stubborn marks with manufacturer-approved products to preserve finish and extend laminate life.
Improper mopping techniques and wrong product combinations
After avoiding abrasive tools and harsh chemicals, you still can damage laminate by using the wrong mopping methods or mixing cleaners.
Don’t flood floors or let water pool; use a damp, well-wrung microfiber mop. Avoid mixing vinegar, bleach, or ammonia with commercial cleaners — reactions can dull finishes.
Stick to manufacturer-approved products and rinse residues promptly to protect finish and seams.
Prevention and Long-term Care Strategies
To keep your laminate looking its best, you’ll want a simple daily and weekly cleaning routine plus seasonal checks for polish alternatives or resealing needs.
Use mats and felt pads to protect high-traffic zones and furniture, and manage pet nails and accidents promptly.
Control indoor humidity and ventilation to prevent warping and extend the floor’s life.
Daily and weekly maintenance routine
1 simple daily habit and a short weekly routine will keep your laminate floors looking great and prevent costly repairs.
- Sweep or vacuum daily to remove grit.
- Wipe spills immediately with a damp cloth.
- Mop weekly with a manufacturer-approved cleaner.
- Use felt pads on furniture legs.
- Place doormats to trap dirt and moisture.
Seasonal and annual care (polish alternatives, resealing considerations)
Daily and weekly habits keep immediate dirt and spills at bay, but seasonal and annual care will protect your laminate from long-term wear.
Every season, inspect seams and edges for lifting, clean thoroughly with a manufacturer-safe cleaner, and avoid wax polishes.
If finish looks worn, use a recommended laminate refresher—not a sealant—for light restoration.
Reserve professional resealing advice for major damage.
Protecting floors from furniture, pets, and high-traffic areas (mats, pads)
When you plan ahead, simple protections keep laminate looking new for years: use felt pads under furniture legs, wide caster wheels, and area rugs in entryways and under dining tables.
Trim pet nails, place washable mats at doors, and rotate rugs in high-traffic zones.
For heavy furniture, lift when moving or use sliders to prevent scratches and indentations.
Humidity control and environmental tips to prevent warping
Because laminate reacts to moisture and long-term humidity swings, keep indoor relative humidity between about 35–55% to prevent boards from expanding or contracting.
Use a hygrometer, run a humidifier in winter and a dehumidifier or AC in summer, and ventilate bathrooms and kitchens.
Wipe spills immediately, avoid steam cleaners, and maintain consistent temperature to minimize stress and gaps over time.
Comparing Cleaning Methods and Products
Now you’ll compare common approaches—damp mopping, spray-and-wipe, and steam mops—to see which balances cleanliness with laminate safety.
We’ll also weigh DIY mixes against commercial cleaners for effectiveness and pet- and child-safe ingredients.
Finally, you’ll learn which options work best for high-traffic homes, pet owners, and families.
Damp mop vs. spray-and-wipe vs. steam mop
Although each method can make laminate floors look clean, they work very differently and suit different needs:
You’ll choose based on soil level, finish sensitivity, and convenience. Damp mopping is gentle; spray-and-wipe targets spots; steam mops risk warping if overused. Match technique to damage risk and drying time.
| Method | Best for | Risk |
|---|---|---|
| Damp mop | Regular care | Low |
| Spray-and-wipe | Spots | Low |
| Steam mop | Heavy grime | Medium |
DIY solutions vs. commercial cleaners: effectiveness and safety
When deciding between DIY solutions and commercial laminate cleaners, consider how well each removes dirt, how safe it’s for your floor’s finish, and how much effort you’re willing to put in.
DIY mixes (vinegar diluted, mild soap) cost less and work for light soil but risk residue if overused.
Commercial cleaners are formulated for finishes, often easier and safer when used per instructions.
Best pick for high-traffic homes, pet owners, and families
Because high-traffic homes, pet owners, and families need durability and quick cleanup, choose methods and products that remove soil without leaving residue, protect the wear layer, and stand up to frequent use.
You’ll want a pH-neutral laminate cleaner, microfiber mop, and spot-clean enzyme spray for accidents. Avoid oil soaps and excess water; dry promptly and use mats to reduce grit and scratching.
Troubleshooting: Common Problems and Solutions
If you notice minor warping or buckling, you can often fix it by reducing humidity, re-seating loose planks, or using weights until they settle.
For persistent dullness or finish wear, try gentle cleaners and a manufacturer-recommended polish, but don’t sand or use harsh products.
If damage is widespread or structural, call a professional to assess whether repair is feasible or replacement makes more sense.
How to fix minor warping or buckling
Although minor warping or buckling can be alarming, you can often fix it yourself with a few targeted steps.
First, identify moisture source—stop leaks, improve ventilation, use a dehumidifier.
Remove baseboards, gently lift affected planks to dry and flatten; weight them down once dry.
Replace badly swollen boards and leave proper expansion gaps when reinstalling to prevent recurrence.
What to do about persistent dullness or finish wear
When your laminate starts looking dull or the factory finish wears thin, you don’t always need to replace the floor—first check for surface grime, scratches, or worn areas that cleaning and light restoration can fix; deeper wear may call for targeted repairs or a protective overlay.
Start with a gentle cleanser, microfiber mop, and scratch-removal kit; use a laminate polish sparingly and test first.
When to call a professional vs. when to replace planks
Because some issues are quick fixes while others risk structural damage, you’ll want to judge whether you can tackle a laminate problem yourself or call a pro.
Replace planks for deep gouges, swelling from water, or delamination.
DIY if scratches, loose edges, or localized staining respond to repair kits.
Call a pro for extensive water damage, subfloor issues, or mismatched replacement planning.
Frequently Asked Questions (FAQ)
You probably have a few quick questions about caring for laminate, like whether you can use a steam mop or if vinegar or ammonia will harm the surface.
You’ll also want to know how often to deep-clean, how to remove water stains or ring marks, and whether laminate can be refinished or resealed.
Below are clear answers to each of these common concerns.
Can I use a steam mop on laminate floors?
Curious whether a steam mop will harm your laminate floors? You shouldn’t use steam mops regularly—excess heat and moisture can swell seams, lift edges, and damage the wear layer.
Occasional, very gentle steam on well-sealed, manufacturer-approved laminate might be safe, but dry methods or damp mopping with recommended cleaners are the reliable choice to prevent warping and dulling.
How often should I deep-clean laminate floors?
How often you should deep-clean laminate floors depends on traffic, pets, and visible buildup. Generally, aim for a thorough cleaning every 1–3 months, with spot treatments as needed in between.
Stick to manufacturer-friendly cleaners, lift stains promptly, and move furniture occasionally to clean hidden dust.
If entryways get heavy dirt, increase frequency; low-traffic rooms can wait toward the three-month mark.
Will vinegar or ammonia damage my laminate?
If you’ve been scheduling regular deep cleans, the next common question is whether household acids or alkalis—like vinegar or ammonia—are safe for laminate.
Don’t use straight vinegar or ammonia; their acidity or alkalinity can dull the finish or break down seams over time.
Instead dilute vinegar heavily (about 1 cup per gallon) or use manufacturer-approved cleaners and spot-test before full use.
How do I remove water stains or ring marks?
When water rings or stains appear, act quickly to lift them before they set into the finish: blot excess moisture with a soft cloth.
Then gently rub a damp microfiber with mild dish soap.
For stubborn rings, try a paste of baking soda and water—rub lightly, then wipe clean.
Dry thoroughly and buff with a dry cloth to restore shine.
Can I refinish or reseal laminate flooring?
After tackling stains and keeping the surface dry, you might wonder whether you can refinish or reseal laminate floors.
You can’t sand and refinish like hardwood; the wear layer is a printed, sealed surface. If it’s worn, replace damaged planks.
You can use manufacturer-approved repair kits or surface cleaners that restore shine, but avoid coatings that trap moisture or peel.