
How to Remove Vinyl Flooring: the Easiest Methods With Least Effort
You can remove vinyl flooring quickly with the right prep and tools: clear the room, test for asbestos, and protect adjacent areas. For loose or peel-and-stick vinyl, heat seams with a heat gun or hair dryer and peel up strips; for glued sheet vinyl use a utility knife to score, pull with pliers, then scrape adhesive with a long-handled scraper or a rented power scraper and solvent. For large jobs, rent equipment or hire pros, and keep reading for step-by-step tips.
How to Remove Vinyl Flooring Quickly and with Least Effort
If you want the quickest ways to strip vinyl, start with a clear list of the fastest methods—heat, scoring and pulling, or using a floor scraper or chemical adhesive remover.
This guide is for DIYers and pros who need to save time or prepare a subfloor for refinishing, not for delicate historic floors.
You’ll learn when it’s worth rushing the job and when a careful, slower approach pays off.
Fastest methods at a glance
Start by choosing the quickest approach that matches your floor type and tools: peeling works best for loose or glue-free vinyl, heat-and-scrape speeds removal for glued sheets, and a power scraper or oscillating tool will cut labor on large areas.
- Peel: ideal when you need to know how to get up vinyl flooring with minimal mess.
- Heat and scrape: for stubborn glued sheets.
- Power scraper: fastest for large rooms.
Who this guide is for and when to remove vinyl flooring
Anyone tackling a floor replacement or upgrade will find this guide useful—whether you’re a DIY homeowner working on a single room, a landlord prepping a rental, or a contractor needing quick refresher tips.
Use it when vinyl is damaged, delaminating, stained, or beneath a remodel. If subfloor concerns, water damage, or adhesive residue threaten new flooring, remove vinyl first to guarantee a safe, level base.
Basic Understanding What Vinyl Flooring Is and Why Removal Varies
Before you start, know what kind of vinyl you’re dealing with—sheet, luxury plank/tile, peel-and-stick, or glued-down—as each peels up differently.
Also consider the subfloor (concrete, plywood, OSB, or existing tile) because it influences the tools and effort required.
Gather the right tools, safety gear, and materials checklist so you’re ready for whatever the job throws at you.
Types of vinyl flooring (sheet, luxury vinyl plank/tile, peel-and-stick, glued-down)
Vinyl comes in several common forms—sheet, luxury vinyl plank/tile (LVP/LVT), peel-and-stick, and glued-down—and each one peels up and tears out differently, so you’ll want to identify which you have before you begin removal. Know how adhesive, backing, and plank seams change effort and tools.
| Type | Adhesive | Removal tip |
|---|---|---|
| Sheet | Full-spread | Score, peel |
| LVP/LVT | Click or glue | Pry seams |
| Peel-and-stick | Pressure-sensitive | Heat, peel |
Common subfloors and how they affect removal (concrete, plywood, OSB, existing tile)
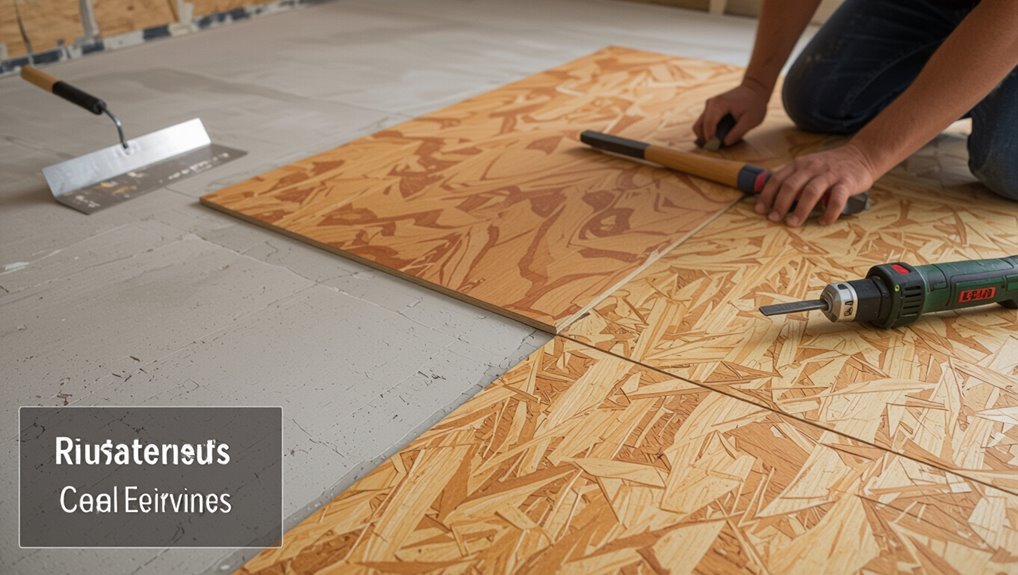
Although the floor under your vinyl might be out of sight, it changes how you remove the material: concrete, plywood, OSB, and existing tile each demand different tools and techniques.
Knowing which one you’re dealing with helps you plan labor, safety steps, and whether you’ll need repair afterward.
Concrete needs adhesive scraping and possible patching; plywood/OSB can delaminate; tile adds extra demo and grout removal.
Inspect first.
Tools, safety gear, and materials checklist
Because different vinyl types and subfloors change the job, you’ll want a clear checklist of tools, safety gear, and materials before you start so you can work efficiently and stay safe.
Gather essentials, plan disposal, and inspect adhesive.
- Tools: utility knife, floor scraper, pry bar
- Safety: gloves, N95 respirator, safety glasses
- Materials: solvent, garbage bags, plywood patching supplies
Preparation Before You Start
Before you pull up any vinyl, check how well it’s stuck and whether the underlayment is sound so you can pick the right removal method.
Clear the room, seal off adjacent areas, and lay down drop cloths to protect surfaces and contain dust.
Make sure you have power access, good ventilation, and a plan for disposing of removed flooring and adhesive waste.
Assessing the condition and adhesion of the vinyl
When you’re getting ready to remove vinyl flooring, start by closely inspecting its surface and how well it’s stuck down; this tells you what tools and techniques you’ll need.
Check for tears, bubbles, seams, and glued edges. Press and pry small areas to gauge adhesion.
Note subfloor damage, moisture stains, or mold. Document troublesome spots to plan removal order and required repairs.
Clearing the room and protecting adjacent areas
Now that you know where the vinyl is damaged or tightly adhered, clear the room so you can work safely and efficiently.
Remove furniture, rugs, and fragile items; roll up loose mats.
Seal doorways with plastic sheeting and painter’s tape to protect adjacent rooms and baseboards.
Cover vents and thresholds, and place drop cloths to catch debris and adhesive residue during removal.
Power access, ventilation, and waste disposal planning
Because you’ll be using power tools, set up a clear plan for electrical access, airflow, and disposal so the job stays safe and efficient.
Position outlets, use heavy-duty extension cords without daisy-chaining, and test GFCI protection.
Open windows, run fans or a HEPA air scrubber, and wear a respirator.
Rent or arrange a dumpster, bag debris, and recycle materials when possible.
Primary Methods to Remove Vinyl Flooring
You’ll usually choose one of four removal methods based on the vinyl type and how it’s attached.
Peel-and-stick comes off easiest, sheet vinyl takes more effort, and glued-down vinyl or VCT requires heavier tools and time.
Luxury vinyl planks or tiles (LVP/LVT) can behave like peel-and-stick or like glued products, so you’ll treat them accordingly.
Method 1 Peel-and-Stick Vinyl (Least effort)
For peel-and-stick vinyl you’ll need just a few tools: a putty knife or scraper, utility knife, heat gun or hair dryer, and adhesive remover.
Start by loosening a corner with the utility knife and scraper, then peel slowly, using heat to soften stubborn sections.
Finish by scraping off residue and cleaning the subfloor so it’s ready for whatever comes next.
Tools needed
Start with a few basic tools and you’ll handle most peel-and-stick vinyl removal quickly: a utility knife, a sturdy putty knife or floor scraper, a heat gun or hair dryer to soften adhesive, work gloves, and safety glasses.
Add a pry bar for stubborn edges, a plastic scraper to protect substrate, adhesive remover or mineral spirits, rags, and a bucket for cleanup.
Step 1: Loosen a corner
Peel back a corner of the vinyl to give yourself a working edge; use a utility knife to cut a small slit if the sheet is stubborn or a putty knife to pry up a loose corner.
Work slowly, lifting a few inches at a time until you can grip the flap.
Remove any nails or staples you find, and clear away loose adhesive debris before proceeding.
Step 2: Peel slowly and apply heat if needed
With a corner lifted, continue pulling the sheet back slowly, keeping the strip as close to the floor as possible to reduce tearing.
If adhesive resists, warm the vinyl with a heat gun or hair dryer on low, moving constantly to avoid scorching.
Pull at a shallow angle, reheating stubborn sections until the sheet releases.
Dispose strips as you go to keep the workspace clear.
Step 3: Remove residue and prep floor
Scrape away leftover adhesive and grime so the subfloor’s ready for whatever comes next.
Use a floor scraper or stiff putty knife, then apply adhesive remover or a vinegar-water solution for stubborn spots.
Rinse, dry, and sand any high spots.
Vacuum and wipe with a tack cloth.
Inspect for damage and repair gaps or seams before installing new flooring.
Method 2 Sheet Vinyl Removal (Moderate effort)
You’ll need a utility knife, pry bar, floor scraper, and adhesive remover to tackle sheet vinyl removal.
Start by cutting the vinyl into manageable strips, then pull from seams and edges to lift each strip.
Finish by scraping off the backing and removing any leftover adhesive before prepping the subfloor.
Tools needed
For sheet vinyl removal you’ll need a few specific tools to make the job efficient and safe: a utility knife, floor scraper or long-handled scraper, pry bar, heat gun or hair dryer, pliers, and a heavy-duty adhesive remover or solvent if glue’s stubborn.
Also wear knee pads, gloves, safety goggles, and a respirator for solvent fumes.
Have a trash bin and drop cloth handy.
Step 1: Cut into manageable strips
With your tools ready and protective gear on, start by scoring the sheet vinyl into manageable strips so you can lift and remove it more easily.
Use a straightedge and utility knife to cut 6–12-inch-wide strips, keeping blade shallow to avoid damaging underlayment.
Work systematically across the room, re-sharpening the blade as needed, and dispose of strips in manageable bundles.
Step 2: Pull up from seams and edges
Start at a seam or along an edge and pry the vinyl up carefully using pliers and a putty knife, working a few inches at a time so the backing and adhesive don’t tear away in thin strands.
Grip lifted sections firmly, pull steadily at a low angle, and continue along seams.
Cut or rip stubborn areas into smaller pieces to keep removal controlled and reduce floor damage.
Step 3: Remove remaining backing and adhesive
Scrape up the remaining backing and adhesive using a floor scraper or putty knife, working in small sections so you can see what’s left on the subfloor.
Use adhesive remover or a heat gun for stubborn areas, then scrape again.
Wipe residue with mineral spirits or a recommended cleaner, rinse, and let dry.
Inspect for damage and sand or patch as needed before new flooring.
Method 3 Glued-Down Vinyl or VCT (Higher effort)
For glued-down vinyl or VCT you’ll need a floor scraper, oscillating tool, heat gun, and adhesive remover.
Start by scoring or heating the seam to break the bond, then use the scraper or a machine to lift the vinyl.
For stubborn glue, apply a chemical remover or sand it off, then thoroughly clean and neutralize any residues.
Tools needed (floor scraper, oscillating tool, heat gun, chemical adhesive remover)
Glued-down vinyl or VCT is one of the toughest flooring types to remove, so you’ll want a few specific tools on hand: a heavy-duty floor scraper with long handle, an oscillating multi-tool with a rigid scraper blade, a heat gun to soften adhesive, and a solvent-based adhesive remover.
Also bring knee pads, pry bar, shop vacuum, gloves, and safety goggles for safe, efficient work.
Step 1: Score or heat to break bond
Start by weakening the vinyl’s attachment to the subfloor so removal tools can do their job more easily.
Score seams and edges with a utility knife to break surface seal, or apply heat with a heat gun on low to soften adhesive—keep the gun moving to avoid scorching.
For stubborn spots, use a chemical adhesive softener per directions and let it dwell before proceeding.
Step 2: Use scraper or machine to lift vinyl
Once the seams are scored and adhesive softened, you’ll need to lift the vinyl using either hand tools or a powered machine depending on how stubborn the glue is.
Start with a stiff putty knife or floor scraper, prying at an edge and working in short sections.
For large areas or tough bonds, rent a floor stripper with a carbide blade to speed removal and reduce fatigue.
Step 3: Apply adhesive remover or sanding for stubborn glue
If the vinyl pulls up but leaves a sticky layer behind, you’ll need to remove the adhesive with either a chemical stripper or mechanical sanding depending on how much remains and the surface underneath.
Test a small area first. For chemical removers, apply per instructions and scrape softened glue.
For sanding, use coarse grit then finer to smooth.
Wear PPE and ventilate the space.
Step 4: Clean and neutralize chemical residues
After you’ve removed the bulk of the adhesive, you’ll need to clean and neutralize any chemical residues left from solvent strippers or adhesive removers to protect the subfloor and prepare it for the next finish.
Rinse thoroughly with clean water, scrub with a neutralizing detergent or vinegar solution, then rinse again.
Dry completely, inspect for residue, and ventilate the area before proceeding.
Method 4 Removing Luxury Vinyl Planks/Tiles (LVP/LVT)
For LVP/LVT you’ll want basic tools like pry bars, a putty knife, utility knife, and safety gear before you start.
First remove trim and junction pieces, then pry up loose or edge planks; treat click-lock boards by releasing them and glued planks by carefully prying or using adhesive removers.
Finally inspect and repair the subfloor as needed before installing new flooring.
Tools needed
You’ll need a few specific tools to remove luxury vinyl planks or tiles efficiently: a pry bar or pull bar, floor scraper (manual or powered), utility knife with extra blades, a heat gun or floor stripper (for stubborn adhesive), mallet, and heavy-duty gloves and knee pads for protection.
Also grab a pry bar cap or block to protect edges, a dust mask, shop vac, and trash bags for cleanup.
Step 1: Remove trim and transition pieces
With tools on hand, start at the room perimeter and remove baseboards, quarter round, and any thresholds or metal junction strips that cover the ends of the vinyl planks or tiles.
Pry trim gently with a pry bar and block to avoid drywall damage. Label or stack pieces for reuse.
Remove junction screws or clips, keeping fasteners with their trim for reinstallation later.
Step 2: Pry up loose or edge planks
Start at a corner or along an outside wall and work toward the center, prying up loose or edge planks with a flat pry bar or putty knife to expose the seam and adhesive beneath.
Lift gently to avoid breaking tongues or surrounding planks. Slide the tool under the plank edge, apply steady leverage, and remove nails or staples you encounter before pulling each plank free.
Step 3: Handle click-lock vs. glued planks differently
After you’ve pried up the loose and edge planks, sort the remaining field pieces by how they’re fastened—click-lock boards will come apart differently than glued ones.
For click-lock, lift and disengage seams with a pry bar, working row by row.
For glued planks, heat adhesive with a heat gun or use a floor scraper and adhesive remover, taking care not to gouge the subfloor.
Step 4: Repair subfloor as needed
Inspect the exposed subfloor carefully for damage—dips, loose panels, rot, or lingering adhesive—and decide what repairs are necessary before installing new flooring.
Remove old adhesive with a scraper or solvent, replace rotten or warped sections, secure loose boards with screws, and sand high spots.
Fill gaps and level low areas with appropriate patching compound, then clean and dry the surface before proceeding.
Comparing Methods Effort, Time, Cost, and Floor Damage Risk
When you’re choosing how to remove vinyl flooring, weigh effort, time, cost, and the risk of damaging the subfloor—each method shifts those factors in different directions, so pick the one that matches your priorities and skill level.
| Method | Effort | Damage Risk |
|---|---|---|
| Peel & pull | Low | Low |
| Heat & scrape | Medium | Medium |
| Grinding/chemicals | High | High |
Troubleshooting Common Problems During Removal
You’ll likely run into a few hiccups, from stubborn adhesive and vinyl glued to concrete with mastic to unexpected subfloor damage.
Know how to identify and treat each issue, and when to call a pro for asbestos or other hazardous materials.
With the right tools and safety steps you can handle most problems without making things worse.
Stubborn adhesive that won’t come off
Adhesive that won’t budge can stall your whole project, but you can tackle it with the right approach and tools.
Start by scraping with a floor scraper, then apply a commercial adhesive remover or citrus-based solvent, following label safety.
Use a heat gun carefully to soften residue, then scrub with a stiff brush.
Wipe clean, repeat as needed, and ventilate the area.
Vinyl stuck to concrete with mastic
pry up the vinyl carefully — mastic bonds to concrete like glue and you’ll need a plan to remove both without damaging the slab.
Work in small sections, use a floor scraper and heat to soften mastic.
Apply a solvent rated for concrete, wait, then scrape.
Use a rotary floor grinder or diamond cup for stubborn residue, vacuum dust, and rinse thoroughly before new flooring.
Damaged subfloor after removal
When the vinyl and mastic come up, you may find the subfloor torn, gouged, or uneven. Addressing those issues promptly will keep your new floor from failing.
Inspect for rot, loose boards, or crumbling concrete. Replace rotten sections, nail or screw loose planks, and use patching compound or self-leveler on concrete.
Sand, clean, and prime before installing the new flooring.
Detecting and managing asbestos or hazardous materials
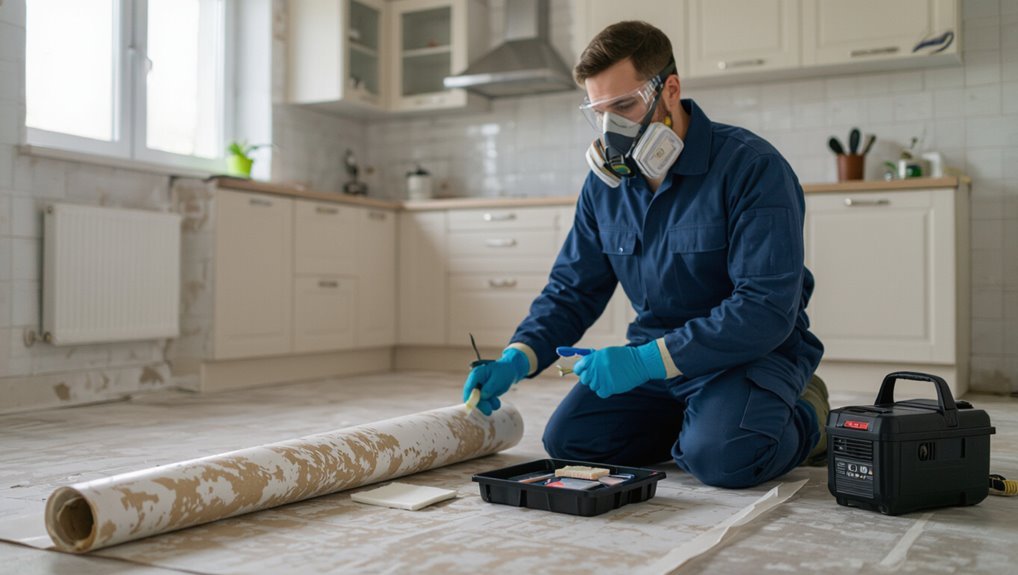
Before you repair or replace the subfloor, check for asbestos and other hazardous materials that might’ve come up with the vinyl or mastic.
Older homes often used asbestos-containing adhesives and backing. If you suspect contamination, stop work, avoid dust, and seal the area.
Hire a certified abatement contractor for testing and removal. Keep occupants and pets away until professionals clear the site.
Best Practices to Minimize Effort and Damage
Use heat, the right solvents, and mechanical aids in the right sequence to loosen vinyl without overworking the subfloor.
If the job’s large or the adhesive’s stubborn, you’ll save time and money by renting a floor stripper or hiring a pro.
Work in organized passes, use proper lifting posture, and take short breaks to keep the pace safe and efficient.
Using heat, solvents, and mechanical aids effectively
Heat, solvents, and mechanical tools each have a place in vinyl removal, and knowing how to combine them will save you time and prevent damage to the subfloor.
Start with low heat to soften adhesive, use a citrus or adhesive remover sparingly, then score and pry with a floor scraper.
Work in small sections, ventilate, wear gloves and a respirator, and stop if the subfloor resists.
When to rent tools or hire a pro
When your DIY pace slows or the job risks damaging the subfloor, consider renting heavier equipment or hiring a pro to finish the work. Powerful floor scrapers, walk-behind grinders, and industrial heat guns cut time and effort but can also gouge wood or cement if misused.
Rent when scope or tool cost justifies it; hire if structural issues, extensive adhesive, or inexperience raise risk.
Time-saving tips and ergonomics for large rooms
If you’re tackling a large room, plan your workflow and set up ergonomics before you strip a single plank so you won’t waste time doubling back or strain your back.
Use staging, breaks, and proper tools to stay efficient.
- Rotate tasks: cutting, prying, hauling.
- Use knee pads, long handles, cart.
- Stage debris near exits for quick removal.
Post-Removal Tasks and Floor Prep
Once the vinyl’s up, you’ll need to clean adhesive residue and level the subfloor so new flooring sits flat.
Test concrete for moisture and address any dampness, then repair or replace any damaged subfloor sections.
Finally, install the proper underlayment and primer so the new floor bonds and performs as planned.
Cleaning adhesives and leveling subfloor
Start by stripping away leftover adhesive and debris so you’ve got a clean, level surface to work with.
Scrape stubborn glue with a floor scraper or use an adhesive remover per instructions, ventilating the area.
Sand or grind high spots and fill low areas with a polymer-modified floor patch.
Feather the patch edges, let it cure, then sand smooth before installing new flooring.
Moisture testing and remediation on concrete
Because concrete can trap moisture long after you’ve removed the old vinyl, you need to test the slab before installing anything new.
Use a reliable moisture meter or do a calcium chloride test to measure vapour emission. If results exceed product limits, apply a vapour barrier, epoxy moisture mitigation, or sealers per manufacturer instructions.
Retest to confirm dryness before proceeding.
Repairing or replacing damaged subfloor sections
After you confirm the slab is dry, inspect the subfloor for soft spots, rot, or warped areas that could compromise your new floor.
Mark damaged sections, remove compromised plywood or damaged concrete, and clean debris.
Replace with pressure-treated plywood or patch concrete using a proper repair mix.
Fasten, level, and sand joints.
Verify structural soundness before proceeding with any underlayment or finish.
Preparing for new flooring (underlayment, priming)
Prep the subfloor and surrounding areas carefully before you lay any underlayment or primer: sweep and vacuum all dust and debris, make certain the surface is dry and level, and fill small gaps or low spots with a fast-setting floor patch.
Choose underlayment suited to your new flooring, roll it smooth, tape seams, and apply primer where adhesive or moisture barrier is required before installing finish flooring.
Common Mistakes to Avoid
Don’t rush the removal or you’ll risk gouging the subfloor—take your time and lift tiles or sheets carefully.
Don’t reach for harsh chemical cleaners that can harm the underlayment or leave residues.
And don’t ignore safety: use proper ventilation, PPE, and follow product warnings.
Rushing removal and damaging subfloor
Rush through vinyl removal and you’ll likely trade a faster finish for a ruined subfloor. If you yank adhesive or pry without care, you’ll gouge, delaminate, or crack plywood and concrete.
Take time to soften adhesive where needed, use proper tools, and work methodically. A careful approach preserves structural integrity, saves repair costs, and makes the next flooring installation far easier.
Using incorrect chemical cleaners
If you grab the wrong cleaner, you can damage both the vinyl and the subfloor beneath it.
Don’t reach for harsh solvents or concentrated adhesive removers unless the product specifically lists vinyl-safe use. Test any chemical on a hidden spot first, follow manufacturer instructions, wear appropriate gloves, and neutralize residues.
Using the right cleaner preserves materials and simplifies cleanup without causing long-term harm.
Ignoring safety and ventilation
Because removing vinyl can kick up dust, fumes, and sharp debris, you should prioritize ventilation, PPE, and safe handling from the start.
Don’t skip precautions or assume brief exposure is harmless. Follow these essentials:
- Open windows, run fans, and use a respirator for adhesives or old vinyl.
- Wear gloves, eye protection, and knee pads.
- Dispose of sharp waste sealed and labeled.
Cost and Time Estimates by Room Size and Method
Room size and removal method both drive how much you’ll pay and how long the job takes: small 50–100 sq ft rooms that use pry-and-pull methods often take 2–4 hours and cost little beyond your time, while larger 200–300 sq ft spaces or rooms requiring adhesive or heat-assisted removal can take a day or more and add $100–$400 in labor or rental fees.
| Size | Time/Cost |
|---|---|
| Small | 2–4 hrs / minimal |
| Medium | 4–8 hrs / $50–$150 |
| Large | 1+ day / $100–$400 |
| Adhesive | extra time / higher cost |
FAQ Quick Answers to Common Questions
You’ll find quick answers here to common concerns like how long removal takes for a 200 sq ft room and whether you should DIY or hire a pro.
I’ll cover safe methods for scraping adhesive, how to check for asbestos in old vinyl, and signs that the subfloor might be damaged.
Use these tips to decide your next steps and plan the job safely.
How long does it take to remove vinyl flooring from a 200 sq ft room?
How long will it take to remove vinyl flooring from a 200 sq ft room?
Expect about 3–8 hours for floating or peel-and-stick vinyl with basic tools; 6–12+ hours for glued vinyl or sheet flooring that needs adhesive scraping.
Factors: subfloor condition, adhesive type, tools, and whether you cut into sections.
Plan extra time for cleanup and repairs to the subfloor afterward.
Can I remove vinyl flooring myself or should I hire a professional?
Deciding whether to DIY vinyl removal or hire a pro comes down to your skill level, tools, time, and tolerance for messy, physical work.
If you’re handy, have proper tools, and can handle disposal and cleanup, you can save money doing it yourself.
Hire a professional if the floor’s glued, uneven, or you want faster, guaranteed results with less hassle and risk.
What is the safest way to remove adhesive residue?
If you choose the DIY route, you’ll probably face leftover adhesive once the vinyl and underlayment are up, and removing that residue safely keeps the subfloor intact.
Use a plastic scraper, warm water, and mild detergent first. For stubborn glue, apply a citrus or soy-based adhesive remover, let it soak, then scrape gently.
Sand lightly and vacuum before refinishing.
How do I know if vinyl contains asbestos?
Want to know whether your vinyl flooring contains asbestos?
Older vinyl (pre-1980s) and backing or adhesive may contain asbestos. You can’t tell by sight or smell.
Check installation dates, product labels, or building records. The only definitive method is lab testing of a sample by an accredited asbestos lab.
If you suspect asbestos, avoid disturbing the material and hire a licensed professional for testing and removal.
Will removing vinyl damage my subfloor?
While removing vinyl can leave marks or damage if done carelessly, you can often protect the subfloor by using the right tools and techniques—gentle prying, proper heat application for adhesive, and slow, even scraping help prevent gouges, tearing, or adhesive residue that would require extra sanding or repairs.
Inspect the subfloor as you work; minor damage is repairable, but deep gouges or rot may need patching or replacement.
