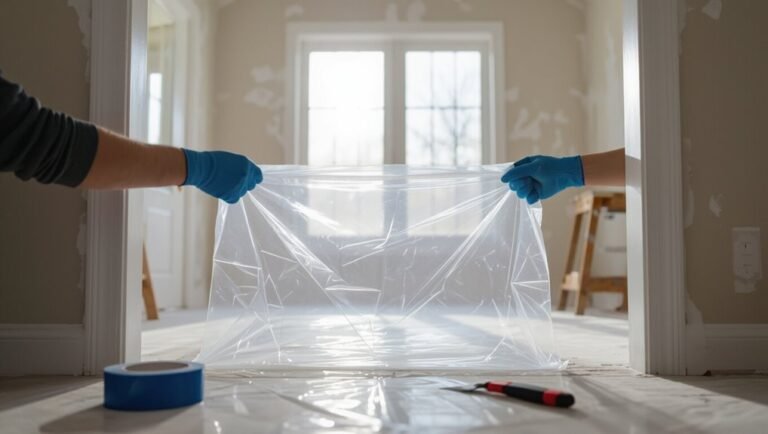
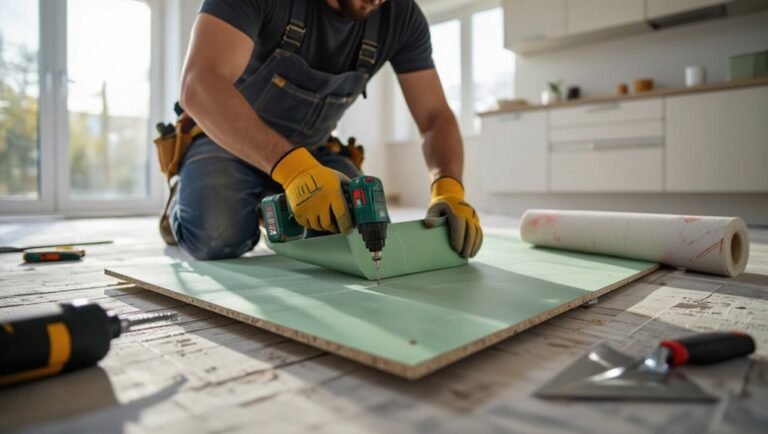
How to Lay Laminate Flooring: Step-by-Step Instructions for Perfect Results
You can install laminate flooring yourself by prepping a clean, dry, level subfloor, acclimating planks 48 hours, and laying a vapor-barrier underlayment with spacers for expansion gaps. Start along a straight wall, click or glue boards row by row, stagger end joints, and cut last rows to fit with a pull bar. Finish with baseboards and thresholds, control humidity, and inspect for gaps. Keep going to learn detailed tips, tools, and troubleshooting for perfect results.
How to Lay Laminate Flooring: and Project Overview
You can tackle a laminate floor yourself if you’ve got basic carpentry skills and the right tools, but some situations call for a pro.
I’ll summarize how long a typical project takes, what skills and materials you’ll need, and when hiring help makes more sense.
Use this overview to decide if this DIY job fits your schedule and abilities.
Can You Lay Laminate Flooring Yourself?
Yes—you can definitely lay laminate flooring yourself, and many DIYers finish a typical room in a weekend with basic tools and careful planning.
You’ll follow clear steps for measuring, underlayment, and click-lock installation, so learning how to lay laminate flooring is straightforward.
Stay patient, work methodically, and handle cuts and changes carefully to get professional-looking results without hiring a pro.
Project Summary Time, Skill Level, Tools, and Materials Needed
Having confidence in your ability to tackle a weekend laminate install, let’s map out the time, skill level, and the exact tools and materials you’ll need so you can plan the job efficiently.
- Time: 1–2 days for average room.
- Skill: basic DIY—measuring, cutting, snapping planks.
- Tools: saw, spacers, tapping block, pull bar.
- Materials: underlayment, laminate, adhesive/trim, threshold strips.
When to Hire a Pro vs DIY
When your room is fairly straightforward—square or rectangular, with level subflooring and simple doorways—you can probably handle laminate installation yourself over a weekend; however, hire a pro if the job includes uneven floors, complex cuts around cabinets or stairs, moisture-prone areas, or if you want warranties and a perfectly seamless finish without the learning curve.
If you’re confident with tools and measuring, DIY saves money; otherwise, call a pro.
Understanding Laminate Flooring: What It Is and Why Choose It
You’ll learn what laminate flooring is—how its layered construction works and what materials go into it—so you can compare it to hardwood, vinyl, and engineered wood.
You’ll see the main benefits and limitations to help decide if it’s right for your project.
Finally, you’ll review common plank types, sizes, and finish options to match style and performance needs.
What Is Laminate Flooring? Materials and Construction
Laminate flooring is a multi-layered synthetic product designed to mimic wood, stone, or tile while giving you a durable, budget-friendly surface.
You’ll find four main layers: a protective wear layer, a printed decorative film, a high-density fiberboard core for stability, and a backing layer for moisture resistance.
Planks click together for floating installs and require proper subfloor prep.
Benefits and Limitations Compared to Hardwood, Vinyl, and Engineered Wood
Choosing flooring is about balancing style, cost, and performance, and laminate gives you a strong value proposition compared with hardwood, vinyl, and engineered wood. You get durable, affordable visuals; it resists scratches but can’t be refinished and handles moisture worse than vinyl.
| Advantage | Limitation |
|---|---|
| Cost-effective | Not refinishable |
| Scratch-resistant | Moisture sensitivity |
| Wide styles | Less authentic feel |
| Easy install | Variable durability |
Types of Laminate Planks, Sizes, and Finish Options
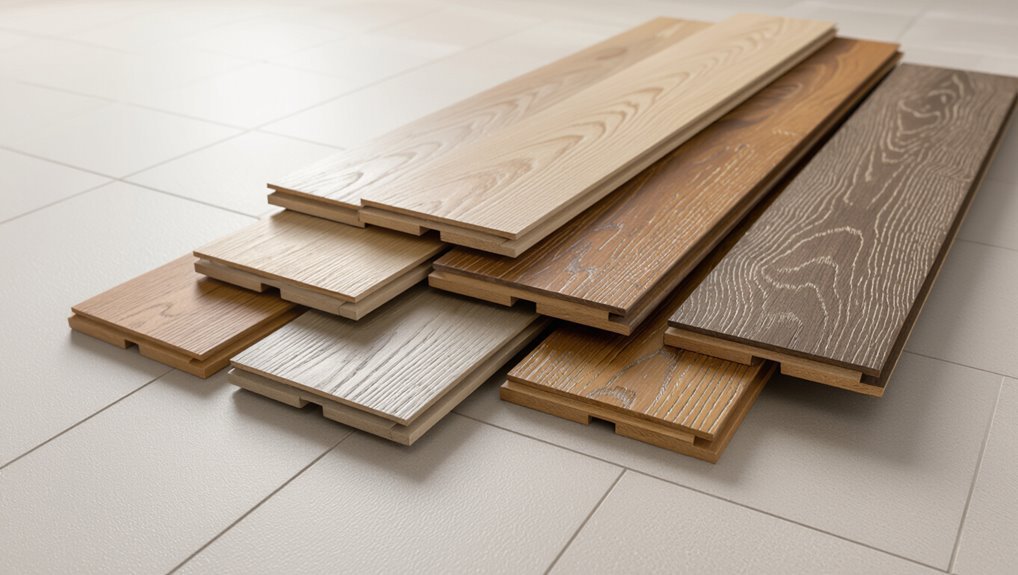
There are several plank types and size options to match your project, from narrow boards that emphasize a classic look to wide planks that make rooms feel larger.
You’ll also choose between traditional wood visuals, stone patterns, and textured or high-gloss finishes depending on style and wear needs.
Pick plank thickness for durability, AC rating for abrasion, and bevels or embossing for realism and slip resistance.
Pre-Installation Preparation
Before you start laying planks, measure the room carefully and calculate how much laminate, underlayment, and trim you’ll need.
Check and prepare the subfloor—whether concrete, plywood, or an existing floor—acclimate the planks to the room, and gather the right tools, materials, and safety gear.
Finally, plan your layout, mark expansion gaps, and choose junction treatments so the installation goes smoothly.
Measuring the Room and Calculating Materials
Accurately measuring your room and calculating how much laminate you’ll need sets the foundation for a smooth installation, so take your time and be precise.
Measure length and width, note alcoves, and plan plank direction. Calculate area plus 10% waste. Use a tape, sketch, and arithmetic.
- Measure room dimensions
- Add 10% waste
- Account for doorways
- Choose plank layout
Assessing and Preparing the Subfloor (Concrete, Plywood, Existing Floor)
Start by walking the entire floor to inspect and pinpoint issues—cracks, dips, high spots, moisture, or loose panels—that’ll affect your laminate’s stability and longevity.
Clean thoroughly, remove debris and old adhesive.
For concrete, check moisture and level with patch or self-leveler.
For plywood, secure squeaks and replace damaged sheets.
Smooth existing resilient floors if allowed by manufacturer before installing underlayment.
Acclimating Laminate Planks and Environmental Considerations
While you let the planks sit, condition them to the room they’ll be installed in so they expand or contract to local temperature and humidity; aim for at least 48 hours in stacked boxes, opened and laid flat, in the installation area.
Maintain stable humidity (30–50%) and temperature (60–80°F). Avoid direct sunlight, heaters, or dampness.
Monitor conditions; adjust HVAC or dehumidifiers before installing.
Tools, Materials, and Safety Gear Checklist
Before you lay a single plank, gather the essential tools, materials, and safety gear so the job goes smoothly and safely; having everything organized prevents costly pauses and mistakes.
You’ll need measurement, cutting, and installation tools plus underlayment and spacers. Check protective gear and extras.
- Tape measure, square, pencil, chalk line
- Saw, pull bar, tapping block, mallet
- Underlayment, vapor barrier, spacers
- Gloves, safety glasses, knee pads, dust mask
Planning Layout, Expansion Gaps, and Transition Treatments
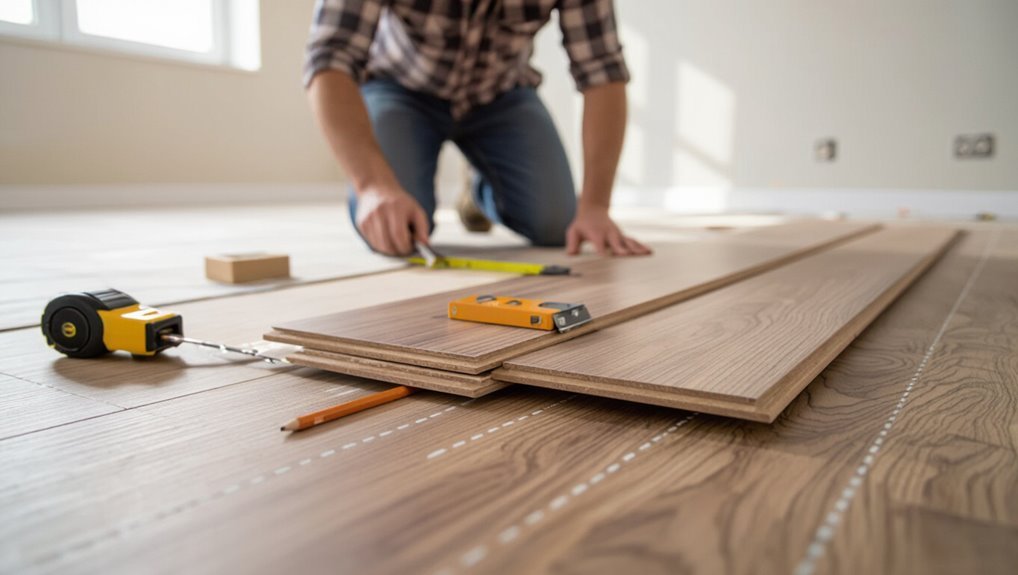
With your tools and safety gear ready, take time to map the room and decide how the planks will run so you avoid awkward narrow strips at walls and doorways.
Stagger end joints, measure starting and ending rows, and plan door changes.
Maintain recommended expansion gaps (usually 1/4″–3/8″) around perimeters using spacers.
Choose appropriate transition strips for thresholds, doorways, and differing floor heights.
Step-by-Step Installation Guide
Now that your room’s prepped, you’ll follow a clear step-by-step installation: prepare and test the subfloor, roll out the correct underlayment with proper overlaps, and plan your starting wall and board stagger.
You’ll also need safe cutting techniques and the right saw for precise cuts.
Finally, lay the first row using spacers, orient the tongues correctly, and check alignment as you go.
Step 1 Prepare the Subfloor: Cleaning, Leveling, and Moisture Testing
Get the subfloor right and the rest of your laminate installation will go smoothly; this step covers cleaning, leveling, and moisture testing so your floor stays flat and dry for years.
Remove debris, nails, and adhesive; vacuum and mop.
Check for high/low spots with a straightedge and patch or sand as needed.
Use a moisture meter across the surface and address dampness before proceeding.
Step 2 Install Underlayment: Types and Overlap Methods
Step 2 is laying the underlayment, the thin cushioning and moisture barrier that protects your laminate and evens out minor subfloor imperfections.
Choose foam, cork, or combination vapor-barrier underlayment based on moisture and sound needs.
Roll or lay sheets perpendicular to boards, butted tight. Overlap vapor seams per manufacturer, tape overlaps, and trim edges.
Keep underlayment flat and continuous.
Step 3 Plan Starting Wall and Stagger Pattern for Boards
Although you could start against any straight wall, choose the wall that will be most visible when the room’s in use and that offers the longest straight run; this becomes your starting wall and determines how you’ll stagger the boards for a balanced layout.
Measure the room width, plan end-gap minimums, and lay rows so end joints fall at least 12–18 inches apart for strength and visual appeal.
Step 4 Cutting Planks Safely (Saw Types and Techniques)
With your starting wall set and stagger pattern planned, you’ll next make the cuts that let boards fit around walls, vents, and doorways.
Doing this safely and accurately keeps the install tight and your fingers intact. Use a miter saw for straight cuts, a jigsaw for curves, and a circular saw for rip cuts.
Clamp, wear eye and hearing protection, and measure twice before cutting.
Step 5 Laying the First Row: Spacers, Tongue Orientation, and Alignment
Start by laying your first plank with the tongue facing the wall and a row of spacers in place to maintain the expansion gap; this orientation makes snapping subsequent boards together easier and guarantees a straight starter line.
Press each board firmly against the spacers, stagger end joints, check alignment with a chalk line, and trim the last plank to fit while keeping the gap.
Step 6 Locking Subsequent Rows: Click Systems, Angled Insertion, and Tapping Block Use
Now you’ll lock in the next rows by angling each plank’s tongue into the previous row’s groove, lowering it until it clicks; this click confirms a proper fit and keeps seams tight while you work across the room.
Stagger end joints, tap gently with a tapping block and mallet to close gaps, and check alignment frequently. Trim last boards to fit.
Step 7 Handling Doorways, Obstacles, and Irregular Shapes
When you reach doorways, vents, or oddly shaped areas, take your time to measure and mark each cut precisely so pieces fit snugly without forcing seams.
Use a contour gauge or cardboard template for irregular profiles, transfer measurements to planks, and cut with a jigsaw or coping saw.
Fit around pipes and thresholds, leaving required clearance, then dry-fit before finishing.
Step 8 Installing Last Row and Ensuring Proper Expansion Gap
You’ll finish the job by installing the last row of planks and confirming a consistent expansion gap around the room’s perimeter so the floor can expand and contract without buckling.
Measure and rip planks to fit, leaving the manufacturer’s recommended gap (usually 1/4″–1/2″).
Use spacers, a pull bar, and clamps to lock boards tightly.
Remove spacers only after installation.
Step 9 Installing Trim, Transitions, and Thresholds
Finish the look and protect the edges by installing baseboards, quarter-round, connector strips, and thresholds that cover expansion gaps and create smooth joins between rooms and flooring types.
Measure carefully, miter or coping trim for tight corners, and nail or glue according to manufacturer instructions.
Install connectors at doorways and height changes, ensuring gaps remain for expansion and that trim sits flush without pinching the flooring.
Step 10 Final Inspection and Cleanup

With trim and thresholds in place, do a thorough final inspection and cleanup to guarantee your floor looks great and performs well.
Check seams, expansion gaps, and junctions for tightness and proper alignment.
Remove debris, vacuum, and mop with a manufacturer-approved cleaner.
Reinstall outlet covers and vent grilles.
Note any defects for warranty claims and discard scraps responsibly.
Common Problems During Installation and How to Fix Them
As you finish the install, you’ll likely run into a few common problems that have straightforward fixes.
You’ll learn how to identify and close gaps, correct lippage or an uneven subfloor, repair click/lock joint failures, and address moisture-related issues after installation. Tackling these now will keep your floor looking and performing its best.
Gaps Between Planks Causes and Remedies
When gaps appear between laminate planks, they’ll not only look bad but can trap dirt and weaken the floor over time. So, you’ll want to diagnose and fix the cause quickly.
Check for inadequate acclimation, poor locking engagement, uneven subfloor (not lippage), or improper expansion gaps.
Re-seat joints, replace damaged tongues, shim subfloor low spots, and guarantee correct perimeter spacing to prevent recurrence.
Uneven Floor or Lippage Diagnosis and Correction
Gaps often signal issues you can see from above, but uneven floors and lippage show up differently: one plank edge sits higher than its neighbor, creating a trip hazard and stressing the locking system.
Check with a straightedge and feel for high edges. Remove affected rows, inspect subfloor for humps or loose underlayment, sand or shim low spots, then reinstall planks, ensuring proper alignment and pressure.
Click/Lock Failures Repair Options
Click/lock failures are frustrating but fixable — you’ll usually see them as misaligned seams, popped joints, or planks that won’t snap together fully.
Inspect tongues and grooves for damage, replace bad planks, and clean debris. Use a tapping block and pull bar to realign joints.
For slight gaps, apply manufacturer-approved glue sparingly. Avoid forcing damaged profiles; cut out and replace if necessary.
Moisture-Related Issues After Installation What to Do
If moisture shows up after installation, act quickly to limit damage and pinpoint the source.
Stop water, dry the area with fans/dehumidifiers, and lift affected planks to inspect subfloor and underlayment.
Replace swollen or warped boards, treat mold, and fix leaks or humidity control.
Reinstall with proper vapor barrier and allow acclimation to prevent recurrence.
Best Practices, Tips, and Time-Saving Strategies
Start by staggering boards for both strength and a natural look, and plan cuts to minimize waste with smart layout tricks.
Keep consistent expansion gaps and check door clearances before you finish, and use simple seasonal maintenance to protect the floor long-term.
These tips will save time and prevent common problems if you follow them from the start.
Stagger Patterns for Strength and Aesthetics
A proper stagger pattern not only makes your laminate floor look professional but also prevents weak joints and reduces the chance of boards separating over time.
Stagger rows by at least 6–12 inches, vary end joints, and avoid aligning seams on adjacent rows.
Use random starting lengths, keep consistent expansion gaps, and inspect alignment frequently to guarantee both strength and a balanced, natural appearance.
Efficient Cutting and Layout Tricks to Reduce Waste
While you’re planning row layouts, think ahead about plank lengths and offcuts so you can minimize waste and save time during installation.
Measure rooms in full, mark common cut lengths, and arrange starter rows to yield usable offcuts.
Cut longer planks first, keep consistent grain direction, label pieces, and batch cuts.
Use a stop block and take accurate measurements to avoid re-cuts and scrap.
Maintaining Expansion Gaps and Door Clearance Tips
Because laminate expands and contracts with humidity and temperature, you must leave consistent expansion gaps around the perimeter and at doorways to prevent buckling and noisy floors.
Use spacers (usually 8–10 mm), maintain uniform gaps at thresholds, and trim door jambs or undercut casings for clearance.
Check connections and leave extra gap at long runs; cover gaps with trim or reducers.
Seasonal and Long-Term Maintenance Recommendations
Seasonally inspect your laminate for gaps, warping, and surface wear—do this at least twice a year and after major humidity shifts—so you can catch problems early and avoid costly repairs.
Maintain finish and stability with these steps:
- Vacuum and dry-mop weekly.
- Use felt pads on furniture.
- Wipe spills immediately.
- Control indoor humidity (35–65%) year-round.
Tools and Materials Comparison
Now that you’ve got the basics, let’s compare the essential tools you’ll need versus optional upgrades that speed the job or improve the finish.
You’ll also want to choose the right underlayment—foam for budget and cushioning, cork for sound control and eco‑friendly feel, or a vapor barrier where moisture is a concern.
Knowing which tools and underlayment suit your room and budget will save time and prevent costly mistakes.
Essential Tools vs Optional Upgrades
1 clear distinction will help you shop smarter: separate must-have tools that get the job done from optional upgrades that save time or improve finish. You’ll need basics; upgrades are worth it if you value speed or polish.
| Essential | Optional |
|---|---|
| Tape measure | Under-door saw |
| Rubber mallet | Tapping block set |
| Spacers | Pull bar |
| Saw | Flooring nailer |
| Pencil | Circular saw guide |
Underlayment Types Compared (Foam, Cork, Vapor Barrier)
Choosing the right underlayment can make or break your laminate floor’s comfort, sound control, and moisture protection, so you’ll want to match the material to your subfloor and room conditions. Foam is budget-friendly and easy; cork offers superior sound reduction; vapor barrier prevents moisture. Pick based on room humidity, subfloor type, and desired insulation.
| Type | Best for |
|---|---|
| Foam | Budget, smooth subfloors |
| Cork | Soundproofing, comfort |
| Vapor Barrier | Basements, moisture-prone areas |
Cost Breakdown and Project Planning
You’ll start by estimating material costs, factoring in underlayment, trim, and any hidden expenses like subfloor repairs or disposal fees.
Consider labor savings if you DIY versus hiring help, and use sample budgets for small, medium, and large rooms to see how costs scale.
With clear per-square-foot numbers and a contingency buffer, you’ll plan a realistic project budget.
Estimating Material Costs, Labor Savings, and Hidden Expenses
How much will your laminate project really cost once you factor in materials, labor savings from DIY, and those easy-to-overlook expenses?
Calculate plank, underlayment, trim, and adhesive costs per square foot, then add tools, delivery, and waste (typically 5–10%).
Subtract what you’d pay a pro to see labor savings.
Don’t forget potential subfloor repairs, changes, and disposal fees when finalizing your budget.
Sample Budget Scenarios for Small, Medium, and Large Rooms
Now that you’ve totaled material costs, factored in DIY labor savings, and accounted for hidden expenses like subfloor repairs and disposal, let’s map those numbers onto real-room examples so you can see what to expect.
Small (120 sq ft): $300–700.
Medium (250 sq ft): $600–1,400.
Large (400 sq ft): $1,000–2,400.
Include 10–15% contingency for surprises.
##
Since the subtopic wasn’t provided, let’s pick one to continue the guide: “Preparing the Subfloor.” You’ll clean, level, and dry the surface before installing underlayment. Measure and repair gaps or squeaks. Check moisture and flatten high spots.
| Task | Tool | Tip |
|---|---|---|
| Clean | Broom/vac | Remove debris |
| Level | Floor patch | Follow manufacturer |
| Check moisture | Moisture meter | Test multiple spots |
| Dry | Fans | Wait fully before installing |
Mistakes to Avoid When Laying Laminate Flooring
Don’t skip prepping the subfloor or testing for moisture, because a bad base will ruin your install.
Follow the manufacturer’s instructions and honor warranties, and make sure you leave proper expansion gaps.
Take your time cutting and fitting each plank so pieces lock correctly and the floor settles without problems.
Skipping Subfloor Preparation or Moisture Testing
If you skip prepping the subfloor or skip moisture testing, you’re inviting uneven seams, warping, and costly repairs down the line.
You should level, clean, and dry the subfloor, repair damage, and install a proper vapor barrier where needed.
Test concrete and wood for moisture, use recommended underlayment, and don’t install over damp surfaces—laminate fails quickly if you don’t.
Ignoring Manufacturer Instructions and Warranties
When you skip the manufacturer’s instructions or ignore warranty requirements, you risk voiding coverage and creating installation problems that could’ve been avoided.
Follow recommended adhesives, underlayment, acclimation times, and installation patterns.
Document purchases and procedures, register the product if required, and keep receipts.
If you deviate, expect denied claims and no support for defects linked to improper methods—so follow the rules.
Improper Expansion Gap Management
Because laminate expands and contracts with temperature and humidity, you need to leave the proper expansion gaps around the room and at fixed objects.
If you don’t, boards can buckle, warp, or push against trim. Measure and maintain recommended gap widths, use spacers while installing, and allow gaps at doorways and vents.
Cover gaps with appropriate trim without pinning the floor.
Rushing Cutting and Fitting Steps
Although you may be enthusiastic to finish, rushing cuts and fits leads to wasted boards, uneven seams, and noticeable gaps; take your time to measure twice and cut once.
You’ll work neater when you mark boards carefully, use proper guides, and dry-fit pieces before locking them in.
Patience prevents costly mistakes—slow, precise cuts yield tight joints and a professional-looking floor.
Frequently Asked Questions (FAQ)
You probably have practical questions like whether you can install laminate over tile or other existing floors and how much expansion gap you need.
You’ll also want to know how to switch between rooms or different floor types, whether laminate works in basements or bathrooms, and what affects its lifespan.
We’ll answer each of these so you can make smart installation and maintenance choices.
Can laminate flooring be installed over tile or existing floors?
Wondering if you can lay laminate over existing tile or another floor? Yes—provided the surface is flat, clean, dry and firmly bonded.
Level low spots, remove loose grout, and add a suitable underlayment or moisture barrier. Avoid uneven, soft, or water-damaged substrates.
Check manufacturer guidelines for compatibility; some brands prohibit direct installation over certain floor types.
How much expansion gap is required and why?
A small, consistent gap around the room lets your laminate flooring expand and contract without buckling or creating gaps. Manufacturers typically recommend 1/4 to 3/8 inch for narrow rooms and up to 1/2 inch for runs over 25–30 feet or heavy sunlight exposure.
Use spacers during installation, keep gaps at doorways, and cover edges with baseboard or quarter-round while preserving the void for movement.
How do I transition between rooms or to different floor types?
How do you create smooth, durable shifts between laminate and other rooms or floor types?
Use transition strips or thresholds sized for height differences and movement. Choose T-molding for same-height joins, reducers for drop-offs, and stair nosing where needed.
Secure strips to subfloor, not floating planks, and leave expansion gaps beneath. Match color and profile for a seamless, professional look.
Can I install laminate flooring in basements or bathrooms?
If you’ve handled moving between rooms and different floor types, you’ll also want to think about where laminate performs well and where it doesn’t.
You can use laminate in basements or bathrooms only with precautions: choose water-resistant or waterproof products, install a proper moisture barrier, guarantee subfloor is dry and level, and avoid standing water.
Consider vinyl for high-moisture areas.
How long does laminate flooring last and what affects its lifespan?
Though laminate isn’t indestructible, you can expect well-made, properly installed planks to last 10–25 years depending on wear and care.
Lifespan hinges on AC rating, thickness, moisture exposure, installation quality, and maintenance. High-traffic rooms shorten life; using rugs, felt pads, and prompt spills cleanup extends it.
Replace individual boards when damaged, and consider higher-grade laminate for longer durability.