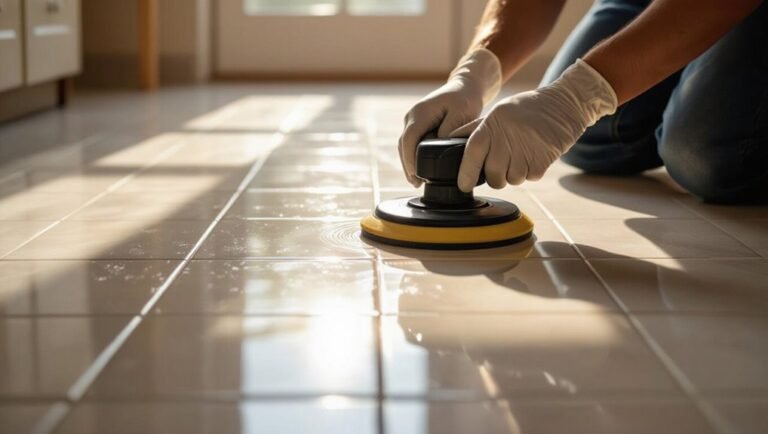
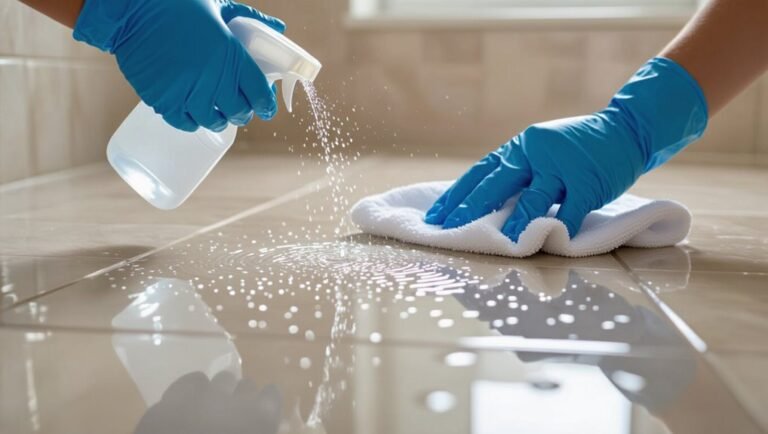
How to Clean Any Type of Floor the Right Way (Room by Room Guide)
You’ll clean every floor efficiently by following a three-step routine: sweep, treat stains, then mop with a pH-appropriate cleaner. Remove clutter and dry surfaces to avoid damage, and match methods to materials—use minimal water on hardwood and laminate, scrub grout for tile, and vacuum or shampoo carpets. Keep tools, enzyme cleaners for pet messes, and microfiber mops handy. Follow room-specific tips for kitchens, baths, and entryways to prevent wear and prolong finishes, and learn more practical steps ahead.
How to Clean Any Type of Floor the Right Way (+ Hook)
You can clean any floor well by following one simple, three-step routine: sweep, treat stains, then mop with the right solution.
This universal approach saves time and prevents damage across hardwood, tile, laminate, and vinyl.
I’ll show you a room-by-room guide so you know which tweaks to make for kitchens, bathrooms, and living areas.
Best universal approach in 3 steps
Three simple steps will let you clean any floor the right way without guesswork: prep to remove loose debris, choose the safest cleaning method for the surface, and finish with protection to keep dirt away longer.
Ask yourself how do you clean the floor: sweep or vacuum, pick a pH-appropriate cleaner and mop or spot-clean, then dry and apply mats or sealant to protect.
Why this room-by-room guide matters
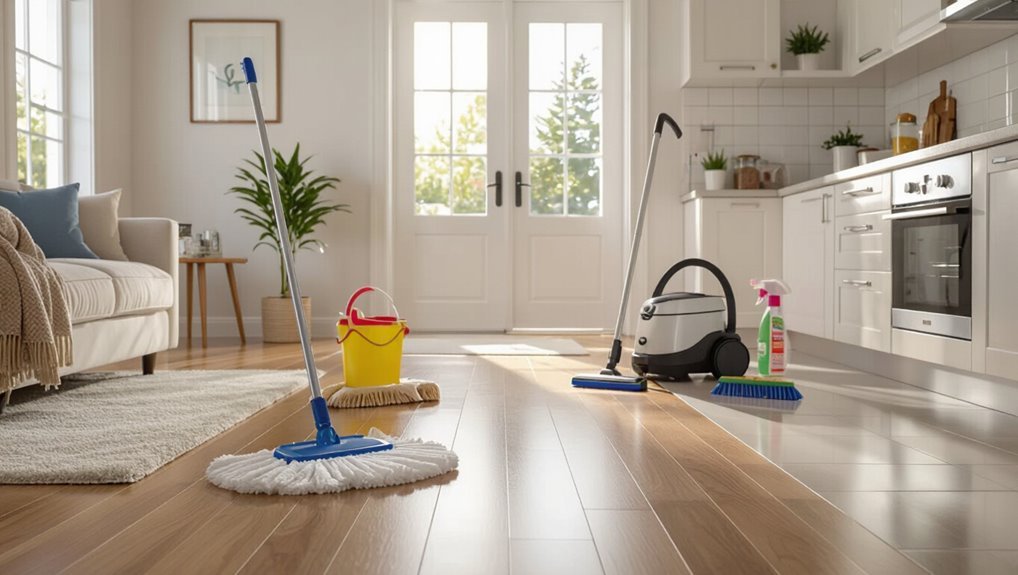
Because every room gets used differently, a one-size-fits-all cleaning plan will leave some floors dingy or damaged—this room-by-room guide shows what to do instead.
You’ll learn targeted routines, safe products, and timing that match traffic, moisture, and material. Followed consistently, these tips prevent wear, cut cleaning time, and keep each floor looking its best without unnecessary work or risky shortcuts.
Basic Understanding Floor Types, Materials, and Common Challenges
You’ll encounter many floor materials—hardwood, laminate, tile, vinyl, stone, concrete, carpet, and rugs—each needing different care based on finish, seams, porosity, and how much traffic or pets they see.
Those factors determine whether you should sweep, mop, use a wet cleaner, or stick to dry methods to avoid damage.
Also weigh safety and health issues like slip risk, VOCs from cleaners, and allergens when choosing products and routines.
Overview of common floor materials (hardwood, laminate, tile, vinyl, stone, concrete, carpet, rugs)
Floors shape both how a room looks and how it performs, so knowing the differences between hardwood, laminate, tile, vinyl, stone, concrete, carpet, and rugs helps you pick the right care and avoid damage.
You’ll learn typical vulnerabilities and maintenance needs so you can clean effectively without harming materials.
- Hardwood: sensitive to water
- Laminate: scratch-prone
- Tile: grout needs attention
- Vinyl: resilient, avoid harsh chemicals
- Carpet/rugs: trap dirt, need regular agitation
Key factors that determine cleaning method (finish, seams, porosity, traffic, pets)
When deciding how to clean any surface, consider its finish, seams, porosity, traffic level, and whether pets use the space—these factors dictate what cleaners, tools, and techniques will be safe and effective.
Match cleaner pH and abrasion to finish, avoid excess water on porous or seam-prone floors, increase cleaning frequency for high-traffic zones, and choose pet-safe products and durable tools to prevent damage and staining.
Safety and health considerations (slip risk, VOCs, allergens)
Those factors also affect health and safety: mismatched cleaners or improper techniques can raise slip risks, release VOCs, or stir up allergens.
You should choose low-VOC, floor-appropriate products, rinse residues, and dry surfaces promptly to prevent slips.
Use HEPA vacuums for dust and pet dander, ventilate rooms when cleaning, and test anti-slip treatments on small areas to confirm effectiveness without damaging finishes.
Room-by-Room Cleaning Strategy
Before you start cleaning each room, clear clutter, dust surfaces, and test any cleaner on a hidden spot to avoid damage.
Keep a compact tools-and-supplies checklist handy so you’ve got everything from brooms and mops to spot cleaners and microfiber cloths.
Then tailor your routine—daily and weekly care for entryways and mudrooms, focused degreasing in kitchens, and special attention to mixed flooring and rugs in living areas.
General preparatory steps before cleaning (declutter, dust, test cleaners)
Although it might feel tempting to dive right in, start by decluttering each room, dusting surfaces, and testing any cleaners on a hidden spot so you won’t damage floors or fixtures.
Clear toys, rugs, and cords; wipe baseboards and vents to prevent grit.
Try cleaners on a discreet patch, wait for full dryness, and note any discoloration before proceeding.
Tools and supplies checklist for every room
Pick a handful of reliable tools and keep room-specific extras handy so you can move quickly from kitchen messes to bedroom dust without backtracking.
You’ll want basics ready and tailored supplies accessible per room—label caddies for efficiency.
Carry:
- Microfiber mop
- Vacuum with attachments
- Broom and dustpan
- Gentle floor cleaner plus degreaser
- Microfiber cloths and scrub brush
Entryway and Mudroom daily, weekly, deep-clean
In the entryway and mudroom you’ll want durable cleaners and tools suited to tile, stone, and concrete—pH-neutral stone cleaner for natural stone, a mild detergent for sealed concrete, and a tile cleaner with a grout-safe formula.
Tackle salt and tracked-in mud quickly with a stiff broom then a wet mop or a steam cleaner to prevent staining and abrasion.
For heavy-traffic zones, set down durable mats, spot-clean daily, and schedule weekly scrubbing plus a seasonal deep clean to strip buildup.
Best products and techniques for tile, stone, and concrete
Entryways and mudrooms take the brunt of outdoor grit, so you’ll want a simple routine that protects tile, stone, and concrete without damaging finishes.
Sweep or vacuum daily, mop weekly with pH-neutral cleaner for stone and tile, and dilute mild detergent for concrete.
Spot-treat stains with a soft brush, avoid acidic cleaners and abrasive pads, and reseal porous surfaces as recommended.
Handling salt, mud, and heavy traffic zones
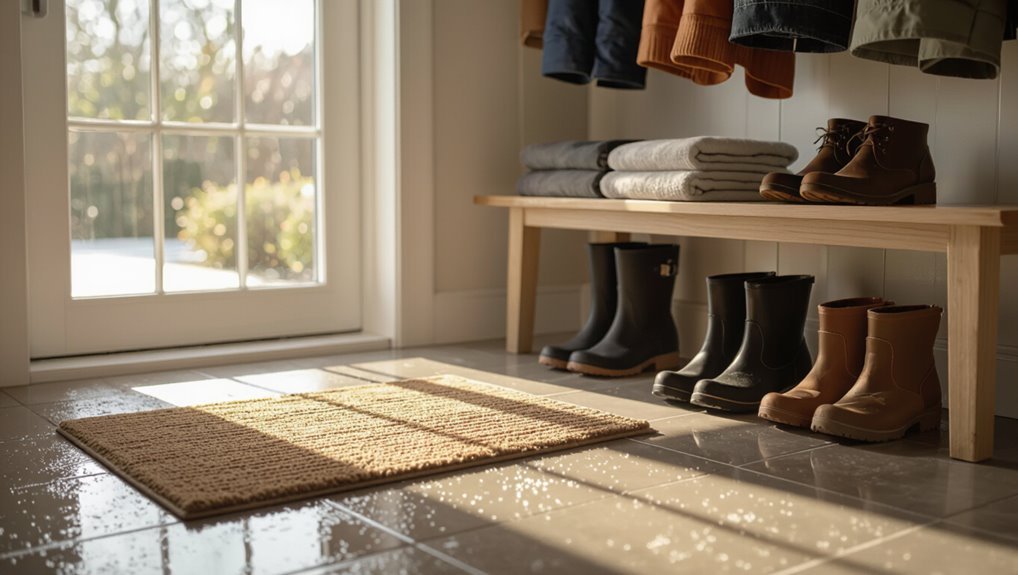
When salt, mud, and heavy foot traffic are part of daily life, you’ll need a straightforward routine that prevents long-term damage without adding work:
Wipe shoes on heavy-duty mats, shake or vacuum mats daily, and sweep entryways each evening.
Weekly mop with a neutral cleaner, rinse well, and spot-treat stains.
Deep-clean monthly: move mats, scrub grout or textured flooring, and reseal porous surfaces as needed.
Kitchen grease, spills, and stickiness
In the kitchen you’ll treat tile, vinyl, laminate, and sealed hardwood differently—choose cleaners safe for each surface to avoid damage.
Tackle grease with a targeted degreaser and scrub grout gently to keep it from staining.
Set a simple routine for daily spills and a monthly or quarterly deep-clean for stubborn build-up.
Cleaning tile, vinyl, laminate, and sealed hardwood in kitchens
Tackle kitchen floors quickly after spills to prevent grease and sticky residues from setting into grout, seams, or the finish on sealed hardwood and laminate.
Sweep or vacuum loose debris, then mop with a pH-neutral cleaner safe for each floor type. Wring mops well to avoid excess water on laminate and hardwood.
Dry floors promptly and spot-clean sticky areas with a microfiber cloth.
Degreasing strategy and grout care
Because grease can bond quickly to grout and floor finishes, act fast after spills: blot excess, spray a degreaser or vinegar solution, scrub grout with a brush, then rinse. Repeat stubborn spots.
| Task | Product | Time |
|---|---|---|
| Blot | Paper/towel | Immediate |
| Degrease | Citrus cleaner | 5–10 min |
| Scrub grout | Stiff brush | 2–5 min |
| Rinse | Warm water | 1–2 min |
Routine vs deep-clean schedule
When you keep up with quick daily touch-ups—sweeping crumbs, wiping spills, and spot-cleaning sticky areas—you’ll cut down how often you need deep, time-consuming scrubs;
pair that routine with a room-by-room weekly plan so kitchen grease never gets a chance to set into grout or finishes.
Schedule focused deep-cleans monthly for ovens, under appliances, and grout sealing; adjust frequency by household traffic.
Living Room / Family Room mixed flooring and rugs
In living rooms with mixed hardwood, carpet, and area rugs, you’ll switch cleaning methods to protect each surface.
Use gentle cleaners and the right tools for hardwood, vacuum and spot-treat carpets, and shake or clean area rugs according to their material.
For stains and pet messes, blot immediately, use enzyme cleaners when appropriate, and test any product in an inconspicuous spot first.
Cleaning hardwood, carpet, and area rugs safely
1 room with mixed surfaces—hardwood, wall-to-wall carpet, and area rugs—asks for different care steps so each material stays clean and lasts longer.
Vacuum carpets and rugs regularly, using appropriate attachments.
Sweep or dry-mop hardwood daily, then damp-mop with a wood-safe cleaner.
Rotate and shake rugs outside.
Use furniture pads and entry mats to reduce wear and dirt transfer.
Spot treatment for stains and pet messes
Because spills and pet accidents move fast, you should act quickly to blot, lift, and treat each spot according to the surface—hardwood, wall-to-wall carpet, or area rug—to prevent stains and lingering odors.
Follow targeted steps and test cleaners first:
- Blot excess solids or liquids immediately.
- Use enzyme cleaner for pet messes.
- Dab, don’t rub, on rugs.
- Neutralize odors with baking soda.
- Rinse and dry thoroughly.
Bathroom moisture, mold, and grout
In the bathroom you’ll use different cleaners and tools for tile, stone, and vinyl to protect finishes and remove soap scum.
Keep mold at bay by controlling humidity, wiping wet surfaces, and using mold-resistant caulk or sealers.
If grout looks stained or crumbling, you’ll want to deep-clean with a grout brush and restore or regrout to prevent moisture damage.
Tile, stone, and vinyl cleaning methods for bathrooms
Bathrooms demand targeted care: tile, stone, and vinyl each react differently to moisture, cleaners, and scrubbing, so you’ll want methods that remove soap scum and mildew without damaging surfaces or grout.
For glazed tile use mild detergent and soft brush; for natural stone choose pH-neutral cleaner and avoid acids; vinyl tolerates gentle bleach solutions for stains.
Rinse thoroughly and dry to prevent residue.
Mold prevention and grout restoration tips
When you cut humidity and dry grout quickly, you stop mold before it starts; regular ventilation, timely wiping, and targeted cleaners keep spores from taking hold.
Use a dehumidifier or fan after showers, squeegee tiles, and fix leaks.
Restore grout with bleach-free cleaners or baking soda paste, reseal cured grout annually, and replace badly damaged sections to prevent recurrence.
Bedroom maintaining hardwood, laminate, and carpet
In the bedroom you’ll use gentler cleaners and soft tools to protect hardwood or laminate finishes and keep carpets from wearing prematurely.
Don’t over-wet floors—wipe spills quickly and follow manufacturer care for treatments or polish.
Also vacuum and rotate mattress and clean under the bed regularly to cut dust and extend bedding life.
Gentle cleaning to protect finishes and prolong life
Although bedrooms see less traffic than other rooms, gentle, regular care keeps hardwood, laminate, and carpet looking their best and extends their lifespan.
You should sweep or vacuum weekly with appropriate attachments, spot-clean spills immediately using recommended cleaners, use microfiber mops for damp cleaning, protect surfaces with pads under furniture, and avoid harsh chemicals or excessive water to prevent warping, fading, and fiber damage.
Mattress and under-bed cleaning notes
Because allergens and dust collect quickly in hidden spaces, you should include mattress and under-bed care in your regular bedroom routine.
Vacuum mattresses with a HEPA-filter attachment, spot-clean stains, and air them monthly.
Clear and vacuum beneath the bed, slide in a microfiber duster for edges, and use low-profile storage to keep airflow.
Rotate mattresses every three months to reduce wear.
Laundry Room lint, detergent buildup, and concrete/vinyl floors
In the laundry room you’ll want quick fixes for spills and detergent residue, like blotting with a microfiber cloth and a mild vinegar solution.
Sweep or vacuum lint regularly to prevent buildup around vents and behind appliances.
Place rubber or felt pads under washers and dryers and use a drip tray to protect concrete or vinyl from stains and heavy wear.
Quick methods for spills and detergent residue
When a spill happens or detergent builds up in the laundry room, act fast to keep lint and residue from spreading or staining; blot liquids, scrape dried gunk, and sweep or vacuum loose fibers before you apply any cleaner.
Use a mild, pH-neutral cleaner for vinyl or sealed concrete, rinse thoroughly, dry with microfiber, and repeat spot treatments until residue is gone.
Protecting floors from heavy appliances
If you keep heavy appliances on unstable or unprotected flooring, they can cause scratches, dents, and trapped lint that lead to long-term damage and staining.
Place rubber pads or anti-vibration feet under washers and dryers, use a drip pan for leaks, and add a washable mat to catch detergent spills and lint.
Check and clean under appliances monthly to prevent buildup.
Basement and Garage concrete, sealed floors, stains
In your basement or garage, you’ll tackle oil and rust stains first with targeted cleaners or absorbents to lift marks without damaging the concrete.
After cleaning, consider sealing or adding protective coatings to simplify future maintenance and prevent new stains.
Also address moisture with proper drainage, dehumidifiers, and routine inspections to protect the slab and any coatings long-term.
Oil and rust stain removal, sealing and protective coatings
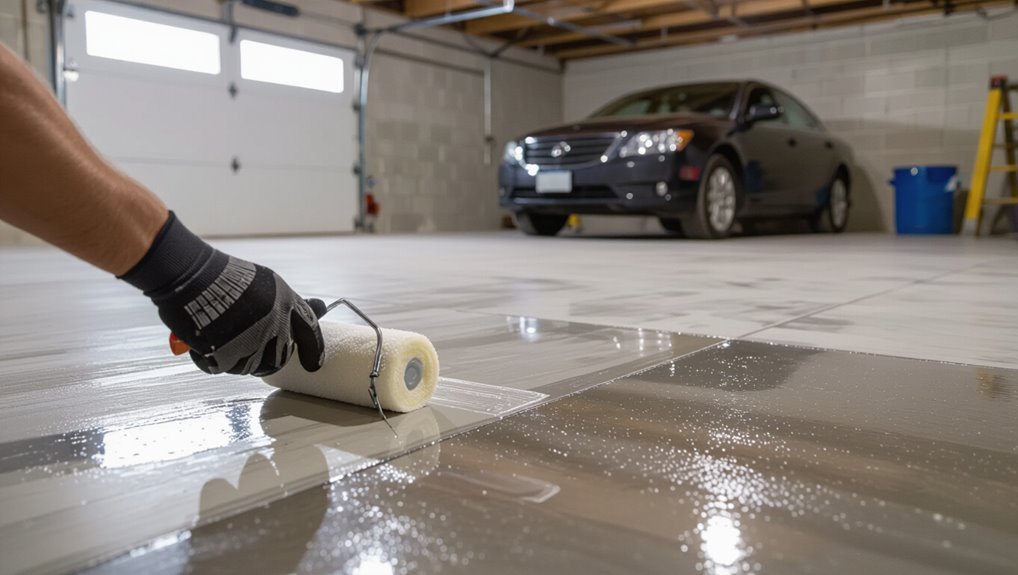
Because oil and rust can deeply bond to concrete and sealed finishes, you’ll want to tackle them quickly with the right cleaners and techniques to prevent long-term damage.
Use absorbent powder for fresh oil, scrub with a degreaser or trisodium phosphate for set stains, and apply a rust remover per label.
After cleaning, seal or coat concrete with a breathable, oil-resistant sealer to protect surfaces.
Moisture mitigation and long-term maintenance
Oil and rust treatments protect surfaces now, but moisture poses a different, ongoing threat you’ll need to manage in basements and garages.
Install proper drainage, use a dehumidifier, and seal cracks to prevent seepage. Reapply breathable sealers periodically, monitor humidity and stains, and keep gutters clear.
Promptly address leaks, lift damp items, and schedule annual inspections to preserve concrete and coatings long term.
Outdoor and Transitional Spaces porches, patios, and stairs
For porches, patios, and stairs you’ll choose between pressure washing and gentler scrubbing depending on the surface and finish.
Hard materials like concrete and pavers handle high-pressure cleaning, while wood, composite decking, and older stone usually need milder methods and appropriate cleaners.
I’ll walk you through which pressure settings, brushes, and detergents suit each material so you don’t damage the surface.
Pressure washing vs gentle scrubbing, materials guide
When choosing between pressure washing and gentle scrubbing for porches, patios, and stairs, consider the surface material, the type of grime, and nearby landscaping so you pick a method that cleans effectively without causing damage.
Use pressure washing on concrete and sealed stone at controlled psi; avoid it on wood, painted surfaces, or aged masonry.
For those, scrub gently with appropriate cleaners and a soft-bristled brush.
Step-by-Step Cleaning Procedures
Start by removing loose dirt with dusting tools and dry-clean techniques so you don’t grind grit into the floor.
Next, treat spots and stains with the appropriate removal method for the stain type before you proceed.
Finish with your chosen wet-cleaning method—mop, steam, or low-moisture—and speed drying with ventilation, fans, and rugs as needed.
Step 1: Dusting and dry cleaning (tools and techniques)
1. Begin by removing loose debris with a broom or vacuum using appropriate attachments; you’ll protect finishes and prevent scratches.
Use microfiber dust mops for hard floors and electrostatic cloths for baseboards. Work toward one exit, overlapping strokes. Shake or empty dust collectors outside.
Replace filters and wash mop heads regularly so dry cleaning stays effective and hygienic.
Step 2: Spot cleaning and stain removal (by stain type)
Tackle stubborn spots next by identifying the stain type—oil, protein (like blood or egg), tannin (coffee, tea, wine), dye (ink, marker), or mineral (rust, salt)—so you can choose the right cleaner and method; treating stains promptly and testing solutions on an inconspicuous area will give you the best chance of full removal without damaging the floor finish.
- Blot, don’t rub
- Use appropriate solvent
- Enzymatic for protein
- Acid for rust
- Rinse and dry promptly
Step 3: Wet cleaning methods mopping, steam, and low-moisture options
Now you’ll move from spot treatment to wet cleaning—mopping, steam, or low‑moisture systems—choosing the method that matches your floor type and soil level; each approach has a clear step‑by‑step routine, specific tools, and moisture limits.
So follow manufacturer guidance and test a small area before treating the whole surface.
Mop with appropriate solution, use steam cautiously on sealed floors, and prefer low‑moisture systems for sensitive materials.
Step 4: Drying and post-clean care (ventilation, fans, rugs)
Let the floor dry quickly and safely by increasing airflow and removing moisture-trapping items: open windows or vents, run ceiling or box fans toward the room to speed evaporation, and lift or prop up rugs, furniture pads, and small items so air can circulate under them.
Use dehumidifiers in humid climates, blot damp spots, avoid walking until dry, and replace rugs only when moisture-free to prevent mold.
Product and Tool Comparison
Now you’ll compare products and tools so you pick what’s best for each floor type.
We’ll weigh the pros and cons of steam cleaners, mops, vacuums, and machines.
You’ll also look at how natural and commercial cleaners stack up for effectiveness and safety.
Choosing the right cleaner for each floor type
Choosing the right cleaner for each floor type matters because the wrong product or tool can damage finishes, leave residues, or simply fail to remove dirt. You’ll match cleaner pH, avoid abrasives, and test a small area. Use recommended products for wood, tile, vinyl, laminate, and stone.
| Floor type | Suggested cleaner |
|---|---|
| Wood | pH-neutral wood cleaner |
| Tile | Mild detergent |
| Vinyl | Non-abrasive cleaner |
| Stone | pH-balanced stone cleaner |
| Laminate | Damp microfiber cloth |
Pros and cons of steam cleaners, mops, vacuums, and machines
1 clear way to pick the right cleaning tool is to weigh pros and cons: steam cleaners sanitize without chemicals but can harm some finishes.
Mops are inexpensive and versatile yet can spread dirty water.
Vacuums remove dry debris efficiently but won’t clean sticky spills.
Floor-cleaning machines speed large jobs but cost more and need storage and maintenance.
Choose based on floor type, job size, and budget.
Natural vs commercial cleaners effectiveness and safety
While natural cleaners like vinegar, baking soda, and castile soap rely on simple, non-toxic ingredients that work well for routine cleaning, commercial products are formulated to tackle tougher stains, disinfectants, and specialized surfaces—so you should match the product to the task and surface.
Use naturals for daily maintenance and sensitive floors; choose commercial cleaners for grease, deep stains, or bacteria, following label instructions and ventilating.
Common Mistakes and Problems to Avoid
Before you start scrubbing, know the top 10 cleaning mistakes that can permanently harm floors—like using too much water, harsh chemicals, or the wrong tools.
You’ll learn how to spot damage such as swelling, dulling, and scratches and what fixes actually work.
Pay attention now so you can prevent problems and save time and money later.
Top 10 cleaning mistakes that damage floors
Cleaning floors sounds simple, but ten common mistakes—like using too much water, harsh cleaners, or the wrong tools—can quickly ruin finishes and shorten a floor’s life.
You should avoid these top errors and adopt gentler habits immediately.
- Using excessive water
- Abrasive scrubbing pads
- Harsh chemical cleaners
- Dragging heavy furniture
- Ignoring manufacturer guidelines
How to identify and fix common cleaning-related damage (swelling, dulling, scratches)
You can spot and fix most cleaning-related floor damage by knowing what to look for: swelling shows as raised or buckled boards and soft spots near moisture sources.
Dulling looks like a loss of sheen and becomes more visible under angled light.
Scratches appear as linear gouges or surface abrasions that catch your fingernail.
For fixes, dry and dehumidify swollen areas, buff and reseal dull finishes, and sand-fill or use touch-up kits for scratches.
Prevention, Maintenance, and Best Practices
Start with simple daily and weekly tasks, plan monthly checks, and schedule annual deep maintenance so your floors stay in top shape.
Protect surfaces from pet claws, heavy furniture, and moisture with mats, pads, and routine inspections.
Know the signs—wear, persistent stains, or lost finish—so you can refinish, reseal, or replace at the right time.
Daily, weekly, monthly, and annual maintenance plans
Because regular care prevents buildup and expensive repairs, set up clear daily, weekly, monthly, and annual routines that match your floor type and traffic levels.
You’ll save time and extend lifespan by scheduling simple tasks and noting seasonal needs.
- Daily: sweep or dry mop
- Weekly: damp mop with appropriate cleaner
- Monthly: inspect seals and deep-clean grout
- Annual: reseal or refinish if needed
Track tasks on a calendar.
Protecting floors from pets, furniture, and moisture
Regular maintenance routines will cut down on wear, but protecting floors from pets, furniture, and moisture keeps that effort from going to waste.
Use pads under legs, felt protectors, and area rugs for high-traffic zones. Trim pet nails, place mats at entries, and wipe spills immediately.
Control humidity with a dehumidifier or vents. Rotate furniture periodically to prevent uneven fading and indentations.
When to refinish, reseal, or replace flooring
When wear becomes visible or protective coatings fail, you should decide quickly whether to refinish, reseal, or replace so minor damage doesn’t become a costly problem.
Inspect scratches, gouges, water stains, and soft spots.
Refinish wood for surface damage, reseal tile or concrete when grout or sealant wears, and replace when structural failure, persistent odor, or mold risks remain after repairs.
DIY Repairs and When to Call a Pro
You can handle small fixes yourself—like rubbing out scratches, touching up grout, or swapping a cracked tile—using basic tools and kits.
If stains, warping, widespread grout failure, or structural issues persist, it’s time to call a pro for deep cleaning or restoration.
When you do, ask about their experience with your floor type, warranties on work, and a written estimate before hiring.
Small repairs you can do at home (scratch repair, grout touch-up, tile replacement)
Tackle minor floor damage yourself—scratches, worn grout, and a chipped tile are often fixable with a few tools and basic know-how.
For wood, use a matching filler or stain marker and finish with clear coat.
Regrout small joints with premixed grout and seal.
Replace a cracked tile by removing grout, lifting the tile, applying thinset, and setting a replacement, then grout and seal.
Signs you need professional cleaning or restoration
Minor DIY fixes can stretch the life of your floor, but some problems go beyond a quick patch and need a pro’s tools and experience.
Call a professional if stains won’t lift, deep gouges or cupping appear, large grout failure or loose tiles emerge, persistent odors or mold persist, water damage covers broad areas, or finish loss is extensive and sanding/recoating is required.
How to choose a flooring professional (questions to ask)
Which questions should you ask before hiring someone to work on your floors?
Ask about licensing, insurance, and warranties.
Request references and recent photos of similar work.
Confirm materials, timeline, and cleanup.
Get a written estimate detailing labor, materials, and potential extra costs.
Ask who’ll supervise the job and how they handle disputes or defective work.
Verify payment terms and final inspection.
Eco-Friendly and Budget-Friendly Cleaning Strategies
You can save money and cut chemicals by making simple cleaners at home, like vinegar and baking soda solutions for tile or a mild castile soap mix for wood.
Look for eco-friendly products with clear certifications—such as EPA Safer Choice, Green Seal, or Ecologo—to guarantee ingredients are safe and effective.
I’ll list easy recipes and recommended certified brands so you can choose what fits your budget and floor type.
Low-cost homemade solutions and recipes
Making your own floor cleaners can save money and cut down on harsh chemicals, and you’ll usually only need a handful of pantry staples like vinegar, baking soda, and castile soap.
Use recipes suited to floor type, test first, and dilute properly.
Try simple mixes:
- Vinegar + water for tile
- Baking soda paste for spots
- Castile soap mop solution
- Lemon deodorizer
- Olive oil wood polish
Eco-friendly product recommendations and certifications
When you want eco-friendly and budget-conscious cleaners, look for products that balance plant-based ingredients with proven cleaning power and clear certifications so you’ll know they’re genuinely greener.
Choose EPA Safer Choice, Green Seal, or EU Ecolabel labels. Prefer fragrance-free, biodegradable formulas and concentrated refills to cut waste and cost.
Test new cleaners on a small floor area before full use.
FAQ Quick Answers to Common Floor-Cleaning Questions
You probably have quick questions like how often different floors need deep cleaning, whether steam cleaners are safe for hardwood or laminate, and how to remove pet urine and odors without damage.
You’ll also want to know how to restore shine to dull floors safely and whether natural cleaners stack up against commercial products.
Below are concise answers to get you practical, useable guidance.
How often should I deep-clean each floor type?
How often should you deep-clean each floor type?
Expect to deep-clean high-traffic hard floors (tile, vinyl, sealed wood) every 1–3 months; low-traffic sealed wood every 6–12 months.
For natural stone, deep-clean and reseal every 6–12 months.
Laminate and engineered wood need deep cleaning every 3–6 months.
Carpet benefits from professional deep cleaning every 6–12 months, more often with pets or allergies.
Can I use a steam cleaner on hardwood or laminate?
After scheduling deep cleans based on floor type, consider whether a steam cleaner fits your routine.
You can’t use high-heat steam on solid hardwood—moisture and heat can warp or strip finish. For laminate and engineered wood, check manufacturer guidance: many advise against steam or allow low-heat, controlled steam.
When unsure, stick to damp mopping with approved cleaners to protect finishes.
What’s the safest way to remove pet urine and odors?
Because pet urine soaks quickly and leaves lingering odors, act fast and blot the area with paper towels or a clean cloth to remove as much liquid as possible.
Then clean with an enzyme-based cleaner made for pet stains to break down urine molecules and neutralize smells without harming your floor’s finish.
Rinse lightly, dry thoroughly, and repeat if odor persists; avoid ammonia or bleach-based cleaners.
How do I restore shine to dull floors without damaging them?
Want your floors to gleam again without risking damage? Start by identifying the floor type, then use manufacturer-approved cleaners and microfiber mops.
Remove grit first to avoid scratching. For wood, apply a compatible polish sparingly; for tile or vinyl, use a pH-neutral cleaner and buff while damp.
Test any product in an inconspicuous spot, and avoid wax on unsealed or urethane-finished floors.
Are natural cleaners as effective as commercial products?
Curious whether natural cleaners can match commercial products? You’ll find many natural options—vinegar, baking soda, castile soap—work well for light dirt and routine maintenance.
They’re gentler and eco-friendly but may struggle with heavy grease, deep stains, or disinfecting.
Test on a small area, dilute properly, and use commercial cleaners when you need stronger degreasing or certified sanitizing power.
Closing Checklist and Room-by-Room Quick Reference
Wrap up your cleaning routine with a printable checklist that breaks tasks into daily, weekly, and deep-clean items so you won’t miss anything.
Keep a quick-reference chart nearby that matches each floor type to the recommended cleaning method and products. Use these tools room-by-room to save time and protect your floors.
Printable quick checklist for daily, weekly, and deep-clean tasks
A single-page checklist can keep your daily, weekly, and deep-clean tasks clear and actionable—use it as a closing checklist at the end of each day and a room-by-room quick reference for bigger chores.
Print it and hang it where you clean, then tick off items as you go:
- Sweep or vacuum high-traffic areas
- Spot-treat spills immediately
- Mop or damp-clean weekly
- Deep-scrub monthly
- Inspect and restock supplies
Quick-reference chart for cleaning methods by floor type
Print your checklist near each cleaning zone, then keep a small chart that matches floor types to the safest, most effective methods so you’ll know at a glance how to tackle any room. Use this quick-reference chart to choose cleaners, tools, and frequency.
| Floor Type | Best Cleaner | Tool |
|---|---|---|
| Hardwood | pH-neutral | Microfiber mop |
| Tile | Mild detergent | Scrub brush |
| Vinyl | Vinegar solution | Damp mop |