
How to Clean Vinyl Plank Flooring: The Right Way to Do It
You’ll keep vinyl plank floors looking like new by sweeping or vacuuming regularly, spot-treating spills immediately, and mopping with a microfiber mop and a pH‑neutral cleaner or a mild dish soap mix. Avoid abrasive tools, wax, and steam cleaners, and don’t leave standing water—dry seams and edges thoroughly. Use felt pads under furniture and entry mats to reduce wear. Follow a simple weekly and monthly routine, and keep going to learn tips for tough stains and repairs.
How to Clean Vinyl Plank Flooring and Hook
You’ll get the best, safest, and fastest method to clean vinyl plank flooring and remove scuffs or sticky residue.
This guide is for homeowners, renters, and caretakers who want simple, effective steps without harsh chemicals.
You’ll learn what products to use, which to avoid, and quick techniques to keep your floors looking new.
Direct Quick Answer: Best, Safe, and Fast Cleaning Method
For a fast, safe, and reliable clean, use a microfiber mop and a diluted pH-neutral cleaner—mix about 1/4 cup of vinyl-approved cleaner or mild dish soap with a gallon of warm water—and work in small sections, rinsing the mop frequently to avoid streaks.
When wondering how do I clean vinyl plank flooring, avoid harsh chemicals, scrub gently, dry promptly, and spot-treat stubborn grime.
Who this guide is for and what you’ll learn
Now that you’ve got a quick, safe cleaning method to rely on, let’s clarify who this guide helps and what you’ll get from it.
You’ll learn practical, damage-free techniques, stain removal tips, product recommendations, and maintenance schedules.
This guide’s for homeowners, renters, and caretakers with vinyl plank floors who want easy, effective routines that preserve appearance and extend flooring life without harsh chemicals or costly mistakes.
Basic Understanding: What Is Vinyl Plank Flooring and Why Cleaning Matters
Vinyl plank flooring is a layered product—rigid cores like SPC, softer WPC, and luxury vinyl options—with wear layers and finishes that determine texture and protection.
You’ll want to clean differently depending on the surface finish because durability, appearance, and even warranty can hinge on using the right methods.
Understanding those materials and finishes helps you choose safe cleaners and extend the life of your floor.
What vinyl plank flooring is (materials, surface types: SPC, WPC, luxury vinyl)
Think of vinyl plank flooring as a layered, engineered product designed to mimic wood or stone while staying durable and low-maintenance.
You’ll find three main types:
SPC (stone-plastic composite) is rigid and dense.
WPC (wood-plastic composite) offers more cushion.
Luxury vinyl includes both flexible and rigid planks with varied wear layers and textures.
Choose based on feel and durability.
Why proper cleaning matters (durability, warranty, appearance)
Care matters when you want your vinyl plank flooring to look great and last—regular, proper cleaning prevents grit and spills from scratching the wear layer, helps preserve the plank’s finish for years, and keeps you in compliance with many manufacturers’ warranties.
Common surface finishes and how they affect cleaning
With several common surface finishes—such as wear-layer film, embossed textures, and polyurethane coatings—your cleaning approach should match the finish to avoid damage and preserve appearance.
Smooth wear layers tolerate gentle mops and mild cleaners; embossed textures need soft brushes or microfiber to lift dirt from grooves.
Avoid abrasive pads and harsh chemicals on polyurethane; test cleaners in an inconspicuous spot first.
Tools and Supplies You Need
You’ll want a few essentials on hand—broom or vacuum, a microfiber mop, and a bucket—to keep vinyl plank floors dirt-free.
Use pH-neutral cleaners or simple DIY mixes, and consider commercial products made for vinyl; steer clear of harsh chemicals, wax, and abrasive pads.
For tougher jobs, you can add optional accessories like a soft-bristled scrub brush or a steam mop rated safe for vinyl.
Essential tools (broom, vacuum, microfiber mop, bucket)
Start with four basic tools that make cleaning vinyl plank flooring quick and effective: a broom or vacuum for loose debris, a microfiber mop for gentle wet cleaning, and a bucket for diluting cleaner and rinsing.
You’ll also want items that protect and reach:
- Soft-bristle broom
- Vacuum with hard-floor setting
- Microfiber flat mop
- Sturdy bucket with wringer
Recommended cleaning solutions (pH-neutral cleaners, DIY mixes, commercial products)
1 reliable rule: pick a cleaner that’s gentle on vinyl—pH-neutral formulas and mild DIY mixes work best, while harsh acids, ammonia, and abrasive powders can dull or damage the finish.
Use diluted pH-neutral floor cleaner or a mild vinegar-and-water mix for routine cleaning.
For stubborn grime, choose a vinyl-safe commercial product and always test in an inconspicuous spot first.
Products to avoid (harsh chemicals, wax, abrasive pads)
Because vinyl’s protective wear layer can be easily scratched or chemically attacked, avoid harsh cleaners (like bleach, oven degreasers, and ammonia), abrasive powders or scrubbing pads, and wax-based products that can build up or discolor the floor.
You should also skip:
- Steel wool or scouring pads
- Solvent-based degreasers
- Paste waxes and restorative coatings
- Heavy-duty bleach cleaners
Optional accessories for deep cleaning
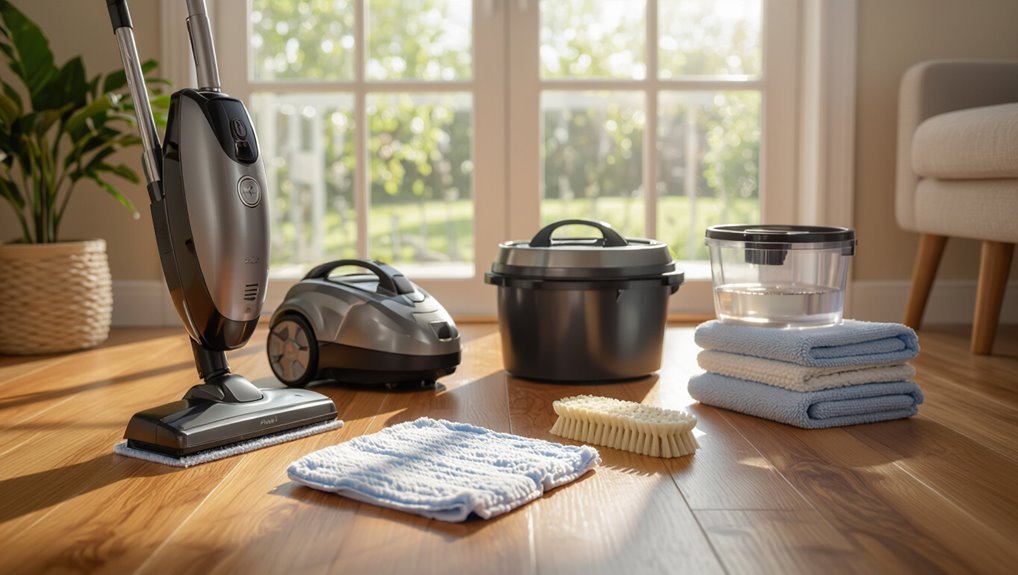
When you’re tackling a deep clean, a few purpose-built accessories can make the job quicker and safer for your vinyl plank floors.
Consider a microfibre mop head, soft-bristle scrub brush, grout brush for edges, and a gentle steam mop rated for vinyl.
Use non-abrasive pads, a spray bottle for diluted cleaner, and rubber gloves to protect hands and guarantee controlled, even cleaning.
Step-by-Step Cleaning Process
Start by clearing furniture and loose debris so you can reach every plank.
Sweep or vacuum thoroughly—pay special attention to edges and gaps—to remove grit before any wet cleaning.
Tackle spills with targeted spot treatments, then mop with the right technique and rinse well to avoid residue and standing water.
Step 1 Prep: Remove furniture and debris
Clear the room of furniture and loose items so you can access the entire floor without obstruction.
Move chairs, rugs, and fragile items to a safe spot.
Lift heavy pieces with help or use sliders to prevent damage.
Pick up visible debris, cords, and pet bowls so cleaning tools won’t snag.
Close doors to keep the area clear and ready for the next step.
Step 2 Dry cleaning: sweeping and vacuuming (tips for edge and gap areas)
Although dry cleaning seems simple, sweeping and vacuuming properly makes the biggest difference in protecting your vinyl plank flooring.
Start with a soft-bristle broom or microfiber dust mop to lift grit; follow with a vacuum using a hard-floor setting or brushless attachment.
Pay extra attention to edges and gaps, loosening trapped debris with a crevice tool or soft brush before final pass.
Step 3 Spot cleaning spills and stains (common stains and targeted methods)
When a spill happens, act quickly to prevent staining and damage to your vinyl plank flooring.
Blot liquids with a soft cloth, avoid scrubbing, and use mild detergent for residue. For tougher spots, try targeted solutions listed below—test in an inconspicuous area first.
- Water and mild dish soap
- Baking soda paste for grease
- Isopropyl alcohol for ink
- Vinegar solution for coffee
Step 4 Mopping: correct technique and mop types
Step 4: mop your vinyl plank floor using a gentle, controlled technique that avoids excess water and abrasive motions.
Use a microfiber flat mop or a sponge mop—both pick up dirt without scratching. Lightly dampen the mop with manufacturer-approved cleaner diluted per instructions.
Work in small sections, moving with the grain of planks. Rinse or change mop heads when they get dirty to prevent streaks.
Step 5 Rinsing and drying: preventing residue and water damage
After mopping, you’ll want to remove any cleaner residue and excess moisture to keep your vinyl looking its best and to prevent water damage.
Rinse with a clean mop or microfiber cloth and plain warm water, changing rinse water often.
Dry thoroughly with absorbent towels or a dry microfiber mop, paying attention to seams and edges to stop warping and mildew.
Step 6 Replacing furniture and protective measures
Once the floor is completely dry, you can start returning furniture but do it carefully to avoid scratching or denting the vinyl.
Lift items rather than dragging them, use felt pads under legs, and place area rugs in high-traffic spots.
Avoid wheels or heavy casters without protective covers.
Reinstall rugs only after ensuring no trapped moisture; monitor for indentations over the next week.
Deep Cleaning and Stain Removal Techniques
When you need more than routine mopping, use steam-free deep-clean methods like diluted dish soap, baking soda paste, or a commercial vinyl cleaner to protect the floor’s wear layer.
For stubborn spots—oil, ink, nail polish, scuff marks, and pet stains—treat each with the appropriate solvent or gentle abrasion and always spot-test first.
If stains persist, the finish’s damaged, or large areas are affected, call a professional to avoid voiding warranties or harming the planks.
Safe deep-clean methods (steam-free alternatives)
Although steam cleaners promise quick results, you shouldn’t use them on vinyl plank flooring because the heat and moisture can warp planks and damage the wear layer; instead, choose steam-free deep-clean methods that safely lift dirt and stains without risking boards.
Use a damp microfiber mop with a pH-neutral cleaner, scrub grout or textured areas gently with a soft brush, and spot-treat stubborn grime with isopropyl alcohol diluted.
Removing specific stains: oil, ink, nail polish, scuff marks, pet stains
1 simple trick for tackling stubborn spots is to match the stain to the right remover and act quickly, because prompt, targeted treatment prevents permanent damage to vinyl planks.
For oil, blot and use dish soap; for ink, dab alcohol; for nail polish, acetone sparingly; for scuffs, try a vinyl eraser. Quick action matters.
- Blot, don’t rub
- Test first
- Use minimal solvent
- Rinse well
When to call a professional
If a stain won’t budge after your targeted treatments or you’re facing extensive buildup, call a professional—it’s smarter and often cheaper than risking damage from stronger chemicals or aggressive scrubbing.
A pro assesses adhesive or deep-set stains, uses manufacturer-safe cleaners, restores finish, and prevents warping.
Schedule service when stains persist beyond DIY, cover large areas, or humidity/structural issues accompany the damage.
Comparison: Commercial Cleaners vs. DIY Solutions
You’ll weigh commercial cleaners’ convenience and targeted formulas against DIY mixes that use vinegar, dish soap, or baking soda.
Consider effectiveness, safety for your finish, cost, and how eco-friendly each option is. That comparison will help you pick the best balance of performance, price, and environmental impact.
Commercial cleaners pros and cons
When weighing commercial cleaners against DIY solutions, consider what you value most: convenience and consistent results from store-bought products, or cost savings and ingredient control from homemade mixes. Commercial options save time and often protect finishes, but they cost more and can contain harsh chemicals. Choose based on sensitivity, budget, and frequency of cleaning.
| Pro | Con |
|---|---|
| Consistent results | Higher cost |
| Time-saving | Chemicals |
| Designed for vinyl | Less control |
| Available formulas | Possible residue |
| Protective additives | Environmental impact |
DIY recipes (vinegar, dish soap, baking soda) effectiveness and safety
Mixing simple ingredients like vinegar, dish soap, and baking soda can clean vinyl plank floors effectively for routine dirt and spills, but they work differently and have limits compared with commercial cleaners.
You can dilute vinegar for mopping, use mild dish soap for grease, and baking soda for spot scrubs.
Avoid undiluted acids or abrasive scrubbing that can dull or damage the wear layer.
Cost, convenience, and environmental considerations
Although commercial cleaners can save you time with ready-made formulas and clear dosing, DIY solutions usually cost far less and let you control ingredients.
You’ll weigh convenience against price: store products cut cleaning time but add recurring costs and chemicals, while DIY mixes need effort but reduce waste and let you choose eco-friendly components.
Pick what fits your budget and values.
Common Mistakes and How to Avoid Them
Don’t let common mistakes shorten the life of your vinyl plank flooring.
Using too much water or abrasive tools can warp boards and strip the wear layer, and applying polish or wax meant for other floors can leave residue or void your warranty.
Learn what to avoid so you can clean effectively without risking damage.
Top mistakes that damage vinyl plank flooring
Because vinyl plank flooring’s wear layer looks durable, it’s easy to overlook habits that cause damage; here are the most common mistakes people make and how to avoid them so your floors last and stay attractive.
Don’t:
- drag furniture without protection
- use harsh chemical cleaners
- skip felt pads under legs
- ignore grit and debris buildup
Wipe spills promptly and follow manufacturer care instructions.
Why excessive water and abrasive tools are harmful
When you soak vinyl plank flooring or scrub it with abrasive tools, you can weaken the wear layer and force water into seams and underlayment, leading to swelling, warping, or delamination.
Don’t mop with puddles or use steel wool, stiff brushes, or harsh scrub pads.
Use a damp microfiber mop and gentle cleaners to protect seams, finish, and long-term stability.
Misusing polish or wax and warranty implications
If you apply polish or wax meant for other floors, you can create a cloudy buildup, make the surface slippery, or block the manufacturer’s wear layer—so always check product compatibility first.
Using wrong products can void warranties, and improper coatings hide damage inspectors need to see.
Follow manufacturer care instructions, use approved finishes only, and keep receipts to protect coverage and avoid costly repairs.
Maintenance Plan and Best Practices
Set up simple daily, weekly, and monthly cleaning routines so you can keep spills, grit, and buildup from damaging your vinyl.
Use preventive measures like entry mats, furniture pads, and humidity control to reduce wear and tear.
Add seasonal care and long-term preservation steps—like deeper cleans and inspection—to extend the life and appearance of your floors.
Daily, weekly, and monthly cleaning routines
Because regular care prevents buildup and extends the life of your vinyl plank floors, establish simple daily, weekly, and monthly routines you can actually stick to.
Daily: sweep or vacuum loose dirt.
Weekly: damp-mop with manufacturer-recommended cleaner.
Monthly: inspect for wear and deep-clean stubborn spots. Track tasks to stay consistent.
- Quick daily sweep
- Gentle weekly mop
- Monthly deep-clean
- Note issues promptly
Preventive measures: mats, furniture pads, humidity control
Keeping up with those daily, weekly, and monthly tasks will go a long way, but preventing damage in the first place saves more time and money.
Use nonrubber-backed mats at entrances to trap grit, place felt pads under furniture and chair legs, and lift furniture when moving.
Keep indoor humidity between 30–50% to prevent warping and seams from separating.
Seasonal care and long-term preservation tips
When you plan seasonal care and a simple maintenance routine, your vinyl plank floors will stay attractive and durable for years; stick to quarterly deep-cleaning, seasonal inspections, and annual protective measures so small issues never become big repairs.
Rotate rugs, trim pet nails, and check seams for lifting. Reapply felt pads, replace worn entry mats, and address spills promptly to prevent staining and warping.
Troubleshooting: Problems, Causes, and Fixes
If your vinyl planks whiten or warp after cleaning, you’ll learn what likely caused it and how to fix or prevent it.
We’ll also cover how to track down and eliminate persistent odors so they don’t come back.
Finally, you’ll get clear options for repairing scratches and guidance on when it’s time to replace affected planks.
Whitening or warping after cleaning causes and remedies
Although vinyl plank floors are durable, they can sometimes whiten or warp after cleaning, and knowing the likely causes helps you fix the problem quickly.
Whitening often comes from residue buildup or harsh cleaners; rinse with clean water and a mild pH-neutral solution.
Warping usually indicates excess moisture or heat; dry thoroughly, improve ventilation, and avoid steam cleaners.
Replace badly damaged planks.
Persistent odors and how to eliminate them
Why does your vinyl plank floor sometimes hold onto smells even after you clean it?
Odors often come from trapped spills, pet accidents, or mold in seams and under edges.
Dry thoroughly, lift edges to ventilate, and treat with enzymatic cleaners for organic stains.
For mildew, use diluted white vinegar; rinse and air-dry.
Seal gaps to prevent recurrence.
Scratch repair options and when to replace planks
Even with odors removed and seams sealed, your vinyl planks can still show wear from pets, furniture, or heavy foot traffic. Small surface scratches are common and often fixable, while deep gouges or buckling mean replacement.
You can try DIY buffing, repair kits, color-matched fillers, or plank replacement depending on damage severity.
- Buffing with a soft pad
- Use repair kit
- Fill and color-match
- Replace damaged plank
Frequently Asked Questions (FAQ)
You’ve probably got questions about steam mops, vinegar, deep cleaning frequency, scuff removal, or what to do if water seeps between planks.
I’ll answer each clearly so you can protect your floors without guessing.
Read on for quick, practical tips and safe solutions.
Can I use a steam mop on vinyl plank flooring?
Can you use a steam mop on vinyl plank flooring? You generally shouldn’t. High heat and moisture can warp, delaminate, or loosen seams, especially on click-lock or older planks.
If your manufacturer explicitly approves steam cleaning, use the lowest setting and avoid prolonged passes.
Otherwise, stick to damp mopping with manufacturer-recommended cleaners to protect finish and warranties.
How often should vinyl plank floors be deep cleaned?
If steam mopping is off the table for most vinyl planks, you’ll still want a schedule for deeper cleaning beyond regular sweeping and damp mopping.
Deep clean every 1–3 months depending on traffic: monthly for busy households, every 2–3 months for moderate use, and less often in low-traffic areas.
Use manufacturer-approved cleaners and a soft-bristle brush to lift embedded dirt without damaging the finish.
Is vinegar safe for vinyl plank flooring?
Wondering whether vinegar’s a safe, budget-friendly cleaner for vinyl plank floors?
You can use a diluted solution—about 1/2 cup white vinegar per gallon of warm water—for routine cleaning. It won’t harm most modern vinyl if properly diluted and rinsed, but avoid straight vinegar and harsh scrubbing.
Test a small, inconspicuous area first to verify no finish dulling or discoloration occurs.
How do I remove stubborn scuff marks without damaging the floor?
Scrape gently and test first: to remove stubborn scuff marks from vinyl plank flooring without damaging the finish, start by using a soft, nonabrasive tool—like a damp microfiber cloth, a pencil eraser, or a melamine (magic) sponge—and work slowly to lift the mark;
if residue persists, apply a small amount of gentle dish soap or rubbing alcohol on a cloth, rinse, then dry.
What to do if water seeps between vinyl planks?
Removing scuff marks is one thing, but water seeping between vinyl planks demands a different response because trapped moisture can warp edges and promote mold.
Act quickly: blot surface water, lift affected seams if possible, and prop boards to air-dry.
Use fans and dehumidifiers, disinfect with a mild solution, and inspect for buckling or mold.
Replace damaged planks and seal seams to prevent recurrence.
