How to Fix a Rip in Vinyl Flooring Without Replacing the Whole Floor
You can fix a rip in vinyl flooring without replacing the whole floor by cleaning the area, trimming ragged edges, and using a matched patch or seam adhesive to bond the tear. For small surface tears apply vinyl adhesive and press seams with a roller; for larger rips cut a neat patch from spare vinyl, glue it in place, trim flush, and blend edges. Temporary fixes use heavy-duty tape until a proper patch is done, and more tips follow.
Can You Fix a Rip in Vinyl Flooring Without Replacing the Whole Floor?
You can often repair a small rip in vinyl without replacing the whole floor, but large tears, widespread damage, or underlying subfloor issues usually mean replacement is smarter.
Repairs typically take less than a few hours and only require patch material, adhesive, and a seam roller, while replacement adds days of work and higher material and labor costs.
We’ll compare time, cost, and needed materials so you can decide the best option.
Direct solution summary (when to repair vs. replace)
Sometimes a small tear can be fixed without replacing the whole floor, but whether you should repair or replace depends on the size, location, and condition of the vinyl.
If the rip is under a cabinet, near a seam, or small and clean, you can learn how to fix a rip in vinyl flooring with patching or adhesive.
Replace for widespread damage.
Time, cost, and materials overview
If the tear is small and the surrounding vinyl’s intact, you can usually fix it without replacing the whole floor—expect most DIY repairs to take 30 minutes to a few hours depending on prep and drying time. You’ll need basic tools and low cost materials; professional help raises price and time.
- Utility knife and scraper
- Vinyl patch or replacement piece
- Adhesive and seam sealer
- Roller and clean cloth
Basic Understanding What Causes Rips in Vinyl Flooring and How Repairs Work
You’ll want to know what usually causes rips—wear and impact, temperature swings, and subfloor problems—because the cause affects how you fix it.
Different vinyl types (sheet, plank, tile, luxury vinyl) repair differently, so the material will shape your options and techniques.
Generally small, localized damage can be repaired, while widespread, structural, or recurring problems usually mean replacement is the better choice.
Common causes of rips (wear, impact, temperature, subfloor issues)
Because vinyl’s top layer is thin and flexible, everyday stresses can lead to rips even when the damage looks minor at first.
You’ll see rips from long-term wear, sudden impact, temperature shifts, or a problematic subfloor. Know the cause to pick the right fix.
- High-traffic scuffing along walkways
- Heavy furniture dropped or dragged
- Shrink/expansion at cold or hot edges
- Uneven, cracked subfloor beneath
Types of vinyl flooring and how they affect repair options (sheet, plank, tile, luxury vinyl)
Knowing what caused the rip helps, but the repair you choose also depends on the kind of vinyl you have. Sheet vinyl needs patching from underneath or adhesive seams; plank and tile let you replace individual pieces; luxury vinyl often hides seams but may need matching planks. Use proper adhesive and a trim kit for seams or replacements.
| Type | Repair note |
|---|---|
| Sheet | Patch/adhesive |
| Plank | Replace piece |
| Tile | Replace/grout |
| Luxury vinyl | Match/color trim |
When a repair is feasible vs. when replacement is recommended
If the damage is small, localized, and the surrounding vinyl is sound, you can usually repair the rip instead of replacing the whole floor.
You should replace if seams lift, multiple rips appear, the subfloor is compromised, or pattern mismatch prevents patching.
Assess size, location, traffic, and material type before deciding.
- small tear near wall
- corner peel by door
- large sagging seam
- water‑stained underlayment
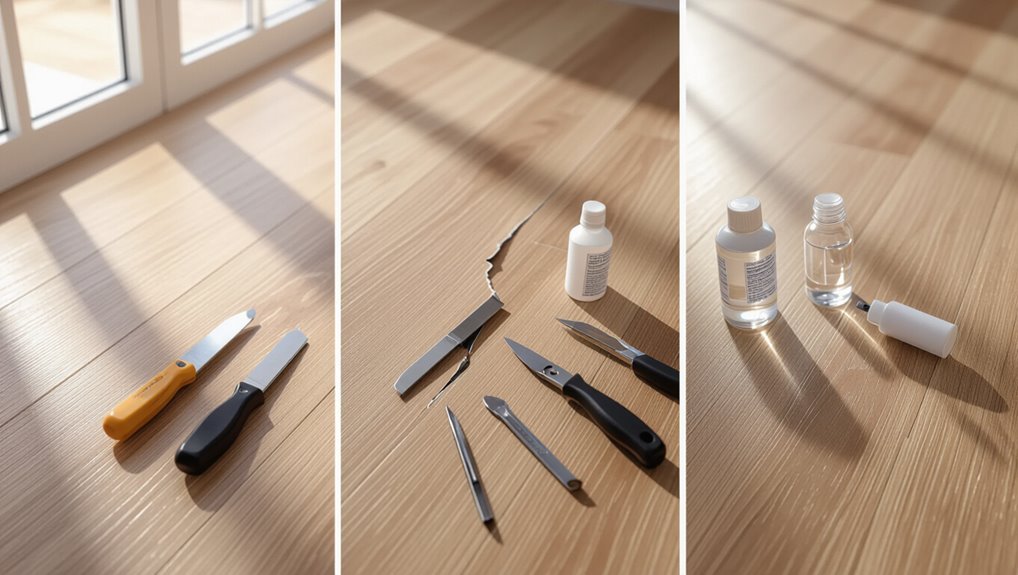
Tools and Materials You’ll Need to Repair a Rip in Vinyl Flooring
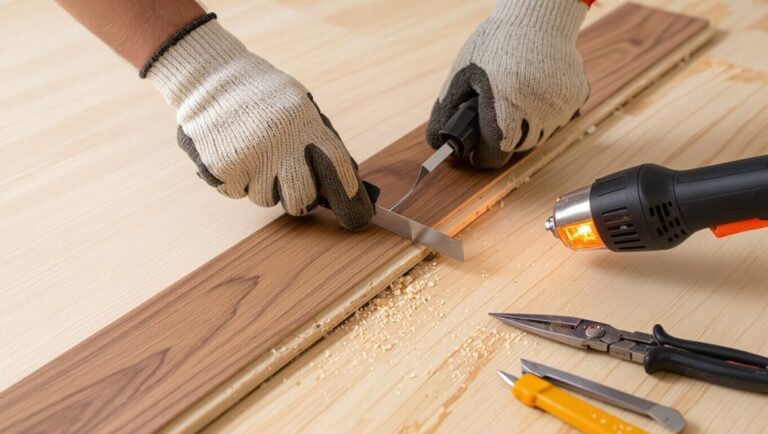
You’ll want a few essential tools on hand—like a sharp utility knife, seam roller, adhesive, and a heat gun—to get the job done cleanly.
Pick patch materials and adhesives that match your floor, such as a vinyl patch kit, seam sealer, or contact cement, depending on the rip.
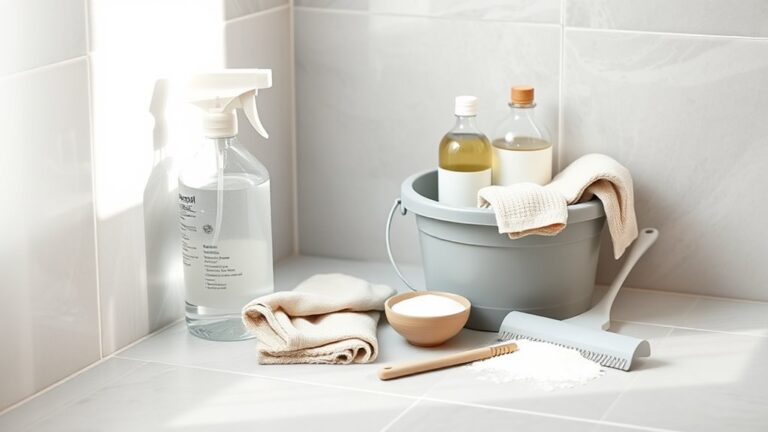
Don’t forget safety gear and prep items—gloves, eye protection, a clean cloth, and a flat work surface—to protect yourself and guarantee a solid repair.
Essential tools (utility knife, seam roller, adhesive, heat gun)
Gather the right gear before you start: a sharp utility knife for clean cuts, a seam roller to press edges down, a strong vinyl adhesive or patch kit to bond the material, and a heat gun to soften stubborn areas and help the adhesive set.
You’ll also want gloves, a straightedge, scrap vinyl, and a cloth for cleanup.
- utility knife
- seam roller
- heat gun
- clean cloth
Patch materials and adhesive types (vinyl patch kit, seam sealer, contact cement)
Choose the right patch material and adhesive for the job to guarantee a lasting, nearly invisible repair. Use a vinyl patch kit for color match, seam sealer for tiny gaps, or contact cement for stronger bonds. Match flexibility and finish to existing flooring, and test a small area.
| Material | Best use |
|---|---|
| Vinyl patch kit | Color match |
| Contact cement | Strong bond |
Safety gear and prep items
Before you start the repair, put on basic safety gear and lay out prep items so the job goes smoothly and safely.
Wear gloves and eye protection, keep a dustpan and broom handy, and clear the area. Have good lighting and ventilation, then organize your patch, adhesive, and tools for easy access.
- Nitrile gloves
- Safety glasses
- Utility knife
- Clean cloths
Step-by-Step Repair Methods
Now you’ll learn clear, step-by-step fixes for different rip sizes and situations.
For small surface tears you’ll clean and glue a patch.
For larger rips you’ll cut and fit a patch from scrap vinyl.
And for plank or tile seams you’ll use heat and seam sealer to restore the join.
I’ll also cover quick temporary fixes you can use in rentals or emergencies until you do a permanent repair.
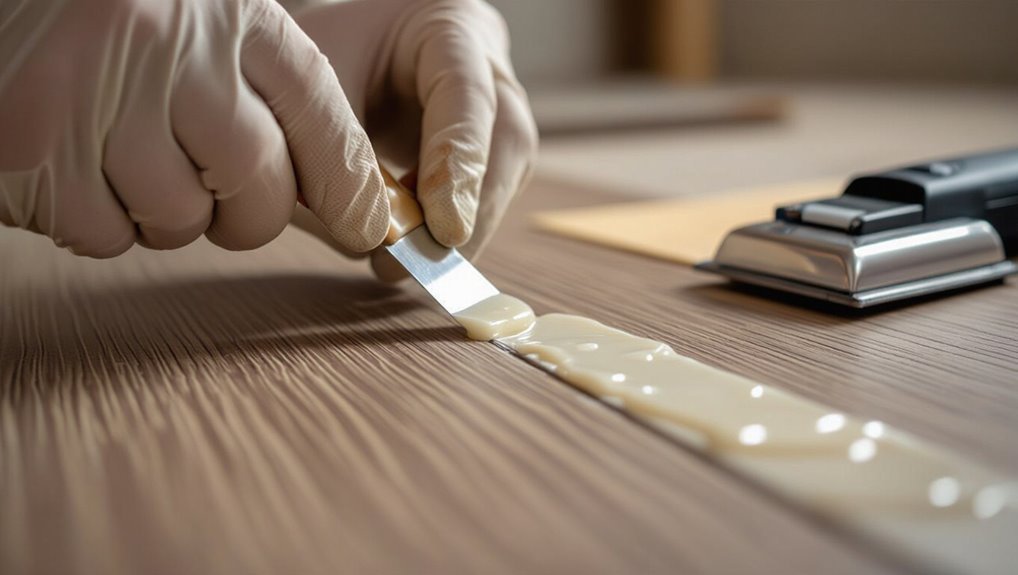
Method 1 Small surface tear: clean-and-glue patch
Start by cleaning and thoroughly drying the ripped area so adhesive will bond.
Trim any loose edges, tuck in a thin backing under the tear, then apply vinyl adhesive and press the seams together, using weights to hold them.
Finish by trimming excess backing, rolling the seam smooth, and letting the repair cure fully.
Step 1: Clean and dry the area
Step 1 is to clean and dry the torn area thoroughly so glue will bond properly:
Remove dirt, dust, and grease with a mild detergent and warm water, then blot with a clean cloth.
Rinse to remove soap residue and dry completely using paper towels, a fan, or hair dryer on low.
Any moisture will prevent adhesion, so make certain the spot is bone dry before moving on.
Step 2: Trim loose edges and prepare a backing
Trim any ragged vinyl edges with sharp scissors or a utility knife, cutting back only what’s necessary so the tear lies flat.
Slide a thin piece of backing—plastic canvas, cardboard or a scrap of vinyl—under the tear to support the repair. Trim the backing to fit beneath without bulging.
Dab clean the area again, then hold the backing steady while you prepare adhesive in the next step.
Step 3: Apply adhesive and press seams; use weights
Apply a vinyl adhesive sparingly under the torn edges and along the backing, then press the seam down so the edges align flush with the surrounding floor.
Hold the repair firmly, smoothing from center outward to remove air.
Place a flat weight or several books over the seam for the recommended curing time.
Check alignment periodically and adjust if any lifting occurs.
Step 4: Finish: trim excess, roll seam, let cure
Finish the repair by removing any adhesive squeeze-out, trimming stray backing or patches flush with a sharp utility knife, and rolling the seam firmly to guarantee full contact and a smooth surface before letting the glue cure.
Keep pressure with a seam roller or rolling pin for several minutes, wipe residual glue with solvent if needed, and avoid traffic until the adhesive fully sets per manufacturer instructions.
Method 2 Larger rip: vinyl patch from a scrap piece
For larger rips you’ll cut a neat rectangle around the damage so you can fit a solid patch.
Prepare a matching piece from spare vinyl or a hidden area, then test-fit it to check color and texture.
Once it matches, adhere the patch, trim the seam, and carefully blend the edges for an invisible repair.
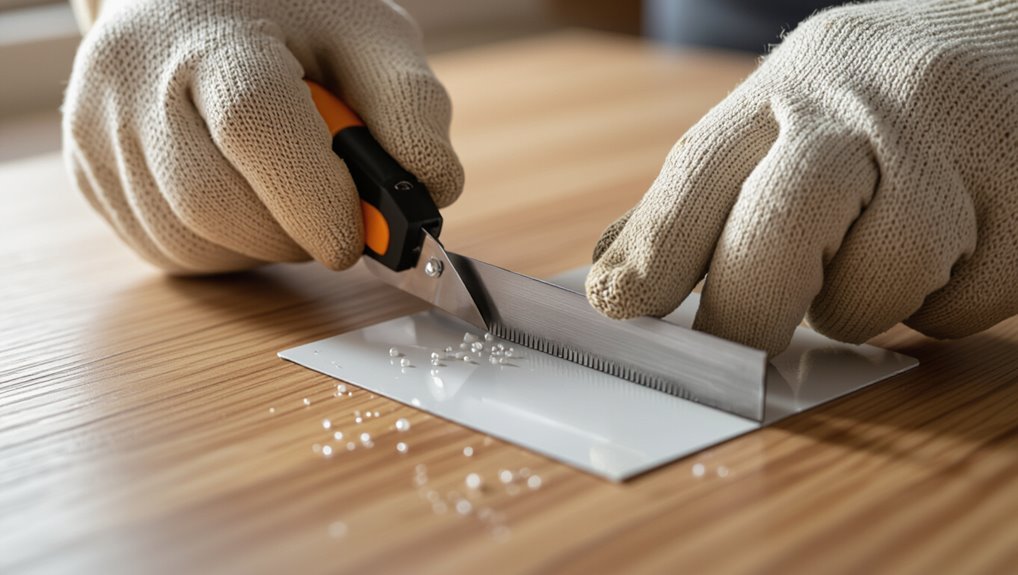
Step 1: Cut out a neat rectangle around the damage
Start by cutting a clean rectangle around the rip so you can work with straight edges and fit an exact patch.
Use a utility knife and a metal straightedge, trimming to remove frayed edges and unstable material. Cut slightly beyond the damaged area to reach solid vinyl.
Keep corners square and measure precisely so the replacement piece will sit flush without gaps or overlaps.
Step 2: Prepare a matching patch from spare vinyl or hidden area
Now cut a patch that exactly matches the rectangle you removed, using either a scrap piece of the same vinyl or a hidden section (like under a closet or appliance) for the best color and pattern match.
Trim edges squarely, keep the pattern orientation identical, and label grain direction.
Clean the underside of the patch, remove backing contaminants, and set it aside for adhesive application.
Step 3: Test fit and texture-match the patch
Test-fit the patch into the cut to confirm alignment, then check the surface feel so the repaired spot blends invisibly with the surrounding floor.
Press the piece gently, rotate if needed, and guarantee pattern lines match.
Compare sheen and embossed texture; sand tiny high spots or lift fibers from the scrap to match.
Keep adjustments minimal to preserve fit and appearance.
Step 4: Adhere the patch, seam trim, and blend edges
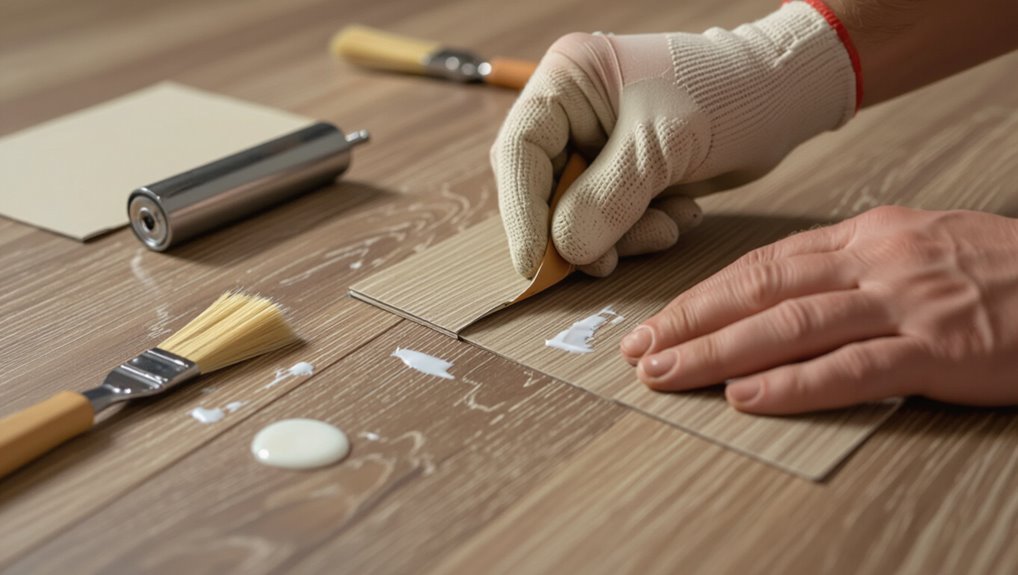
With the patch aligned and texture matched, you can glue it into place and finish the seam so the repair disappears.
Apply a thin bead of vinyl adhesive under the patch, press firmly, and wipe excess. Use seam trim or roller to seat edges.
After adhesive sets, feather edges with fine-grit sandpaper and a matching color repair compound so the join reads seamless.
Method 3 Seam repair for plank or tile vinyl using heat seam and seam sealer
For plank or tile seams you’ll start by cleaning the joint and removing any debris so the edges can meet properly.
Use a heat gun to relax the vinyl and gently close the gap, then apply seam sealer and tool it smooth for a flush finish.
Let the sealer cure fully, then inspect the seam to confirm a secure, invisible repair.
Step 1: Clean seam and remove debris
Start by clearing the seam area so you can see the damage clearly and work without interference.
Remove loose dirt, dust, and crumbs with a vacuum or soft brush.
Use a plastic scraper to lift trapped debris gently.
Wipe the seam with a lint-free cloth dampened with mild soapy water, then dry thoroughly.
Verify no adhesive residue or particles remain before proceeding.
Step 2: Use heat gun to relax edges and close gap
Heat the vinyl edges gently to soften them so you can ease the gap closed without damaging the plank or tile.
Hold the heat gun 6–8 inches away, move constantly, and stop when edges become pliable.
Use a flat, clean tool or gloved finger to press edges together, aligning patterns.
Let it cool fully before proceeding to the next sealing step.
Step 3: Apply seam sealer and tool for a flush finish
Apply a thin bead of vinyl seam sealer along the closed gap, then smooth it with the manufacturer’s seam tool to create a flush, invisible join.
Work steadily, keeping the bead continuous and thin. Use the tool’s rounded edge to force sealer into any micro-gaps and to level excess.
Wipe tool residue with a damp cloth and avoid overfilling to prevent visible buildup.
Step 4: Curing and inspection
Once the seam sealer’s bead is smooth and any excess wiped away, let the repair cure undisturbed so the compound can set fully; follow the manufacturer’s recommended cure time and conditions (temperature and humidity) to guarantee a durable bond.
After curing, inspect the seam for gaps, soft spots, or discoloration. Test stability gently and trim any excess cured sealer for a neat finish.
Method 4 Temporary quick fixes until permanent repair (for rental or emergency)
If you need a quick, temporary fix, you can use surface adhesives or heavy-duty double-sided tape to hold the rip flat and prevent tripping.
Apply adhesive or tape only to clean, dry edges and press firmly. Then cover with a low-profile mat if desired.
Remember this is short-term—pursue a permanent repair when the rip grows, catches debris, or the adhesive fails.
Step 1: Surface adhesive or tape options
Before you pick a product, know that surface adhesives and tape are only short-term fixes meant to keep a rip flat and safe until you can do a proper repair.
Choose low-profile repair tape or vinyl-specific adhesive strips; they resist moisture and won’t gum up finish.
Clean and dry the area, press firmly, and trim excess.
Check periodically and replace as needed.
Step 2: When to pursue permanent fix
While temporary fixes can keep your vinyl safe and tidy for a short time, you should plan a permanent repair as soon as you can—especially if the rip exposes padding, seams, or edges to moisture or heavy traffic.
If the tear spreads, smells, or catches on shoes, schedule a lasting fix.
For rentals, notify your landlord and document damage before doing nonpermanent repairs.
Troubleshooting Common Repair Challenges
You’ll often run into issues like mismatched color or texture, adhesive that won’t hold, or seams and bubbles that reappear after a repair.
I’ll show how to pick the right patch and blend textures, diagnose and fix adhesive failures, and prevent raised seams and trapped air.
Follow these tips to make your repair look and last like new.
Matching color and texture problems and solutions
Matching the color and texture of your vinyl is often the trickiest part of a repair, but it’s doable if you approach it systematically: assess the existing sheen and pattern, bring a sample or clear photo to match against replacement material or patching products, and test small mixes of colorant and embossing techniques before committing.
- Sun-faded plank with dull grain
- Glossy tile flecked with mica
- Subtle wood knots and pores
- Tiny pebble embossing
Adhesive failure: causes and corrective actions
Getting the color and texture right won’t help if the patch won’t stick; adhesive failure is a common culprit that undermines even the neatest repairs.
You’ll inspect, clean, and choose the right glue, then press and cure properly. Watch for contamination, wrong adhesive, insufficient pressure, and movement during drying.
- Dusty edge
- Old adhesive residue
- Flexible seam pulling
- Foot traffic too soon
Preventing raised seams and bubbles after repair
When you patch vinyl, preventing raised seams and bubbles comes down to careful surface prep, correct adhesive application, and controlled pressure while the repair cures.
You should clean, dry, and roughen edges, spread adhesive evenly, press seams with a roller, and weight the area until set to avoid trapped air or mismatch.
- Clean, dry edges
- Even adhesive film
- Roller pressure along seam
- Weighted cure time
Cost, Time, and When to Call a Professional
You can often fix small vinyl rips yourself for a modest cost—usually a few dollars for a patch kit or $50–$150 for replacement planks—and most DIY jobs take an hour or two, while larger patches may take a half-day.
If the subfloor’s damaged, the rip is extensive, or you need pattern matching, call a pro to avoid bigger problems.
Ask contractors about their experience with vinyl, whether they handle subfloor repairs, a written estimate, timeline, and warranty on workmanship.
Typical DIY cost and time estimates by repair method
Although repair choices vary, most DIY vinyl fixes fall into a few predictable cost and time ranges, so you can plan realistically. You’ll choose patch, seam glue, or replacement plank methods depending on damage. Expect varying costs and durations:
| Method | Cost (DIY) | Time |
|---|---|---|
| Patch | $5–$20 | 15–45 min |
| Seam glue | $10–$30 | 30–90 min |
| Plank swap | $20–$60 | 45–120 min |
Signs you should hire a pro (subfloor damage, extensive rips, pattern matching)
Those DIY time and cost ranges cover most minor fixes, but some situations call for a pro.
Hire one if the subfloor’s rotten, warped, or uneven, since repairs affect stability.
Also call a pro for long, multiple, or jagged rips that exceed patching, or when you need pattern or color matching across large areas.
Professionals prevent bigger, costlier problems later.
What to ask a flooring contractor and expected services
Wondering what to ask a flooring contractor and what to expect? You’ll want clear answers on cost, timeline, warranty, and whether they’ll repair or replace sections.
Ask for an on-site estimate, materials list, and cleanup plan.
Expect inspection, adhesive or patch work, seam sealing, and final inspection.
- Contractor measuring the rip
- Matching vinyl pattern
- Applying adhesive and roller
- Sealing seams and trims
Prevention and Best Practices to Avoid Future Rips
To prevent future rips, keep your vinyl clean with gentle, non-abrasive methods and wipe up spills promptly.
Use furniture pads, area rugs in high-traffic zones, and control humidity to reduce stress on the floor.
Check routinely for small nicks or loose seams and repair them right away before they grow into rips.
Proper maintenance and cleaning habits
Keep up with regular care and you’ll prevent many common causes of rips in vinyl flooring.
You should sweep daily, mop with manufacturer-approved cleaners, wipe spills immediately, and inspect seams for lifting.
Small issues fixed fast stay small.
- A soft broom clearing crumbs
- A damp mop gliding over planks
- A microfiber cloth blotting spills
- Hands lifting a loose edge for inspection
Protective measures (furniture pads, rugs, humidity control)
You’ve already cut many risks by keeping your vinyl clean and repairing small issues quickly; now focus on shielding the surface from everyday wear.
Place felt pads under chair and table legs, use low-profile caster wheels on office chairs, lay washable rugs in high-traffic zones, and control humidity with a dehumidifier to prevent expansion.
- Felt pads under legs
- Low-profile caster wheels
- Washable rugs in walkways
- Dehumidifier set to stable humidity
Inspecting and repairing small damage early
Because small nicks and loosened seams rarely fix themselves, inspect your vinyl regularly and tackle minor damage as soon as you spot it.
Check high-traffic areas, under furniture, and along edges for cuts, lifting, or bubbling.
Clean the area, apply adhesive or a patch kit promptly, and press seams flat.
Early fixes prevent larger rips and extend your floor’s life.
Mistakes to Avoid During Vinyl Floor Repairs
Don’t reach for any glue and hope it works—you’ll end up with a sticky mess if the adhesive isn’t designed for vinyl.
Make sure your patch matches the rip precisely and that you prep the surface thoroughly; otherwise the repair will lift or show seams.
If a repair goes wrong, you can remove the bad adhesive, clean and sand the area, and reapply the correct patch and vinyl adhesive.
Common DIY errors (wrong adhesive, poor patch fit, inadequate surface prep)
Mistakes like using the wrong adhesive, cutting a poor-fitting patch, or skipping surface prep are what turn a simple vinyl repair into a recurring problem.
You’ll want correct glue, precise cuts, and a clean, dry surface. Avoid shortcuts that cause bubbling, lifting, or visible seams.
- glue smeared onto the pattern
- ragged patch edges
- dust trapped under patch
- uneven pressure during set
How to fix or undo a bad repair
If a repair goes wrong, you can usually undo it cleanly—if you act methodically and avoid common shortcuts that caused the failure in the first place.
Remove dried adhesive with a recommended solvent, lift edges gently with a putty knife, trim jagged patch edges, clean and dry the area, then reapply correct adhesive and press a properly fitted patch.
Test before finishing.
FAQ Fast Answers to Common Questions
You’ll get quick answers here to common worries like whether you need a matching spare, how long DIY fixes last, and whether the repair will be noticeable.
You’ll also learn why regular glue or caulk usually isn’t the right choice and what safety steps to take if you use a heat gun indoors.
Read on and you’ll know what’s practical and what to avoid.
Can you repair vinyl flooring without a matching spare piece?
Wondering whether you can fix vinyl flooring without a matching spare piece? Yes — you can for small rips.
Use color-matched filler, adhesive, and a blending marker or paint to hide edges.
For larger areas, patching with a remote tile or custom-cut piece works better.
Keep seams tight, press firmly, and finish with clear sealer to protect the repair.
How long will a DIY vinyl repair last?
How long will a DIY vinyl repair last?
It depends on damage size, repair quality, adhesive used, and traffic.
Small, well-bonded patches in low-traffic spots can last years. Larger or poorly sealed repairs may fail within months.
Proper surface prep, moisture control, and using recommended products extend life.
Monitor seams and reapply adhesive or replace the plank when deterioration appears.
Will a repaired area be noticeable?
Noticeable? You’ll often see the repair up close, especially on patterned or textured vinyl.
From a normal standing view and once sealed, small rips blend well if you match color, grain, and use thin adhesive.
Imperfections hide better with light foot traffic and proper finishing.
Severe damage or poor matching will remain obvious despite a solid repair.
Can you use regular glue or caulk to fix a vinyl rip?
Curious whether regular glue or caulk will do the job? You shouldn’t use standard household glues or silicone caulk: they often won’t bond properly, can discolor vinyl, and may remain tacky.
Use a vinyl-specific adhesive or seam sealer designed for flooring. Apply sparingly, press smooth, wipe excess, and follow product instructions for curing to get a durable, discreet repair.
Is it safe to heat vinyl with a heat gun indoors?
Wondering if you can safely use a heat gun on vinyl indoors? You can, but you must be careful.
Work in a well-ventilated area, wear heat-resistant gloves and eye protection, and keep the gun moving to avoid melting or burning.
Maintain a safe distance, test on a scrap piece, and have a fire extinguisher nearby.
Don’t overheat—fumes and damage risk remain.
Visual Guide and Resources
You’ll find step-by-step photos and clear diagrams that match each repair method so you can follow along confidently.
I’ll also link to recommended repair kits, adhesives, and tools that make the job easier.
Check the tutorials for short videos and supplier links before you start.
Step-by-step photos or diagrams for each repair method
1 clear set of photos or diagrams can make the difference between a botched repair and a job that looks seamless; below you’ll find step-by-step visuals for each common vinyl fix—patching, seam repair, and reattaching lifted edges—so you can follow along and match tools, materials, and techniques to your situation.
You’ll get numbered shots: prep, measuring, cutting, adhesive application, smoothing, and final inspection for each method.
Links to recommended products, kits, and tutorials
Below are vetted product links and step-by-step tutorials to help you pick the right kit and tools for patching, seam repair, or reattaching lifted vinyl—everything from adhesive types and repair patches to seam rollers and heat guns—so you can match the technique in the visual guide to reliable materials and follow clear instructions.
You’ll find sources for pro-grade adhesives, DIY patch kits, matching vinyl samples, and how-to videos.
- tube of vinyl adhesive and applicator
- peel-and-stick repair patches set
- seam roller and mini heat gun combo
- video tutorial playlist with step-by-step fixes