Is Vinyl Flooring Waterproof? The Full Truth About Water Resistance
You can trust many modern vinyl floors to handle spills, humidity, and routine mopping, but whether it’s truly waterproof depends on the type, installation, and seam sealing. Sheet vinyl and glue-down LVT/LVP with welded or tight seams can be fully waterproof, while floating click-lock planks resist short-term moisture but may let water seep at joints. Prepare the subfloor, use proper adhesives and barriers, and quick cleanup helps; keep going to learn which options suit each room.
Quick Answer Is Vinyl Flooring Waterproof?
Yes — many vinyl floors are waterproof, so you can use them in kitchens and bathrooms without worrying about everyday spills.
If you’re a homeowner, that means easy cleanup and fewer water-damage worries.
For buyers and installers: choose fully waterproof luxury vinyl planks or tiles and follow manufacturer guidelines for seams and connections.
Short direct answer for homeowners
Wondering whether vinyl flooring stands up to spills? For most homeowners, vinyl performs well: many sheets and luxury vinyl planks resist water and prevent surface damage.
However, performance varies by product and proper installation—seams, edges, and subfloor moisture matter. Check manufacturer specs and use waterproof underlayment or proper seams to guarantee the level of protection you need; is vinyl flooring waterproof depends on those details.
One-sentence summary for buyers and installers
Although many vinyl products are waterproof at the surface, you should expect performance to depend on the product type, seam/edge detailing, and installation—choose fully waterproof luxury vinyl or properly sealed sheet vinyl and follow manufacturer guidelines to protect the subfloor.
As a buyer or installer, pick rated waterproof products, seal seams and connections, install per instructions, and plan for moisture management to prevent hidden damage.
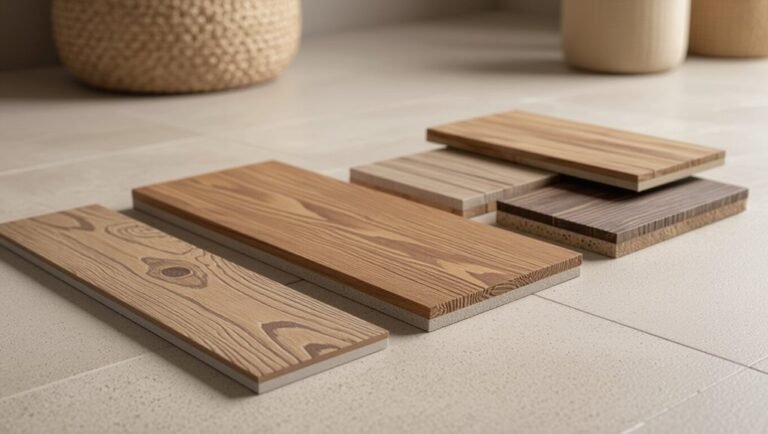
What Is Vinyl Flooring? Basic Understanding
Vinyl flooring comes in several formats—sheet, luxury vinyl plank (LVP), luxury vinyl tile (LVT), and vinyl composite tile—so you’ll want to pick the style that fits your room and budget.
Each type is built from layers: a clear wear layer on top, a printed design and vinyl core for structure, and a backing for stability.
Understanding those layers helps you judge durability and how the floor will handle moisture.
Types of vinyl flooring (sheet, luxury vinyl plank (LVP), luxury vinyl tile (LVT), vinyl composite tile)
Flooring comes in several vinyl formats, each made for different rooms and budgets:
Sheet vinyl offers seamless coverage ideal for bathrooms;
LVP mimics hardwood with plank shapes for living areas;
LVT recreates tile visuals without grout lines;
VCT (vinyl composite tile) suits commercial spaces, durable and replaceable.
You’ll choose based on appearance, traffic, and installation preference.
Typical construction and materials (wear layer, vinyl core, backing)
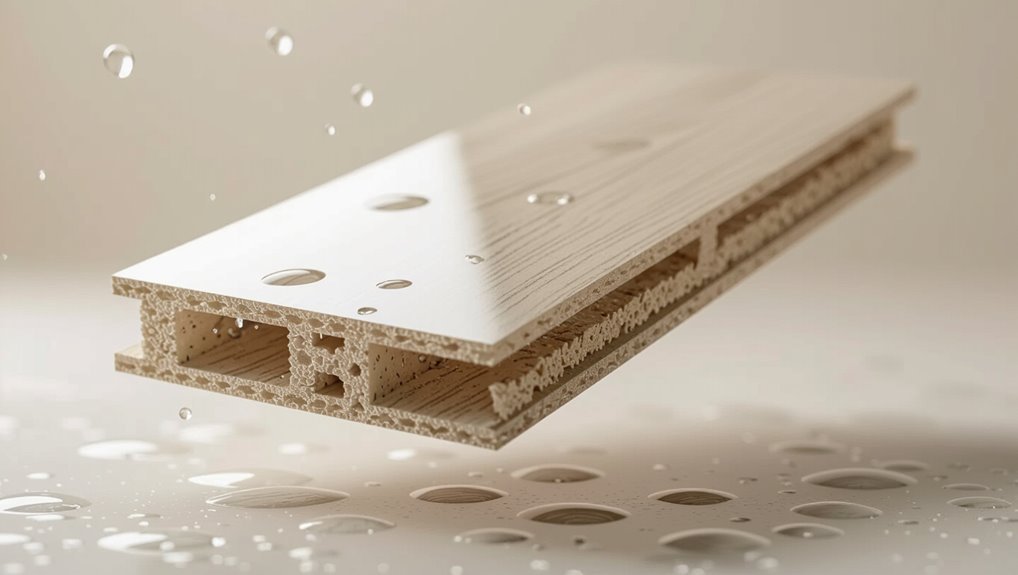
Now that you know the main vinyl formats, it helps to look at what they’re made of so you can match performance to room needs.
You’ll find a clear wear layer that resists scratches and stains, a printed decorative layer for pattern, a vinyl core (solid or SPC/WPC) that provides stability, and an underlayment or backing that adds cushion, moisture barrier, and sound control.
Water Resistance vs. Waterproof Definitions and Differences
You’ll want to know that “water-resistant” flooring can handle spills and moisture for a short time but won’t protect against prolonged exposure or standing water.
“Waterproof” has both legal and practical meanings—manufacturers may back it with specific testing standards and warranties that cover immersion or long-term leaks.
Check labels and certifications closely, because how a maker defines and tests “waterproof” determines the level of protection you actually get.
What “water-resistant” means for flooring
While both terms sound similar, “water-resistant” means a product can resist water penetration for a limited time or under light exposure, not that it keeps water out forever.
You’ll still need to clean up spills quickly and avoid prolonged moisture to prevent damage. For flooring, that means short spills and damp mopping are fine, but standing water, leaks, or high humidity can cause swelling, warping, or adhesive failure.
What “waterproof” legally and practically means
Because manufacturers, standards bodies, and courts each look at water performance differently, “waterproof” can mean one thing in marketing and another in legal or practical terms; you should know it’s not absolute.
Legally, claims must match tested conditions and warranty terms.
Practically, waterproof often means the material resists moisture intrusion, but installation, seams, and subfloor conditions determine real-world performance and liability.
How manufacturers label and certify waterproof claims
When manufacturers label a product “water-resistant” or “waterproof,” they’re signaling different levels of protection based on tests, materials, and warranty limits, so you need to read the fine print to know what they actually mean. You should check certifications, test conditions, and exclusions to verify real-world performance.
| Label | Meaning |
|---|---|
| Water-resistant | Surface protection |
| Waterproof | Structural protection |
| Certified | Lab-tested |
| Warranty | Coverage limits |
Which Vinyl Types Are Waterproof or Water-Resistant?
You’ll find some vinyl types are fully waterproof—like WPC, SPC, and certain waterproof LVP/LVT—while standard vinyl and sheet vinyl are typically only water-resistant unless specifically treated.
Installation matters too: floating floors can allow moisture underboards, glued or loose-lay installations can offer better surface sealing.
Keep these distinctions in mind when choosing vinyl for wet areas.
Waterproof options (WPC, SPC, fully waterproof LVP/LVT)
Curious which vinyl types actually stand up to water? You’ll want WPC and SPC rigid-core planks or fully waterproof LVP/LVT.
They use dense cores (wood or stone plastic composite, or vinyl composite) and sealed click or glued edges to block moisture.
These options tolerate spills, bathrooms, and basements better than standard vinyl, but install and seam quality still determine real-world waterproof performance.
Water-resistant options (standard vinyl, sheet vinyl considerations)
Although standard vinyl and sheet vinyl aren’t fully waterproof like WPC or SPC, they still offer good water resistance for many rooms in your home.
You’ll find standard LVP/LVT resists spills and humidity when seams and edges are properly sealed.
Sheet vinyl gives a continuous surface with fewer seams, lowering leak risks.
Both need prompt cleanup to prevent subfloor damage.
How installation method affects waterproof performance (floating vs. glued vs. loose-lay)
Because the way vinyl gets installed directly affects how well it keeps water out, you should consider installation type when choosing flooring for moisture-prone areas.
Floating click-lock planks resist spills but can let water seep at seams.
Glue-down creates a sealed barrier, great for basements.
Loose-lay offers easy replacement but needs tight edges and occasional adhesives to prevent infiltration.
Real-World Performance: How Vinyl Handles Water
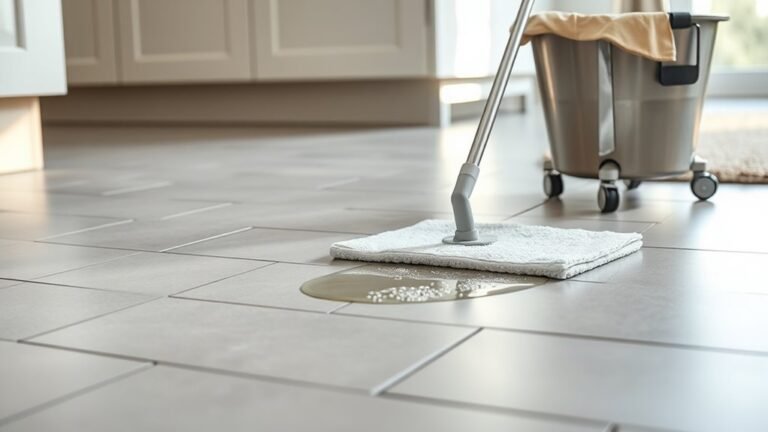
You’ll find vinyl handles short-term exposure like spills and mopping quite well, especially when you wipe it up quickly.
It’s less forgiving with long-term water — floods or persistent moisture can seep into joints, seams, and edges and cause damage.
Pay close attention to installation and seam sealing, because those are the most common failure points.
Short-term exposure (spills, mopping)
Short-term spills and routine mopping are where vinyl usually shines: most modern luxury vinyl planks and sheets repel water at the surface, so quick blotting or a damp mop prevents damage.
You can clean spills without worrying about swelling or staining if you act fast. Use a soft mop, mild cleaner, and dry seams and edges to avoid trapped moisture and stains.
Long-term exposure (floods, persistent moisture)
Although vinyl resists surface water well, long-term exposure from floods or persistent moisture can reveal weaknesses you mightn’t notice with quick spills.
You’ll face swelling, adhesive breakdown, and substrate damage if water lingers. Even waterproof planks can trap moisture beneath, promoting mold and cupping.
Prompt drying, proper underlayment, and addressing leaks prevent chronic harm and extend the floor’s lifespan.
Joints, seams, and edges common failure points
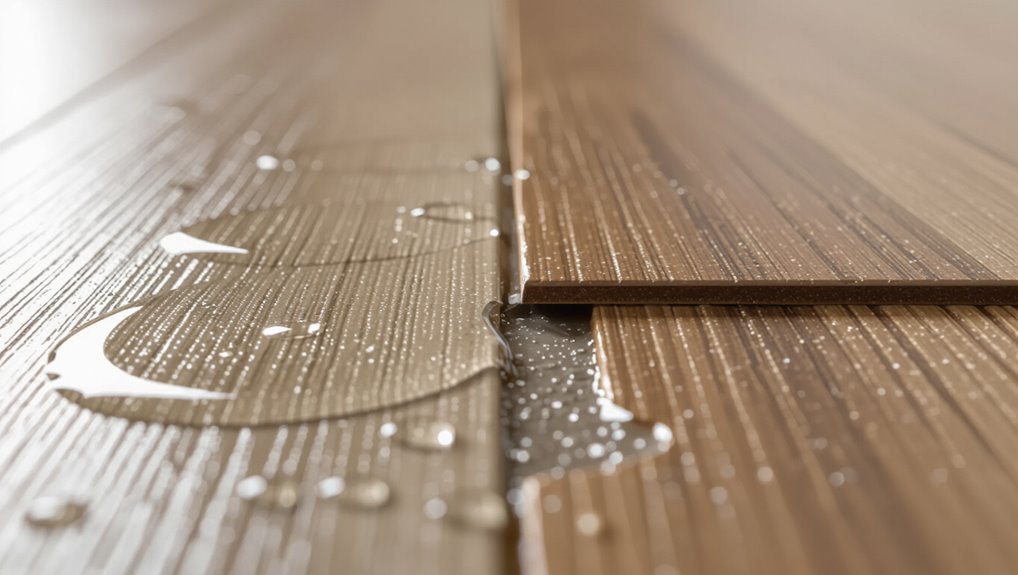
1 common weak spot in vinyl installations is where pieces meet—joints, seams, and exposed edges tend to show water-related failures first.
You’ll see swelling, delamination, or adhesive breakdown if seams aren’t sealed or edges aren’t trimmed and caulked.
Inspect seams after spills, maintain caulk, and guarantee proper installation techniques to minimize water migration and extend the floor’s life.
Installation Factors That Influence Waterproofing
How you install vinyl matters just as much as the product itself — proper subfloor prep and moisture barriers set the foundation for waterproof performance.
You’ll also need tight seals at seams and junctions, the right adhesives or underlayments, and choices that match whether you’re doing it yourself or hiring a pro.
These installation factors directly affect how well your floor keeps water out and how long that protection lasts.
Subfloor preparation and moisture barriers
When you’re getting ready to install vinyl, preparing the subfloor and adding the right moisture barrier are the first line of defense against water damage; a smooth, dry, and level base guarantees the flooring can perform as advertised.
Check for moisture with a meter, repair cracks, and remove debris.
Choose a compatible underlayment or vapor barrier for your subfloor type to prevent trapped moisture.
Sealing seams and transitions
Once your subfloor and moisture barrier are in place, sealing the seams and junctions becomes the next step in keeping water out.
Run sealant along plank joints, shifts, and around fixtures to block capillary action. Use appropriate caulk or waterproof seam tape where recommended, press edges firmly, and smooth thoroughly.
Check for gaps after curing and reapply where needed to maintain a watertight surface.
Recommended adhesives and underlayments for waterproof installs
One key to a truly waterproof vinyl install is choosing the right adhesive and underlayment for your subfloor and environment.
Use moisture-resistant, urethane or pressure-sensitive adhesives rated for vinyl; they bond strongly and resist water wicking.
Select a closed-cell foam or cork underlayment with a vapor barrier for concrete, or an engineered plywood underlayment for wood subfloors to prevent moisture transfer.
Professional vs. DIY installation impacts
Choosing the right adhesive and underlayment sets the stage, but who installs the floor and how they do it will determine whether your vinyl stays waterproof in practice.
If you hire a pro, they’ll make sure seams, changes, and perimeter seals meet manufacturer specs.
DIYers can succeed with patience and proper tools, but mistakes in leveling, seam bonding, or sealing often compromise water resistance.
Maintenance, Cleaning, and Care to Preserve Water Resistance
Keep vinyl’s water resistance by sticking to simple daily and weekly cleaning: sweep or vacuum debris, and mop with a pH-neutral cleaner.
Don’t use harsh chemicals or steam mops that can damage the wear layer, and avoid abrasive scrubbers.
Wipe up spills, pet accidents, and condensation immediately to prevent seepage at seams and baseboards.
Daily and weekly cleaning best practices
Daily and weekly cleaning routines will do more than keep your vinyl looking good—they’re key to preserving its water-resistant finish and preventing moisture damage.
Sweep or vacuum daily to remove grit, then spot-dry spills immediately.
Weekly, mop with a damp microfiber mop using a pH-neutral cleaner diluted per instructions.
Rinse if residue remains and guarantee floors dry thoroughly to avoid trapped moisture.
Products to avoid (harsh chemicals, steam mops)
Although vinyl stands up to everyday cleaners, you should avoid harsh chemicals and tools that can strip its protective wear layer or force water into seams.
Don’t use bleach, ammonia, abrasive powders, or solvent-based degreasers. Avoid steam mops and high-heat devices—they can warp, delaminate, or open seams.
Stick to pH-neutral cleaners and soft mops to preserve water resistance and finish.
Handling spills, pet accidents, and condensation
When spills, pet accidents, or condensation occur, act quickly to prevent moisture from seeping into seams or under the plank edges.
- Blot liquids immediately with absorbent cloths, then mop with a damp microfiber—don’t let water sit.
- Sanitize pet messes with a gentle vinyl-safe cleaner and dry thoroughly to avoid odors and staining.
- Control humidity and use fans or dehumidifiers to prevent recurring condensation problems.
Common Problems and Mistakes That Cause Water Damage
You can still end up with water damage even if your vinyl looks waterproof—improper installation and skipped checks for subfloor moisture are common culprits.
Missing or poor seals at junctions, doorways, and appliances let water seep where it shouldn’t.
Using the wrong cleaning methods or harsh products can also compromise seams and finishes, so be careful with technique and supplies.
Improper installation errors
If installers skip proper subfloor prep, misalign seams, or rush adhesive application, water can find gaps and undermine your vinyl quickly.
You’ll see lifting, curling edges, and bubbling where moisture penetrates imperfect joints.
Poorly trimmed planks, uneven junctions, or inadequate acclimation create stress points.
Insist on skilled installation, correct adhesives, tight seams, and proper rolling to minimize leaks and prolong performance.
Ignoring subfloor moisture or existing water issues
Because subfloor moisture often starts below your sightline, homeowners underestimate how quickly hidden dampness wrecks vinyl flooring.
If you install over wet plywood, concrete, or old leaks, adhesive fails, planks cup, and mold grows.
Test moisture, fix leaks, dry and treat affected areas, and only install when levels meet manufacturer specs.
Skipping this invites costly repairs and voided warranties.
Poor sealing at transitions, doorways, and appliances
When changes, doorways, and appliance edges aren’t sealed properly, water finds the smallest gaps and ruins your vinyl quickly.
You should inspect connections, thresholds, and around dishwashers, sinks, and refrigerators for gaps or failing caulk.
Replace worn seals, use proper transition strips, and guarantee appliances sit level.
Doing this prevents seepage, mold, and edge lifting that shorten your floor’s life.
Using wrong cleaning methods or products
Although you might think any cleaner will do, using the wrong methods or products can strip protective coatings, leave residues that attract moisture, or degrade seams and adhesives.
You should avoid harsh solvents, abrasive pads, and oil-based soaps that break down wear layers or gummy adhesives.
Use manufacturer-recommended cleaners, soft mops, and prompt rinsing so you don’t unintentionally create leaks or trapped moisture.
Prevention, Repair, and Remediation Strategies
You can prevent most water problems by selecting the right product, sealing seams, and keeping subfloor moisture in check before and after installation.
Watch for early signs like cupping, edge lifting, and mold so you can act quickly and choose the right fix—spot repairs for planks or seam resealing for small leaks.
When damage is widespread, or mold and cupping persist, you’ll need to replace the flooring rather than keep repairing it.
Preventive measures before and after installation
Because proper prevention starts before the first plank is laid, take a systematic approach to moisture control, substrate preparation, and routine maintenance so you keep vinyl flooring watertight and durable.
Seal subfloors, use moisture barriers, acclimate planks, and follow manufacturer adhesives.
After installation, maintain caulking at seams, clean spills promptly, inspect seals periodically, and control indoor humidity to prevent long-term water intrusion.
How to detect early water damage (cupping, edge lifting, mold)
How can you spot early water damage before it turns into a major problem?
Check for cupping—boards bowing at edges—edge lifting along seams, and soft or spongy spots when you press.
Smell for mustiness, watch for dark stains or discoloration, and inspect baseboards for swelling.
Use a moisture meter if you suspect hidden dampness and monitor high-risk areas regularly.
Repair options for damaged vinyl, seams, and planks
Noticing cupped boards, lifted edges, or soft spots early gives you a much better chance of fixing vinyl without a full replacement.
You can re-glue loose seams, patch small tears with matching vinyl repair kits, and replace individual planks or tiles.
Dry the subfloor, trim damaged edges, use adhesive or click-lock replacements, and seal seams with waterproof seam sealer to prevent recurrence.
When to replace flooring vs. repair
When deciding whether to repair or replace your vinyl, weigh the extent of damage, the condition of the subfloor, and the long-term cost and performance implications.
If damage is localized, seams or planks can be patched or swapped.
Replace when water has warped multiple planks, mold exists, or repair costs approach replacement.
Prioritize durability, warranty, and preventing future moisture.
Comparison: Vinyl vs. Other Flooring for Wet Areas
When you’re choosing flooring for wet areas, compare vinyl’s water resistance and installation ease to ceramic/porcelain tile’s durability and grout maintenance.
You’ll also want to weigh vinyl against laminate, which struggles with moisture, and against hardwood or engineered wood, which can warp or need special sealing.
That way you can match performance, look, and maintenance to the room’s moisture risk.
Vinyl vs. ceramic/porcelain tile
Although both vinyl and ceramic/porcelain tile handle moisture well, they do it in different ways that affect performance, cost, and installation. You’ll choose vinyl for softer, warmer underfoot and easier DIY installs; pick tile for ultimate durability and heat resistance despite higher cost and grouting needs.
| Feature | Quick take |
|---|---|
| Waterproofing | Vinyl: surface waterproof |
| Durability | Tile: longer-lasting |
Vinyl vs. laminate
If you need flooring that stands up to spills and humidity, vinyl outpaces laminate: vinyl’s core and surface layers resist water, while standard laminate swells and warps if moisture gets between its seams. You’ll find vinyl easier to maintain in bathrooms and basements.
| Feature | Vinyl | Laminate |
|---|---|---|
| Water resistance | High | Low |
| Repairability | Patchable | Often replace |
Vinyl vs. hardwood and engineered wood
Vinyl still has the edge over wood options for wet areas because its layers block moisture and keep seams stable, while solid hardwood and many engineered boards can swell, cup, or delaminate when exposed to water. You’ll prefer vinyl for bathrooms, basements, and kitchens because it resists moisture and cleans easily, unlike vulnerable wood.
| Vinyl | Wood |
|---|---|
| Water-resistant | Swells with water |
| Low maintenance | Requires care |
Buying Guide: How to Choose Vinyl for Bathrooms, Kitchens, Basements
When choosing vinyl for bathrooms, kitchens, or basements, you’ll want to check key specs like overall thickness, wear layer thickness, and whether the core is SPC, WPC, or traditional vinyl.
Look for waterproofing certifications, clear warranty terms that cover moisture damage, and any installation requirements that affect performance.
Ask manufacturers and installers about seam sealing, recommended underlayment, and proof of past installations in similar wet environments.
What specs to look for (thickness, wear layer, core type)
Choosing the right vinyl starts with checking three key specs: overall thickness, wear layer, and core type.
You’ll want thicker planks (≥4mm) for comfort and stability, a durable wear layer (20–30 mil or higher) for scratches and moisture, and a waterproof core—WPC or SPC—for dimensional stability.
Match specs to traffic and moisture levels for reliable performance in baths, kitchens, basements.
Certifications and warranties related to waterproofing
Why trust a product’s waterproof claims without checking the paperwork?
Look for third‑party certifications (IICRC, ISO, ASTM) and manufacturer test results that verify water resistance and dimensional stability.
Read warranty fine print: coverage length, conditions (installation method, subfloor prep), and exclusions for moisture damage.
Choose products with clear, transferable warranties and documented testing so you won’t face surprise denials.
Questions to ask manufacturers and installers
What should you ask before trusting a vinyl product for wet rooms? Ask direct, specific questions so you know performance and limits.
- Is the product fully waterproof or water-resistant, and what testing backs that?
- What installation methods and sealants do you recommend for bathrooms, kitchens, basements?
- What warranty covers moisture damage and who handles claims if installation fails?
Cost Considerations and ROI
You’ll want to compare price ranges for water-resistant versus fully waterproof vinyl, since waterproof options usually cost more upfront.
Factor in installation fees and possible hidden expenses like moisture mitigation or subfloor prep.
Also weigh expected lifespan and resale value for wet-area installs to judge your true ROI.
Price ranges for water-resistant vs. waterproof vinyl
Prices for vinyl flooring vary widely, and you’ll usually pay more for true waterproof products than for water-resistant options because of their core materials and construction.
Expect water-resistant vinyl at lower price points—budget-friendly planks or sheets—while waterproof SPC or WPC cores command higher prices.
Factor durability, warranty, and lifespan: higher upfront cost often delivers better long-term value and resale appeal.
Installation costs and hidden expenses (moisture mitigation)
Beyond purchase price, installation and hidden expenses can quickly change your project’s bottom line.
You’ll pay for underlayment, moisture barriers, adhesive, and skilled labor—especially if subfloor prep or leveling’s needed.
Expect extra costs for moisture testing, vapor retarders, and repairing damp damage.
Factor these into your ROI calculations; cutting corners now can mean costly remediation later.
Longevity and value for wet-area installations
1 key consideration for wet-area installations is how long the vinyl will actually last under constant moisture and how that lifespan affects your return on investment.
You should weigh product grade, wear layer, and installation quality against replacement frequency. Higher-quality waterproof vinyl costs more upfront but reduces long-term repair, mold remediation, and downtime, often delivering better total cost of ownership in bathrooms, laundries, and basements.
Case Examples and Scenarios
When you’re choosing vinyl for a bathroom, look at fully waterproof options and proper edge sealing to avoid moisture damage.
For basements with high humidity, you’ll want waterproof vinyl with a stable, moisture-resistant underlayment and attention to perimeter ventilation.
In kitchens and laundry rooms, pick durable, scratch-resistant vinyl with tight seams and quick cleanup features to handle spills and heavy use.
Best solution for bathrooms
Because bathrooms face constant moisture and frequent spills, choosing the right vinyl product and installation method matters a lot for long-term performance.
In this section you’ll find practical case examples and scenarios that match common bathroom types—tiny powder rooms, family bathrooms with tubs, master suites with soaking tubs, and wet-room or accessible bathrooms—so you can see which vinyl options, underlayment, seam treatments, and maintenance routines work best in each situation.
For small powder rooms pick luxury vinyl plank with tight seams; use waterproof underlayment for family baths; glue-down LVT and welded seams suit wet rooms; add non-slip finish and regular caulk checks.
Best solution for basements with high humidity
If your basement struggles with high humidity, pick vinyl systems designed to resist moisture and allow vapor control—tight-lock luxury vinyl planks over a moisture barrier work well for finished basements, while glue-down LVT or sheet vinyl with sealed seams is better where intermittent condensation or minor seepage occurs.
Add a dehumidifier, guarantee good drainage and slope away from foundation, and use breathable wall finishes to reduce trapped moisture.
Kitchen and laundry room recommendations
Anyone installing vinyl in a kitchen or laundry room should choose products and installation methods that handle frequent spills, heat, and heavy traffic.
Pick waterproof or water-resistant rigid core or LVP with welded seams or properly sealed click joints.
Use moisture barriers on subfloors, trim edges with waterproof caulk, and protect high-wear zones with mats.
Clean spills promptly and inspect seams regularly.
Frequently Asked Questions (FAQ)
You probably have specific questions, like whether vinyl can go in a bathroom or shower and if it will swell or warp when wet.
You’ll also want to know whether “waterproof” means it resists mold and mildew, if you can install it over existing flooring, and how long it lasts in wet environments.
I’ll answer each of these clearly so you can choose the right product and installation.
Can vinyl flooring be used in a bathroom or shower?
Wondering whether vinyl flooring works in a bathroom or shower? Yes—waterproof luxury vinyl planks and tiles suit bathrooms, resisting spills and humidity.
For showers, use specifically rated, fully waterproof sheet vinyl or engineered systems designed for wet zones. Guarantee proper substrate preparation, sealing at edges and penetrations, and correct installation to maintain watertight performance and avoid water intrusion beneath the floor.
Will vinyl swell or warp if it gets wet?
Although most modern vinyl flooring resists everyday moisture, it can still swell or warp if water gets trapped beneath it or if seams and edges aren’t properly sealed.
If flooding, leaks, or prolonged dampness occur, planks or sheets may cup, buckle, or lift.
Promptly dry, remove standing water, and fix leaks; guarantee proper installation and sealed seams to minimize risk.
Is waterproof vinyl immune to mold and mildew?
Even though waterproof vinyl resists moisture, it’s not completely immune to mold and mildew if conditions allow spores to take hold.
You can still get growth along seams, edges, or under loose planks where water pools and ventilation is poor.
Clean spills promptly, control humidity, and guarantee proper installation and seals to minimize risk; regular inspection prevents hidden infestations.
Can I install waterproof vinyl over existing flooring?
Can you install waterproof vinyl over your current floor? Yes—often you can lay it over clean, flat, dry surfaces like tile, vinyl, or concrete.
You’ll need to remove loose trim, fix uneven spots, and follow manufacturer guidelines about underlayment and adhesive.
Avoid installing over soft, cushioned flooring or water-damaged subfloors; those require repair or replacement first.
How long does waterproof vinyl last in wet environments?
How long will waterproof vinyl hold up in wet environments? It typically lasts 10–25 years depending on quality, installation, and care.
High-quality luxury vinyl plank/tile with proper adhesive and sealed seams resists moisture longer.
Drain spills, maintain ventilation, and avoid prolonged standing water to extend life.
Heavy wear, poor subfloor prep, or constant saturation shorten lifespan considerably.