How to Clean Sandstone Floors Without Causing Damage
You can safely clean sandstone floors by sweeping or dust-mopping loose grit, then mopping with a pH‑neutral cleaner diluted per instructions and a soft microfiber mop; rinse thoroughly and dry to avoid streaks or water penetration. Spot-treat spills immediately with mild cleaner and blot, never scrub with acids, bleach, or abrasive pads, and test any product in an inconspicuous spot first. Follow gentle deep‑clean and sealing guidance below for tougher stains and long‑term protection.
How to Clean Sandstone Floors Without Causing Damage (Quick Answer & Overview)
You can clean sandstone safely by following a simple five-step routine that uses pH-neutral cleaners and soft tools.
Clean when you see dulling, stains, or every few months for high-traffic areas to prevent buildup.
In the summary below I’ll list the key do’s (gentle cleaners, sealing) and don’ts (acidic products, abrasive pads).
Quick Answer Safe, effective cleaning in 5 steps
Although sandstone’s soft, porous surface demands care, you can safely clean it in five straightforward steps that prevent damage and restore appearance.
Start by sweeping loose grit, test a pH-neutral cleaner, mop gently with diluted solution, rinse with clean water, and dry thoroughly.
Follow up with a compatible sealer if recommended.
This concise routine shows how to clean sandstone floors safely and effectively.
When to clean sandstone floors (frequency and signs they need attention)
When sandstone floors start showing dull patches, dark stains, or a buildup of gritty residue, it’s time to clean them.
Generally, deep-clean every 6–12 months depending on traffic and environment. Spot-clean spills immediately.
If foot traffic, pets, or outdoor exposure increase dirt, shorten intervals to monthly light cleaning and quarterly deep care.
Watch for grout discoloration or persistent slipperiness—those signal attention.
Summary of do’s and don’ts
If you want to keep sandstone looking its best, stick to gentle, pH-neutral cleaners, soft brushes or microfiber mops, and prompt spot-cleaning—don’t use acids, harsh abrasives, or high-pressure washers that can etch or loosen the stone.
Do rinse and dry, test cleaners, reseal as recommended, and blot spills immediately.
Don’t scrub with wire, use bleach, or ignore staining—address issues early.
Understanding Sandstone Floors (What Sandstone Is and Why It Needs Special Care)
Sandstone is a porous, relatively soft natural stone with finishes ranging from honed to textured, so you’ll want to know how each surface reacts to water and abrasion.
Different varieties—like quartz-rich, feldspathic, or oolitic sandstone—have distinct densities and wear characteristics that affect cleaning frequency and methods.
Because standard alkaline or acidic cleaners can etch, strip sealers, or darken the stone, you’ll need gentle, pH-neutral products and the right technique.
What sandstone is porosity, softness, and common finishes
Think of sandstone as a delicate, porous rock made of sand-sized mineral grains bound together.
You’ll notice high porosity so it soaks up liquids and stains easily. It’s relatively soft, so scratching and abrasion happen faster than on harder stones.
Finishes—honed, tumbled, or sealed—affect texture and protection, so choose care methods that match the finish to avoid damage.
Common types of sandstone flooring and how they differ
Now that you know sandstone soaks up liquids and scratches more easily, it helps to recognize the common flooring types so you can match care to material. You’ll see colour, grain, finish, and hardness vary; choose cleaning methods accordingly.
| Type | Characteristic |
|---|---|
| Buff | Smooth, mild sheen |
| Honed | Matte, denser feel |
| Natural | Textured, porous |
| Tumbled | Aged, softer edges |
| Calibrated | Uniform, consistent density |
Why standard cleaners can damage sandstone
Because sandstone’s open pores and variable hardness react differently to chemicals and abrasion, standard household cleaners can etch, stain, or strip protective sealers.
You’ll damage the surface with acidic cleaners, bleach, or strong alkalis that dissolve binders or lighten color.
Abrasive pads scratch softer grains, while residues attract dirt.
Use pH-neutral, stone-safe products and test first in an inconspicuous spot.
Safety and Preparation Before Cleaning
Before you start, gather a checklist of tools, cleaning agents, and protective gear—gloves, goggles, a stiff brush, pH-neutral cleaner, and sealant if needed.
Always spot-test any cleaner in an inconspicuous area to confirm it won’t etch or discolor the stone.
Note that indoor sandstone needs gentler methods to protect finishes and nearby furnishings, while outdoor stone may tolerate stronger cleaners and pressure washing with proper precautions.
Tools, materials, and protective gear checklist
Checklist: gather the right tools, materials, and protective gear so you can clean sandstone safely and effectively.
You’ll need quality items to avoid damage and protect yourself.
- Soft-bristled broom and microfiber mop
- pH-neutral stone cleaner and spray bottle
- Soft nylon scrub brush and bucket
- Rubber gloves and eye protection
- Knee pads and non-slip shoes
How to test a cleaner in an inconspicuous area (spot test)
Now that you’ve gathered your tools and protective gear, you should always spot-test any cleaner on an inconspicuous patch of sandstone to confirm it won’t stain, etch, or alter the finish.
Apply a small amount, wait the recommended dwell time, rinse thoroughly, and dry.
Inspect for color change, dulling, or residue over 24 hours before treating larger areas.
Precautions for indoor vs outdoor sandstone
While indoor and outdoor sandstone share cleaning basics, you’ll need different precautions: inside, protect finishes, furnishings, and ventilation; outside, guard landscaping, drains, and nearby masonry.
Indoors, seal vents, move furniture, use drop cloths, and open windows or run exhaust fans.
Outdoors, cover plants, divert runoff, block storm drains, and test pressure washing distance to avoid etching or mortar damage.
Step-by-Step Safe Cleaning Process
Start with dry cleaning—dust, sweep, and vacuum thoroughly to remove grit that can scratch the stone.
Then pick a pH-neutral cleaner or a safe homemade solution and follow a gentle wet-cleaning routine: dilute the cleaner, mop with light agitation, and avoid scrubbing.
Finish by rinsing well to remove residue, drying with airflow or towels, and buffing to restore the sandstone’s appearance.
Step 1 Dry cleaning: dusting, sweeping, and vacuuming techniques
1. You’ll start by removing grit and loose dirt to prevent scratching.
Dust with a microfiber mop, sweep with a soft-bristle broom, then vacuum using a floor-brush attachment. Work in sections, following natural stone seams.
Empty the vacuum frequently and avoid beater bars. Check corners and under furniture so no abrasive particles remain before any damp cleaning step.
Step 2 Choosing the right cleaner: pH-neutral options and homemade solutions
Because sandstone is porous and soft, you’ll want a pH-neutral cleaner or a very mild homemade solution to avoid etching or discoloration.
Choose stone-specific, labeled pH-neutral products and test in an inconspicuous spot.
For DIY, mix a few drops of gentle dish soap with warm water or use diluted rubbing alcohol for spot cleaning.
Avoid acids, bleach, and harsh abrasives.
Step 3 Gentle wet cleaning method: dilution, mopping, and agitation
Now that you’ve selected a pH-neutral cleaner, dilute it according to the label (or use just a few drops of dish soap in a bucket of warm water) and work in small sections:
damp-mop with a soft microfiber or sponge mop, agitate stubborn spots gently with a soft-bristled brush, and rinse the mop frequently so you’re not re-depositing dirt.
Blot excess moisture with a clean towel between sections.
Step 4 Rinsing and removing residue without streaks
After you’ve washed each small area, rinse thoroughly with clean water and work quickly to remove any soapy film so it doesn’t dry into streaks; use a separate bucket of fresh water and a clean microfiber mop or cloth, changing the rinse water often.
Rinse until water runs clear, wring the mop frequently, and overlap passes to avoid missed strips. Inspect for residue and repeat as needed.
Step 5 Drying and restoring appearance (airflow, towels, buffing)
Step 5: Dry the floor promptly and restore its look by promoting airflow, blotting remaining moisture with clean, lint-free towels, and gently buffing to revive the stone’s natural luster.
Open windows or use fans, work in sections, and press towels rather than rubbing.
Once nearly dry, buff with a soft cloth or pad in circular motions to eliminate streaks and enhance sheen without abrading.
Deep Cleaning and Stain Removal
Before you tackle stubborn marks, learn to identify the stain type—oil, organic, rust, or efflorescence—since each needs a different approach.
Use safe, stain-specific methods and poultices for many spots, but reserve professional treatment for deep-set or extensive damage.
For mineral deposits and efflorescence, follow gentle, non-acidic removal techniques to protect the stone.
Identifying stain types (oil, organic, rust, efflorescence)
How can you tell what’s staining your sandstone—oil, organic matter, rust, or efflorescence—so you can choose the right treatment?
Inspect color, texture, and location. Smell and water tests help. Note reaction to mild acid or poultice tests before treatment.
- Oil: dark, repels water
- Organic: leaf/food, brown/green
- Rust: orange/red, metallic
- Efflorescence: white powder
Test small spot first.
Safe stain-specific methods and poultices
When tackling deep stains on sandstone, match the treatment to the stain type and test in an inconspicuous spot first; using the wrong cleaner can etch or discolor the stone.
For oil, use a solvent-based cleaner then a mild detergent; for organic stains, apply a poultice with hydrogen peroxide; for rust, use a manufacturer-approved rust remover.
Rinse thoroughly and repeat if needed.
When to use a poultice vs professional treatment
If a targeted poultice hasn’t lifted a deep stain after a couple of careful attempts, it’s time to contemplate professional help.
You’ll keep using poultices for small, recent stains or delicate areas.
Call a pro when stains penetrate grout, cover large areas, or resist safe repeat treatments.
Professionals assess structural issues, use appropriate solvents, and prevent accidental surface damage.
Removing efflorescence and mineral deposits safely
Because efflorescence and mineral buildup can weaken grout and dull sandstone’s finish, you’ll want to remove them promptly and carefully.
Start by dry-brushing loose crystals, then test a mild acidic cleaner (diluted white vinegar or commercially formulated stone cleaner) in an inconspicuous spot. Rinse thoroughly, neutralize, and dry.
For persistent deposits, repeat gently or call a pro to avoid etching or salt recurrence.
Sealing and Protection
You’ll want to decide whether sealing your sandstone is worth it by weighing the protection and easier cleaning it offers against any change in appearance or breathability.
Choose a sealer formulated for porous stone—penetrating (silane/siloxane) for a natural look or topical for higher sheen—and follow the manufacturer’s prep, application, and curing instructions closely.
After sealing, stick to a light maintenance schedule (gentle cleaning and periodic resealing every 1–5 years depending on traffic and product).
Do you need to seal sandstone? Pros and cons
Wondering whether to seal your sandstone?
Sealing helps repel stains, reduces water ingress and makes cleaning easier, especially in high-traffic or outdoor areas.
But it can alter appearance, require periodic reapplication, and trap moisture if applied incorrectly.
You’ll weigh protection and maintenance against aesthetics and breathability—seal when risks outweigh drawbacks, and skip it for low-use, well-draining installations.
Types of sealers suitable for sandstone and how to choose
Pick a sealer that matches your sandstone’s porosity, location, and desired look—penetrating (silane/siloxane) sealers soak in and repel water without changing appearance, while film-forming sealers (acrylics, urethanes, or polyurethanes) sit on the surface to enhance color and shine but can gloss over texture and need more maintenance. Choose penetrating for natural finish; film-forming for gloss.
| Type | Finish | Durability |
|---|---|---|
| Penetrating | Natural | High |
| Film-forming | Glossy | Moderate |
| Hybrid | Semi | Variable |
| Breathable | Natural | High |
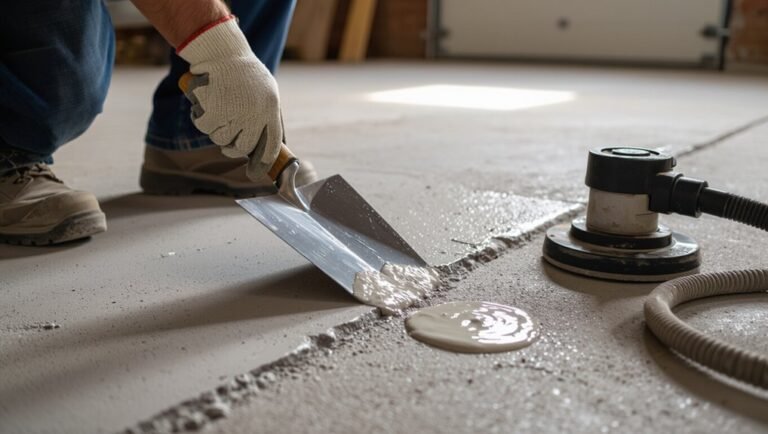
How to apply a sealer correctly (prep, application, curing)
Before sealing, prepare the floor thoroughly so the sealer can bond and perform—clean off all dirt, grease, and residues with a pH-neutral cleaner, rinse well, and let the stone dry completely (often 24–48 hours depending on porosity and humidity).
Test sealer on an inconspicuous area, apply evenly with a low-lint applicator, avoid pooling, follow manufacturer drying times, and allow full cure before light use.
Maintenance schedule after sealing
Once the sealer’s cured, stick to a simple maintenance schedule to keep your sandstone protected and looking its best:
Sweep or dust-mop daily, damp-mop with pH-neutral cleaner weekly, and blot spills immediately.
Reapply sealer every 1–3 years depending on wear.
Inspect high-traffic areas biannually and spot-treat stains promptly.
Avoid harsh cleaners or acidic products to preserve the finish.
Common Mistakes That Cause Damage
Don’t use acidic or highly alkaline cleaners, because they’ll etch sandstone, and avoid abrasive pads or metal brushes that scratch the surface.
Don’t over-wet the floor or let water sit in pores, and don’t trap moisture under rugs or tiles.
And be careful with sealers—using the wrong product or applying too much can cause discoloration and film buildup.
Using acidic or alkaline cleaners
If you use acidic or highly alkaline cleaners on sandstone, you can etch the surface, strip finishes, and cause permanent discoloration.
You should avoid vinegar, bleach, drain cleaners, and heavy-duty degreasers.
Test any cleaner on an inconspicuous spot, follow manufacturer dilution instructions, neutralize residues with clean water, and use pH-neutral stone cleaners to protect color and finish while removing dirt safely.
Abrasive scrubbing and wrong tools
While harsh chemicals can harm sandstone, so can the way you scrub it—scrubbing with abrasive pads, stiff wire brushes, or gritty powders will scratch the surface, wear away sealers, and leave visible swirl marks.
Use soft-bristled brushes, microfiber pads, or non-abrasive sponges. Test tools on an inconspicuous area first, work gently, and replace aggressive equipment that could permanently dull or etch your stone.
Over-wetting and trapped moisture
Because sandstone soaks up water, over-wetting a floor or leaving moisture trapped under rugs and grout can cause staining, softening, and long-term deterioration, especially in porous or unsealed areas.
You should mop with minimal liquid, wring cloths thoroughly, and dry promptly. Check beneath mats and around grout lines for damp spots.
Use fans or dehumidifiers to speed drying and prevent mold.
Applying the wrong sealer or too much sealer
Mistakes with moisture management often lead people to rush sealing, but choosing the wrong sealer or applying too much can cause just as much harm as trapped damp.
You’ll want a breathable, penetrating seal designed for sandstone; film-forming or non-breathable coatings trap moisture, cause staining, and promote flaking.
Apply thin, even coats, follow manufacturer directions, and test first to avoid buildup and irreversible damage.
Prevention and Long-Term Care Best Practices
To keep sandstone looking its best, you should stick to simple daily and weekly routines like sweeping, gentle mopping, and spot-cleaning spills quickly.
Use protective measures—entry mats, felt pads under furniture, and area rugs—to prevent scratches and grit abrasion, and take seasonal steps for outdoor stone such as sealing before winter and removing freeze-thaw hazards.
Call a professional when stains, deep etching, or drainage and structural issues go beyond routine care.
Daily and weekly maintenance routines
When you keep up with simple daily and weekly tasks, your sandstone will stay cleaner and last longer.
You should sweep daily, spot-clean spills immediately, mop weekly with pH-neutral cleaner, check grout and joints, and rotate furniture gently to avoid uneven wear.
- Sweep or dust-mop daily
- Wipe spills right away
- Damp-mop weekly with neutral cleaner
- Inspect grout and joints
- Rotate furniture occasionally
Protective measures: mats, pads, and furniture protection
Although sandstone is tough, you’ll extend its life and appearance by using the right protective measures—place absorbent mats at entrances to trap grit and moisture, use non-slip felt or rubber-backed pads under furniture legs to prevent scratches, and add area rugs in high-traffic zones to reduce wear.
Regularly lift rugs to clean underneath, replace worn pads, and avoid dragging heavy items across the floor.
Seasonal care and weather-related precautions for outdoor sandstone
Protecting indoor sandstone with mats and pads is only part of the story—you’ll need season-specific steps to keep outdoor sandstone sound and attractive year-round.
In winter, clear snow quickly, avoid salt and use sand for traction.
In spring, rinse pollen and debris.
During summer, shade sensitive areas and reapply breathable sealer if UV fades stone.
Inspect after storms for erosion.
When to call a professional
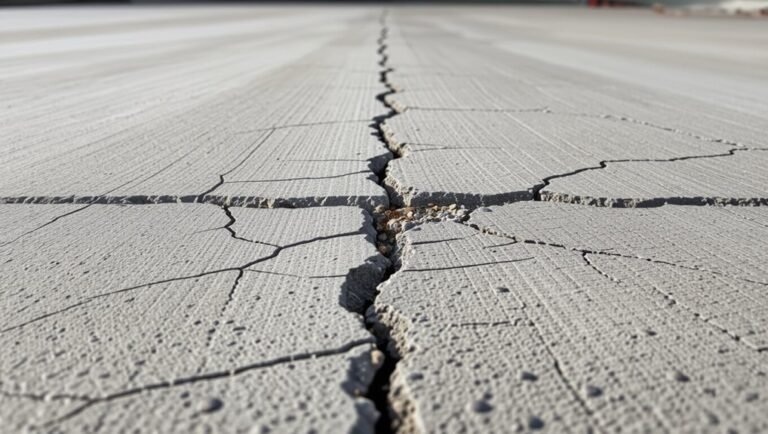
If the issue is beyond routine sweeping, call a professional—especially for deep-set stains, structural cracks, uneven settling, or persistent efflorescence that DIY methods can’t fix.
You should also hire experts for large-scale restoration, failed sealants, or water infiltration.
Professionals assess substrate issues, recommend appropriate cleaners and sealers, and perform repairs safely, preventing costly mistakes and preserving your sandstone’s appearance and integrity long term.
Comparison: DIY Methods vs Professional Cleaning
You’ll want to weigh cost, effectiveness, and risk when choosing between DIY cleaning and hiring pros. Below is a quick comparison to help you decide which scenario fits your needs. Use DIY for light maintenance, and call professionals for deep stains or delicate restorations.
| Factor | When to Choose |
|---|---|
| Cost vs effectiveness | DIY is cheaper but less thorough; pros cost more but deliver better results |
| Risk | DIY risks damage from wrong cleaners; pros reduce risk with expertise |
| Recommended scenarios | DIY for routine care; professionals for heavy stains, large areas, or historic stone |
Cost, effectiveness, risk, and recommended scenarios
When weighing DIY cleaning against hiring a pro, consider cost, effectiveness, and the risks each option brings so you can choose what’s right for your sandstone.
DIY saves money for light stains and routine maintenance but risks damage from improper cleaners or equipment.
Professionals cost more, clean thoroughly, and reduce long-term risk—ideal for deep stains, large areas, or historic and high-value sandstone.
Tools and Products Recommendation Guide
You’ll want to choose gentle commercial cleaners and appropriate sealers formulated for sandstone to protect the stone without stripping it.
Use soft-bristled brushes, microfiber mops, and vacuums with soft-floor settings to lift dirt safely.
Avoid acidic cleaners, abrasive pads, and stiff wire brushes that can etch or scratch the surface.
Recommended gentle commercial cleaners and sealers
Because sandstone is porous and sensitive to harsh chemicals, pick cleaners and sealers formulated specifically for natural stone; they’ll clean without etching and seal without trapping moisture.
- pH-neutral stone cleaner for routine washing
- Dilutable poultice remover for stains
- Breathable penetrating sealer (silane/siloxane)
- Anti-efflorescence cleaner for mineral salts
- Mild alkaline cleaner for oil-based stains
Tools that are safe to use (mops, brushes, vacuums)
Along with choosing the right cleaners and sealers, pick tools that won’t scratch, abrade, or trap grit against the sandstone surface.
Use microfiber mops for wet cleaning, soft-bristle brushes for grout and textured areas, and a vacuum with a hard-floor setting or brushless suction head.
Rinse mop heads frequently and replace pads when worn to prevent reintroducing grit.
Tools/products to avoid
Harsh tools and common household products can quickly damage sandstone, so avoid anything abrasive or acidic that strips minerals or scratches the surface.
Don’t use harsh chemicals or rough scrubbers; rinse gently, test cleaners, and protect sealed stone.
- Steel wool or wire brushes
- Acidic cleaners (vinegar, lemon)
- Bleach or ammonia
- High‑pressure washers
- Sanding pads or grinders
FAQ Common Questions About Cleaning Sandstone Floors
You probably have specific questions like whether you can use vinegar or bleach on sandstone, how often to reseal, or if sanding or polishing will help.
You’ll also want to know how to tackle deep-set oil stains and whether steam cleaning is safe.
Below are clear answers to each of these common concerns.
Can I use vinegar or bleach on sandstone?
Can vinegar or bleach harm sandstone? Yes — both are risky.
Vinegar’s acidity etches and dulls the stone; bleach can discolor and weaken natural pigments. Don’t use them.
Instead, choose pH-neutral stone cleaners or mild dish soap diluted in water. Test a hidden spot first, blot spills promptly, and rinse thoroughly.
When in doubt, consult a professional stone cleaner.
How often should sandstone be sealed?
Since acidic or bleaching cleaners can damage sandstone, sealing becomes your next line of defense to protect the stone from stains and wear.
Seal new floors after installation or 30 days, then reapply every 1–3 years depending on foot traffic, exposure and the sealer type.
Test periodically: if water no longer beads, it’s time to reseal to maintain protection.
Will sanding or polishing work on sandstone floors?
Although sanding or polishing might seem like a quick fix, sandstone’s soft, porous nature usually makes aggressive abrasion risky and often ineffective for restoring the surface.
You’ll likely remove more material than you intend, expose fresh pores, and create uneven patches.
Instead, use gentle honers or professional light honing and always test a small area first; sealing afterward helps protect the repaired surface.
How do I remove deep-set oil stains?
How do you tackle deep-set oil stains on sandstone without making things worse?
Blot fresh oil, then apply a poultice: mix powdered clay or talc with a mild degreaser or hydrogen peroxide to a thick paste.
Spread over stain, cover with plastic, tape edges, and leave 24–48 hours.
Remove, rinse gently, repeat if needed.
Test first in an inconspicuous spot.
Is steam cleaning safe for sandstone?
Curious whether steam cleaning will harm your sandstone? You should avoid high-temperature steam: sandstone’s porosity and natural cement can soften, crack, or delaminate under intense heat and pressure.
Low-pressure steam on sealed sandstone can work for light grime, but always test a hidden area first.
When in doubt, use gentle detergents and soft brushes or consult a professional.