How to Cut Ceramic Tile That’s Already Installed Without Cracking It
You can cut installed ceramic tile without cracking it by preparing the area, removing grout along the cut line, and using the right tools like a wet saw or angle grinder with a diamond blade to control heat and vibration. Measure twice, mark clearly, protect surrounding tiles with tape or plywood, and make slow steady cuts while supporting the tile to prevent stress. Follow proper PPE and finishing steps, and keep going to learn precise techniques and troubleshooting.
Quick Answer Can You Cut Installed Ceramic Tile Without Cracking It?
Yes—you can cut installed ceramic tile without cracking it if you use the right tools (wet saw or angle grinder with a diamond blade) and proper technique.
Expect clean edges on the cut tiles and minimal surrounding damage when you score, support, and cut slowly; thin or brittle tiles raise the risk of chips.
Consider cutting in place for a few tiles or trim jobs, but replace whole sections when multiple tiles are damaged or cuts would compromise grout and substrate.
Short direct answer and expected results
You can cut installed ceramic tile without cracking it, but it takes the right tools and techniques to avoid damage; expect clean edges if you use a wet tile saw or a score-and-snap method for straight cuts.
Anticipate more chipping on curves or small notches unless you use a diamond hole saw or grout-side cutting approach.
When asked how do you cut ceramic tile that’s already installed, use steady, slow cuts and support.
When you should consider cutting installed tile vs. replacing sections
If you can cut installed tile without cracking it, the next question is whether you should cut in place or remove and replace sections.
Cut in place for small adjustments, trim-outs, or when surrounding grout and substrate are sound.
Replace sections if multiple tiles are damaged, cuts are complex, or matching grout and layout matter.
Weigh time, skill, and finish quality before deciding.
Understanding Ceramic Tile and Why It Cracks
To cut tile cleanly you need to know what you’re cutting—glaze, body density, and porosity all change how a blade or wheel behaves.
Cracks usually come from external stress, vibration, or the wrong tool and technique, so you’ll want to control those factors.
Also note that porcelain, glazed ceramic, and terracotta each demand different cutters and feeds to avoid breakage.
Tile anatomy: glaze, body, and porosity
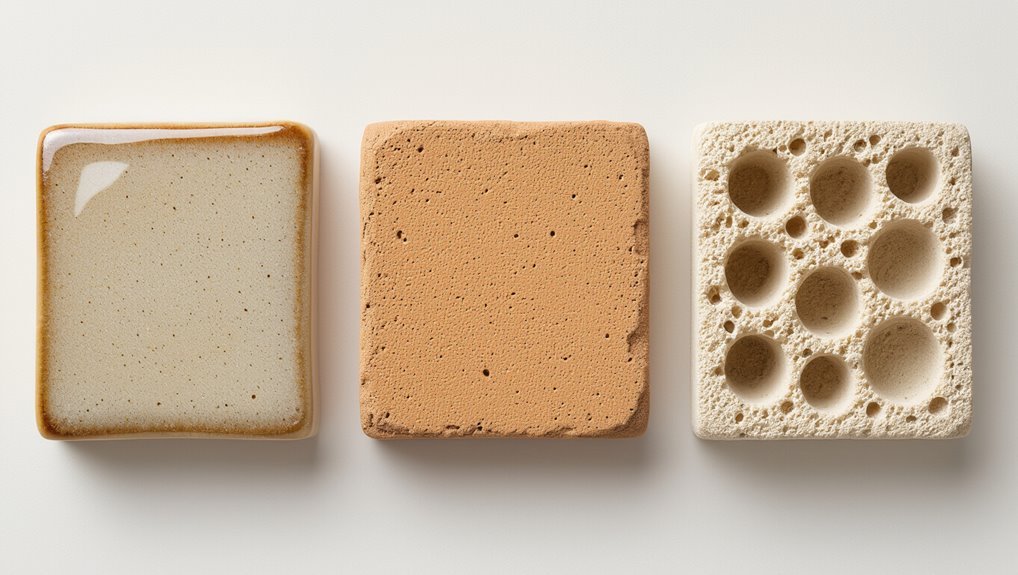
Think of a ceramic tile as a layered system: a hard, often glassy glaze sits on a dense body, and the body’s porosity controls how the tile behaves under stress and when it’s cut.
You’ll note glazed surfaces resist wear and show color; the body—porcelain, red or white—dictates density and water absorption.
Lower porosity means greater strength; higher porosity needs gentler handling.
Common causes of cracking when cutting installed tile (stress, vibration, improper tools)
When you cut installed ceramic tile, cracks usually come from three culprits: stress from improper support, vibration from dull or wrong tools, and using the wrong blade or technique.
You’ll cause stress by flexing unsupported tile or cutting too close to grout. Vibration chips glaze; dull blades increase heat and chatter.
Use proper support, sharp blades, steady feed, and slow speed to avoid cracking.
Types of ceramic tile and how they affect cutting approach
Because ceramic tiles vary in composition and hardness, you need to pick cutting methods that match the tile type.
Porcelain is dense and brittle—use slow, wet diamond blades and reduced vibration.
Glazed or softer earthenware tolerates scoring and snapping.
Large-format or mosaic tiles need support and smaller bits.
Adjust feed rate, blade choice, and water to minimize chipping and cracking.
Safety and Preparation Before Cutting
Before you cut, you’ll want to gather PPE — safety glasses, a dust mask or respirator, ear protection, gloves, and knee pads — to keep yourself safe.
Check the existing installation for loose grout, substrate damage, and movement so you don’t worsen hidden problems when you cut.
Protect surrounding tiles and fixtures with masking, plywood or scrap tile, and drop cloths to prevent chips and dust from spreading.
Personal protective equipment checklist
Although tile cutting can look straightforward, you’ll need proper personal protective equipment to keep dust, shards, and vibration from injuring you.
Use this checklist before you start:
- NIOSH-rated respirator (P100) for silica dust.
- Shatterproof safety goggles and face shield.
- Cut-resistant gloves and padded vibration-damping gloves.
- Ear protection (earmuffs or plugs) and sturdy work boots.
Inspecting existing installation: grout, substrate, and movement
Now that you’ve got your PPE on, take a close look at the existing installation: check the grout lines, the substrate under the tile, and any movement in the field or perimeter.
Tap tiles for hollow spots, probe grout for cracks or soft joints, and inspect substrate for cracks, delamination, or moisture.
Note loose tiles or expansion gaps—these affect cutting strategy and risk of cracking.
Preparing the surrounding area and protecting adjacent tiles
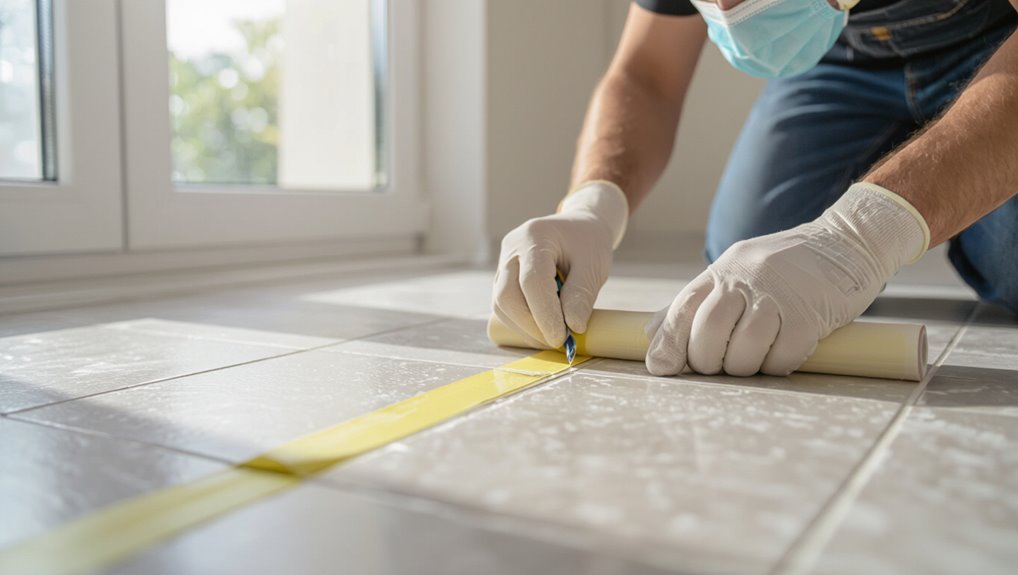
Clear the work area and set up barriers so dust, chips, and tools stay away from adjacent tiles and fixtures.
Tape protective foam or cardboard to neighboring tiles, cover grout lines with painter’s tape, and remove loose objects.
Wear eye, ear, and respiratory protection.
Use drop cloths and a shop vac for cleanup.
Work slowly to avoid vibration that can crack surrounding tiles.
Tools and Materials You Need
You’ll need the right cutting tools—both manual (tile nippers, snap cutters, scoring tools) and power options (wet saws, angle grinders)—to handle different cuts and tile thicknesses.
Bring the right accessories and consumables too: scoring bits, diamond blades/wheels, masking/taping supplies, and replacement blades.
If this is a one-off job, consider renting big gear; buy smaller tools and consumables if you’ll use them again.
Recommended cutting tools (manual and power)
Before you make your first cut, gather a mix of manual and power tools so you can match the tool to the tile type, the cut shape, and the work setting. You’ll use handheld scores and nippers for small trims, a wet tile saw for straight full-depth cuts, and an angle grinder for curved or plunge cuts. Choose by precision and access.
| Tool type | Best for |
|---|---|
| Manual score & snap | Small adjustments |
| Tile nippers | Irregular edges |
| Wet saw | Straight cuts |
| Angle grinder | Curves/plunges |
Accessories and consumables: blades, diamond wheels, scoring tools, tapes
Accessories and consumables make the difference between a sloppy job and a clean, durable cut, so stock the right blades, wheels, scoring tools, and tapes before you start.
Use continuous-rim diamond blades for wet cuts, segmented or turbo for faster dry cuts, fresh scoring wheels for snap cuts, and high-quality masking and painter’s tape to mark lines and protect adjacent grout.
Replace worn consumables promptly.
When to rent vs. buy tools
If you’re tackling a small patch or a one-day job, rent the big, expensive gear; if you’re planning larger projects or expect to use tools again, buy them.
Renting saves money, storage, and maintenance time for seldom-used items like wet saws or tile cutters.
Buy handheld tools, safety gear, and quality blades you’ll reuse.
Compare rental rates, project length, and resale value before deciding.
Step-by-Step Guide: How to Cut Ceramic Tile That’s Already Installed
Before you cut, you’ll measure and mark the exact line so the new edge fits flush with surrounding tiles.
You’ll remove grout along that line with a grout saw or rotary tool, then choose the right cutting method — score for shallow nicks, a handheld wet saw or circular saw with a diamond blade for through-cuts, or an angle grinder for perimeter and plunge cuts.
Follow each technique carefully to protect adjacent tiles and get a clean result.
Step 1 Marking and measuring the cut precisely
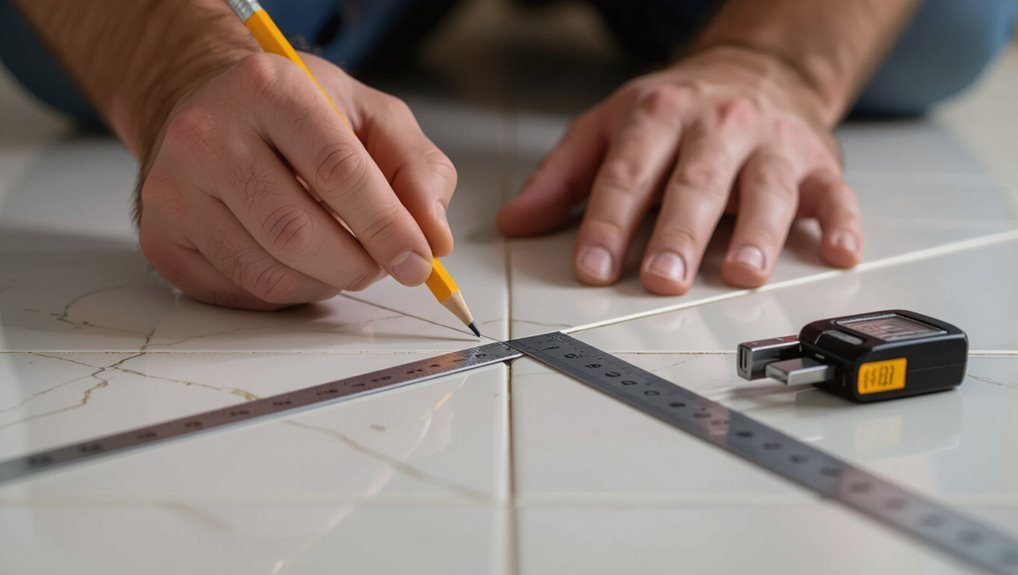
Start by taking precise measurements of the area you need to cut and transfer those dimensions directly onto the tile with a pencil or grease marker; you’ll avoid mistakes by measuring twice—once for length and once for width—and noting any offsets for grout lines or adjacent trim.
Then use a straightedge to draw clear cut lines, mark reference points, and verify alignment visually before cutting.
Step 2 Removing grout around the cut line (tools and technique)
Once you’ve confirmed your cut line, remove the surrounding grout so the blade can follow a clean path without binding or chipping.
Use a grout saw or oscillating tool with a grout blade, work slowly, and keep the stroke shallow to avoid damaging adjacent tiles.
Vacuum debris frequently, wear eye protection, and test the cleared channel with the blade before cutting.
Step 3 Score method for small, shallow cuts (manual scoring technique)
With the grout cleared, you can use the score-and-snap method for small, shallow cuts that don’t require power tools.
Mark the cut line, clamp a straightedge, then score firmly once or twice with a carbide-tipped tile scoring tool.
Apply even pressure, snap along the score by pressing down on the tile edge, and smooth the break with a rubbing stone for a clean finish.
Step 4 Using a handheld wet saw or circular saw with diamond blade on installed tile
Switch to a handheld wet saw or a circular saw fitted with a continuous-rim diamond blade when you need deeper, more precise cuts on installed tile that scoring can’t handle.
Secure work area, mask grout lines with tape, clamp a guide, and wet the blade to reduce dust and heat.
Move steadily, let the blade do the work, and support cut sections to prevent breakage.
Step 5 Using an angle grinder for perimeter and plunge cuts
Grab your angle grinder when you need tidy perimeter or plunge cuts that other tools can’t reach; its small, maneuverable wheel lets you make precise slice-ins and notches on installed tile.
Wear eye, ear, and respiratory protection, clamp a guide if possible, score shallow passes, and cool periodically to prevent glaze cracking.
Move slowly, keep steady pressure, and clean dust frequently.
Step 6 Drilling holes and making notches for fixtures
Start by marking the exact location and size of the hole or notch you need. Then pick the right bit or blade for the job—diamond drill bits for round holes, carbide-tipped or a small angle grinder for notches.
Secure a backing board, clamp a guide, score edges, and drill slowly with water cooling. Clean debris, test-fit the fixture, and adjust minimally to avoid chipping.
Step 7 Finishing edges: sanding, rubbing stone, and edge trim
After you’ve drilled or notched the tile and checked the fit, smooth the cut edges to prevent chips and make the repair look professional.
Use a diamond hand pad or sanding block to gently remove burrs, keep movements light and even, and test fit often.
For exposed edges, consider a matching edge trim or bullnose piece to protect and conceal raw cuts.
Step 8 Cleaning and sealing cut edges and regrouting
Wipe away dust and slurry from the cut edges with a damp sponge and let them dry completely so sealers and grout can bond properly.
Inspect for hairline chips, then apply a penetrating tile sealer to exposed ceramic and cut substrate.
After sealer cures, mix grout to match existing joints, pack evenly, remove excess, and wipe clean.
Cure time varies—follow product instructions.
Alternative Methods for Difficult Cuts
If a cut looks risky, you can remove the tile and cut it on a bench or cut in place—each has clear pros and cons for control, mess, and risk to neighboring tiles.
For fragile areas, sectionally removing surrounding tiles lets you access the piece without wrecking the whole installation.
For odd shapes, use sturdy templates and jigs to mark and guide your saw for accurate, repeatable cuts.
Removing the tile vs. cutting in place: pros and cons
While cutting tile in place saves time and avoids disturbing surrounding grout, you’ll often get cleaner results by removing the tile first when access or jigging is limited.
Removing lets you cut with full control, use templates, and avoid vibration transfer.
Cutting in place prevents grout damage and keeps alignment.
Choose removal for precision; cut in place for speed and minimal disturbance.
Sectional removal technique to minimize damage to surrounding tiles
Because you want to protect neighboring tiles when making difficult cuts, use a sectional removal technique that pulls small, controlled pieces out instead of prying the whole tile at once.
Score the glaze, drill relief holes near the cut, then nibble away grout and ceramic with a carbide bit or chisel.
Work slowly, stabilize adjacent tiles, and clear debris to prevent cracking.
Using templates and jigs for complex shapes
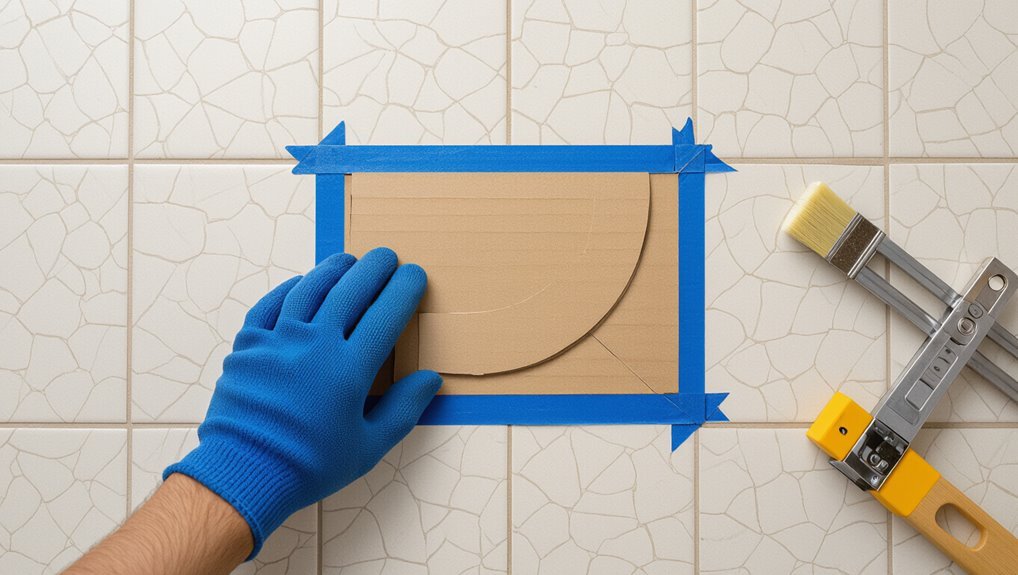
When you need complex shapes—around pipes, vents, or irregular fixtures—templates and jigs let you transfer exact outlines to the tile and guide your cuts with far more control than freehand tracing.
Trace template onto the tile, clamp a guide or jig, and cut slowly with a wet saw, angle grinder, or carbide bit.
Check fit, tweak edges with a file, then seal.
Common Mistakes That Cause Cracks and How to Avoid Them
Don’t force the tool or press too hard—you’re more likely to crack the tile than cut it cleanly.
Always support the tile and substrate, use the correct blade for ceramic versus porcelain, and isolate vibration to prevent stress fractures.
Keep the blade cool with water or breaks to avoid heat-related cracking.
Applying too much pressure or forcing the tool
Forcefully pushing a blade or chisel through tile increases the chance of hairline fractures and full breaks, so ease up and let the tool do the work.
You should apply steady, controlled pressure, use the correct speed, and make multiple light passes rather than one heavy cut.
If resistance spikes, stop, reassess your setup, and adjust blade type or angle to prevent cracking.
Cutting without supporting the tile or substrate
1 common mistake that leads to cracked tiles is cutting without properly supporting the tile and the substrate beneath it; you should always brace both sides to absorb vibration and prevent flexing.
Use clamps, temporary backing, or a plywood brace on both sides of the cut. Support reduces movement, prevents edge chipping, and lets you make cleaner, controlled cuts without forcing the tool.
Using wrong blade/type for ceramic vs. porcelain
Because ceramic and porcelain cut differently, using the wrong blade can easily crack tiles or leave ragged edges.
You should match blade type: continuous-rim diamond or porcelain-specific blades for dense porcelain; segmented or general-purpose diamonds work for softer ceramic.
Verify blade rating, RPM, and wet/dry suitability.
Swap blades when performance degrades, and test on a scrap tile before cutting installed pieces.
Ignoring vibration isolation and not cooling the blade
If you skip isolating vibration or let the blade overheat, you’ll almost guarantee hairline cracks or full splits in installed tile.
Clamp surrounding tiles, use rubber pads, and support cut sections to stop vibration.
Run the blade slowly, flood with water or use intermittent cutting to keep it cool.
Let blade rest if it’s hot, and replace dull blades promptly to prevent stress.
Best Practices and Tips for Reliable Results
Get the right blade speed, feed rate, and cooling to prevent chips and overheating, and make sure you clamp tiles and dampen vibration for clean cuts.
Know when a tricky pattern, stubborn tile, or plumbing obstruction means it’s smarter to call a pro rather than push on.
Keep blades and tools clean, sharp, and properly adjusted so every cut stays predictable.
Tool speed, feed rate, and cooling recommendations
When you’re cutting installed ceramic tile, match blade speed and feed rate to the tile type and blade manufacturer’s recommendations to avoid chipping, glazing, or overheating.
Use steady, moderate feed—too fast scores poorly, too slow overheats. Run blades at recommended RPMs, pause for cooling on long cuts, and use water or a misting system per blade specs to reduce heat and extend blade life.
Securing tiles and controlling vibration during cuts
Having the correct blade speed and cooling is only part of the equation; you also need to firmly secure the tile and minimize vibration so cuts stay clean and edges don’t chip.
Clamp a sacrificial wood board over the tile, use low-vibration tools, and steady the workpiece with soft rubber pads.
Support cut sections to prevent flexing and score before deep cuts for control.
When to call a professional vs. DIY
If you’re comfortable with basic tile tools and small, straight cuts, you can handle many repairs yourself; but call a professional for complex layouts, large-format tiles, angled or wet-area cuts, or any job where a mistake would be costly.
You should also hire pros if you lack steady hands, proper safety gear, or time.
For straightforward repairs, plan carefully, take it slow, and test cuts first.
Maintenance tips for blades and cutting tools
1 simple habit will keep your tile-cutting blades and tools working reliably: clean and inspect them after every use.
Remove debris, check for chips or warping, and replace damaged diamond or carbide blades.
Lubricate moving parts, tighten fasteners, and store tools dry.
Sharpen reusable blades as recommended, balance grinders, and follow manufacturer service intervals to maintain precision and prevent tile cracking.
Quick Troubleshooting If the Tile Cracks
If a tile cracks while you’re cutting, first judge whether it’s a hairline fracture you can live with or a full break that needs replacement.
For minor cracks you can use epoxy or color-matched filler, but for broken tiles you’ll want to remove and replace the piece and regrout.
After repair, adjust your cutting technique and support to prevent the same stress from causing future cracks.
Assessing severity: hairline crack vs. full break
A quick visual and tactile check will tell you whether you’re dealing with a hairline crack or a full break, and that distinction determines your repair approach.
Run your finger lightly across the line: if it feels shallow and grout remains intact, it’s likely cosmetic.
If the tile moves, has missing fragments, or grout gaps widen, treat it as structural and stop using the area.
Repair options for cracked installed tiles
Start by deciding whether the crack needs a cosmetic quick-fix or a full tile replacement; your choice will depend on crack depth, location, and how much use the area gets.
For hairline cracks, fill with matching epoxy or grout and buff smooth.
For deeper or structural cracks, remove and replace the tile, ensuring proper adhesive and grout.
Consider temporary clamping for small splits.
Preventing future cracking after repair
Once you’ve fixed or replaced the cracked tile, take steps to prevent a repeat problem by checking underlying causes and reinforcing the repair.
Inspect substrate for movement, moisture, or loose mortar; level and secure as needed. Use flexible thin-set or epoxy grout and proper expansion joints.
Allow full cure time, avoid heavy loads, and monitor the area periodically so small issues don’t become new cracks.
Time, Cost, and Difficulty Comparison
You’ll want a quick sense of how long different cuts take and what they’ll cost so you can plan the job.
I’ll compare typical time and price ranges for straight, plunge, and notch cuts and note the skill level each method needs.
That way you’ll pick the right tool and approach for your experience and budget.
Estimated time and cost for common cut types
Different cuts take different amounts of time and money, so knowing which ones you’ll need lets you plan the job and budget accurately. You’ll spend minutes to hours per tile depending on cut complexity; cost varies by tool rental or blade wear. Estimate labor + consumables before starting.
| Cut Type | Typical Time | Typical Cost |
|---|---|---|
| Straight | 5–15 min | $0–$5 |
| Notch | 15–30 min | $5–$15 |
| Curve | 20–60 min | $10–$30 |
Difficulty level and skill required for each method
While some cuts only take basic tools and steady hands, others demand steady experience and precision, so match the method to your skill before you start.
Simple scores and manual nippers suit beginners; wet saws and angle grinders need steady control and safety awareness.
Complex plunge cuts or mosaics require practiced technique. If unsure, practice on spare tiles or hire a pro to avoid costly mistakes.
FAQ
You’ll likely have a few quick questions before you start cutting, like whether you can use a regular wet saw without removing grout or if the water will harm nearby grout or the substrate.
You’ll also want tips for cutting straight lines on installed tiles, whether a removed tile can be reused after repair, and which blade works best for older or brittle pieces.
I’ll answer each of these so you can pick the right tools and methods for a clean, safe cut.
Can I cut ceramic tile with a regular wet saw without removing grout?
Can you cut ceramic tile with a regular wet saw without removing the grout? Yes, but it’s tricky.
Score and cut carefully along the tile face, keeping the blade path clear of grout lines. Use a guide, slow feed, and support adjacent tiles to avoid vibration.
Expect limited clearance; for cuts crossing grout or close to edges, remove grout first for cleaner, safer results.
Will water damage the surrounding grout or substrate during wet cutting?
Will a little water from your wet saw harm the grout or substrate? If you control spray and avoid pooling, brief wet cutting won’t ruin cured grout or typical cement backer.
Use a drip tray, tape seams, and dry quickly.
Beware prolonged saturation on fragile or uncured grout, gypsum board, or plywood—protect or avoid wet cutting there to prevent softening or delamination.
How do I cut a straight line on an installed tile?
If you kept water off vulnerable grout and substrates while wet cutting, you can focus on making a clean, straight cut without worrying about damage.
Mark the cut clearly with a pencil or tape. Use a guide: clamp a straightedge or use a tile cutter’s fence.
Score steadily, then snap or finish with a wet saw using a continuous, slow feed to avoid chipping.
Can I reuse a tile that was cut out and repaired?
Wondering whether you can put a repaired tile back in place? You can, but only if the cut edge is clean, the tile didn’t fracture beyond repair, and it still sits flush.
Test-fit dry, check alignment with grout lines, and verify adhesive will bond.
If the piece is weak, warped, or cosmetic damage is obvious, replace it for longevity and appearance.
What blade type is best for older or brittle tiles?
Reusing a repaired tile makes sense only when it’s sturdy, but older or brittle tiles often won’t hold up to standard diamond blades—so you’ll want a gentler cutting approach.
Use a resin-bonded, fine-grit diamond blade or a continuous-rim porcelain/ceramic blade. Cut slowly with plenty of water to reduce vibration and heat.
Test on a scrap, and back the tile for support while cutting.