How Much Do Polished Concrete Floors Cost? (Per Square Foot Breakdown)
You can expect polished concrete to cost roughly $3–$15+ per sq ft depending on slab condition, finish level, and decorative options. If your slab’s in good shape and you choose a basic matte or satin grind, you’ll pay near the low end; high-gloss, dyes, aggregates, or commercial-grade systems push you to the high end. Factor in repairs, moisture mitigation, and labor when budgeting. Keep going to see a full per‑square‑foot breakdown and examples.
Quick Answer How Much Do Polished Concrete Floors Cost Per Square Foot?
You can expect polished concrete to run roughly $3–$5/sq ft on the low end, $6–$12/sq ft in the mid range, and $13+/sq ft for high-end or specialty finishes.
For homeowners, the mid range usually covers most rooms, while commercial projects often hit the high end due to scale and durability specs.
Major cost drivers are prep/repair needs, chosen finish/shine level, and any decorative options like dyes or aggregates.
Typical national average ranges (low, mid, high)
Most homeowners see polished concrete costs fall into three broad bands: low, mid, and high.
If you’re wondering how much do polished concrete floors cost, expect roughly $2–$4/sq ft for basic grind-and-seal, $4–$8 for mid-range densified and polished finishes, and $8–$15+ for high-gloss, decorative, or stained systems.
Prices vary by region, prep, and complexity.
One-line summary for homeowners vs. commercial buyers
While homeowners can expect about $2–$8 per sq ft depending on finish level, commercial buyers typically budget $4–$15+ per sq ft because they need higher-performance polishing, coatings, or decorative systems and often larger-scale prep.
You’ll usually pay less for a simple residential sheen and more for commercial durability and warranty-backed systems.
Decide by planned use, traffic, and desired appearance to match budget and performance.
Cost factors that most change the per-square-foot price
Because several variables directly affect labor and materials, the per-square-foot price for polished concrete can swing widely—from basic residential sheen to high-spec commercial systems.
You’ll pay more for slab condition (repairs, level), chosen grit/shine, dyes or stains, sealing, and traffic-rated coatings.
Accessibility, demo or overlays, and local labor rates also shift costs, so get detailed bids and compare specs, not just price.
What Polished Concrete Is and Why Cost Varies
Polished concrete is a process you get by grinding the slab, applying a densifier, polishing to the chosen sheen, and often finishing with a sealant.
Costs vary because a basic matte polish takes less time and equipment than a high-gloss or terrazzo-like finish that requires finer grits, more passes, and sometimes additives or aggregates.
You’ll pay more for finishes that boost durability, lower maintenance, and deliver a specific aesthetic.
What polished concrete includes (grind, polish, densifier, sealant)
When you invest in polished concrete, you’re paying for a multi-step process that grinds and hones the slab, applies a densifier to harden the surface, and finishes with a protective sealant that locks in shine and durability.
You’ll get coarse grinding to level, progressive polishing for smoothness, chemical densification for strength, and a seal or guard coat for stain resistance and easier maintenance.
Differences between basic polish and high-gloss/terrazzo-like finishes
One clear way to understand price differences is to compare basic polished concrete with high-gloss or terrazzo-like finishes: basic jobs use fewer grit steps, lighter densification, and a simple guard coat, while high-gloss or terrazzo-style floors require many more grinding and polishing passes, stronger densifiers, optional color or aggregate exposure, and thicker protective systems that all add time and material cost.
You’ll also pay more for skilled labor, longer curing, and detailed edge/transition work.
Benefits that influence value (durability, maintenance, aesthetics)
Longevity matters: a well-polished concrete floor resists wear, stains, and moisture far longer than many surface coverings, so you’ll spend less on repairs and replacements over time.
You’ll enjoy low maintenance—simple cleaning and occasional resealing—plus superior durability that supports heavy traffic.
Its sleek aesthetics boost property appeal and resale value, so upfront cost often pays back through reduced lifecycle expenses and marketability.
Detailed Per-Square-Foot Cost Breakdown
You’ll start by looking at base grinding and polishing costs per square foot, then break out prices tied to grind/progress levels (300, 800, 1500, 3000 grit).
Next, compare common add-ons per square foot—stains, dyes, decorative aggregates, and sealers—and how they raise the total.
Finally, we’ll separate labor, material, and equipment amortization so you can see what’s driving the price.
Base grinding and polishing costs (per sq ft)
Base grinding and polishing typically runs between $2 and $6 per sq ft for basic prep and initial polishing, but exact costs depend on concrete condition, desired sheen, and any repairs needed; contractors will charge less for large, open areas and more for tight spaces, heavy staining, or extensive patching. You’ll pay more for repairs, sealing, or aggressive stain removal.
| Item | Typical Impact |
|---|---|
| Repairs | Raises cost |
| Area size | Lowers per-sq-ft cost |
Cost by grind/progress level (300, 800, 1500, 3000 grit)
Polished concrete cost varies by grind level because each step uses different abrasives, labor time, and materials; expect roughly $0.50–$1.50 per sq ft for a 300-grit cut, $1–$3 for an 800-grit intermediate polish, $2–$4 for a 1500-grit high polish, and $3–$6 (or more) for a mirror-like 3000-grit finish, with prices shifting based on floor condition, access, and any repairs or coatings you add.
| Grind level | Typical cost/sq ft |
|---|---|
| 300 | $0.50–$1.50 |
| 800–3000 | $1–$6+ |
Add-on costs per sq ft (stains, dyes, decorative aggregates, sealers)
1 add-on can change both the look and the price: stains, dyes, decorative aggregates, and sealers each carry their own per-square-foot cost and labor needs.
You’ll pay roughly $0.50–$3/sq ft for stains or dyes, $2–$8 for decorative aggregates broadcast, and $0.25–$1 for premium sealers.
Choose based on desired effect, durability, and maintenance, balancing appearance with budget.
Labor vs. materials vs. equipment amortization
Start by breaking the per-square-foot price into three clear parts: labor, materials, and equipment amortization, so you can see what truly drives costs.
You’ll often pay 40–60% for labor, 20–35% for consumable materials (pads, abrasives, sealers), and 10–30% to cover machine purchase and maintenance spread across projects.
Knowing those splits helps you compare quotes fairly.
Project Types and Typical Total Costs
When planning polished concrete, you’ll want to compare typical total costs across project types—from small, average, and large residential floors to retail, warehouse, and office spaces.
Don’t forget lower-cost scenarios like garages, patios, and basements, as well as high-end decorative jobs that add logos, patterns, or colored aggregates.
Next we’ll break out sample totals and factors that drive those price ranges so you can estimate your specific project.
Residential interior floors (small/average/large homes)
Whether you’re updating a small condo, an average-sized family home, or a large luxury residence, polished concrete offers a durable, low-maintenance flooring option that can fit a range of budgets and project scopes. You’ll pay roughly $3–$8/sqft for small, $4–$10/sqft for average, and $6–$15/sqft for large projects—scale, prep, and finishes drive cost.
| Size | Emotion | Typical Cost |
|---|---|---|
| Small | Cozy relief | $3–$8/sqft |
| Average | Confident comfort | $4–$10/sqft |
Commercial and industrial floors (retail, warehouse, office)
Stepping beyond homes, commercial and industrial projects demand a different approach to polished concrete because they face heavier traffic, stricter safety and durability requirements, and larger square footage. You’ll budget higher per-square-foot rates for grit, densifiers, and coatings; expect multi-ton equipment and longer prep. Estimate: retail $4–8/sq ft, warehouses $3–7, offices $5–10.
| Space Type | Traffic | Typical Cost |
|---|---|---|
| Retail | Moderate–High | $4–8/sq ft |
| Warehouse | Heavy | $3–7/sq ft |
| Office | Moderate | $5–10/sq ft |
Garages, patios, and basements lower-cost scenarios
Garages, patios, and basements offer some of the most affordable polished concrete options because they typically need less surface prep, lighter finishes, and smaller-scale equipment than commercial projects.
You’ll pay less per square foot—often $2–$6 for basic grind-and-seal jobs—since repairs are minimal and access is easy.
Expect quicker timelines and straightforward maintenance, keeping total costs lower.
High-end decorative projects (logos, patterns, colored aggregates)
Design-forward polished concrete—featuring inlaid logos, intricate patterns, or colored aggregates—adds significant visual impact but also raises costs compared with basic grind-and-seal floors.
You’ll pay more for design time, custom templates, color dyes, and careful aggregate placement.
Expect total project costs often ranging $10–$25 per sq ft or higher depending on complexity, size, and installer expertise.
Step-by-Step Cost Estimation for Your Project
Start by measuring your square footage and checking the slab condition so you know what’s needed.
Then pick the polish level, decorative and protective treatments, and account for site prep, repairs, and access.
Finally, add estimates for labor, materials, permits, and a contingency to get your total cost.
Step 1 Measure square footage and assess slab condition
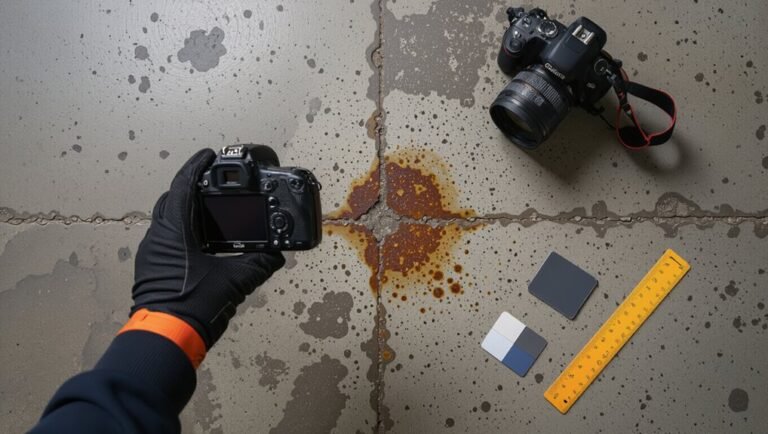
First, measure the floor area in square feet and inspect the slab for cracks, moisture, unevenness, and previous coatings—these factors directly affect material needs and labor time.
You’ll note problem spots, calculate total area, and estimate prep work. Then:
- Mark and record measurements
- Photograph defects and moisture readings
- Estimate grinding and patching hours
- Tally areas needing coatings removed
Step 2 Choose polish level and finish options
While you decide on a polish level and finish, consider how grit, sheen, and treatments affect both appearance and cost—higher grits and glossier finishes need more grinding time and materials, and specialty treatments like densifiers, stains, or topical sealers add expense.
You’ll pick a grit and sheen that balance look and budget, knowing harder polishing raises labor and equipment costs.
- Low grit, matte finish
- Medium grit, satin sheen
- High grit, glossy sheen
- Add-on densifier only
Step 3 Add decorative and protective treatments
Now that you’ve picked a polish level and finish, you’ll decide on decorative and protective treatments that affect both look and long-term performance—and your budget.
You’ll choose options that add visual interest and durability. Consider these cost-driving choices:
- Integral color or dyes for uniform tone
- Stains or design inlays for patterns
- Metal or glass aggregates for sparkle
- Protective sealers or topical coatings for wear
Step 4 Include site prep, repairs, and access considerations
Step 4 covers the site prep, repairs, and access factors that shape both scope and cost—think demo, concrete patching, moisture mitigation, and how easily crews and equipment can reach your space.
You’ll assess damage, remove obstacles, and plan for logistics so estimates reflect real needs.
- Remove coatings and debris
- Fill cracks and level low spots
- Address moisture and vapor issues
- Guarantee clear equipment access
Step 5 Calculate labor, materials, permits, and contingency
Crunch the numbers next: tally labor hours, materials, permits, and a contingency so your estimate matches the real scope.
You’ll price crew rates, grinder rental, diamond tools, sealers, and local permit fees.
Add contingency for surprises and schedule slips. Reconcile totals per square foot and compare bids before committing.
- Labor hours and rates
- Materials and equipment
- Permits and fees
- Contingency allowance
Common Cost Drivers and When Prices Increase
Expect costs to rise if your slab has cracks, moisture, or uneven areas that need repair, or if crews must strip old coverings and adhesives first.
You’ll also pay more for moisture mitigation or vapor barriers, intricate cuts, stains or patterns, and for projects in remote areas or during busy seasons.
Ask your contractor for a breakdown so you can see which factors are driving the price up.
Slab condition issues (cracks, moisture, leveling)
If your concrete slab has cracks, moisture problems, or uneven areas, those issues will drive up the cost and scope of polishing because contractors must repair and stabilize the floor before finishing.
You’ll pay more for crack repair, epoxy or grout fills, moisture mitigation systems, and grinding to level high spots.
Severe unevenness can require self-leveling compounds or slab remediation, increasing labor and materials.
Removal of existing floor coverings and adhesives
Removing existing floor coverings and old adhesives can quickly become the largest unexpected cost when polishing a concrete slab, because you’re paying for labor, disposal, and often aggressive equipment to strip tile, vinyl, carpet, or thick mastic.
Hard-to-reach areas, glued gypsum underlayment, or hazardous adhesives (like asbestos-containing mastic) raise costs further due to remediation, containment, and slower removal rates.
Moisture mitigation and vapor barriers
Because concrete can wick moisture up from the ground and trapped vapor will ruin a polished finish, you’ll often need moisture mitigation or a vapor barrier before grinding begins.
You’ll pay more if tests show high moisture, slab repairs, or epoxy/urethane coatings are required.
Accessibility, square footage, and prep complexity drive costs; thorough mitigation prevents finish failures and costly rework down the line.
Complex layouts, cuts, stains, and pattern work
When your floor plan includes irregular shapes, tight corners, or multiple changes, expect labor and time—and as a result price—to rise; intricate layouts demand more cutting, grinding, and careful sequencing to keep seams straight and finishes consistent.
Custom cuts, decorative saw lines, multiple stain colors, and inlaid patterns add setup, masking, and polishing passes. Expect higher per‑square‑foot rates and longer project timelines.
Geographic location and seasonality
After factoring in layout complexity and decorative work, you also need to evaluate where and when the job happens.
Labor, materials, and permits vary by region—urban areas and high-cost states charge more.
Seasonal demand affects scheduling and rates; winter access issues or summer peak seasons can add overtime or mobilization fees.
Plan for regional quotes and flexible timelines to avoid surprises.
Cost-Saving Strategies and Best Practices
You can balance upfront cost and long-term value by picking a polish level that fits your budget and expected lifespan.
Save on labor by bundling rooms or project phases to cut mobilization fees, and handle simple prep tasks yourself while leaving grinding and sealing to pros.
Finally, follow basic maintenance—regular dust-mopping and correct cleaners—to protect the floor and avoid costly restorations.
Choosing the right polish level for budget vs. longevity
Because budget and lifespan pull in different directions, choosing a polish level means balancing immediate costs with long-term value.
You’ll pick lower grits to save now but expect more maintenance and earlier resealing. Higher grits cost more up front, resist wear, and cut lifetime expense.
Match level to traffic, aesthetics, and replacement tolerance so you don’t overpay or underinvest.
Bundling rooms or phases to reduce mobilization fees
When you group multiple rooms or schedule work in clear phases, contractors can spread travel, setup, and equipment costs across a bigger job, cutting the per-room mobilization fee.
You’ll save more by batching adjacent areas, coordinating timelines, and avoiding repeated site visits.
Ask contractors for phased pricing, confirm minimums, and lock dates to secure lower mobilization rates and smoother project flow.
DIY prep vs. professional-only tasks (what to do yourself)
If you’re comfortable with basic prep work, handling tasks like clearing furniture, sweeping, and removing loose debris can cut your polished concrete bill without risking the finish.
You can also tape off trim, protect adjacent surfaces, and mark cracks for pros.
Leave grinding, densifying, staining, and final honing to experienced contractors—their equipment and skill prevent damage and guarantee warranty compliance.
Maintenance practices that protect long-term value
To protect your polished concrete’s long-term value, establish simple, regular maintenance habits and stick to them.
Sweep or dust-mop daily, wet-mop with pH-neutral cleaner weekly, and use mats at entries to catch grit.
Address spills immediately, avoid harsh chemicals, and apply a restorative polish or densifier per manufacturer schedule.
Inspect periodically and hire pros for deep restoration as needed.
Mistakes to Avoid When Budgeting for Polished Concrete
Don’t underestimate slab repairs or moisture mitigation—those hidden costs can blow your budget.
Don’t pick the cheapest bid without confirming the exact scope and finish level, and don’t ignore long-term maintenance and lifecycle expenses.
Also avoid over-customizing features that don’t show a clear return on investment.
Underestimating slab repairs and moisture mitigation
Because the surface looks solid, you might assume the slab needs little work, but hidden cracks, spalling, and moisture issues can quickly blow your budget.
Don’t skip a moisture test, slab scan, or core sample. You’ll face costly repairs, epoxy treatments, or vapor barriers if problems exist.
Budget for inspection and mitigation up front to avoid delays and surprise expenses during polishing.
Choosing lowest bid without verifying scope/finish level
Although a low bid can look appealing, accepting the cheapest estimate without confirming the scope and finish level often costs you more in the long run.
You’ll face surprises: unclear prep, lower grit polishing, inadequate densifier, or omitted edge work.
Insist on written specs, grind sequence, concrete repairs, sealer type, and warranty.
Compare apples to apples before signing to avoid costly rework.
Ignoring long-term maintenance and lifecycle costs
Fixing scope mistakes upfront won’t save you if you ignore what comes after installation. You’ll face recurring costs: resealing, repairs for wear or staining, and eventual repolishing.
Factor routine maintenance schedules, cleaner types, traffic patterns, and warranty limits into your budget. Ignoring lifecycle expenses understates true cost per square foot and risks unpleasant financial surprises down the line.
Over-customizing without clear ROI
Overdesign can feel tempting, but don’t let aesthetics and novelty drive decisions without clear returns; you’ll pay more up front for special aggregates, elaborate staining, intricate saw-cut patterns, or high-gloss finishes that won’t boost revenue or functionality.
Focus on targeted upgrades tied to measurable benefits—durability, maintenance savings, branding value—and get quotes showing ROI timelines so you avoid costly, decorative choices that never pay off.
How to Get Accurate Quotes What Contractors Should Provide
To get reliable pricing, make sure you ask for an itemized quote that spells out scope, target grit levels, any coatings, and a clear timeline.
Before you sign, prepare specific questions about surface prep, cleanup, change orders, and references so there are no surprises.
Also request sample contract terms and warranty details—coverage length, exclusions, and remedies—so you know what’s guaranteed.
Itemized quote checklist (scope, grit, coatings, timeline)
When you request bids, insist on an itemized quote that clearly lists the work scope, concrete grit progression, any coatings or densifiers, and a realistic timeline so you can compare offers apples-to-apples and avoid surprises.
- Exact square footage and prep tasks
- Grit sequence and expected finish level
- Products: densifier, sealer, or topical coat
- Start/completion dates and cure times
Questions to ask contractors before signing
Now that you’ve got itemized bids, make sure you ask the right questions before signing so the quote you pick really matches your needs.
Verify timeline, site prep, and cleanup responsibilities. Confirm grout or crack repairs and warranty coverage details. Ask about change order triggers and payment schedule.
- Who’ll manage the project?
- What materials will you use?
- How do you handle delays?
- What’s included in the price?
Sample contract terms and warranty items to request
Because a clear contract protects both you and the contractor, insist on written terms that spell out scope, schedule, materials, payment milestones, change-order procedures, and cleanup responsibilities.
Also request explicit warranty language covering workmanship, surface finish (including sheen and stain resistance), and how defects will be remedied, plus a timeline for warranty claims and exclusions (e.g., damage from improper maintenance or heavy equipment).
Also include inspection acceptance criteria, remedy deadlines, retainage terms, and proof of insurance and licensing so you can enforce remedies without surprises.
Comparison: Polished Concrete vs. Other Flooring (Cost and Value)
When comparing polished concrete to epoxy, you’ll see epoxy can be cheaper up front but polished concrete often outlasts it with less maintenance.
Against tile and hardwood, polished concrete usually wins on lifecycle cost because it avoids frequent replacements and refinishing.
Consider polished concrete most cost-effective for high-traffic, large-area, or low-maintenance needs.
Polished concrete vs. epoxy (initial cost, durability)
Although both polished concrete and epoxy coatings aim to create a hard, attractive floor, their upfront costs and long-term durability differ in ways that matter for your budget and use-case. You’ll pay more initially for high-gloss polish but get long-lasting wear; epoxy costs less up front, may chip, and often needs recoat.
| Feature | Polished Concrete | Epoxy |
|---|---|---|
| Initial cost | Higher | Lower |
| Durability | Very high | Moderate |
Polished concrete vs. tile and hardwood (lifecycle cost)
If you’re weighing long-term value, polished concrete often beats tile and hardwood on lifecycle cost because it combines low maintenance, exceptional durability, and minimal replacement needs.
Tile can crack and grout stains, while hardwood needs refinishing and is vulnerable to water.
You’ll spend less on cleaning, repairs, and replacements over decades with polished concrete, though initial finishing quality affects lifespan and appearance.
When polished concrete is the most cost-effective choice
Because polished concrete combines low maintenance, extreme durability, and long service life, it often becomes the most cost-effective option for high-traffic, moisture-prone, or large-area spaces where you want minimal upkeep and few replacements.
You’ll save on replacement, cleaning, and finish recoats versus tile, hardwood, or vinyl, especially in commercial, industrial, or open-plan residential settings with heavy use.
Real-World Cost Examples and Mini Case Studies
You’ll see clear, real-world examples next: a simple residential garage with a full cost breakdown and photos, a mid-range living room remodel with scope and numbers, and a commercial retail retrofit highlighting scope and ROI.
Each mini case study shows actual line-item costs and outcomes so you can compare choices.
Use these examples to gauge what a similar project might cost and what value it can deliver.
Simple residential garage scope, cost breakdown, photos
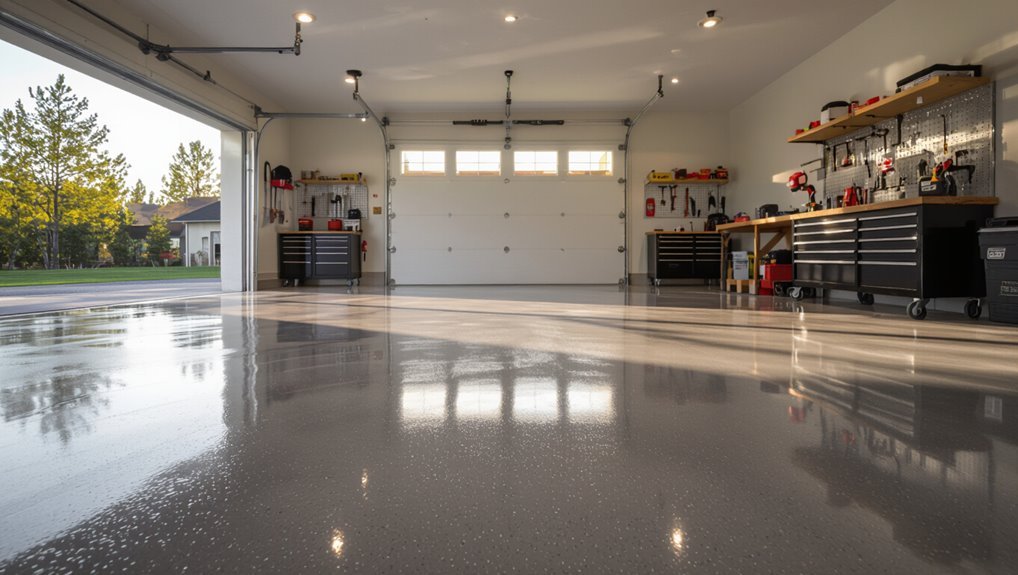
When planning a simple residential garage polish, think through the scope—cleaning and shot-blasting the slab, repairing cracks, applying densifier, and choosing either a clear or lightly pigmented sealer—so you know what drives cost and timeline.
Expect $3–$7 per sq ft for basic polish, higher for extensive repairs or pigmentation.
Typical job: 1–2 days, before/after photos for homeowner records.
Mid-range living room remodel scope and numbers
A mid-range living room polish typically covers cleaning and prepping the slab, fixing hairline cracks and spalls, applying a chemical densifier, and finishing with a durable clear or lightly pigmented sealer—expect most jobs to run $6–$12 per sq ft depending on repair extent, square footage, and finish level.
You’ll pay more for extensive patching, custom stains, or higher gloss; a 400 sq ft room often totals $2,400–$4,800.
Commercial retail retrofit scope and ROI highlights
1 common commercial retrofit scenario is converting a worn retail space into a bright, durable showroom—scope usually includes slab assessment and repair, diamond grinding to remove coatings and level changes, densifier application, optional decorative staining or saw-cut patterns, and a high-wear traffic-grade sealer; costs commonly range $8–$18 per sq ft for typical retail builds, with larger footprints lowering per-square-foot pricing and heavy repairs pushing totals higher.
You’ll recoup costs through lower maintenance, longer lifespan, and improved customer perception, often seeing payback in 3–7 years depending on traffic and sales uplift.
Frequently Asked Questions
You’ll find answers here to common cost-related questions like lifespan and whether that affects price, polishing over existing coatings or tile, and the price difference for stained versus plain polish.
I’ll also cover if sealing is needed and what sealing adds to the bill, plus how soon you can move furniture back after polishing.
If you’ve got other specific concerns, ask and I’ll address them.
How long does polished concrete last and does that affect cost?
How long polished concrete lasts depends on the level of finish, usage, and maintenance—properly installed and cared-for floors can easily endure 20–30 years or more.
Your routine maintenance and occasional resealing extend life; higher gloss and deeper polishing increase upfront cost but reduce long-term repairs.
Expect lower lifecycle cost with quality installation, while heavy traffic or neglect shortens longevity and raises replacement expenses.
Can you polish over existing concrete coatings or tile?
Can you polish over an existing coating or tile?
You can sometimes polish over thin, well-adhered coatings after mechanical profiling, but many sealers, epoxy, or thick paints prevent proper abrasion and bonding.
Tile usually needs removal; grout and adhesive interfere.
A contractor will assess adhesion, perform test grinding, and recommend removal or shot-blasting to guarantee a durable, uniform polished finish.
Is stained concrete more expensive than plain polish?
Wondering whether staining raises the price compared with a plain polish?
Staining usually adds cost because it requires extra prep, materials, and labor for dye or acid application and color sealing steps.
Expect a modest premium per square foot versus a basic polish, especially for custom hues or complex blends.
Still, staining can deliver distinctive looks that justify the extra expense to you.
Do I need to seal polished concrete and how much does sealing add?
If you choose staining for a custom look, you’ll also want to think about sealing because stains and polishes interact differently than plain concrete.
You don’t always need a topical sealer, but sealants add stain protection, spill resistance, and slight sheen control.
Expect $0.50–$2.50 per sq ft extra for common sealers; high-end or recoat services cost more.
How soon can furniture be moved back after polishing?
Once the polishing crew finishes and the surface has cured to the manufacturer’s recommended hardness, you can usually start moving furniture back in 24–72 hours—lighter items sooner, heavier pieces and rugs after the full cure window to avoid impressions or trapped moisture.
Use felt pads, lift heavy items, and avoid rolling casters for a week. Check for moisture and follow installer guidance to protect the finish.
Conclusion Making a Budget-Friendly Decision
To finalize your per-square-foot budget, start with a quick checklist of must-haves, nice-to-haves, and deal-breakers.
Compare contractor quotes, surface prep needs, and long-term maintenance costs to spot hidden expenses.
That’ll help you pick a polished concrete option that fits your wallet and goals.
Quick checklist to finalize your per-square-foot budget
Because you’ve narrowed your goals and gathered quotes, this quick checklist helps you lock in a realistic per-square-foot budget without surprises:
- Confirm scope: area, finish level, edge details.
- Include prep costs: repairs, moisture mitigation, grinding.
- Add finishes and extras: dyes, sealers, warranties.
- Factor contingencies: 5–15% for hidden issues and timeline changes.