How to Clean Paint Off the Floor Without Damaging the Surface
You can remove paint without ruining the finish by matching the method to your floor and the paint type. Start by scooping excess with a plastic scraper, test a small hidden spot, then soften latex with warm soapy water or use rubbing alcohol for vinyl and laminate. For hardwood or painted floors use mineral spirits sparingly; tile and concrete tolerate stronger cleaners or gentle abrasion. Work gently, ventilate, wear gloves, and escalate methods only if needed — keep going to find specific steps for each surface.
Quick Answer How to Remove Paint from Floors Without Damaging the Surface
You can remove paint without harming your floors by following methods tailored to each surface.
For hardwood, gently scrape and use a mild solvent; for tile, use a razor blade or scrub with soapy water; for vinyl and laminate, try rubbing alcohol or a plastic scraper.
Pick the gentlest option that works to avoid scratches or finish damage.
One-line summary for different floor types
Although techniques vary by material, here’s a quick one-line fix for each common floor type so you can remove paint without harming the surface.
- Hardwood: gently scrape and use mineral spirits sparingly—learn how to clean paint off floor finishes without sanding.
- Tile: soften with warm water and mild detergent, then lift with a plastic scraper.
- Laminate/Vinyl: rub with rubbing alcohol, then wipe clean and dry promptly.
Understanding Paint on Floors: What You’re Dealing With
Before you start scraping or scrubbing, know what kind of paint you’re facing — latex, oil-based, enamel, or acrylic — because each removes differently.
Check the floor material too — hardwood, laminate, tile, vinyl, concrete, stone, or even a painted surface — since porosity and finish change how paint bonds.
Paint either dries on the surface, soaks in, or forms a film, and that determines the safest removal method.
Types of paint (latex, oil-based, enamel, acrylic)
Paint comes in several common types—latex, oil-based, enamel, and acrylic—and knowing which one you’re dealing with makes cleanup much easier.
You’ll choose solvents and tools based on binder and drying time: water for latex/acrylic, mineral spirits or lacquer thinner for oil/enamel. Test a hidden spot first to avoid finish damage.
- Fast-drying: acrylic/latex — water-soluble when wet
- Durable: oil-based/enamel — solvent-needed
- Cured vs wet: adjust method accordingly
Common floor surfaces (hardwood, laminate, tile, vinyl, concrete, stone, painted floors)
Knowing the paint type helps, but you also need to contemplate the floor surface under the spill—how you clean hardwood differs from what you’d do on tile or concrete.
Identify finish, seams, and porousness before acting. Use gentler methods on sensitive surfaces; tougher approaches suit durable ones.
- Hardwood/laminate: gentle solvents, minimal water
- Tile/vinyl: scrubbing, stronger cleaners
- Concrete/stone/painted: abrasive or chemical options
How paint bonds to different surfaces (drying, penetration, film formation)
Because surfaces differ in porosity, texture, and finish, paint will dry and stick in distinct ways on each floor type.
You’ll see waterborne paints form a surface film, solvent-based paints penetrate porous concrete or wood, and textured or matte finishes trap droplets.
Knowing whether paint dried on the surface or soaked in lets you choose scraping, solvent softening, or gentle abrasion to remove it safely.
Safety and Preparation Before You Start
Before you start, make sure you’re wearing proper personal protective equipment and have good ventilation to avoid fumes and skin contact.
Gather the right tools and materials so you won’t need to stop mid-job.
Always test a small spot first to check for surface damage and to confirm the cleaner will work.
Personal protective equipment and ventilation
When you’re getting ready to remove paint from a floor, gear up with the right personal protective equipment and make sure the work area has good ventilation to protect your lungs and skin.
Wear appropriate PPE, open windows or run fans, and avoid confined spaces. Follow label warnings and stop if you feel unwell.
- Gloves
- Respirator or mask
- Eye protection
Tools and materials checklist
Gather the right tools and materials so you can work efficiently and safely: durable gloves, a respirator or mask rated for fumes, eye protection, drop cloths, a putty knife or paint scraper, appropriate chemical paint stripper or solvent, a stiff-bristle brush or sanding block, a bucket, rags, and a disposal container for waste.
Pick suitable products, keep them handy, and follow labels.
- Gloves, mask, goggles
- Scraper, brush, sandblock
- Solvent, rags, bucket
Test spot procedure and why it matters
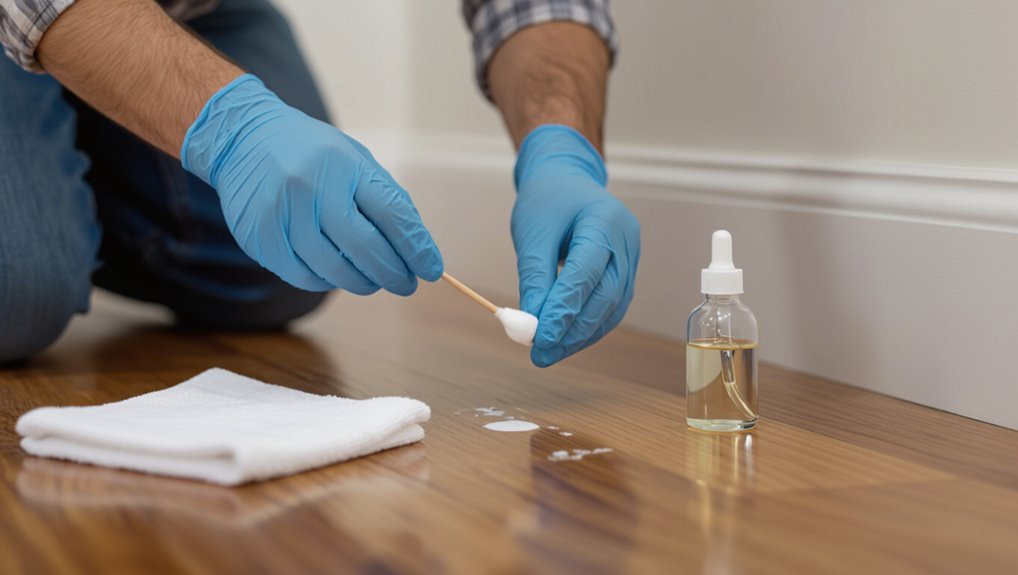
Start by choosing a small, inconspicuous area—about the size of a quarter—to try your cleaning method so you can verify compatibility and results without risking visible damage.
Apply your chosen solvent or tool, wait the recommended dwell time, then inspect for discoloration, finish dulling, or surface softening.
If it passes, proceed; if not, try a gentler option until you find a safe method.
Direct Step-by-Step Methods by Floor Type
Now you’ll get clear, step-by-step methods for each floor type so you can tackle spills quickly and safely.
You’ll learn quick fixes for wet paint, targeted techniques for dried latex or water-based paint, and the right solvents and precautions for oil-based or enamel paints.
Finally, you’ll see when to use heat or mechanical methods like a heat gun, scraper, or sanding and how to do those without damaging the floor.
Removing wet paint (fresh spills) universal quick steps
Act quickly when paint is still wet so it wipes up cleanly without staining; the exact steps depend on your floor type, but the basic approach is the same: blot excess paint, gently lift with a suitable cleaner (water for latex, mineral spirits for oil-based, or a manufacturer-recommended product for specialty floors), and finish by rinsing and drying.
- Blot, don’t rub; remove excess immediately.
- Use water or solvent on a cloth, test unseen area.
- Rinse with mild soap, pat dry to prevent residue.
Removing dried latex/water-based paint from
When removing dried latex paint, you’ll follow different step-by-step methods for each floor type, so start by identifying your surface.
I’ll cover hardwood, laminate, tile and grout, vinyl, and concrete/sealed stone with recommended products, grout-safe tips, and solvent and pressure-wash safety.
Pay attention to the precautions for delicate finishes and when to choose chemical cleaners versus mechanical removal.
Hardwood floors step-by-step, recommended products
Start by evaluating the finish on your hardwood and the paint’s thickness so you pick the gentlest effective removal method; dried latex can usually be lifted without sanding if you act carefully and use the right products.
Use gentle solvent, plastic scraper, and finish-safe cleaner; test hidden area first.
- Use warm soapy water then a plastic scraper
- Try a citrus-based remover sparingly
- Finish-safe denatured alcohol for stubborn spots
Laminate floors step-by-step, precautions
If hardwood methods weren’t right for your project, switch tactics for laminate—its thin wear layer and glued seams need gentler handling than solid wood.
Work quickly, test solvents on an inconspicuous spot, and avoid scraping hard. Use minimal moisture; blot, don’t soak. Follow manufacturer care.
- Gently soften paint with warm soapy water
- Use plastic scraper at low angle
- Finish with laminate-safe cleaner
Tile and grout step-by-step, grout-safe tips
Tile and grout demand a gentler, more targeted approach than smooth surfaces because grout is porous and can stain or erode if you use harsh tools or chemicals.
Work small, soften paint with warm soapy water, scrape gently with a plastic putty knife, then blot—don’t rub—residue away.
Seal grout after cleaning.
- Soften paint with warm soapy water
- Use plastic scraper, nylon brush
- Rinse, blot, then seal grout
Vinyl floors step-by-step, solvent safety
Grout needs a careful touch, and vinyl does too—though its smooth, nonporous surface lets you be a bit more aggressive with mechanical removal and mild solvents.
Start by scraping gently with a plastic scraper, test a small area with isopropyl alcohol, then wipe and rinse. Work patiently to avoid gouging.
- Scrape gently, avoid metal
- Spot-test isopropyl alcohol
- Rinse and dry thoroughly
Concrete and sealed stone step-by-step, pressure wash vs. chemical
Concrete and sealed stone handle dried latex paint differently, so you’ll choose either pressure washing for large exterior areas or targeted chemical removal for indoor or delicate sealed surfaces.
You’ll test a small spot, use a stiff brush and floor-safe stripper or a 1500–3000 psi washer with fan nozzle, then rinse and reseal if needed.
- Test small area first
- Mechanical then chemical
- Rinse, dry, reseal
Removing oil-based and enamel paint safe solvent use and steps
Because oil-based and enamel paints bond tightly, you’ll need the right solvent and a careful approach to remove them without damaging each floor type.
Test solvent in an inconspicuous spot, work small areas, and neutralize afterward. Use protective gear and ventilate.
Choose solvents by floor: mineral spirits for sealed wood, acetone for tile grout, commercial remover for concrete.
- Test first
- Work small
- Neutralize and rinse
Using heat and mechanical methods (heat gun, scraper, sanding) when and how
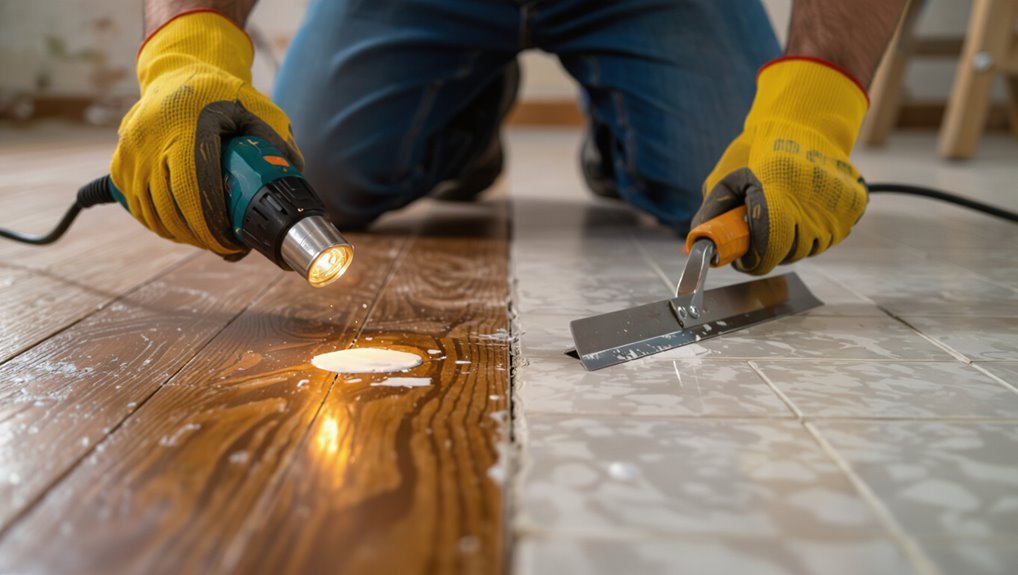
If solvents and gentle scraping haven’t budged oil-based or enamel paint, you can move on to controlled heat and mechanical methods—these work well when paints have cured or when solvent use is limited by floor finish or ventilation.
Use a heat gun at low setting, scrape with a plastic or sharp metal scraper as appropriate, and sand gently for stubborn residue; protect surrounding areas and breathe filtered air.
- Heat gun: low, even strokes
- Scraper: plastic for wood, metal for concrete
- Sanding: fine grit, minimal pressure
Comparison of Removal Methods and When to Use Each
You’ll weigh solvents, water-based cleaners, and mechanical methods to pick the safest, most effective option for your floor.
Consider how each method’s strength, drying time, and chemical risk matches your surface—hardwood, tile, or painted concrete will respond differently.
I’ll point out the main pros and cons so you can choose the right approach for the paint type and floor material.
Solvents vs. water-based cleaners vs. mechanical methods
When deciding how to remove paint from a floor, weigh three main approaches: solvents, water-based cleaners, and mechanical methods—each works best for specific paint types, surface finishes, and damage risks. You’ll choose by paint age, finish sensitivity, and ventilation. Use solvents for stubborn oil-based spots, water cleaners for fresh latex, and mechanical for thick or cured layers.
| Method | Best for | Risk |
|---|---|---|
| Solvents | Cured oil | Finish damage |
| Water-based | Fresh latex | Low |
| Mechanical | Thick paint | Surface abrasion |
Pros and cons by floor material
Different floors call for different removal tactics, so match the method to the material rather than applying a one-size-fits-all fix.
You’ll choose gentler solvents or warm water for sealed wood and laminate, plastic scrapers for tile without scratching, and chemical strippers or heat for concrete, balancing speed against finish risk.
- Sealed wood: mild solvent, minimal abrasion
- Tile: plastic tools, grout care
- Concrete: stronger methods, test first
Tools, Products, and Homemade Solutions
Now you’ll look at the specific tools, commercial products, and safe household solutions that work best for different paint types and floor surfaces.
You’ll learn which cleaners—like mineral spirits for oil-based paint or rubbing alcohol and vinegar for water-based spots—are appropriate, plus gentle options such as baking soda and dish soap.
You’ll also see which tools to use—scrapers, plastic chisels, microfiber cloths, soft brushes, and controlled heat—to remove paint without damaging the floor.
Recommended commercial products by paint type and floor type
Because paint chemistry and floor surfaces react differently, you’ll want product choices tailored to both the paint type (water-based, oil-based, enamel, or epoxy) and the flooring material (finished hardwood, laminate, tile, vinyl, or concrete).
Choose low-VOC waterborne removers for latex, solvent-based strippers for oil/enamel, and industrial epoxy solvents for cured epoxy; always spot-test first.
- Waterborne remover: gentle for finished hardwood/laminate
- Solvent stripper: for oil-based enamel on tile/vinyl
- Epoxy solvent: for concrete and heavy-duty areas
Safe household alternatives (vinegar, rubbing alcohol, baking soda, dish soap)
You can often remove fresh or small paint spots with common household items—vinegar, rubbing alcohol, baking soda, and dish soap—saving time and harsh chemicals.
Test a hidden area first. Apply gently, blotting rather than scrubbing to protect finish. Rinse and dry.
- Vinegar: softens water-based paint for wiping away
- Rubbing alcohol: lifts small drips
- Baking soda + dish soap: mild abrasive paste for stubborn spots
Tools: scrapers, plastic chisels, microfiber, soft brushes, heat sources
A small set of the right tools will make paint removal faster and safer: use thin metal scrapers for stubborn, cured spots but switch to plastic chisels or a putty knife on finished floors to avoid gouging.
Employ microfiber cloths and soft-bristled brushes to lift residue without scratching, and consider gentle heat sources (a hair dryer or heat gun on low) to soften dried paint before scraping.
- Thin metal scraper for cured paint
- Plastic chisel/putty knife for finished surfaces
- Microfiber cloths and soft brushes for cleanup
Common Mistakes That Damage Floors and How to Avoid Them
Don’t let quick fixes turn into permanent damage: over-sanding, harsh solvents, and metal scrapers can strip finishes, and too much water can warp or stain boards.
Watch for dull spots, deep scratches, raised grain, or blotchy discoloration as signs you’ve harmed the surface.
If you spot damage, stop immediately, blot excess moisture, neutralize solvents per product instructions, and consult a repair method—sanding/light refinishing or a professional—before continuing.
Over-sanding, harsh solvents, metal scrapers, excessive water examples and prevention
While trying to remove paint quickly, it’s easy to go too far with sanding, strong solvents, metal scrapers, or water—and each of those mistakes can seriously harm your floor’s finish or structure.
You should use gentle abrasives, mild removers, plastic scrapers, and controlled moisture. Prevent damage by testing, working slowly, and stopping at the first sign of finish loss.
- Test in an unseen area
- Use plastic tools
- Wipe and dry promptly
Signs you’ve damaged the surface and immediate remedies
If you notice dull spots, scratches, raised grain, or patches where the finish has thinned, you’ve likely gone too far—and you’ll want to act quickly to limit further harm.
Stop work, dry the area, and avoid solvents. Prompt remedies include light sanding, a targeted finish touch-up, or calling a pro for deep damage.
- Blend with fine grit
- Apply matching finish
- Protect and monitor
Restoration and Aftercare
After you remove the paint, check for cleaning residue and neutralize any remaining solvents so they don’t damage the floor.
If you spot stains, dull finish, or small scratches you can often repair them with targeted cleaners, touch-up kits, or a light buff.
Consider refinishing, resealing, or calling a pro when damage is widespread, deep, or you’re unsure how to restore the surface safely.
Cleaning residue and neutralizing solvents
Scrub away leftover tackiness and solvent fumes by rinsing the area with clean, warm water and a mild detergent, then blotting dry—this removes residue that can attract dirt or react with floor finishes.
Rinse thoroughly, ventilate the room, and avoid harsh chemicals. Follow with a neutralizing wipe if needed.
- Rinse until suds disappear
- Air out for solvent evaporation
- Use pH-neutral cleaner
Repairing minor surface damage (stains, finish dulling, small scratches)
Once the floor is clean and free of solvent residue, you can address minor surface damage like stains, dulled finishes, and small scratches.
Gently clean stained spots, buff dulled areas with a soft cloth and appropriate polish, and rub out fine scratches with a manufacturer-recommended repair kit. Test products in an inconspicuous spot first.
- Spot-clean stains
- Polish dulled finish
- Use scratch repair kits
When to refinish, reseal, or call a professional
If the damage goes beyond small stains or surface scratches, you’ll need to decide whether to refinish, reseal, or call a professional based on extent, location, and your comfort with the work.
Assess peel, deep gouges, or widespread finish failure; minor dulling can be resealed. If unsure or damage is structural, hire a pro.
- Refinish: deep damage
- Reseal: surface wear
- Pro: structural issues
Prevention: How to Protect Floors During Painting Projects
Before you start painting, lay down quality drop cloths and tape edges with proper masking to keep drips and splatters off the floor.
Use weighted or taped seams and plastic sheeting in high-traffic areas so coverings stay put.
If a spill happens, blot excess paint immediately and tackle the stain fast with the appropriate cleaner to prevent it from setting.
Best practices for masking, drop cloths, and protective coverings
Good surface protection starts with the right masking and drop-cloth choices so you don’t turn a small paint job into a big cleanup.
You should tape edges with low-residue painter’s tape, lay heavy canvas or rosin paper to prevent slips, and secure seams.
Remove debris first and keep coverings flat to avoid paint pooling or tracking.
- Use low-residue tape
- Heavy canvas/rosin paper
- Secure seams/edges
Quick actions to take when a spill happens
Even with tape and sturdy drop cloths in place, spills can still happen — and how you act in the first minutes determines whether the stain sets or comes right up.
Act fast: blot excess, avoid rubbing, and note paint type. Use safe cleaners for the surface and test a hidden spot first to prevent damage.
- Blot excess immediately
- Identify paint and solvent
- Test cleaner on hidden area
Troubleshooting Scenarios and Solutions
If a stain won’t budge, start with gentler methods and escalate to stronger solvents or mechanical removal as needed.
For paint lodged in grout or textured surfaces, you’ll need targeted tools and techniques to reach crevices without damaging the floor.
Decide early whether you’re tackling a spot or a large area, since that choice changes products, time, and cleanup methods.
Stubborn stains that won’t budge escalation steps
When a paint stain refuses to come up, follow a deliberate escalation: try gentler removers first, then stronger solvents, and finish with mechanical methods only if chemical options fail.
Test each step in an inconspicuous spot, work outward, and rinse thoroughly. Wear gloves and ventilate.
- Start with soap, water, and a plastic scraper
- Use rubbing alcohol or citrus solvent next
- Try denatured alcohol or acetone cautiously
Paint in grout lines or textured surfaces targeted approaches
Because grout and textured surfaces trap paint in tiny crevices, you’ll need targeted tools and patience to remove it without damaging the finish.
Use gentle solvents, multiple small passes, and avoid aggressive scrubbing. Work small, test first, and rinse well to prevent residue.
- Nylon brush or toothbrush for agitation
- Plastic scraper or dental picks for crevices
- Mild solvent on a cotton swab
Large-area removal vs. spot cleaning strategy differences
After you’ve handled stubborn grout and textured spots with targeted tools, you’ll need a different plan for large swathes of paint versus isolated drips.
You’ll choose methods based on coverage, drying time, and floor material. For big areas, work systematically; for spots, test solvents first. Prioritize gentle techniques to protect finishes.
- Systematic wet stripping for large areas
- Spot solvent and scraping
- Heat or softening for stubborn patches
Frequently Asked Questions
You probably have a few quick questions about what products and methods are safe for different floors.
We’ll cover whether paint thinner, vinegar, sanding, or other techniques will work on hardwood, tile, laminate, and grout, and when it’s smarter to call a pro.
Read on for straightforward answers and practical safety tips.
Can I use paint thinner on hardwood floors?
If the paint’s fresh and you act fast, you might think paint thinner is a quick fix—but it’s usually too harsh for hardwood finishes and can strip varnish, discolor the wood, or leave a sticky residue.
Instead, test a small hidden spot, use a safer solvent like mineral spirits sparingly on finished floors, blot gently, and follow with mild soap and water.
Will vinegar remove dried paint from tile or laminate?
Hardwood finishes can rule out harsh solvents, but tile and laminate usually tolerate gentler acids better, so vinegar often comes up as a DIY option for dried paint.
You can soften water-based paint with white vinegar warmed slightly, then scrape gently with a plastic spatula.
For stubborn spots, repeat or use a commercial remover labeled safe for tile/laminate; always test in an inconspicuous area first.
How do I remove paint from grout without discoloring it?
How can you lift paint from grout without leaving a stain?
Scrape gently with a plastic scraper, then blot softened spots with a cloth soaked in warm, soapy water.
For stubborn paint, apply a poultice of baking soda and water or use a diluted, color-safe grout cleaner; rinse thoroughly and pat dry.
Test cleaners in an inconspicuous area first.
Is it safe to sand paint off a floor myself?
You can sand paint off a floor yourself, but take precautions to protect your health and the surface.
Wear an appropriate respirator, eye protection, and gloves. Use the right grit and a random-orbit sander to avoid gouging.
Test a small area first, keep dust contained with a vacuum and plastic sheeting, and clean residues promptly to prevent staining or finish damage.
When should I hire a professional for paint removal?
When should you call in a pro? Hire a professional if paint covers large areas, involves lead-based paint, or if delicate or historic flooring might be damaged.
Call someone when DIY methods haven’t worked, when stubborn chemical or epoxy coatings resist removal, or if you lack proper tools, ventilation, or confidence.
Pros guarantee safe, efficient removal and help restore the surface correctly.
Visual Guide and Quick Reference Tools
You’ll find a simple step-by-step flowchart to help you pick the safest, fastest removal method based on paint type and how long it’s been sitting.
There’s also a compact quick-reference table that matches common floor materials to recommended methods and specific products.
Use these visuals to make decisions faster and avoid trial-and-error.
Step-by-step flowchart for choosing a removal method
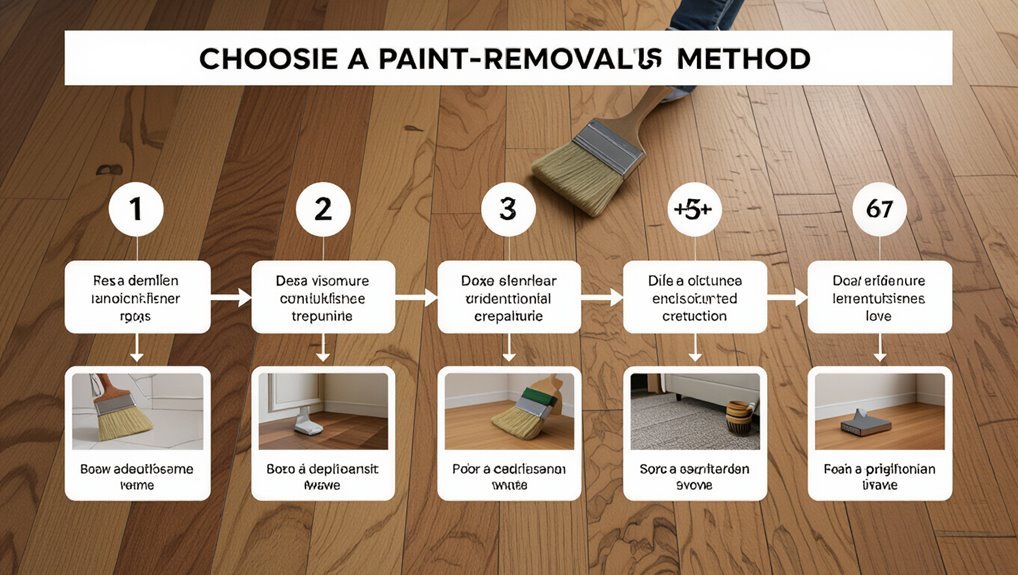
Although paint type and floor material determine much of the process, a clear step-by-step flowchart helps you pick the safest, fastest removal method.
This visual guide walks you from identifying the paint and substrate to choosing a solvent, mechanical, or heat approach, with quick-reference icons for safety, surface risk, and cleanup.
You follow branches: paint age, adhesion, finish, and floor sensitivity, then get the recommended technique and precautions.
Quick reference table: floor type vs. recommended method and products
A clear quick-reference table lets you match floor type to the safest, most effective removal method and specific products at a glance, saving time and reducing surface risk. Use this compact visual to pick the right approach quickly.
| Floor type | Method / Product |
|---|---|
| Hardwood | Dry scrape, mineral spirits |
| Laminate | Soft blade, warm soapy water |
| Tile | Plastic scraper, citrus remover |