Does Ceramic Tile Need to Be Sealed and How Often Should You Do It?
You should seal grout and any porous or unglazed ceramic tile to prevent stains and moisture; glazed tiles usually don’t need it. Test with a water drop—if it soaks in, seal. Reseal grout about every 6–12 months, unglazed tiles every 1–3 years, and epoxy grout rarely needs it. Use penetrating sealers for invisible protection, clean and dry surfaces first, and follow product instructions carefully; keep going to get practical tips, product choices, and step-by-step guidance.
Quick Answer Does Ceramic Tile Need to Be Sealed and How Often?
Yes — you usually need to seal grout and some porous ceramic tiles to protect them.
For glazed, low-porosity tiles you can seal grout only and reapply every 1–3 years; for unglazed or high-porosity tiles seal both tile and grout and check every 6–12 months.
If you’re unsure, test a small area with water to see if it beads (no seal needed) or soaks in (seal it).
Short definitive answer
While glazed ceramic tiles generally don’t need sealing, you should seal unglazed ceramic, porous grout, and any damaged glaze to protect against stains and moisture.
Reapply grout sealers every 6–12 months and consider resealing unglazed tiles every 1–3 years depending on traffic and exposure.
If you’re asking “does ceramic tile need sealed,” prioritize grout and porous surfaces, then test and schedule resealing.
One-sentence timing guideline by tile and grout type
If you want a quick rule of thumb, seal unglazed ceramic every 1–3 years, reseal porous grout every 6–12 months (or sooner in high‑traffic/wet areas), you rarely need to seal intact glazed tile except to protect damaged glaze, and always test first to confirm absorbency before setting a schedule.
| Material | Timing |
|---|---|
| Unglazed ceramic | 1–3 years |
| Porous grout | 6–12 months |
| Glazed tile | Rarely |
Basic Understanding What Sealing Means for Ceramic Tile and Grout
You’ll want to know that sealing a tile’s surface and sealing grout serve different purposes: tile sealants can protect glazes or porous tiles, while grout sealers focus on the porous joints.
Common types include penetrating (soaks in), topical (forms a surface film), and epoxy (durable, often used on grout), each working differently to block moisture, stains, and dirt.
Understanding how each sealant works helps you choose the one that best prevents water intrusion, staining, and wear.
Difference between sealing tile surface vs. sealing grout
Because tile and grout are different materials with different porosities and roles, sealing each one serves distinct purposes and requires different products and techniques.
You’ll seal grout to block moisture, stains, and mold in its porous joints, while sealing the tile surface (when needed) protects against surface staining and wear.
Apply and maintain each separately for effective, long-lasting protection.
Sealant types used for ceramic tile and grout (penetrating, topical, epoxy)
Three main sealant types—penetrating (impregnating), topical, and epoxy—cover virtually all ceramic tile and grout needs, and each works differently so you can choose what matches the surface and use.
You’ll pick based on location, wear, and appearance preferences.
- Penetrating: invisible, soaks into porous grout.
- Topical: surface film, enhances sheen.
- Epoxy: durable, fills and seals joints.
How sealants work and what they protect against
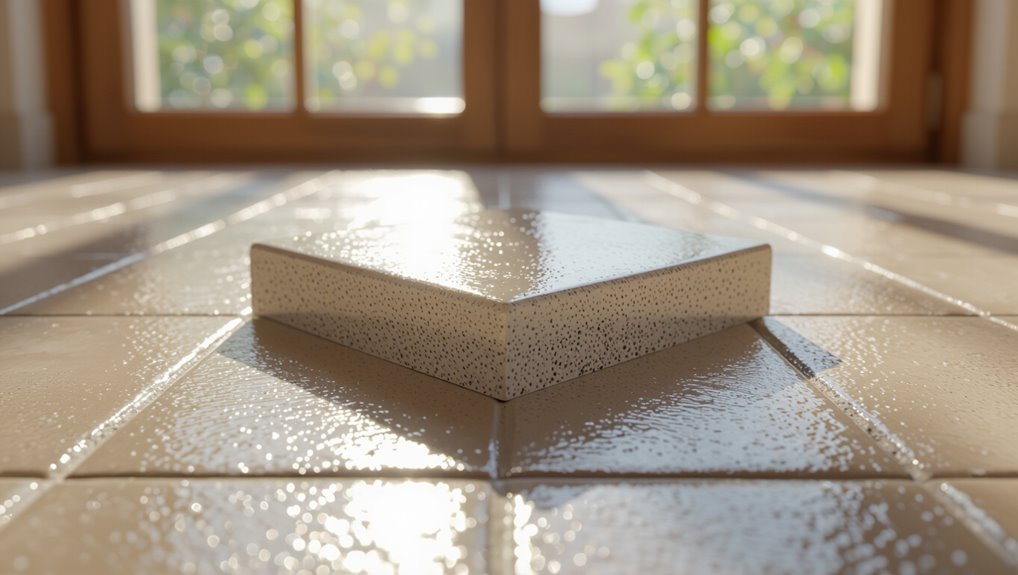
Now that you know the main sealant types, it helps to understand how they actually work and what they protect against.
Sealants either penetrate pores to repel water and oils or sit on surfaces to block stains and wear.
They protect tile from moisture, grout from discoloration and mold, and surfaces from scratches and chemical damage, extending appearance and lifespan.
When Sealing Is Necessary Factors That Determine Need
You’ll decide whether to seal based on a few key factors: how porous the tile is (unglazed soaks up more than glazed) and the grout’s composition and porosity.
Think about where the tile is—high-traffic floors, wet areas like bathrooms and kitchens, or outdoor surfaces exposed to freeze-thaw cycles need more protection.
Also consider exposure to moisture, stains, or harsh chemicals, which increases the need for sealing.
Porosity of tile and common ceramic variants (glazed vs. unglazed)
Tile porosity determines whether sealing is necessary: some ceramics absorb water and stains quickly, while others resist them.
You’ll find glazed tiles have a glassy, low-porosity surface that usually doesn’t need sealing, though edges or crackled glazes might.
Unglazed tiles—porcelain, quarry, or terracotta—are more porous and benefit from sealers to prevent staining and moisture penetration.
Test with water droplets.
Grout composition and porosity
Because grout is often more porous than the adjacent tile, its composition and porosity play a big role in whether you should seal it: cement-based grouts absorb water and stains readily, epoxy and urethane grouts resist moisture much better, and sanded versus unsanded textures change how easily contaminants penetrate.
You should inspect grout type and porosity, then choose a penetrating sealer for cementitious grout; nonporous grouts rarely need sealing.
Location and traffic: floors, walls, bathrooms, kitchens, outdoors
Grout type and porosity set the stage, but where the tile sits and how it’s used often decides whether you should seal it.
High-traffic floors, entryways, and kitchen work zones benefit from sealing to resist wear and stains.
Walls and low-traffic areas often don’t need it.
Outdoors usually requires sealer for durability.
Consider usage patterns and maintenance tolerance when deciding.
Exposure to moisture, stains, chemicals, and freeze-thaw conditions
If your installation faces frequent water, oil, chemicals, or freeze‑thaw cycles, sealing becomes a practical safeguard rather than an option.
You’ll protect porous tile and grout from absorption, stains, and chemical damage. Sealing reduces moisture penetration that causes efflorescence and freeze cracking outdoors, and it makes cleaning easier indoors.
Choose a compatible sealer and reapply based on exposure intensity and manufacturer guidance.
How Often to Seal Recommended Frequency by Situation
For unglazed tile, you’ll usually reseal every 1–3 years and watch for darkening or water beading failure as signs it’s time.
Glazed tile often doesn’t need sealing, but you can test by placing water drops to see if they absorb; seal only if they soak in.
Re-seal grout based on type—sanded and unsanded every 1–3 years, epoxy rarely—and shorten intervals in high-traffic or wet areas.
Unglazed ceramic tile: typical schedule and signs it needs resealing
Because unglazed ceramic is porous, you’ll want a regular sealing schedule based on location and wear: high-traffic floors and exterior tiles typically need resealing every 1–2 years,
bathroom walls and low-traffic indoor floors every 2–4 years, and decorative or rarely used surfaces every 4–10 years.
Check for dullness, increased staining, water darkening, or grout absorption; those signs mean it’s time to reseal.
Glazed ceramic tile: when sealing may be optional and tests to check
When glazed ceramic has a hard, intact surface, you often won’t need to seal it at all, though some situations still call for protection; check the finish and location to decide.
Tap and inspect for crazing, wear, or dull spots.
Do a water drop test: if droplets bead, sealing’s optional; if they soak in or stain, apply a penetrating sealer to high-traffic or wet areas.
Grout resealing intervals by type (sanded, unsanded, epoxy)
If grout’s exposed to traffic, moisture, or stains, you’ll need to reseal it on a predictable schedule that varies by grout type: sanded grout typically needs resealing more often than epoxy, unsanded falls somewhere in between, and epoxy usually requires little to no sealing. Check and reseal as follows:
| Grout Type | Recommended Interval |
|---|---|
| Sanded | 6–12 months |
| Unsanded | 12–24 months |
| Epoxy | 3–5 years |
| Note | Adjust for use and moisture levels |
High-traffic and high-moisture scenarios: accelerated schedule
In high-traffic or constantly wet areas you’ll need to seal grout more often to prevent staining and breakdown, so plan for a faster maintenance routine than the standard intervals.
Check grout every 3–6 months in entryways, kitchens, showers, and laundry rooms. Reseal as soon as water no longer beads.
In commercial or poolside settings consider quarterly or even monthly treatments.
How to Test If Your Ceramic Tile or Grout Needs Sealing
To check if your tile or grout needs sealing, start with a simple water-drop test: place a few drops on several areas and watch whether the water beads or soaks in within a minute.
Also look and feel for dull, discolored, or crumbly grout and any tiles that stain easily, which are signs the seal is failing.
If you’re unsure or spot widespread issues, have a professional inspection to assess porosity and recommend treatment.
Water drop / absorbency test step-by-step
Start by placing a few drops of water on several tiles and grout lines in different spots around the room; this simple absorbency test shows whether your ceramic tile or grout needs sealing.
Wait 2–5 minutes, then observe. If water beads, sealing’s fine. If it soaks in or darkens the grout/tile, mark that area.
Repeat elsewhere to map vulnerable spots before sealing.
Visual and tactile signs of failing seal
After you map spots with the water drop test, look and feel for signs the seal’s breaking down.
Check for dullness, darkening or persistent stains where water soaks in.
Run your fingers: rough, chalky grout or sticky, tacky tile points to failure.
Cracked, flaking sealer or increased grout discoloration also signals it’s time to reseal before damage worsens.
Professional inspection indicators
When a pro inspects your tile, they’ll go beyond the water-drop test and use targeted checks—like moisture meters, borescopes for voids under tile, and adhesion probes—to pinpoint where sealers are failing and where grout’s absorbed contaminants.
You can expect dye tests, pore-depth readings, and infrared scans to reveal wet spots, efflorescence, or delamination.
Use their report to prioritize resealing, repairs, or replacement.
Step-by-Step Guide How to Seal Ceramic Tile and Grout
Before you start, you’ll want to clean and repair tiles and pick a day with moderate temperature and low humidity.
Choose a sealant based on your tile and grout type and whether you need a penetrating sealer or a topical coating, then follow the manufacturer’s application steps for that product.
Apply evenly, observe specified drying and curing times, and follow post-application care to guarantee long-lasting protection.
Preparation: cleaning, repairs, and choosing the right conditions
Though it might seem simple, preparing your ceramic tile and grout properly is the step that determines how well a sealer will bond and how long it will last.
You’ll clean, repair, and pick conditions that let the sealer cure. Key tasks include:
- Remove dirt, grease, and old sealers thoroughly.
- Repair cracks and replace loose grout joints.
- Guarantee dry, 50–80°F conditions and good ventilation.
Product selection: choosing sealant by tile/grout/type of use
Product choice matters: pick a sealer that matches your tile material, grout composition, and the room’s traffic or moisture level.
For glazed tiles use a topical or water-based sealer; porous natural stone and unglazed ceramics need penetrating sealers.
Choose grout-specific formulas for cementitious joints.
For bathrooms and kitchens prioritize moisture-resistant, mildew-inhibiting products; high-traffic floors benefit from durable, wear-resistant sealers.
Application steps for penetrating sealers
When you’re ready to apply a penetrating sealer, work in small, well-ventilated sections and follow a steady sequence: clean thoroughly, let surfaces dry, test the sealer on an inconspicuous area, apply evenly with the recommended tool, wait the specified dwell time, and wipe off excess before it skins over.
Repeat for each section, allow full cure per product instructions, and avoid walking on tiles until cured.
Application steps for topical sealers and coatings
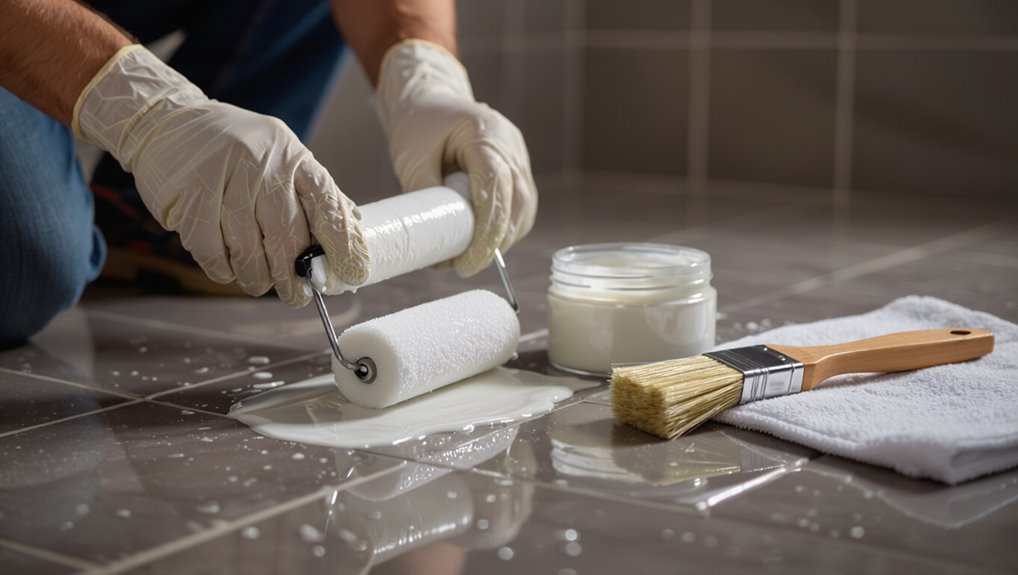
If you want a durable, visible finish on ceramic tile and grout, topical sealers and coatings are applied in a few careful steps that prioritize adhesion and even coverage.
Clean and degrease thoroughly, then tape edges.
Apply sealer with a short-nap roller or brush in thin, even coats, working in sections.
Remove drips, overlap slightly, and follow label recoat instructions.
Drying times, curing, and post-application care
Drying and curing happen in distinct stages, so don’t assume the surface is ready just because it feels dry to the touch.
Wait the manufacturer’s recommended dry time before light use—usually 1–24 hours—and full cure before heavy traffic or wet cleaning, often 24–72 hours.
Keep area ventilated, avoid humidity, and don’t use harsh cleaners for a week.
Inspect and recoat if needed.
Common Mistakes and How to Avoid Them
Don’t pick a sealer that doesn’t match your tile or grout—using the wrong product can leave stains or fail to protect.
Make certain surfaces are clean and in good repair before you seal, and apply the right amount so you don’t under- or over-seal.
Always follow the manufacturer’s instructions and guarantee proper ventilation while you work.
Using wrong sealer for tile/grout type
When you pick a sealer that doesn’t match your tile or grout, you’ll see problems fast—staining, discoloration, slippery residue, or seal failure.
Check manufacturer recommendations and match sealer type to material: penetrating sealers for porous ceramic and grout, topical or enhancing sealers for glazed tile if appropriate.
Test in an inconspicuous spot, follow cure times, and replace with the correct product if issues appear.
Sealing over dirty or damaged surfaces
Choosing the right sealer is only half the job; applying it over dirty or damaged tile and grout will still give you poor results.
You should clean thoroughly—degunk grout lines, remove efflorescence, and let surfaces dry.
Repair cracked grout or chipped tiles before sealing.
If you skip prep, the sealer won’t adhere properly, trapping contaminants and causing uneven protection and premature failure.
Applying too much or too little sealer
Anyone can overdo or skimp on sealer, and both mistakes hurt protection and appearance—too little leaves grout and pores exposed, while too much creates a hazy, sticky film that never cures properly.
You should apply thin, even coats with a quality applicator, wait recommended dry times, and wipe excess promptly.
Test a small area first to guarantee coverage without buildup.
Ignoring manufacturer instructions and ventilation
If you skip the manufacturer’s instructions or skimp on ventilation, you risk poor adhesion, shortened warranty coverage, and harmful fumes in your home.
Follow product directions for temperature, cure times, and compatible substrates. Use fans, open windows, or a respirator when recommended.
Ignoring guidelines leads to costly repairs, voided warranties, and health hazards—so read labels and ventilate every time.
Maintenance, Cleaning, and Re-Sealing Best Practices
You’ll keep your sealant working longest by sticking to simple daily wipes and a weekly gentle clean that won’t strip protection.
Use pH-neutral cleaners and soft tools, avoid harsh acids or abrasive pads, and spot-seal or touch up grout as soon as you see wear.
Call a pro for full resealing or grout restoration when water no longer beads or stains return after routine care.
Daily and weekly cleaning routines that preserve seals
Daily and weekly cleaning routines keep your grout and sealant intact and extend the time between re-seals. You should remove spills quickly, sweep daily, and mop weekly with gentle motion to avoid abrading seals.
- Wipe up acidic spills immediately to prevent dulling.
- Sweep or vacuum to remove grit that wears seals.
- Mop using minimal water and soft tools; let dry fully.
Recommended cleaning products and those to avoid
When choosing cleaners, pick pH-neutral, non-abrasive products formulated for ceramic tile and grout so you won’t strip the sealer or dull the finish.
Use mild dish soap solutions or commercial tile cleaners labeled safe for sealed surfaces.
Avoid bleach, ammonia, acidic cleaners (vinegar, lemon), scouring powders, and abrasive pads—they can etch tile and degrade sealers, shortening protection and causing staining.
How to maintain sealed grout and touch-up techniques
Keeping sealed grout in top condition means regular gentle care and quick touch-ups to stop small issues from becoming big ones.
Wipe spills promptly, mop with pH-neutral cleaner, and avoid abrasive tools.
Inspect grout periodically; reapply a compatible sealer to small worn spots using a brush or applicator.
For minor stains, use a gentle grout cleaner and rinse thoroughly before resealing.
When to call a professional for resealing or restoration
If you’re unsure whether a project is beyond routine upkeep, call a professional when grout is crumbling, large areas of sealer are failing, tiles are loose or cracked, or stains and efflorescence won’t respond to cleaning and spot resealing.
You should also hire pros for extensive color-matching, substrate repairs, or historic tile restoration; they’ll assess moisture issues, recommend appropriate sealers, and guarantee lasting results.
Cost, Time and DIY vs Professional Considerations
You’ll typically spend a modest amount on DIY sealing—expect materials and sealant to run a few dozen to a couple hundred dollars and a day or two for prep and application on most small to medium jobs.
Hire a pro when work is complex, covers large areas, or involves restoration, since they save time, guarantee even coverage, and can handle repairs you might miss.
Also weigh warranties and long-term value: pro-installed systems often include guarantees that can extend seal life and protect your investment.
Typical cost ranges and time estimates for DIY sealing
Typical DIY sealing projects for ceramic tile usually cost between $30 and $200 in materials, depending on tile area and sealer type, and take a few hours to a full weekend to complete. You’ll buy sealer, applicators, and cleaners; prep, apply, and cure. Plan labor and ventilation. Compare products for coverage and dry times.
| Item | Typical cost/time |
|---|---|
| Sealer | $15–$80 |
| Tools | $10–$40 |
| Time | 2–16 hours |
When hiring a pro makes sense (complex jobs, large areas, restoration)
You’ve seen how a DIY sealing job can be affordable and quick for small, straightforward areas, but some situations call for a professional.
Hire pros when grout is crumbling, tiles are uneven, or coatings require stripping and reapplication. They finish large areas faster, use commercial-grade sealers for durability, and handle restoration challenges safely.
Compare quotes, timelines, and references before committing.
Warranty and long-term value considerations
When weighing warranty terms and long-term value, consider both upfront cost and ongoing performance: cheaper DIY sealers save money now but often carry limited or no warranties, while professional work and commercial-grade products usually include guarantees that protect you against premature wear or failure.
Also factor expected lifespan, maintenance frequency, and transferable warranties—investing more upfront can reduce total cost and hassle over time.
Environmental and Health Considerations
When choosing a sealer, you’ll want to evaluate VOC levels and whether a solvent- or water-based product is best for your space.
Use safe application practices—ventilate well, wear a mask and gloves—and follow local rules for disposal of rags and leftover product.
Also look for eco-friendly, low-VOC or certified sealers to reduce health risks and environmental impact.
VOCs, solvent vs. water-based sealers
Curious about how sealers affect indoor air and health?
You’ll notice solvent-based sealers release higher VOCs, causing stronger odors and potential short-term irritation.
Water-based sealers emit far fewer VOCs, dry faster, and’re generally safer for occupied spaces.
Choose low-VOC or certified products if sensitivity’s a concern, and always check product labels for VOC content and indoor air quality ratings.
Safe application practices and disposal
Anyone applying tile sealer should protect themselves and the environment by working in well-ventilated areas, wearing appropriate PPE (gloves, goggles, and a respirator if using solvent-based products), and following the manufacturer’s instructions for application and drying times.
Dispose of unused sealer and contaminated rags per local hazardous-waste rules, never pour leftovers down drains, and store containers sealed away from heat and children.
Eco-friendly sealer options
Although solvent-based sealers often promise fast results, you can choose eco-friendly alternatives that cut VOC emissions and reduce health risks without sacrificing protection.
Look for water-based, low-VOC, or plant-derived sealers certified by reputable ecolabels. They protect grout and tile, dry quickly, and minimize odors.
You’ll also reduce indoor air pollution and disposal hazards while maintaining effective, long-lasting sealing performance.
FAQs
You probably have a few practical questions about sealing—like whether glazed ceramic can be left unsealed, whether sealers change appearance or slip resistance, and how long protection lasts.
You’ll also want to know if you can seal over an old sealer or must strip it first, and whether porcelain or natural stone need sealing instead of ceramic.
Below are clear answers to each concern to help you decide what to do next.
Can glazed ceramic tile be left unsealed forever?
Curious whether glazed ceramic tile needs sealing at all? You can often leave glazed ceramic unsealed because its fired glass-like surface resists stains and moisture.
However, grout and any unglazed edges remain vulnerable, and high-traffic or wet areas increase risk.
If you prefer minimal upkeep and live in low-traffic spaces, unsealed glazed tile can be acceptable with regular cleaning and grout care.
Will sealing change the look or slip resistance of my tile?
Wondering if a sealer will alter your tile’s appearance or make it slipperier?
Most penetrating sealers are invisible and won’t change color or sheen; topical sealers can add gloss or a slight wet look.
Properly applied, sealers generally don’t increase slipperiness; some can even improve traction.
Always test a small area and choose a product labeled for floor safety if slip resistance matters.
How long does tile/grout sealant last once applied?
Although sealant longevity varies, most penetrating grout sealers last about 1–5 years and topical tile sealers about 2–10 years depending on product type, traffic, and maintenance.
You’ll see faster wear in high-traffic, wet, or cleaned-with-harsh-chemicals areas.
Check water beading and perform spot tests yearly. Reapply when absorption increases or protection feels reduced to maintain stain resistance and ease of cleaning.
Can I seal over old sealer or do I need to strip it first?
Can you seal over old sealer? You can sometimes recoat if the existing sealer is intact, clean, and bonding well.
Test with water: if it beads, the sealer still works. If it soaks in, peels, or is discolored, strip it first for proper adhesion.
Use the manufacturer’s guidance and a compatibility test before applying a new sealer.
Is sealing necessary for porcelain or natural stone instead of ceramic?
How do you know whether porcelain or natural stone needs sealing?
Porcelain is dense and usually doesn’t need sealer, though unglazed or textured porcelain might benefit.
Natural stone—like marble, travertine, or limestone—absorbs moisture and typically requires a penetrating sealer.
Test with water: if it darkens, seal.
Reseal natural stone periodically; porcelain only if staining appears or manufacturer recommends.