How to Remove Glued Laminate Flooring Without Destroying the Subfloor
You can remove glued laminate without wrecking the subfloor if you work slowly, use the right tools, and match methods to the adhesive and substrate. Start by removing trim, loosen planks at seams with a pry bar, heat, or scoring knife, then lift carefully to avoid gouges. Scrape remaining glue mechanically or with tested solvents, sand or patch minor damage, and always use PPE. Keep going below for step-by-step techniques, safety tips, and when to call a pro.
Quick Answer Can You Remove Glued Laminate Flooring Without Damaging the Subfloor?
Yes — you can often remove glued laminate without wrecking the subfloor, but expect some stubborn adhesive and possible surface dings that need repair.
It’ll take several hours to a couple of days depending on room size, and you’ll need basic tools like a scraper, heat gun, pry bar, adhesive remover, and moderate DIY skill.
If you’re unsure or the subfloor is valuable, consider hiring a pro to avoid costly mistakes.
Short summary of feasibility and expected outcomes
Although you can often remove glued laminate without destroying the subfloor, it takes care, the right tools, and realistic expectations about some surface damage.
You can usually salvage most of the subfloor if you follow guidance on how to remove glued laminate flooring, work slowly, and accept minor sanding or patching.
Expect some adhesive residue, occasional gouges, and repair work before refinishing.
Time, tools, and skill level required
Expect the job to take anywhere from a full weekend to several days depending on room size, adhesive type, and your pace—you’ll need patience, basic carpentry skills, and a handful of power and hand tools to remove glued laminate without seriously damaging the subfloor.
Bring a pry bar, oscillating multi-tool, heat gun, floor scraper, hammer, chisels, safety gear, and adhesive remover; work methodically and don’t rush.
Basic Understanding What Is Glued Laminate Flooring and Why Removal Can Damage the Subfloor
Glued laminate flooring comes in variations — click-lock panels that were later glued, tongue-and-groove laminate, and different adhesive systems like pressure-sensitive or construction adhesives — and you’ll want to know which you’re facing.
Subfloors such as plywood, OSB, or concrete bond differently to each adhesive, so removing the laminate can pull off thin layers of wood or leave stubborn residue on concrete.
Look for signs like visible trowel lines, cured glue patches, or absence of fasteners to tell glued installations from mechanically fastened ones.
Types of glued laminate and adhesive systems
Some laminate floors stick down with different layers and adhesives, and knowing which type you’re dealing with helps you avoid costly subfloor damage during removal.
You’ll encounter varied face layers, glued-down planks, vinyl-laminate hybrids, pressure-sensitive adhesives, and heavy epoxy-like glues.
Identify adhesion type before prying, heating, or using solvents to minimize tearing or gouging.
- layered click with glue
- full-spread adhesive
- pressure-sensitive tape
- epoxy/urethane
- peel-and-stick samples
Common subfloor materials (plywood, OSB, concrete) and how adhesives bond to them
Knowing the adhesive type helps you decide how aggressive to be, but the subfloor itself plays an equally important role in how well that glue bonds and how much damage removal can cause.
You’ll see differences: plywood holds adhesives well but peels in sheets; OSB’s texture grabs glue and can splinter; concrete absorbs moisture, creating very strong mechanical bonds.
- Plywood: strong, layered grip
- OSB: rough, splinter-prone
- Concrete: porous, absorbs adhesive
- Moisture effect: weakens or strengthens bond
- Surface finish: smooth vs. rough changes adhesion
Signs of adhesive vs. mechanically fastened flooring
You can usually tell whether laminate is glued down or mechanically fastened by how it reacts when you probe an edge or remove a junction piece.
If planks lift easily with intact tongues, it’s click‑locked or nailed. If residue stays on the subfloor, or planks fracture and pull up chunks, adhesive’s present.
Look for tacky glue lines, hardened beads, or screw/nail heads.
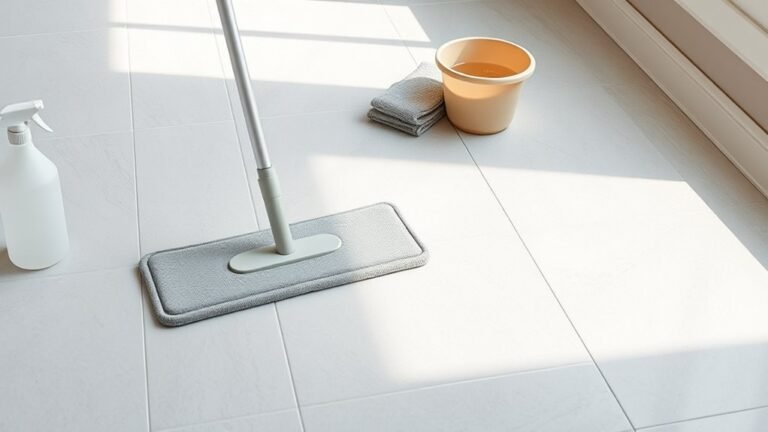
Safety, Preparation, and Tools Checklist
Before you start, make sure you’ve got the right personal protective equipment and a clear plan to keep the worksite safe.
Gather both manual and powered tools plus consumables so you won’t stop mid-job, and note which tasks each tool is for.
Clear and document the room, then test for hazards like moisture, asbestos, and lead before you begin.
Personal protective equipment and worksite safety
Because you’ll be working with sharp tools, heavy materials, and potentially toxic adhesives, gear up with the right personal protective equipment and set clear safety boundaries on the worksite.
Wear proper PPE, keep exits clear, and mark hazardous zones.
Follow these essentials:
- Gloves (cut-resistant)
- Safety glasses or face shield
- N95 or respirator
- Knee pads and sturdy boots
- First-aid kit nearby
Tools and materials you’ll need (manual and powered options)
With your PPE on and the worksite secured, turn attention to the tools and materials that’ll make the job efficient and safe.
You’ll need both manual and powered options to loosen adhesive, lift planks, and protect the subfloor. Choose quality blades, pry tools, and dust control gear.
- Pry bar and floor scraper
- Oscillating tool with scraper blade
- Heat gun or infrared heater
- Floor adhesive remover
- Shop vacuum with HEPA filter
Preparing the room: clearing, documenting, and testing for hazards (moisture, asbestos, lead)
Start by clearing the room completely and documenting existing conditions so you can work safely and restore or claim damage later.
Remove furniture and trim baseboards, take photos of floor junctions and any visible stains or repairs, and mark areas that look damp or cracked.
Test moisture with a meter, and screen for asbestos or lead using DIY kits or certified pros.
Ventilate and wear PPE.
Step-by-Step Removal Process
Start by evaluating the floor—find seams, changeover strips, and the best starting point so you can plan each move.
Remove trim and baseboards carefully, then loosen planks at seams and edges with a pry bar, heat gun, or scoring knife.
Lift planks using proper leverage and teamwork, and finish by removing remaining adhesive with mechanical scraping or a chemical remover as needed.
Step 1 Assess and plan: identify seams, transition strips, and starting point
Preparation matters: before you pry up any boards, walk the room to locate seams, threshold strips, and the best place to begin so you can remove panels without breaking them or damaging the subfloor.
Plan access, note glued edges, and pick a corner or seam with least adhesive. Carry tools, protect nearby surfaces, and set disposal area.
- seams location
- adhesive hotspots
- weakest panel edge
- tool staging
- safe exit path
Step 2 Remove trim, baseboards, and transition pieces without damaging walls
Before you pry up boards, remove trim, baseboards, and connector pieces so you can lift flooring without tearing wall paint or splintering molding.
Work gently: score caulk, find nails, and use a pry bar with a shim to protect surfaces. Keep trim intact for reinstallation.
- Score caulk lines first
- Protect wall with a shim
- Pry near studs
- Remove nails carefully
- Label pieces
Step 3 Loosen planks at seams and edges (manual pry, heat gun, scoring)
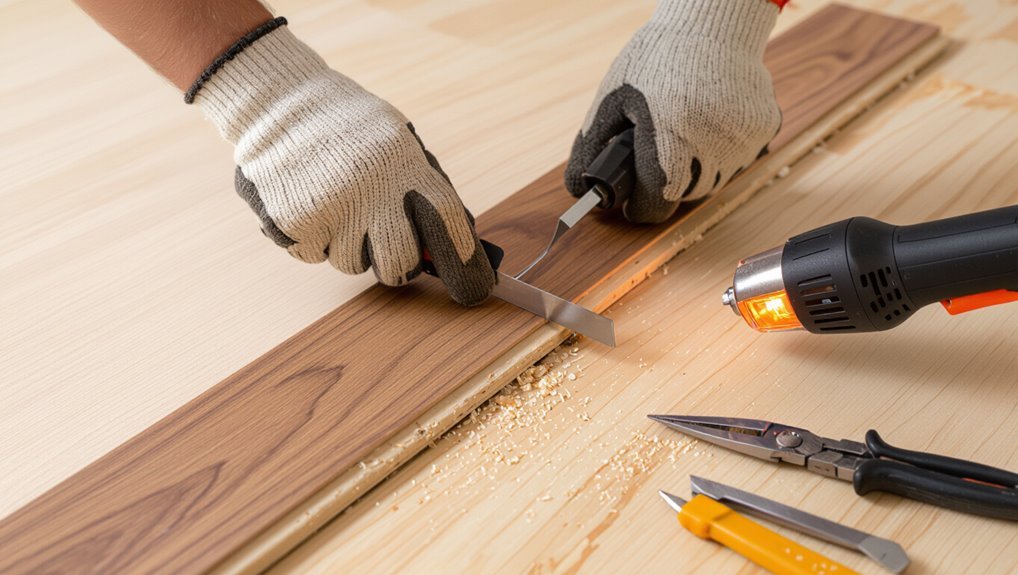
Loosen the glued planks by working the seams and edges methodically: pry gently where the boards meet, apply heat to soften adhesive on stubborn sections, and score the surface to break the bond if necessary.
Work slowly to avoid gouging the subfloor and keep tools controlled.
- Use a thin pry bar
- Heat in small areas
- Score across seams
- Protect adjacent flooring
- Wear gloves and eye protection
Step 4 Lift planks safely (pulling technique, leverage, and teamwork)
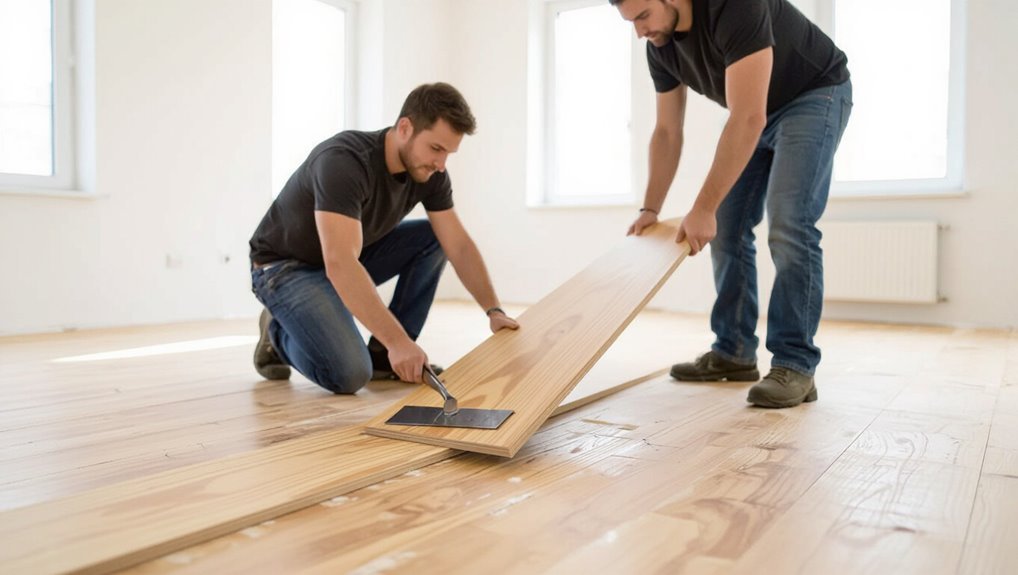
Start by pulling a corner of a loosened plank upward with a firm, steady motion—don’t yank—to lift it away from the subfloor; use your pry bar as a fulcrum close to the plank’s edge to increase leverage and have a partner support the opposite end for longer boards.
Work in short sections, keep the blade low to avoid gouging, and hand off heavy pieces to prevent strain.
Step 5 Remove remaining adhesive (mechanical scraping vs. chemical adhesive removers)
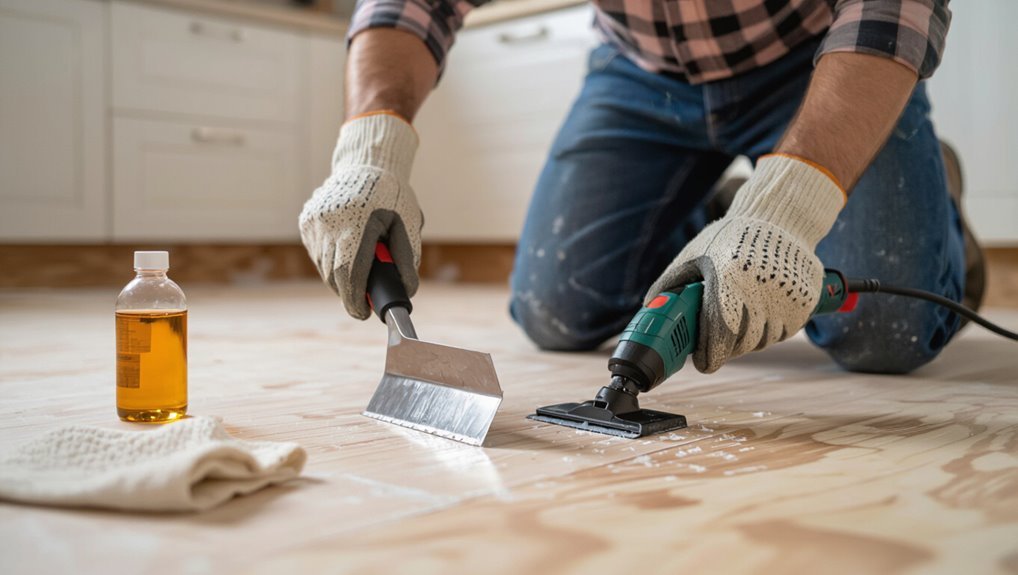
You’ll need to get the old adhesive off the subfloor before installing new flooring—choose between mechanical scraping for speed and control or chemical adhesive removers for stubborn residue.
Plan your approach based on the amount of glue, the subfloor type, and ventilation. Use tools and safety gear, test a small area, and work systematically.
- Scraper or floor stripper
- Heat gun option
- Solvent type
- PPE (gloves, mask)
- Ventilation plan
Step 6 Final subfloor cleaning and inspection (sanding, patching, leveling)
Inspect the subfloor carefully and clean any remaining dust, debris, or solvent residue so you can accurately assess sanding, patching, and leveling needs.
You’ll sand high spots, grind stubborn adhesive, fill gaps or gouges with appropriate patch, and check flatness with a straightedge.
Prep for underlayment or finish flooring only after moisture and level meet manufacturer specs.
- Sand high spots
- Remove adhesive
- Patch holes/gouges
- Check levelness
- Verify moisture
Techniques by Subfloor Type
Next you’ll look at techniques tailored to the subfloor you’re working on so you can choose the safest and most effective approach.
For plywood or OSB that means careful prying, adhesive scraping, and watching for weakened boards, while concrete often needs grinding, chemical adhesive removers, and moisture-barrier checks.
If there’s existing vinyl or other thin substrate, you’ll evaluate delamination and decide whether to salvage or strip it down to the structural subfloor.
Plywood and OSB best methods and precautions
When you’re dealing with glued laminate over plywood or OSB, begin by identifying which subfloor you have since each reacts differently to moisture, adhesives, and removal tools.
Work gently: pry, soften adhesive with heat or solvent, and avoid aggressive grinding.
Check for delamination or rot and replace damaged panels promptly.
- Use flat pry bars
- Test solvents first
- Apply heat cautiously
- Protect edges
- Replace compromised boards
Concrete adhesive removal, grinding, and moisture barrier considerations
Start by evaluating the concrete surface and the type of adhesive you’re up against, since removal approaches and moisture-control needs vary with different glues and slab conditions.
You’ll grind or use chemical strippers, manage dust, and test for moisture; then install an appropriate vapor barrier or primer before new flooring.
- Identify adhesive chemistry
- Test slab moisture
- Choose grinding grit
- Control dust/HEPA
- Apply compatible barrier
Existing vinyl or thin substrates delamination and salvage options
Although delamination can look like a total loss, you can often salvage sections of existing vinyl or thin substrates by evaluating bond integrity and matching your repair to the subfloor type.
Inspect, peel loose areas, and test adhesion; keep stable patches. When removal’s needed, protect the subfloor and prep for patching or new underlayment.
- Assess adhesion
- Retain stable vinyl
- Use compatible adhesives
- Patch damaged areas
- Prep for new flooring
Tools and Methods Compared
You’ll weigh manual tools against power tools to see which gives better control, speed, and effort for your subfloor.
Compare heat guns with infrared heaters for how evenly and safely they soften adhesive.
Then look at chemical removers versus mechanical grinding to balance effectiveness, surface impact, and safety precautions.
Manual tools vs. power tools
Deciding between manual tools and power tools comes down to your budget, the size of the job, and how quickly you want the laminate and adhesive removed. You’ll choose pry bars and scrapers for control and low cost, or oscillating tools and floor scrapers for speed but higher risk to the subfloor.
| Tool Type | Speed | Subfloor Risk |
|---|---|---|
| Manual | Low | Low |
| Power | High | Moderate |
Heat guns vs. infrared heaters for adhesive softening
When you need to soften adhesive for glued laminate, heat guns and infrared heaters both work but in different ways: heat guns concentrate hot air on a small area for quick, localized softening, while infrared heaters deliver radiant heat over a broader surface for gentler, more uniform warming.
You’ll choose based on speed, control, and subfloor sensitivity.
- Heat gun: fast, focused
- Infrared: even, less surface damage
- Control: adjustable
- Safety: watch temperatures
- Coverage: spot vs. area
Chemical adhesive removers vs. mechanical grinding pros, cons, and safety
Although chemical adhesive removers can dissolve old glue without heavy scraping, mechanical grinding gives you faster, more complete removal on large, stubborn areas—each method has trade-offs in convenience, effectiveness, and safety you should weigh before starting. You should:
| Method | Pros | Cons |
|---|---|---|
| Chemical | Less dust, precise | Fumes, longer dwell |
| Grinding | Fast, thorough | Dust, risk to subfloor |
Common Problems and How to Fix Them
As you strip glued laminate, you’ll often run into gouges and scratches in the plywood that need patching, veneer overlays, or sanding to restore a smooth surface.
You may also face deep adhesive stains and residue that require solvents, mechanical removal, and sealing to prevent bleed-through.
If you find moisture-damaged subfloor, you’ll need to assess rot, replace affected sections, and dry and treat the area before installing new flooring.
Gouges and scratches in plywood repair methods (patching, veneer, sanding)
Start by evaluating the damage: small scratches, shallow gouges, and deep cuts each need different treatments to restore plywood after removing glued laminate.
You’ll patch small holes with wood filler, sand lightly, veneer larger gouges, and replace boards for severe cuts. Seal repaired areas and sand smooth for finish.
- Assess depth
- Choose filler or veneer
- Clamp patches
- Sand progressively
- Seal repaired plywood
Deep adhesive stains and residue removal and sealing strategies
When you pull up glued laminate, stubborn adhesive can soak into plywood and leave dark stains and tacky residue that simple scraping won’t fix.
So you’ll need a targeted approach to remove it and then seal the surface to prevent future bleed-through.
Use solvents carefully, sand selectively, test primers, and seal with an appropriate blocking primer.
- Solvent softening
- Targeted sanding
- Stain-blocking primer
- Shellac or oil-based sealer
- Light finish coat
Moisture-damaged subfloor discovered during removal assessment and remediation steps
If you find moisture damage under the glued laminate, act quickly to assess the extent and stop ongoing water intrusion before you repair the subfloor.
Inspect for rot, mold, and soft spots; dry thoroughly with fans and dehumidifiers. Remove and replace compromised panels, treat remaining wood with a mold inhibitor, and guarantee subfloor is level before reinstallation.
- Isolate moisture source
- Dry completely
- Remove rotten sections
- Treat mold
- Level and replace
Mistakes to Avoid
Don’t rush the job or use brute force, because you’ll damage the floor or subfloor.
Don’t overuse chemical solvents without proper ventilation, and don’t grind aggressively on a thin subfloor.
And always test for hazardous materials like asbestos or lead before you start removing anything.
Rushing and using excessive force
Although it’s tempting to hurry and yank up stubborn planks, rushing and using excessive force will damage the subfloor, break boards, and make the whole job take longer to fix.
Take your time, score adhesive seams, lift slowly with proper tools, and pry evenly. Work in small sections, inspect as you go, and stop if you feel resistance—force usually means you’re doing it wrong.
Overusing chemical solvents without ventilation
After you’ve slowed down and worked methodically with pry bars and scoring tools, don’t switch to solvents as a quick fix without thinking about ventilation and exposure.
You’ll inhale fumes, damage finishes, and create cleanup problems if you overuse chemicals. Open windows, run fans, wear a respirator rated for organic vapors, and apply solvents sparingly.
Test a small area first to limit risk.
Grinding too aggressively on thin subfloor
When you grind too hard on a thin subfloor, you can quickly eat through the plywood or OSB and create low spots that weaken the whole floor assembly.
You’ll want to use light passes, check thickness often, and back off near joints or seams.
Use a fine-grit disc, keep the sander moving, and stop at the first sign of delamination or softening to preserve structural integrity.
Failing to test for hazardous materials before removal
Don’t skip testing for asbestos, lead, or other hazardous materials before you start prying up glued laminate—those contaminants can lurk in adhesives, underlayment, or old floor layers and put you and anyone in the home at risk.
Arrange professional testing if the build date or materials suggest risk, wear proper PPE, and stop work immediately if results are positive to prevent exposure and costly remediation.
Prevention and Best Practices for Future Flooring Installations
When you install new flooring, pick systems that can be removed later like floating floors or products designed for temporary adhesion.
Use release layers or a proper underlayment and choose adhesives that allow future removal to protect the subfloor.
Also document the installation—photos, adhesive types, and layout—so future removal goes smoothly.
Choosing removable or floating flooring systems
Although you might be tempted to pick the cheapest option, choosing a floating or removable flooring system from the start makes future repairs and updates far easier.
You’ll save time and protect the subfloor by opting for click-lock, tongue-and-groove, or loose-lay products. They let you replace damaged sections without prying up glued material, cutting labor and disposal costs while preserving substrate integrity.
Using release layers or underlayment to protect subfloor
1 simple layer installed beneath glued laminate can save you hours of demolition later: a proper release layer or underlayment prevents adhesive from bonding to the subfloor, cushions the flooring, and makes future removal or repairs far easier.
You’ll choose a thin, durable membrane—rubber, foam, or peel‑and‑stick—lay it flat, seal seams, and anchor edges so panels lift cleanly without gouging the subfloor.
Proper adhesive selection for possible future removal
After laying a release layer, pick an adhesive that lets you lift boards later without wrecking the subfloor.
Choose low-tack, water-based or pressure-sensitive adhesives designed for temporary bonds. Test on scrap and check manufacturer removal guidelines.
Avoid epoxies and permanent contact cements. Use minimal adhesive, follow recommended open time, and keep records of product and batch for easier future removal.
Documenting installation for later removal
When you document the installation as you work, you’ll make future removal far quicker and less risky for the subfloor; note the adhesive type, batch number, application pattern, open/working time, and any release layers used.
Photograph each step, label panels and seams, sketch adhesive bead locations, and record curing conditions.
Store this file with warranty and product data so you or contractors can plan removal safely.
Cost, Time, and When to Hire a Pro
Expect DIY removal to take a weekend or more depending on room size and how stubborn the adhesive is, while pros can often finish in a day or two.
Costs vary with labor, tool rental, disposal fees, and any subfloor repairs you need.
If the job is large, the adhesive is extensive, or you lack tools/experience, you should call a flooring contractor.
Typical time estimates for DIY vs. professional removal
If you’re tackling glued laminate removal yourself, plan for a slower pace than a pro and for the job to take longer than you might think.
Expect a small room (100–200 sq ft) to take a weekend solo, larger areas several days.
Pros can finish the same space in a few hours to a day.
Factor in cleanup and inspections when scheduling.
Cost factors: labor, tool rental, disposal, repairs
Because removal costs add up from several distinct sources, you should budget for labor, tool rental, disposal, and any repairs up front. Estimate hourly labor, rental days for tools, disposal fees per load, and patching or leveling costs. Compare DIY vs. paid help to decide.
| Item | Typical Range | Notes |
|---|---|---|
| Labor | $50–$150/hr | Varies by region |
| Tool rental | $20–$80/day | Demolition tools |
| Disposal | $50–$300 | Haul or skip |
| Repairs | $100–$1,000+ | Patching, leveling |
When to call a flooring contractor or specialist
Those cost line items help you compare DIY vs. paid work, but there are clear situations where hiring a flooring contractor or specialist will save time, money, and headaches.
Call a pro if the subfloor’s damaged, uneven, or has moisture issues, or if the job’s large or your schedule’s tight.
Pros handle permits, disposal, and guarantees, reducing risk and unexpected costs.
FAQ
You’ll probably have a few quick questions before you start, like whether glued laminate will ruin your subfloor or if the planks can be reused.
You’ll also want to know if adhesive removers are safe on concrete, how to test for asbestos or lead, and the best way to prep the subfloor for new flooring.
I’ll answer each so you can plan the safest, most cost-effective removal.
Will glued laminate always ruin my subfloor?
Will glued laminate always ruin your subfloor? Not necessarily. If adhesive was light and the subfloor is sturdy, you can often soften glue with heat or solvents and lift planks without major damage.
Older installations or strong adhesives increase risk of tearing or gouging. Work slowly, use proper tools, and be prepared to sand or patch small imperfections to restore a smooth surface.
Can I reuse the removed laminate planks?
Can you reuse the laminate planks you pry up? You might, but it depends on damage and locking systems.
Inspect each plank for adhesive residue, broken tongues, delamination, or deep scratches. Clean and test-fit suspect pieces in a small area before committing.
Plan to reserve only flawless or easily repaired boards for reinstallation; otherwise recycle or dispose of compromised planks.
Are adhesive removers safe for concrete subfloors?
Wondering whether adhesive removers will hurt your concrete subfloor?
You can safely use many solvent or citrus-based removers if you choose products labeled for concrete, follow manufacturer directions, ventilate, and test a small area first.
Avoid harsh acids or oils that can penetrate or stain.
After use, neutralize and rinse thoroughly, then let the slab dry completely before any new flooring.
How do I test for asbestos or lead before starting?
After removing adhesive, you should check for hazardous materials before doing more demo or installing new flooring.
Hire a certified asbestos/lead inspector or buy an EPA-recognized DIY kit. Have suspect materials sampled and lab-tested; don’t disturb friable materials if you suspect asbestos.
Follow test results: use licensed abatement for positives. Keep records and notify contractors before work begins.
What is the best way to prepare the subfloor for new flooring after removal?
Once you’ve removed the old laminate and adhesive, get the subfloor clean, flat, and dry so your new flooring performs properly; sweep and vacuum debris, scrape or grind remaining glue to the manufacturer’s tolerance, repair or replace damaged sections, fill low spots with a suitable leveling compound, and check moisture with a meter before installing any underlayment or flooring.
Prime porous patches, fasten loose boards, and recheck flatness.