How to Clean LifeProof Flooring to Keep It Looking Brand New
You can keep LifeProof flooring looking brand new by sweeping or vacuuming daily and damp-mopping weekly with a well-wrung microfiber mop and a pH-neutral cleaner. Wipe spills immediately, blotting instead of rubbing, and use pads under furniture to prevent scratches. For deep cleaning, use a manufacturer-safe cleaner, spot-test first, then rinse and dry thoroughly. Treat stains with appropriate cleaners—enzymatic for pet urine, alcohol for ink—and follow care guidelines to maintain warranty; more tips and step-by-step fixes follow.
How to Clean LifeProof Flooring Quick Answer
You can keep LifeProof floors clean by sweeping or vacuuming daily and mopping with a mild cleaner as needed.
Do a quick routine clean weekly to remove surface dirt, and save a deeper scrub for spills, stains, or every few months depending on traffic.
If you notice stubborn grime or residue, step up to a targeted deep clean right away.
One-sentence cleaning summary
When you need a quick clean, sweep or vacuum loose debris.
Mop with a mild pH-neutral cleaner diluted in warm water, then dry or air-dry to prevent streaks and moisture damage.
For how to clean LifeProof flooring in one line: use gentle tools, avoid abrasive cleaners and excessive water, wipe spills promptly, and keep pads and mop heads clean to preserve finish and prevent scratches.
When to deep-clean vs. routine cleaning
A quick sweep, mop, and prompt spill cleanup will handle most day-to-day dirt, but deeper cleaning is needed when soil, stains, or wear build up beyond surface grime.
Spot-clean frequently; deep-clean every 1–3 months or sooner if traffic, pets, or spills cause residue.
Use manufacturer-approved cleaners, a soft brush, and rinse well.
Dry thoroughly to prevent trapped moisture.
What Is LifeProof Flooring and Why Cleaning Matters
LifeProof flooring includes several types—vinyl plank, laminate-look options, and fully waterproof variants—so you’ll want to know which one you have.
Each type has different surface traits like wear layers, seams, and glazing that affect how you clean and what products are safe to use.
Use the right methods or you risk damage, dulling, and even voiding your warranty.
Types of LifeProof flooring (vinyl plank, laminate-look, waterproof variants)
Think of LifeProof flooring as a family of resilient, low-maintenance surfaces designed for different needs: vinyl plank offers realistic wood visuals with full waterproof performance, laminate-look options mimic wood or tile with slightly different wear layers and water resistance, and the brand also sells specific waterproof variants built for heavy moisture areas.
- You’ll choose vinyl plank for true waterproof durability.
- Laminate-look fits budget and style.
- Waterproof variants suit bathrooms and basements.
Surface characteristics that affect cleaning (wear layer, seams, glazing)
Because your cleaning approach depends on the floor’s surface, you should pay attention to three key features: the wear layer, seams, and any factory glazing.
Check wear-layer thickness to know abrasion resistance and appropriate cleaners.
Keep seams dry and clean to prevent grime buildup.
Respect glazing—avoid harsh scrubbers that strip protective coatings—and use soft tools and pH-neutral solutions for routine care.
Risks of improper cleaning (damage, dulling, warranty issues)
If you clean incorrectly, you can strip protective coatings, scratch the wear layer, and force moisture into seams—each outcome shortens the floor’s lifespan and can void your warranty.
You’ll notice dulling, permanent stains, swelling, or edge lifting. Harsh chemicals, abrasive tools, and excess water cause most harm.
Follow manufacturer directions, use recommended cleaners, and address spills quickly to avoid costly repairs.
Tools and Products You Need Before You Start
Before you start cleaning, gather the right tools: a microfiber mop, soft-bristle broom, and vacuum attachments for corners and edges.
Use manufacturer-recommended or pH-neutral cleaners, and if you prefer a DIY solution, dilute vinegar per guidance for safe use.
Steer clear of steam cleaners, abrasive pads, and harsh chemicals to protect your LifeProof floors.
Recommended cleaning tools (microfiber mop, soft-bristle broom, vacuum attachments)
Start with the right tools to protect your LifeProof flooring and make cleaning quicker: use a microfiber mop for daily dusting and light spills, a soft‑bristle broom for sweeping up grit without scratching, and a vacuum with hard‑floor attachments to remove fine debris from seams and edges.
- Microfiber mop: traps dust, gentle on finish.
- Soft‑bristle broom: good for edges.
- Vacuum attachments: reach seams efficiently.
Approved cleaners and safe DIY solutions (manufacturer-recommended products, pH-neutral options, vinegar dilution guidance)
Choose cleaners that protect LifeProof flooring’s finish and seams: use manufacturer‑recommended products or a pH‑neutral floor cleaner, and for a DIY option mix one cup of distilled white vinegar with one gallon of warm water for occasional light cleaning.
You should also:
- Test any new cleaner in an inconspicuous spot first.
- Use diluted solutions; don’t overwet the floor.
- Rinse with clean water after cleaning.
Products and tools to avoid (steam cleaners, abrasive pads, harsh chemicals)
While you’ll need a few basic tools like a soft broom, microfiber mop, and a bucket, avoid items and chemicals that can damage LifeProof flooring’s wear layer or seams:
never use steam cleaners, abrasive pads or brushes, bleach, ammonia, or high-pH degreasers.
Also skip oil-based cleaners, waxes, and harsh solvents.
Test unfamiliar products in an inconspicuous spot before full use.
Routine Daily and Weekly Cleaning Steps (Step-by-Step)
Start by making daily debris removal a habit—sweep or vacuum gently to keep grit from scratching the surface.
Once a week, damp-mop with a mild solution, wring the mop well, and dry the floor promptly to avoid residue.
For spills and stains, blot quickly and avoid aggressive scrubbing, and protect high-traffic areas with mats and furniture pads.
Step 1 Daily debris removal (sweeping and vacuuming techniques)
1. You should remove dirt daily to protect LifeProof floors.
Sweep high-traffic areas with a soft-bristle broom, pushing debris into tight spots. Use a vacuum without a beater bar or with flooring setting to lift grit and pet hair.
Empty the dustbin often and check edges and under furniture. Regular debris removal prevents scratches and keeps finishes even.
Step 2 Weekly damp mopping method (solution mix, wringing technique, drying)
Once a week, damp mopping keeps LifeProof floors looking their best without risking water damage: mix a manufacturer‑approved cleaner or a mild solution of a few drops of dish soap in a gallon of warm water.
Wring your microfiber mop until it’s damp—not wet—and work in overlapping passes with the grain; immediately dry any remaining dampness with a clean microfiber cloth or a dry mop head to prevent streaks and standing water.
Gently rinse mop in fresh water, rewring, and buff high‑traffic areas until dry.
Step 3 Spot cleaning spills and stains (timing, blotting vs. scrubbing)
When a spill happens, act quickly: blot liquids with a clean, absorbent cloth or paper towel—don’t rub—so you lift moisture instead of spreading it; for solids, gently scoop or sweep them up before treating the area.
For stains, test a mild cleaner on an inconspicuous spot, then blot from the edge inward. Repeat as needed and dry thoroughly to prevent residue.
Step 4 High-traffic maintenance (use of mats, furniture pads)
After you’ve handled spills and spot-treated stains, focus on preventing wear in busy areas: high-traffic maintenance keeps LifeProof flooring looking newer longer.
Place low-profile, non-staining mats at entrances to trap grit and moisture, and rotate them regularly.
Add felt or rubber pads under furniture legs, especially chairs and tables, to prevent scratches.
Inspect pads and mats periodically and replace when worn.
Deep Cleaning and Stain Removal (Step-by-Step)
Before you start, move furniture and give the floor a thorough pre-sweep so grit won’t scratch the surface.
Use a recommended deep cleaner with proper dwell time and light agitation to lift built-up grime, then follow stepwise treatments for grease, ink, wine, pet urine, and scuffs.
For mold or mildew at seams, apply a safe cleaner, rinse well, and take prevention steps like improving ventilation and sealing seams.
Preparing for deep clean (furniture moving, pre-sweep)
Though the deep-cleaning stage can seem intimidating, you’ll get faster, better results if you clear the area and remove loose debris first.
Move lightweight furniture and protect legs with sliders; enlist help for heavy pieces. Remove rugs, toys, and pet bowls.
Sweep or vacuum thoroughly, paying attention to corners and baseboards. Check for nails or grit that could scratch during cleaning.
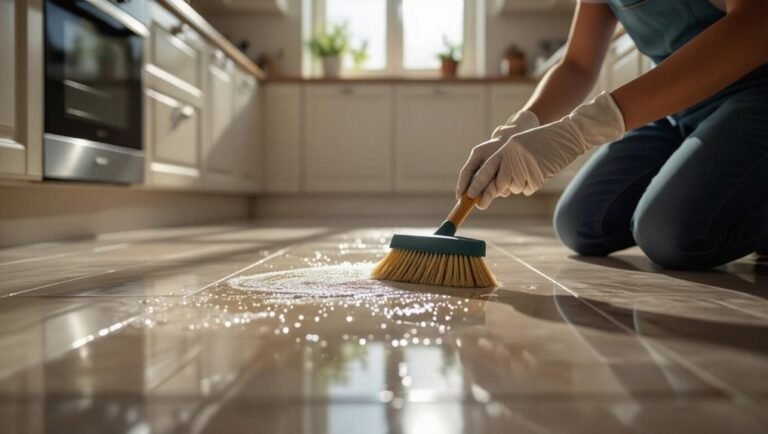
Deep-clean method for built-up grime (product rundown, dwell time, agitation)
Once you’ve cleared the room and removed loose debris, tackle built-up grime with the right cleaner, proper dwell time, and firm agitation to loosen trapped dirt.
Choose a pH-neutral or manufacturer-recommended cleaner; spot-test first. Apply, let sit 3–5 minutes, then scrub with a microfiber mop or soft brush following plank grain.
Rinse thoroughly and dry to prevent residue.
Removing common stains: grease, ink, wine, pet urine, scuffs (stepwise treatments)
Stains happen, but you can remove most of them with the right steps and products without damaging your LifeProof floor.
Tackle each stain promptly: blot, don’t rub, then apply targeted cleaners.
Try these stepwise options:
- Grease/scuffs: degreaser or dish soap, soft brush, rinse, dry.
- Ink/wine: isopropyl alcohol or hydrogen peroxide, blot, repeat.
- Pet urine: enzymatic cleaner, soak, ventilate, dry thoroughly.
Tackling mold or mildew at seams (safe cleaners, prevention follow-up)
If mold or mildew shows up at seams, act quickly to prevent it spreading into the plank joints; you’ll want to use cleaners that kill spores without harming the LifeProof finish or the seam sealant.
Mix a 1:10 bleach-to-water solution or use a commercial mildew cleaner labeled safe for luxury vinyl.
Scrub gently with a soft brush, rinse, dry thoroughly, and improve ventilation to prevent recurrence.
Special Situations and Surface-Specific Tips
When you clean LifeProof flooring, textured and smooth surfaces need slightly different tools and motion to avoid trapping dirt or causing scuffs.
After repairs or seam resealing, don’t use harsh cleaners or heavy scrubbing for a few days so adhesives can fully set.
In wet seasons or snowy months, rinse salt and grit promptly and control indoor humidity to protect seams and finish.
Cleaning textured vs. smooth LifeProof surfaces
Although both are durable, textured and smooth LifeProof surfaces clean differently, so you’ll need slightly different techniques and tools to get the best results.
For textured planks, sweep and use a stiff-bristled brush with diluted cleaner to lift grime from grooves, then rinse.
For smooth floors, microfiber mops and gentle, streak-free cleaners work best. Always test cleaners in an inconspicuous spot first.
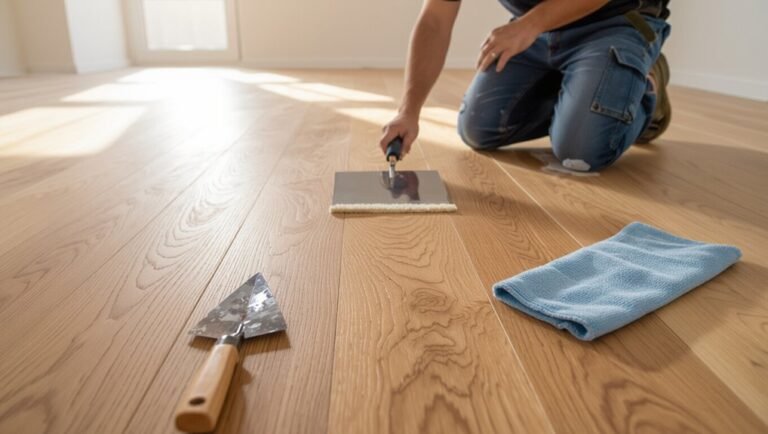
Care after repairs or seam resealing
After repairs or seam resealing, let adhesives or sealants cure fully and avoid heavy traffic for the time the manufacturer recommends; this guarantees bonds set properly and prevents gaps or shifting.
Clean residues gently with a damp cloth and mild cleaner approved by LifeProof. Don’t use abrasive tools on fresh seams.
Inspect seams after curing, and promptly touch up any failed areas to maintain watertight integrity.
Seasonal considerations (humidity, snow/salt cleanup)
Once seams are fully cured and you’ve handled any repairs, pay attention to seasonal factors that affect LifeProof flooring.
In humid months, use a dehumidifier and avoid standing water to prevent cupping or swelling.
After snow or ice, sweep grit, rinse salt residues promptly with a damp mop, and dry thoroughly.
Use walk-off mats to limit tracked moisture and abrasives.
Mistakes to Avoid That Damage LifeProof Flooring
Don’t scrub LifeProof floors with steel wool or harsh brushes—you’ll scratch the wear layer.
Avoid strong acids, alkalis, or undiluted bleach, and don’t mix cleaners that can react.
Also skip steam cleaners and long-term water trapping, since excessive heat or standing moisture can warp or separate planks.
Abrasive cleaning errors (scrubbing, steel wool)
While it might seem like elbow grease will make stains vanish, scrubbing hard or using steel wool can quickly dull LifeProof flooring’s wear layer and leave fine scratches that trap dirt.
Don’t scour—use a soft microfiber mop or cloth and gentle circular motions.
For stubborn spots, soften with warm water or manufacturer-approved cleaners, then blot rather than rub aggressively.
Chemical mistakes (alkaline/acidic cleaners, bleach misuse)
After avoiding harsh scrubbing, you also need to be careful what you spray or pour on LifeProof flooring.
Don’t use strong alkaline or acidic cleaners; they can dull the wear layer and discolor seams. Avoid bleach or undiluted peroxide—use them only when manufacturer-approved and diluted.
Choose pH-neutral cleaners, follow label directions, spot-test first, and rinse residue thoroughly to prevent damage.
Mechanical and maintenance mistakes (steam cleaners, wet-trapping water)
Although they seem convenient, steam cleaners and improper moisture management can seriously harm LifeProof flooring. You shouldn’t use steam or saturate seams; heat and trapped water warp planks and breach the wear layer.
Wipe spills promptly, use damp—not soaking—mops, and guarantee good ventilation. Check under rugs and appliances for hidden moisture and fix leaks immediately to prevent swelling and mold.
Preventive Maintenance and Best Practices
Keep dirt and scratches off LifeProof floors by using entry mats, furniture pads, and area rugs.
Set a simple schedule for daily, weekly, monthly, and annual tasks. You can refresh appearance with gentle buffing or manufacturer-approved re-coating alternatives, and know when wear means it’s time to call a pro.
Follow these preventive steps and a maintenance plan to keep your floors looking their best longer.
Routine protective measures (entry mats, furniture pads, rugs)
When you set up simple protective measures—entry mats at doorways, felt pads under furniture legs, and area rugs in high-traffic zones—you’ll cut down on dirt, scratches, and wear that shorten the life of LifeProof flooring.
- Use washable doormats to trap grit before it reaches floors.
- Replace worn pads and rotate rugs to prevent uneven fading.
- Choose low-profile rugs and breathable pads to avoid moisture buildup.
Scheduled maintenance plan (daily, weekly, monthly, annual tasks)
Those simple protective steps set you up to maintain LifeProof flooring more easily; now you’ll want a clear schedule so small tasks don’t become big problems.
Daily: sweep or vacuum loose dirt.
Weekly: damp-mop with manufacturer-approved cleaner.
Monthly: inspect seams, trim rugs, deep-clean high-traffic zones.
Annually: check under furniture, reseal junctions if needed, and replace worn protectors to prevent damage.
How to extend appearance: buffing, re-coating alternatives, when to call a pro
If you want your LifeProof flooring to keep looking new, regular light buffing and timely surface treatments can do more than deep cleaning alone—they refresh sheen, hide fine scratches, and extend the life of protective coatings.
Buff monthly with a soft pad, use a recommended refresh or recoat product instead of heavy refinishing, and call a pro for gouges, delamination, or persistent wear that DIY fixes can’t resolve.
Comparison: DIY Cleaners vs. Commercial LifeProof Cleaners
When you’re choosing between DIY cleaners and commercial LifeProof cleaners, weigh effectiveness, cost, safety, and any warranty implications to make the best pick for your home. Below is a quick comparison to help you spot the trade-offs at a glance.
| Factor | DIY Cleaners | Commercial LifeProof Cleaners |
|---|---|---|
| Effectiveness | Variable | Formulated for product |
| Cost | Usually lower upfront | Higher but targeted |
Effectiveness, cost, safety, warranty implications
Although DIY cleaners can tackle everyday dirt and cost less upfront, commercial LifeProof cleaners are formulated to protect the finish and meet the manufacturer’s specs—so you’ll weigh immediate savings against long-term performance, safety, and warranty risks.
DIY mixes may work short-term but can leave residues, damage wear layers, or void warranty.
Commercial products cost more but guarantee compatibility, cleaner efficacy, and documented safety.
Quick Troubleshooting Guide
If your LifeProof floor feels sticky after cleaning, check for residue from cleaners or hard-water deposits and rinse with clean water or a mild vinegar solution.
If odors linger, you’ll want to identify trapped moisture or organic buildup and use an enzyme cleaner or targeted spot treatment.
For small scratches and scuffs, try a manufacturer-approved repair kit or a matching color filler to quickly restore the finish.
Floor sticky after cleaning causes and fixes
Because residue left behind from cleaners or hard water can make your LifeProof floor feel sticky, you’ll want to identify the likely cause before re-cleaning.
Check for soap film, wax buildup, or hard-water mineral deposits. Rinse with clean water, mop with a pH-neutral cleaner diluted per label, then dry.
For stubborn film, use a microfiber mop and a vinegar solution rinse, then dry thoroughly.
Persistent odor after cleaning diagnosis and remedies
When a lingering smell won’t go away after cleaning, start by tracing its source so you can treat it correctly; odors often come from trapped dirt in seams, damp underlayment, spills that soaked in, or cleaning-product residue.
Inspect seams, lift edges if possible, dry thoroughly, and clean with a diluted vinegar solution.
For persistent smells, use enzyme cleaners, deodorizing powder, or consult a pro for moisture intrusion.
Small scratches and scuffs quick cosmetic fixes
Once you’ve ruled out moisture or trapped dirt as the source of lingering odors, you can turn your attention to surface wear like small scratches and scuffs that affect appearance but not performance.
For minor marks, gently buff with a soft microfiber cloth and a bit of LifeProof-approved cleaner.
Use a matching color repair pen or wax stick for deeper scuffs, then buff to blend.
FAQ Common Questions About Cleaning LifeProof Flooring
You probably have a few specific questions about cleaning LifeProof floors — like whether vinegar or baking soda are safe, if steam cleaning is allowed, and how often to deep-clean.
You’ll also want to know whether cleaning affects your warranty and how to restore shine to dull planks. I’ll answer each of these clearly so you can clean safely and confidently.
Can I use vinegar or baking soda on LifeProof floors?
Curious whether common pantry staples like vinegar or baking soda are safe for LifeProof floors?
You shouldn’t use undiluted vinegar regularly; its acidity can dull the finish over time. Occasional mild vinegar solution (very diluted) is okay, but stick to manufacturer-approved cleaners for routine care.
Baking soda works for spot scrubbing grout or stubborn marks, but avoid abrasive scrubbing that might scratch the surface.
Is steam cleaning safe for LifeProof flooring?
Wondering whether steam cleaning is safe for LifeProof flooring? You should avoid steam cleaners; high heat and moisture can damage the waterproof core and weaken seams or adhesives over time.
Instead, stick to manufacturer-recommended damp mopping with a microfiber cloth and mild cleaner.
If you’re unsure, check LifeProof’s care instructions or contact customer support before using any steam device.
How often should I deep-clean my LifeProof floors?
Generally, deep-clean your LifeProof floors every 6 to 12 months, depending on traffic and household factors.
If you have pets, kids, or heavy foot traffic, aim for every 3 to 6 months. For low-traffic areas, annual deep cleaning usually suffices.
Spot-clean spills promptly and maintain regular sweeping or vacuuming to reduce the need for frequent deep cleans.
Will cleaning void my flooring warranty?
Will regular cleaning void your LifeProof flooring warranty? No—routine cleaning won’t void it if you follow the manufacturer’s care guidelines.
Use recommended cleaners, avoid harsh chemicals or abrasive tools, and document any professional treatments.
If you’re unsure, check your warranty terms or contact LifeProof/customer service before using unfamiliar products to keep coverage intact.
How to restore shine to dull LifeProof flooring?
If your LifeProof flooring looks dull, you can usually bring back its luster without harsh treatments—start with a thorough sweep and a damp mop using the manufacturer-recommended cleaner to remove surface grime and residue.
Then buff dry with a microfiber cloth to revive shine.
For stubborn haze, apply a pH-neutral polish sparingly, follow directions, avoid waxes, and test in a hidden spot first.
Visual Guide and Maintenance Checklist
You’ll find a printable step-by-step cleaning checklist to follow after each spill or weekly routine.
Keep a quick-reference dos and don’ts list handy so you can protect your floor at a glance.
Use these visual tools to simplify maintenance and avoid common mistakes.
Step-by-step cleaning checklist for printing or saving
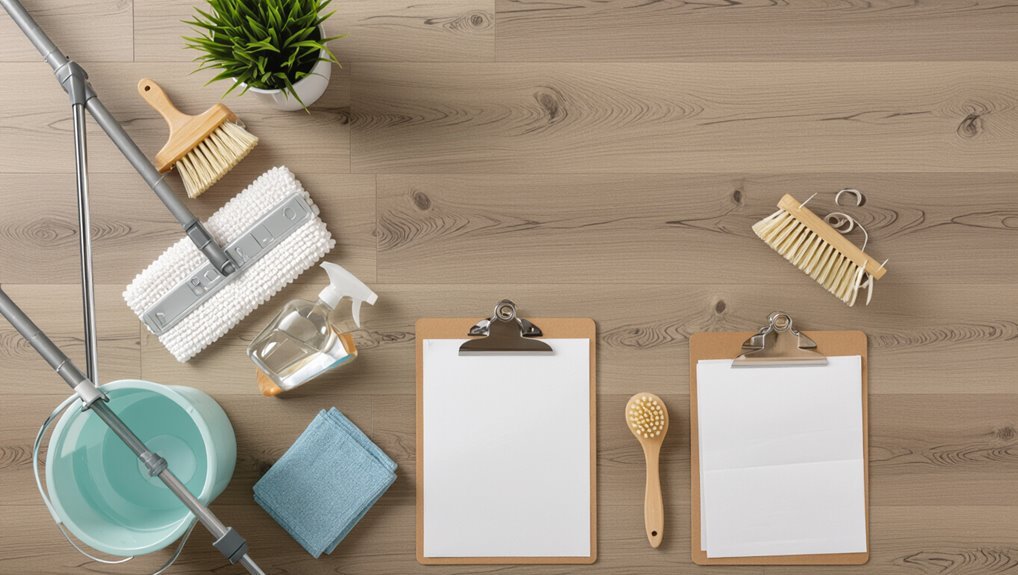
1 clear, printable checklist keeps cleaning simple and consistent: follow each step in order, mark tasks as done, and save the guide near your cleaning supplies or on your phone for quick reference.
Sweep/vacuum daily; spot-clean spills immediately; mop weekly with manufacturer-approved cleaner; rinse and dry; inspect seams monthly; address stains with recommended stain remover; record date and notes after each session.
Quick-reference dos and don’ts list for homeowners
A simple, two-column visual guide makes it easy to scan quick dos and don’ts for LifeProof flooring—follow the left column for safe maintenance actions and the right for things to avoid, and keep the checklist near your supplies or phone for fast reference.
- Do sweep or vacuum daily; mop with mild cleaner weekly.
- Don’t use abrasive pads or steam cleaners.
- Do wipe spills immediately; use felt pads under furniture.