
Can Ceramic Tile Be Stained? What Actually Works and What Doesn’t
You can change ceramic tile appearance, but true permanent staining only works on porous or specially prepared surfaces. Glazed and porcelain tiles resist ordinary dyes, so they need etching, specialty tile stains, reglazing, or durable coatings like epoxy to get lasting color. Unglazed tiles and grout accept acid stains or penetrating dyes but must be sealed afterward. Many DIY tricks fail or peel, so weigh cost versus replacement—and keep going to learn which methods actually work and why.
Can Ceramic Tile Be Stained? Quick Answer and Summary
Yes — glazed ceramic tiles generally won’t take a meaningful stain because their sealed surface repels dyes, while unglazed or porous tiles can absorb color but often unevenly.
If you want a new look, consider surface treatments like specialized tile dyes, paints, or professional re-glazing for consistent results, and reserve staining attempts for truly porous tiles after proper testing.
When durability and uniformity matter, replacing the tile or using a contracted refinisher is usually the smarter choice.
Direct answer short verdict on staining ceramic tile
One quick verdict: you generally can’t stain traditional glazed ceramic tile because the glaze forms a nonporous barrier that won’t absorb color.
If you’re asking “can ceramic tile be stained,” the short answer is no for glazed surfaces.
Unglazed or porous tiles can take stains, but glazed tiles resist them, so you’d need surface treatments or coatings instead of conventional staining.
One-paragraph summary of what works, what doesn’t, and when to consider alternatives
Although glazed ceramic tile won’t absorb dyes because the glaze creates a nonporous barrier, you can successfully change tile appearance by using surface coatings—like tile-specific paints, epoxy overlays, or professional reglazing—and by staining only unglazed or porous tiles.
If dye won’t work, choose coatings, replace tiles, or hire pros; consider durability, prep time, and cost before deciding.
Basic Understanding Types of Ceramic Tile and Why Staining Behavior Varies
To understand staining, you need to know the differences between porcelain, glazed ceramic, and unglazed ceramic because each soaks up liquids differently.
Pay attention to surface finishes—glazed, matte, polished, and through-body affect how easily stains stick.
Also remember grout and other porous substrates will stain far more readily than impervious tile surfaces.
Porcelain vs. glazed ceramic vs. unglazed ceramic
Because tile bodies and surfaces differ, how they take and hold stains also changes dramatically.
Porcelain is dense and low-porosity, so it resists staining and needs abrasive or penetrating methods to alter color.
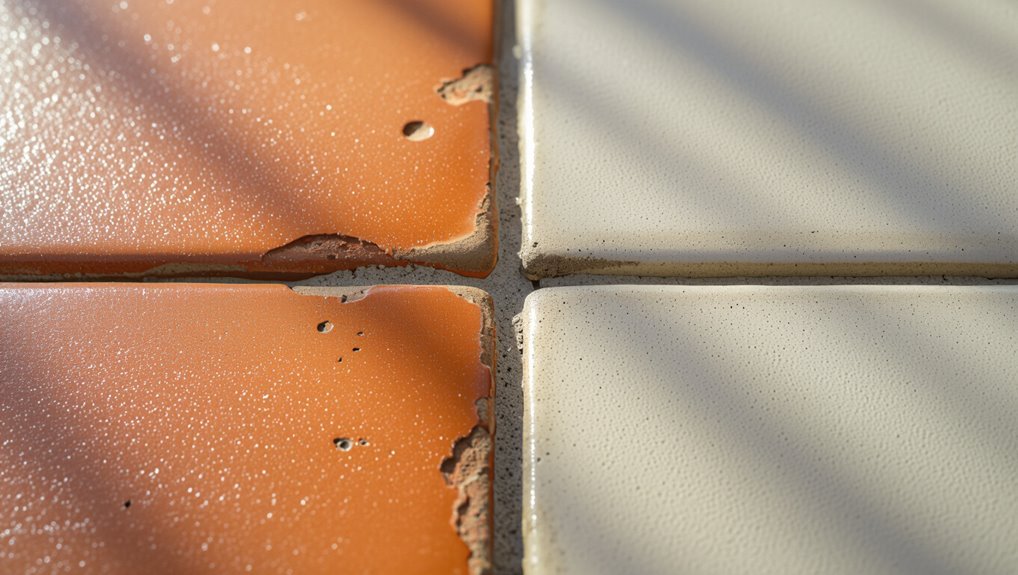
Glazed ceramic has a glassy surface that mostly blocks stains but chips expose the body.
Unglazed ceramic soaks up dyes and liquids, staining more readily and requiring sealing to protect it.
Tile surface finishes: glazed, matte, polished, through-body
Surface finish determines how a tile looks and how it interacts with stains: glazed surfaces shed most liquids, matte finishes hide wear but can trap dirt, polished tiles resist staining but show smudges, and through-body (or full-body) tiles have color that runs through the tile so chips and worn areas stay consistent.
You’ll choose finishes based on maintenance, appearance, and traffic: glazed and polished are easiest; matte and through-body need more attention for surface soils.
Grout and porous substrates vs. impervious tile surfaces
While glazed or porcelain tiles often act like shields, grout and the underlying mortar can soak up spills and stains much more readily.
What Staining Means for Tile Definitions and Common Misconceptions
When you ask whether a tile is “stained,” you need to distinguish surface stains, reversible color changes, and true permanent pigmentation that alters the tile body.
Think about how glaze, the tile’s pore structure, and porous grout either block, absorb, or lock in staining agents.
That distinction explains why some marks wipe away while others need sealers, grinding, or replacement.
Difference between surface stains, color changes, and permanent pigmentation
Even if a spill looks like a stain at first glance, you should know there are three different things people mean by “staining” on tile: surface stains that sit on the glaze, color changes caused by chemical reactions or wear, and true pigmentation that’s baked into the body of the tile.
You can usually remove surface stains, can’t reverse baked pigmentation, and color shifts may need replacement or specialized restoration.
How stains interact with glaze, pore structure, and grout
Because tile is a layered system—glaze, body, and grout—staining depends on where a contaminant lands and how it interacts with each layer.
If glaze is intact and nonporous, spills sit on the surface and clean easily. Unglazed or crazed glaze lets pigments seep into pores or the body, causing deeper discoloration.
Grout absorbs most stains and often requires sealing or targeted cleaning.
What Actually Works: Methods That Can Change Tile Color or Appearance
You can change tile color in several reliable ways depending on the surface and material.
For glazed tile you’ll often use specialized tile stains or oxidizers, while unglazed ceramic can react with acid stains or accept penetrating dyes and pigments.
Porous grout takes dyes differently and can be recolored on its own.
Alternatively, surface coatings like tintable sealers, pigmented epoxies, and grout tints give predictable, uniform results when staining isn’t feasible.
Recoloring glazed tile with specialized tile stain/oxidizers
When simple paint or dye won’t stick to glazed tile, specialized tile stains and oxidizers offer a realistic option for changing color or enhancing surface detail.
These products chemically bond or etch into the glaze so the finish lasts far longer than surface coatings. You apply cautiously, follow manufacturer directions, test on a scrap, neutralize residues, and seal afterward to protect and even out tone.
Using acid stains on unglazed ceramic and how reactions occur
If your ceramic tile is unglazed, acid stains can permanently alter its color by reacting with minerals in the clay rather than simply sitting on the surface.
You’ll apply a diluted acid solution that etches and chemically transforms iron, lime, and other minerals, producing variegated, mottled effects.
Results depend on clay composition, porosity, and application time; test first on a scrap or inconspicuous area.
Penetrating dyes and pigments for porous tile and grout
Although penetrating dyes and pigmented stains work differently than surface coatings, they’re often the best option for changing the color of porous tile and grout because they soak into the material instead of just covering it.
You’ll get durable, even color on unglazed ceramic and cement grout if you clean, etch, and apply dye properly. Test first for absorption and shade.
Surface coatings and pigmented epoxies (tintable sealers and paints)
Because surface coatings sit on top of tile rather than soak in, they’re often the most reliable way to change color on glazed or low-absorption tiles.
You can use tintable epoxies, pigmented sealers, or specialty tile paints to create opaque or translucent finishes.
Prep and adhesion are critical: clean, scuff, and prime.
Expect wear over time and follow manufacturer cure and maintenance instructions.
Tinted grout and grout recoloring for visual change
When you want a noticeable change without replacing tiles, tinting or recoloring grout can redraw the eye and alter a room’s perceived color palette. You can darken, lighten, or match grout to tile, improving contrast or unity. It’s affordable, reversible in many cases, and quick.
- Contrast
- Unity
- Protection
- Ease
| Option | Effect | Durability |
|---|---|---|
| Dye | High contrast | Moderate |
| Sealer tint | Subtle unify | High |
| Epoxy grout recolor | Permanent | Very high |
What Doesn’t Work or Is Not Recommended
You shouldn’t expect ordinary household dyes or fabric stains to penetrate ceramic tile or produce lasting color.
Trying to force a permanent change on non-porous glazed tile without proper etching and priming usually fails, and using harsh chemicals can strip or pit the glaze and leave uneven patches.
Likewise, temporary fixes like stickers, tape, or thin paints may look okay briefly but’ll peel, fade, or trap dirt quickly.
Ordinary household dyes and fabric stains
Although it might seem tempting to test a bottle of dye or a laundry stain remover on ceramic, ordinary household dyes and fabric stains rarely penetrate or bond with tile glazes, so they won’t give you lasting color changes.
You’ll find they sit on the surface, smear, and wash away. They can also leave uneven residue or damage grout, so don’t rely on them.
Attempting permanent color change on non-porous glazed tile without proper prep
If you try to change the color of non-porous glazed tile without proper preparation, the result will usually be peeling, flaking, or uneven coverage because the glaze repels most coatings and adhesives.
You’ll waste time and materials applying paints, stains, or sealers that won’t bond.
Proper prep—etching, sanding, or using a primer made for glossy surfaces—is essential before attempting any lasting color change.
Harmful chemicals that damage glaze or cause uneven results
After prepping or skipping it, some household cleaners and DIY chemicals will ruin glazed tile instead of helping.
You shouldn’t use strong acids (muriatic, concentrated vinegar), undiluted bleach, oven cleaner, or abrasive scrubbers — they etch gloss, strip coatings, or leave streaks.
Solvent-based products and harsh degreasers can react unpredictably, causing uneven color, dull spots, or permanent damage.
Test first.
Temporary cosmetic fixes that fail quickly (stickers, tape, thin paints)
When you need a quick fix, resist the temptation to cover chips or stains with stickers, tape, or a thin coat of craft paint — those shortcuts peel, yellow, or wear off within days and often make the damage more obvious.
You’ll wind up redoing work more often, trapping dirt or adhesive residue, and creating uneven color. Invest in proper tile repair or professional touch-ups instead.
Step-by-Step Guide How to Recolor or Stain Different Types of Ceramic Tile
First, you’ll identify the tile type and test porosity so you know whether stain, dye, epoxy, paint, or a grout colorant will work.
Next, you’ll thoroughly clean, etch, and degrease the surface before using the appropriate application method—brush, roller, spray, or mop—for even coverage.
Finally, you’ll seal and allow proper curing time, then follow post-application care to protect the new finish.
Step 1: Identify tile type and test porosity
Before you stain tile, figure out exactly what kind you’re dealing with and whether it’ll accept color—glazed, unglazed, porcelain, and quarry tiles all react differently—so inspect the tile surface and do a small porosity test (drop a few drops of water and watch if it soaks in or beads up) to determine whether you can stain, need etching, or should opt for a paint/epoxy system instead.
Test multiple tiles and note results.
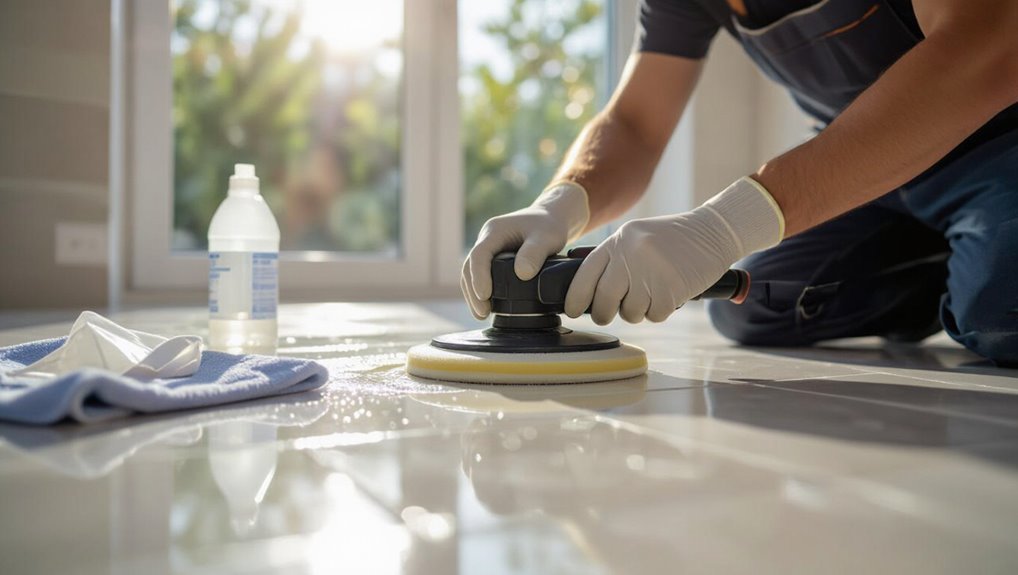
Step 2: Surface preparation cleaning, etching, and degreasing
Scrub the tile surface thoroughly to remove dirt, grease, soap scum, and any loose grout so the stain or coating can bond properly.
Rinse well, then etch or scuff glossy tiles with a mild acid etcher or sandpaper to increase mechanical grip.
Degrease with a solvent or trisodium phosphate rinse, dry fully, and tape or mask adjacent areas before applying any recoloring product.
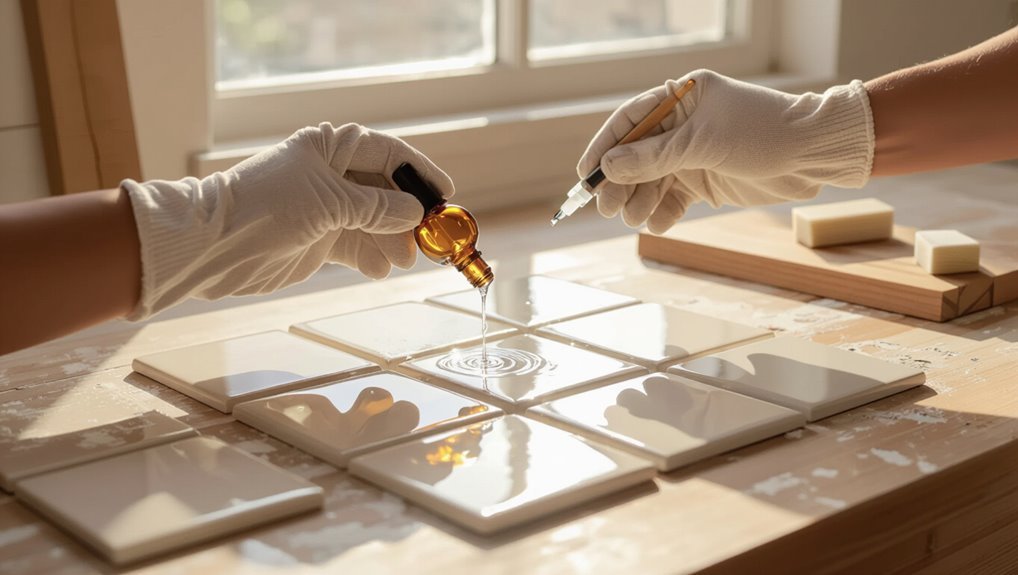
Step 3: Choosing the right product by tile type (stain, dye, epoxy, paint, grout colorant)
Once you know your tile type—unglazed, glazed, porcelain, or quarry—you can match it to the right recoloring method: dyes and penetrating stains work best on unglazed or porous tiles, solvent‑based stains and epoxy coatings suit denser ceramics and porcelain, and high‑adhesion paints or epoxy systems are safer for glossy, glazed surfaces; grout colorants or colored epoxy can refresh joints independently.
Choose products labeled for your substrate, test in an inconspicuous spot, and pick compatible sealers for durability.
Step 4: Application techniques for even color (brush, roller, spray, mop)
Now that you’ve matched product to tile type, focus on how you apply it—technique determines whether the color lays down smoothly or looks patchy.
Use a high-density foam roller for flat surfaces, a brush for grout edges, and a fine mist sprayer for even coats on textured tile.
Mop-on dyes work for large areas but need consistent strokes and overlap to avoid streaks.
Step 5: Sealing, curing times, and post-application care
Although the color may look right after application, you still need to seal and allow proper curing to lock in the finish and protect the tile; follow the manufacturer’s recommended sealer type, application method, and dry times, and avoid heavy traffic or moisture until the full cure is reached.
- Choose compatible sealer.
- Apply thin, even coats.
- Respect tack-free and full cure times.
- Clean gently; avoid harsh chemicals.
Comparison Durability, Cost, and Appearance of Recoloring Options
When you compare acid stains, tile paints, epoxy coatings, and professional reglaze, each option trades off durability, look, and price.
Acid stains penetrate and age naturally but need sealing and periodic upkeep, while paints are cheap and easy but chip faster.
Epoxy gives a tough, glossy finish but can yellow, and professional reglaze offers the most uniform, long-lasting result at a higher cost.
Think about how long you need the finish to last and how much maintenance and money you’re willing to invest.
Acid stains vs. tile paints vs. epoxy coatings vs. professional reglaze
Curious which recoloring method will actually stand up to foot traffic and cleaning?
You’ll find acid stains penetrate porous tile for subtle, variegated looks but work only on unglazed surfaces.
Tile paints offer color flexibility cheap and easy but chip sooner.
Epoxy coatings deliver tough, glossy finishes and high abrasion resistance.
Professional reglaze gives uniform, durable resurfacing at higher cost and labor.
Longevity and maintenance needs for each option
Because each recoloring method behaves differently under daily wear, you should weigh longevity, upkeep, and how it looks together before choosing one.
| Option | Durability | Maintenance |
|---|---|---|
| Acid stain | Medium | Seal annually |
| Tile paint | Low | Recoat often |
| Epoxy | High | Clean gently |
| Reglaze | High | Avoid abrasives |
Common Problems, Mistakes, and How to Avoid Them
When you refinish tile, uneven color, peeling, long-term discoloration, and unsafe chemical exposure are the main things that trip people up.
Learn the root causes—poor prep, wrong products, incompatible cleaners, and inadequate ventilation—so you can prevent them.
I’ll cover how to fix common flaws and which steps and safety measures will keep your result durable and safe.
Uneven color and blotching: causes and fixes
If your stained ceramic tile looks blotchy or has uneven color, it’s usually the result of surface contamination, inconsistent application, or the wrong product for the tile type.
To fix it, clean thoroughly, etch or degrease glazed surfaces as recommended, test on a scrap, and apply thin, even coats with proper drying times.
Replace incompatible stain with a tile-specific dye or stain.
Adhesion failure and peeling: prevention and remediation
Though a stained tile can look great, poor adhesion and peeling will ruin the finish and shorten its life.
Prevent it by thoroughly cleaning, etching, and degreasing before staining, and by choosing primers and sealers rated for ceramic.
Follow manufacturer cure times and apply thin, even coats.
If peeling occurs, strip to bare tile, correct surface prep, and recoat with proper products.
Discoloration over time and cleaning incompatibilities
Peeling and poor adhesion aren’t the only threats to a stained ceramic tile job; colors can shift, dull, or yellow over time, and using the wrong cleaners will speed that process.
You should test cleaners on a hidden area, avoid acidic or bleach-based products that strip pigments or finishes, and use pH-neutral, manufacturer-recommended maintenance to preserve hue and sheen.
Safety and ventilation mistakes when using strong chemicals
When you work with strong chemicals to prep or clean stained ceramic tile, you’re risking more than ruined color—you can expose yourself and others to toxic fumes and skin hazards if you don’t ventilate and protect properly.
Always open windows, run fans, and use an exhaust when available.
Wear gloves, eye protection, and a respirator rated for chemical vapors.
Never mix cleaners; read labels.
Best Practices and Professional Tips
Decide whether you should hire a pro or tackle the job yourself based on tile condition, complexity, and your comfort with surface prep.
Use product categories suited to the tile (e.g., etching agents for glazed tiles, penetrating stains for unglazed, epoxy-based sealers, and appropriate applicators) and always run a small-area trial while documenting materials, steps, and results.
Finally, set a maintenance routine—mild cleaners, periodic resealing, and prompt repair of chips—to keep recolored tile looking its best.
How to choose professional vs. DIY approaches
Curious whether you should tackle staining ceramic tile yourself or hire a pro? You’ll weigh skill, time, and risk: DIY saves money but demands prep, steady technique, and stain knowledge; mistakes are costly.
Hire a pro for complex patterns, large areas, or historic tiles to guarantee consistent color, proper sealing, and warranty.
Choose based on confidence, budget, and project scope.
Recommended products and tools by tile type (general categories, not brand endorsements)
If you opt to DIY or hire help, the products and tools you pick should match the tile type—porcelain, glazed ceramic, unglazed/quarry, or natural stone-like tiles behave differently and need different prep, stain chemistry, and sealers.
For porcelain use etching primers, solvent-based stains, and diamond pads.
Glazed needs adhesion promoters, acid or dye stains, and soft pads.
Unglazed/natural stone require penetrating stains, pH-neutral cleaners, and sealers.
Testing protocol: small-area trials and documentation
Because tiles and stains interact in unpredictable ways, always run small-area trials before committing to a full job.
Pick inconspicuous spots, test each product and method, note substrate, prep, dwell time, and curing conditions.
Photograph before, during, and after. Record color change, adhesion, and wear after 24–72 hours.
Use results to adjust product choice or abandon staining if outcomes disappoint.
Maintenance routine to preserve recolored tile
Once you’ve recolored tile, establish a simple, consistent maintenance routine to protect the finish and extend its life.
Use pH-neutral cleaners, soft mop or microfiber cloths, and avoid abrasive pads, bleach, or wax that can damage coatings.
Wipe spills quickly, place mats in high-traffic zones, and reseal or touch up every 1–3 years depending on wear.
Inspect grout regularly.
Cost, Timeframe, and When to Replace Tile Instead
You’ll want to weigh cost and time before recoloring or reglazing — DIY kits can run low, while pros charge several hundred to a few thousand dollars.
Expect several hours of prep and application plus 24–72 hours of curing before normal use.
If tiles are cracked, loose, or the layout/outdated style is the issue, replacing them is often more practical than refinishing.
Typical cost ranges for DIY vs. professional recoloring and reglazing
Costs for recoloring or reglazing ceramic tile vary a lot depending on whether you tackle the job yourself or hire a pro.
DIY kits and supplies typically cost $50–$300 for small areas; expect to spend more on quality primers and glazes.
Professional reglazing runs $4–$12 per square foot or $300–$1,500+ total, depending on prep, damage, and finish choices.
Time required for prep, application, and curing
Expect to spend a full weekend on a small-to-medium tile project: prepping surfaces, applying color or glaze, and allowing proper cure times all add up.
You’ll spend hours cleaning, sanding, and taping, then a few coats with drying intervals.
Full cure can take 24–72 hours for touch use and up to 7 days for heavy traffic.
Plan downtime accordingly.
Decision factors: when replacement is more practical than recoloring
When the wear, damage, or style mismatch is severe, replacing tile often makes more sense than recoloring because it can be faster, more durable, and ultimately less expensive than repeated touch-ups.
You should weigh labor, material, and disposal costs, plus downtime and curing delays.
Replace when multiple tiles are cracked, glaze is gone, patterns clash, or long-term durability outweighs cosmetic fixes.
Case Studies and Real-World Scenarios
You’ll look at three real examples to see what works and what doesn’t: staining unglazed basement step tiles with an outline technique and the final result, applying an epoxy-based recolor to glazed bathroom wall tiles and the practical challenges, and revitalizing a room by recoloring grout only.
Each case shows different prep needs, costs, and longevity so you can match the approach to your situation. Read on to compare outcomes and decide which trade-offs you’ll accept.
Scenario A: Staining unglazed floor tile in a basement step outline and outcome
If you’re working with unglazed floor tile on a basement step and want to stain it, plan for thorough cleaning, etching, and a test patch first to avoid uneven color or poor adhesion.
You’ll grind light grime, apply acid etch or mechanical abrasion, test stain absorption, then use a penetrating mineral dye and sealer.
Outcome: improved color but variable depth; expect touch-ups.
Scenario B: Recoloring glazed bathroom wall tile with epoxy coating challenges and results
Although glazed bathroom wall tile resists most stains, you can successfully recolor it with an epoxy coating if you prepare properly and accept some trade-offs.
You’ll need thorough cleaning, sanding or etching, a quality primer, and multiple epoxy layers. Expect longer cure times, potential sheen mismatch, and limited DIY forgiveness.
Done right, the finish is durable and water-resistant, but reversibility is difficult.
Scenario C: Grout-only recoloring to update look without touching tile
When changing tile color with epoxy proves too invasive or risky, recoloring grout lets you refresh a room without touching the glazed surface.
You can use tintable grout sealer or grout paint to darken, brighten, or match grout lines. Prep by cleaning and etching grout, test a small area, and apply with a brush or applicator.
Results are subtle, affordable, and reversible.
FAQ
You’ve got practical questions—like whether you can darken glazed tile, how long recoloring lasts, or if patterned and textured tiles can be changed effectively.
You’ll also want to know about warranty or resale impacts and whether acid-based stains are safe indoors.
Below are clear, concise answers to each concern so you can decide with confidence.
Can I stain glazed ceramic tile to a darker color?
Curious if you can darken glazed ceramic tile? You can’t stain the glaze itself because it’s a dense, nonporous layer that resists penetration.
To darken glazed tile, you’ll need surface treatments: tints, paints formulated for tile, or professional coatings.
Prep is essential—clean, etch or sand lightly, and use a primer.
Expect maintenance and possible wear over time.
Will staining tile void warranties or affect resale value?
How will staining tile affect your warranty or resale?
Staining can void manufacturer warranties if it alters factory finishes or requires surface preparation the maker forbids.
Disclose any permanent alterations to buyers; professional, reversible treatments look better than DIY disasters.
Expect varied buyer reactions—some won’t mind improved appearance, others prefer original tile.
Keep receipts and document methods to preserve value and trust.
How long does a tile stain or recoloring typically last?
Wondering how long a tile stain or recoloring will last?
It depends on the method and traffic: professional bonding stains and quality glazes last many years, often matching the remaining life of the tile.
DIY dyes and surface paints can fade or chip within months to a few years under heavy use.
Proper sealing and gentle maintenance extend longevity considerably.
Can I change the color of patterned or textured tile effectively?
If longevity depends on method and wear, color-changing patterned or textured tile brings extra challenges you’ll want to take into account.
You can repaint or dye textured/patterned tile, but results vary: patterns may show through, texture hampers even coverage, and prepping (cleaning, etching, priming) is essential.
Test a small area first and expect touch-ups or partial hiding rather than perfect uniformity.
Is it safe to use acid-based stains in indoor spaces?
Thinking about using acid-based stains indoors? You should avoid them unless you can guarantee perfect ventilation and professional handling.
Acid stains release fumes and can etch finishes, harm grout, and trigger respiratory irritation or chemical burns.
For occupied rooms, choose water-based stains or dyes designed for indoor ceramic use.
Always follow manufacturer safety data sheets and wear appropriate PPE if you proceed.
Visual Resources and Further Reading
Before you start staining, run simple visual checks and small patch tests on spare or inconspicuous tiles to confirm adhesion and color results.
Check manufacturer technical guides and safety data sheets for recommended primers, solvents, and cure times so you’re using the right products.
I’ll list useful links and examples next to help you follow those specs and document your test results.
Recommended tests and visual checks to perform before starting
Since a successful stain job hinges on your tile’s condition and porosity, run a few quick tests and visual checks to avoid surprises—inspect grout lines for cracks or mold, look for surface coatings or sealers that could block penetration, and snap photos of any chips or color variations to track progress.
Test porosity with a water drop, perform a small patch stain, and check adhesion after drying.
Links to manufacturer technical guides and safety datasheets
1 practical step before you stain tile is to gather the manufacturer’s technical guides and safety datasheets so you can confirm product compatibility, application instructions, and hazard controls.
Use links to access up-to-date specs, VOC limits, and PPE recommendations.
Check cure times and surface prep details to avoid failures.
- Manufacturer technical datasheet
- Safety datasheet (SDS)
- Application bulletin
- Compatibility chart
